
Blazor Server Project #17: Facebook Authentication and Authorization
An easy guide to integrating Facebook Sign-In into your web application, allowing users to log in using their Facebook account
Table of Contents
⦁ Overview ⦁ Create the App In Facebook ⦁ Install Facebook Authentication Middleware ⦁ Store the Facebook app ID and secret ⦁ Configure Facebook Authentication ⦁ Sign in with Facebook ▸ Unregistered user ◃▹ Register and set the password ◃▹ Authorization ▸ Registered user ⦁ Summary ⦁ References
This article is the seventeenth in a series covering the Blazor Server Project: (1) How to create a CRUD operation using Dapper (2) Building a dropdown list involves a 1:N relationship (3) How to implement a checkbox list involving an M:N relationships (4) Understanding URL routing and navigation (5) Creating and using page layout (6) How to create a reusable modal dialog component (7) Practical guide to making a master-detail page (8) Master-detail page using dynamic query (9) How to avoid SQL injection attacks (10) Hiding/showing HTML elements (11) Migrate to ASP.NET Core 6.0 (12) Installing ASP.NET Core Identity (13) Integrating Identity tables into the existing project database (14) Authentication and authorization (15) Role-based authorization (16) How to implement Google Authentication (17) Facebook Authentication and Authorization (18) How to configure Twitter Authentication (19) How to Customize Password Policy (20) Account Lockout Policy
These articles are for anyone who wants to learn how to build Blazor Server applications in a practical approach through some sample projects. It will be straightforward if you have some experience with C#, HTML, CSS, and SQL.
Overview
In the previous article, Blazor Server Project #16, we implemented authentication using Google OAuth 2.0. For now, we cover how to apply authentication by integrating Facebook Sign-In into your web app so users can log in using their Facebook accounts. The steps are: ▸ Create the app in Facebook ▸ Install Facebook Authentication Middleware ▸ Store the Facebook Client ID and Secret ▸ Configure Facebook Authentication ▸ Sign in with Facebook
Create the App In Facebook
- Go to the Facebook Developers app page to register. Next, do the following similar screenshots in Figures 1 to 13.
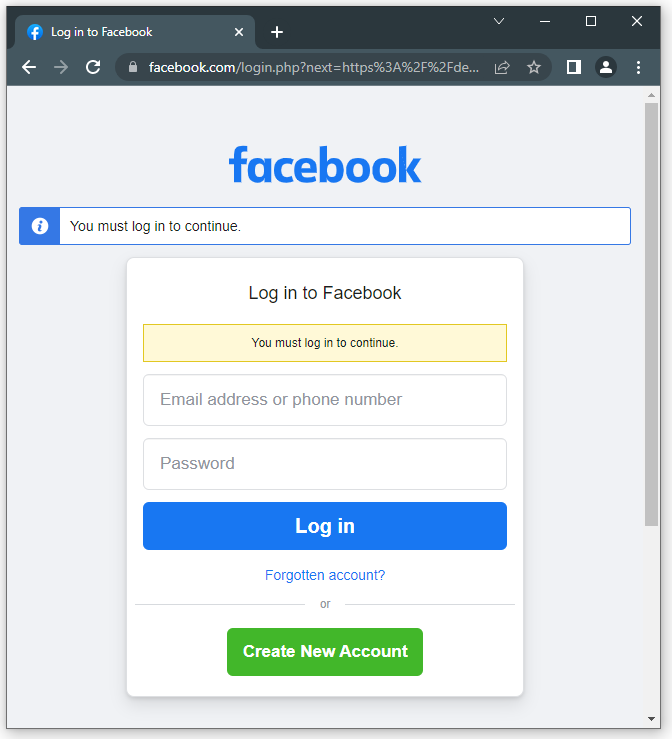
- Log in using your Facebook account.
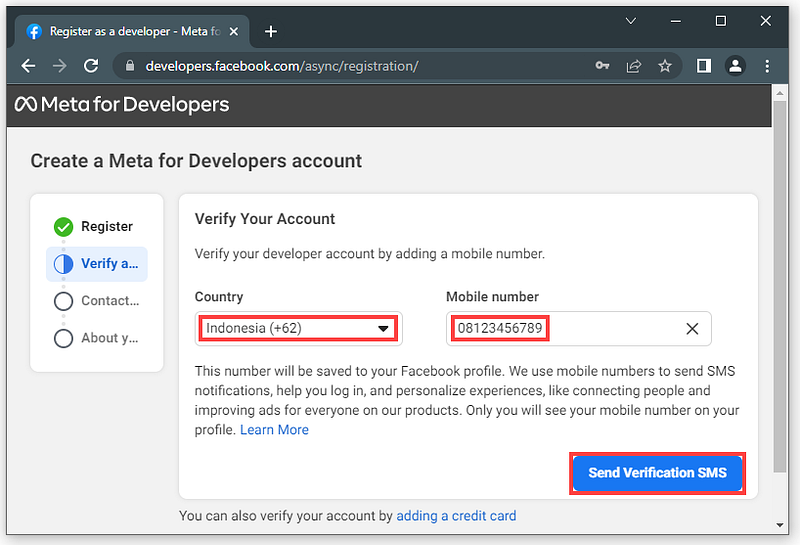
- Verify your developer account by adding a mobile number
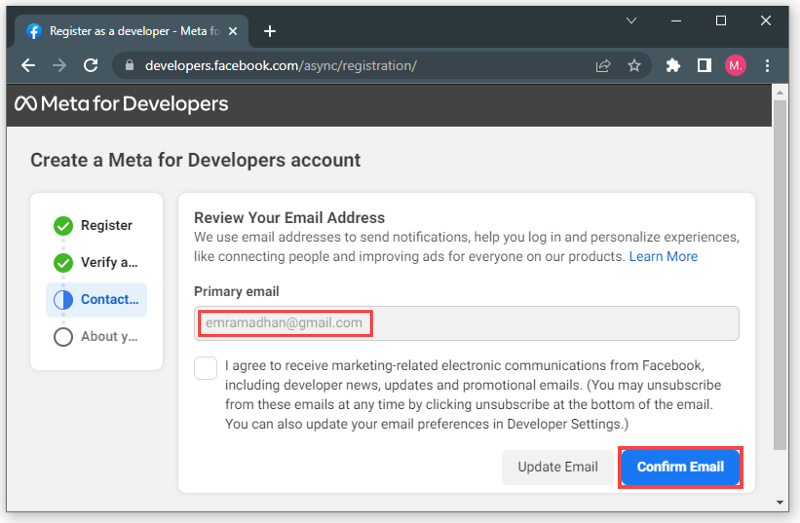
- Confirm your email.
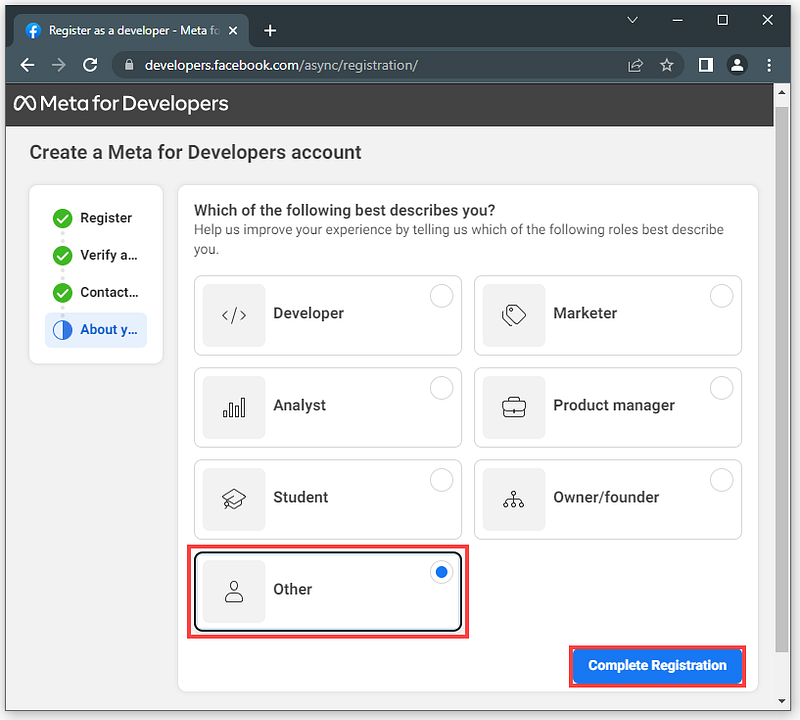
- Select Other from the list and click Complete Registration.
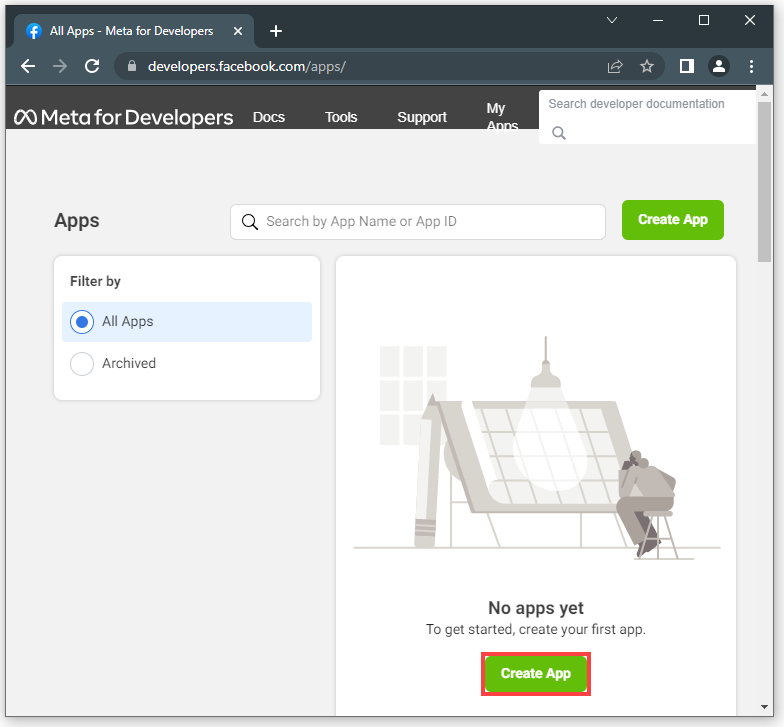
- Click the Create App button.
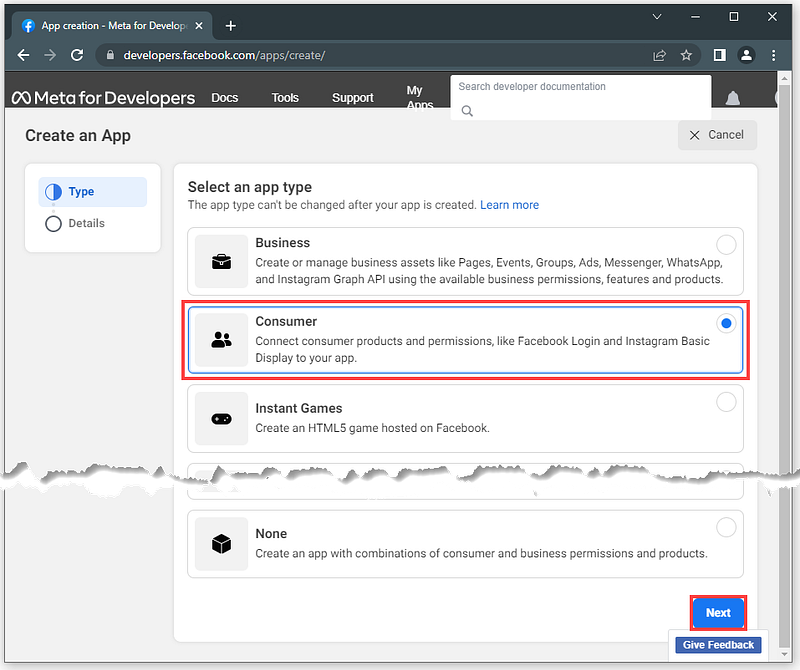
- Select Consumer as the app type and click the Next button.
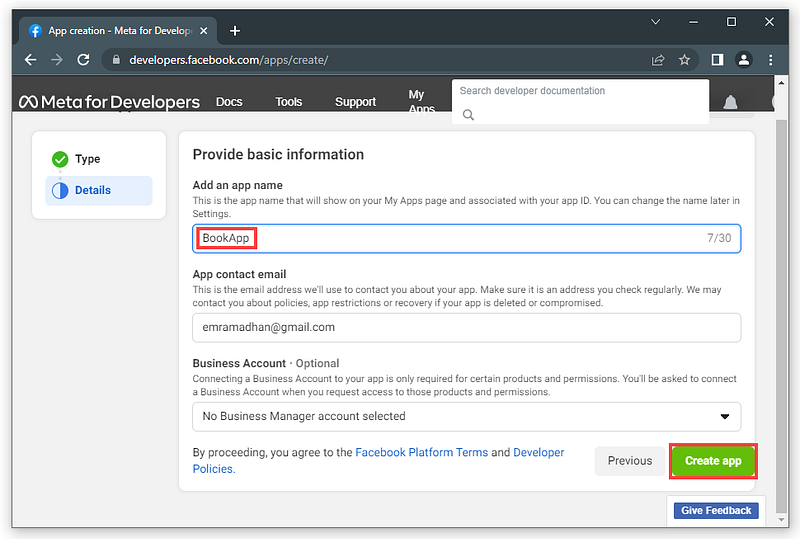
- Type
BookAppas the app name and click the Create app button.
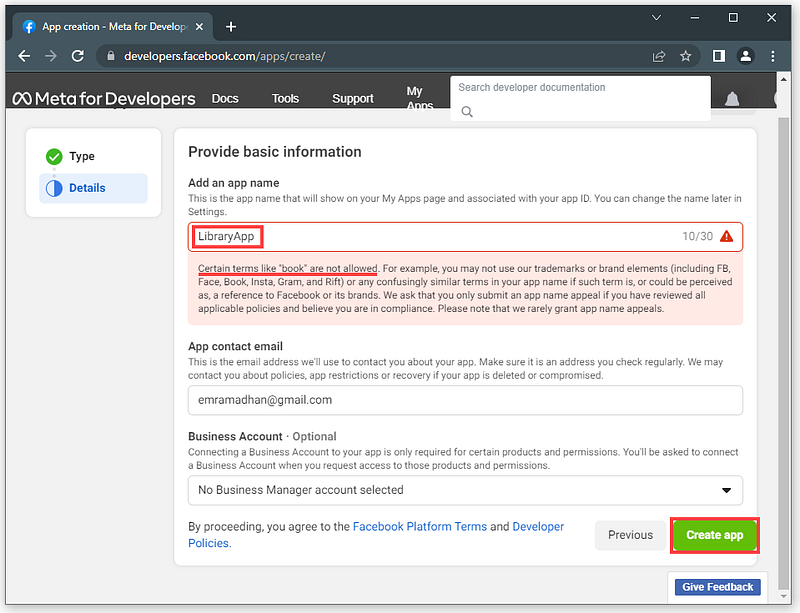
- The app name
BookAppis not allowed. Replace withLibraryAppand click the Create app button.
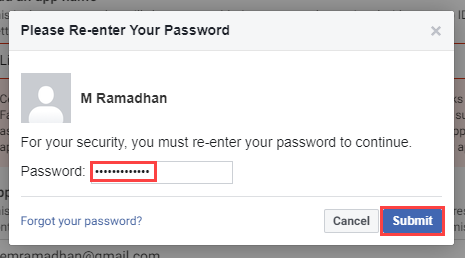
- Re-enter your password and click Submit.
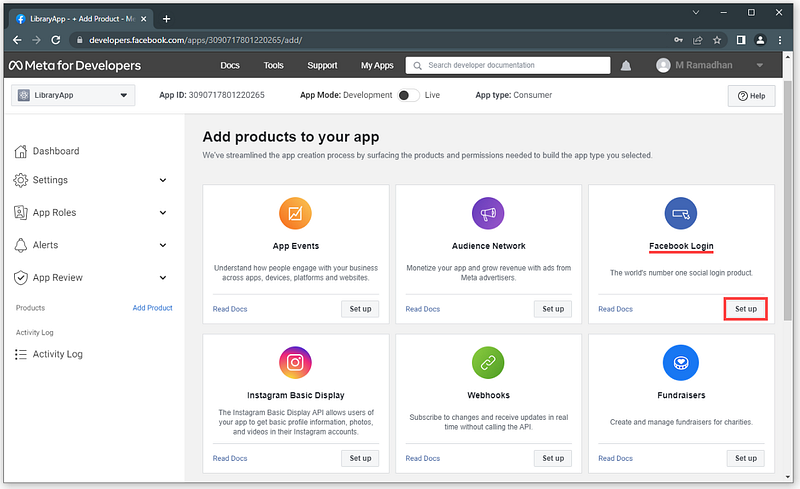
- Click Set Up on the Facebook Login card.
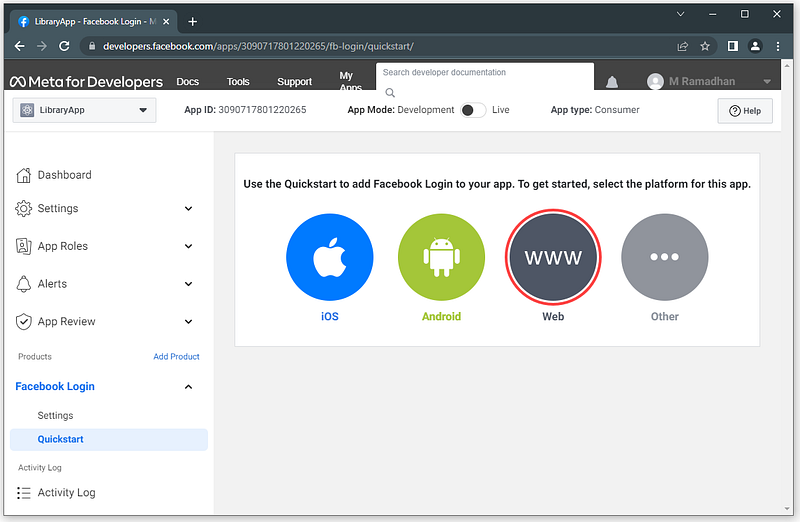
- Select Web as the platform.
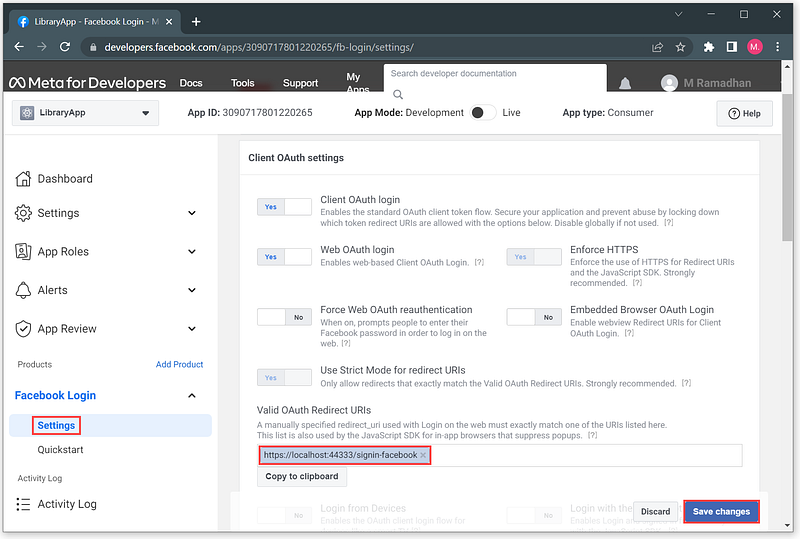
- Click the FaceBook Login Settings in the menu on the lower left, and the following Client OAuth Settings page appears.
- Type
https://localhost:44333/signin-facebookin the text box as your development URI, click the Save changes button. - Click Settings > Basic in the left navigation to display the page below.
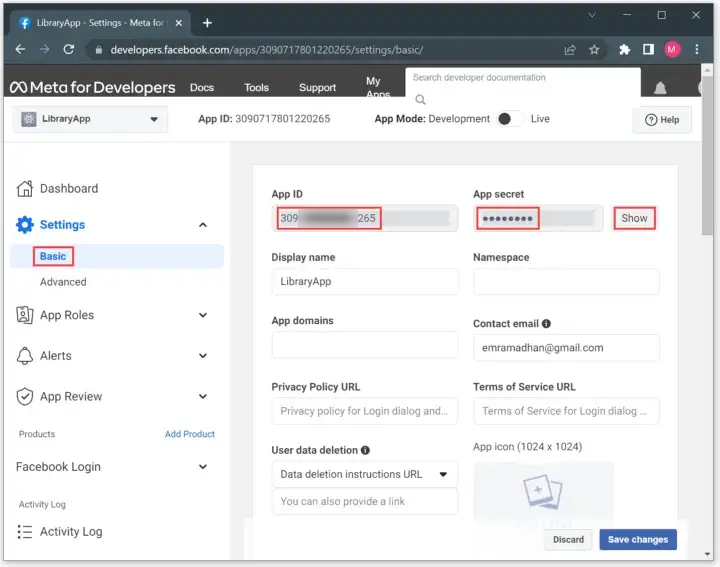
- Click the Show button to see your App secret value. Copy App ID and secret values and paste both into a text file. It would be best if you had them now. Your App ID and secret should differ from mine in Figure 13 above.
- You may change your email and click the Save changes button.
Install Facebook Authentication Middleware
We need to install the Microsoft.AspNetCore.Authentication.Facebook NuGet package in our project.
This project is a continuation of the Blazor Server Project #16.
If you still need to get the project, you can download it via the link below.
- Open the project in Visual Studio 2022.
- Select Tools > NuGet Package Manager > Manage NuGet Packages Solution… from the menu, and the NuGet Solution dialog appears.
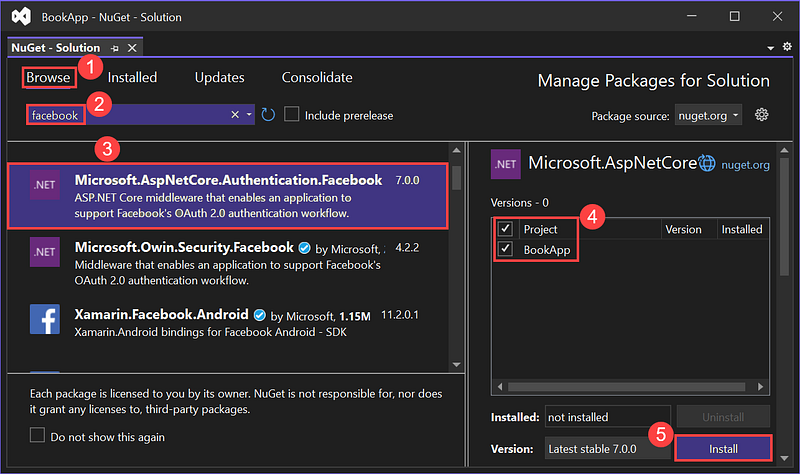
- Select Browse.
- Type
facebookin the Search box - Click
Microsoft.AspNetCore.Authentication.Facebookfrom the package list, check checkboxes, and select Install. - In the Preview Changes window, click OK to proceed with the installation and click I Accept to accept the license.
- The following error message appears.
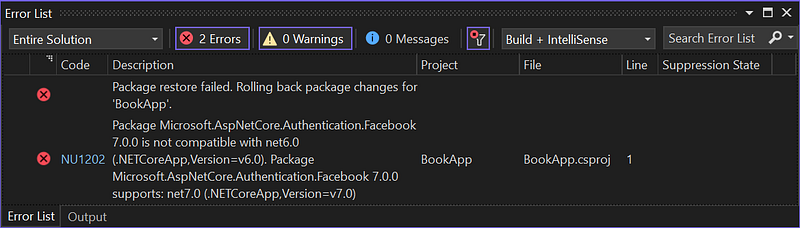
The package is not compatible with net 6.0, so update it to net 7.0 by updating Visual Studio first.
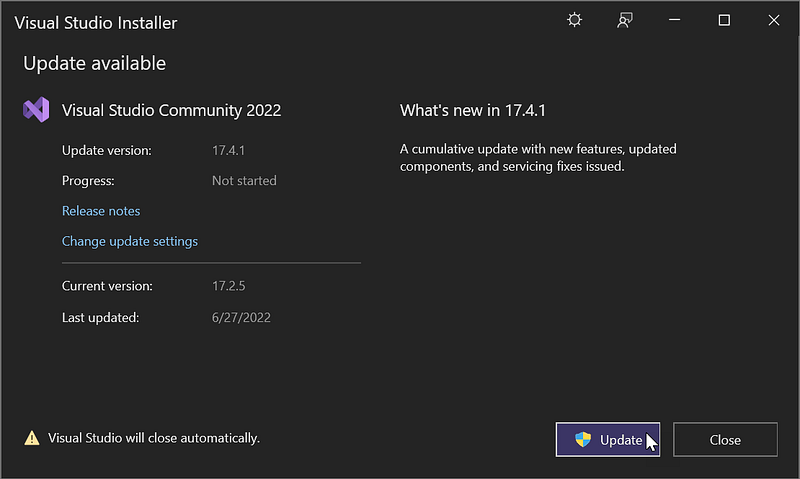
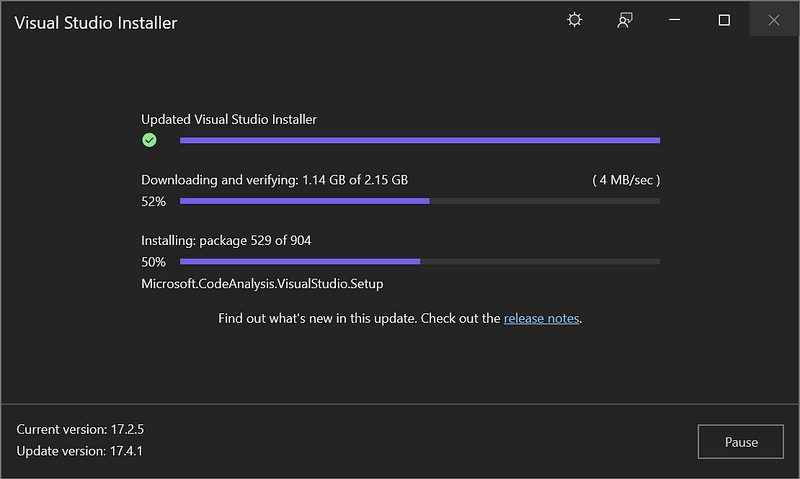
Next, migrate to Net 7.
⦁ Deleting bin and obj folders.
⦁ Updating the target framework.
⦁ Updating installed packages.
It's similar to Blazor Server Project 11.
Reinstall the Microsoft.AspNetCore.Authentication.Facebook NuGet package.
Store the Facebook app ID and secret
- Right-click the BookApp project in the Solution Explorer pane.
- From the context menu, click Manage User Secrets to open the
secrets.jsonfile. - Please copy the following code and paste it into the file.
Listing 1 The contents of the secrets.json file
{
   "Authentication:Google:ClientId": "Your Google ClientId",
   "Authentication:Google:ClientSecret": "Your Google ClientSecret",
   "Authentication:Facebook:AppId": "<app-id>",
   "Authentication:Facebook:AppSecret": "<app-secret>"
}- Replace
<app-id>and<app-secret>with yours. - Save the file. Visual Studio saves it in the file system path:
%APPDATA%\Microsoft\UserSecrets\<user_secrets_id>\secrets.json
Configure Facebook Authentication
Add the following code into Startup.cs file to configure Facebook Authentication.
Listing 2 The contents of the modified Startup.cs file
...
   //Google Authentication service
   ...
   //Facebook Authentication service
   services.AddAuthentication().AddFacebook(facebookOptions =>
   {
      facebookOptions.AppId = Configuration["Authentication:Facebook:AppId"];
      facebookOptions.AppSecret = Configuration["Authentication:Facebook:AppSecret"];
      facebookOptions.Events = new OAuthEvents()
      {
         OnRemoteFailure = loginFailureHandler =>
         {
            var authProperties = facebookOptions.StateDataFormat.Unprotect(loginFailureHandler.Request.Query["state"]);
            loginFailureHandler.Response.Redirect("/Identity/Account/Login");
            loginFailureHandler.HandleResponse();
            return Task.FromResult(0);
         }
      };
   });
...
The application uses the AddFacebook() method to read the AppId and AppSecret from the secrets.json file.
Sign in with Facebook
The app allows any user: ⦁ an unregistered user ⦁ a registered user with no role ⦁ a registered user with one role or more to sign in.
Unregistered user
I only have one Facebook account. I unregister my account first from the app by deleting it from the AspNetUsers table.
- From SQL Server Object Explorer, select Databases > BookDB > Tables, right-click on the AspNetUsers table and choose View Data.
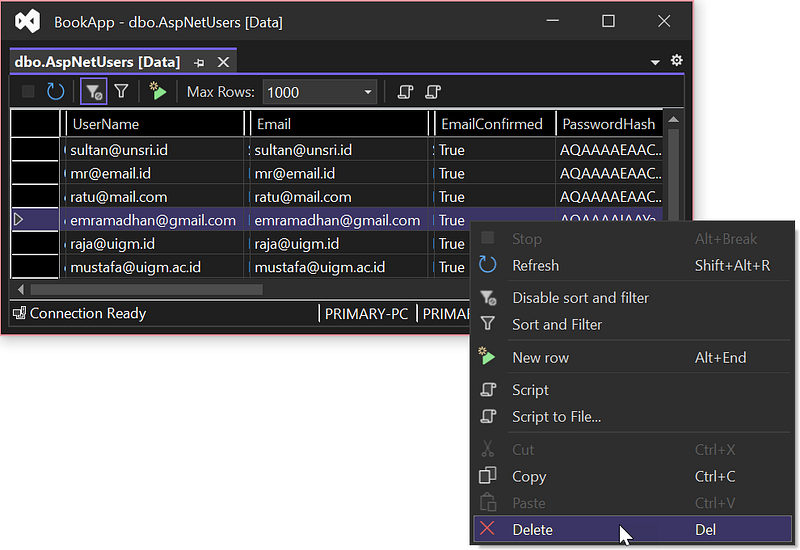
- Right-click on the [email protected] row, and click Delete.
Register and set the password
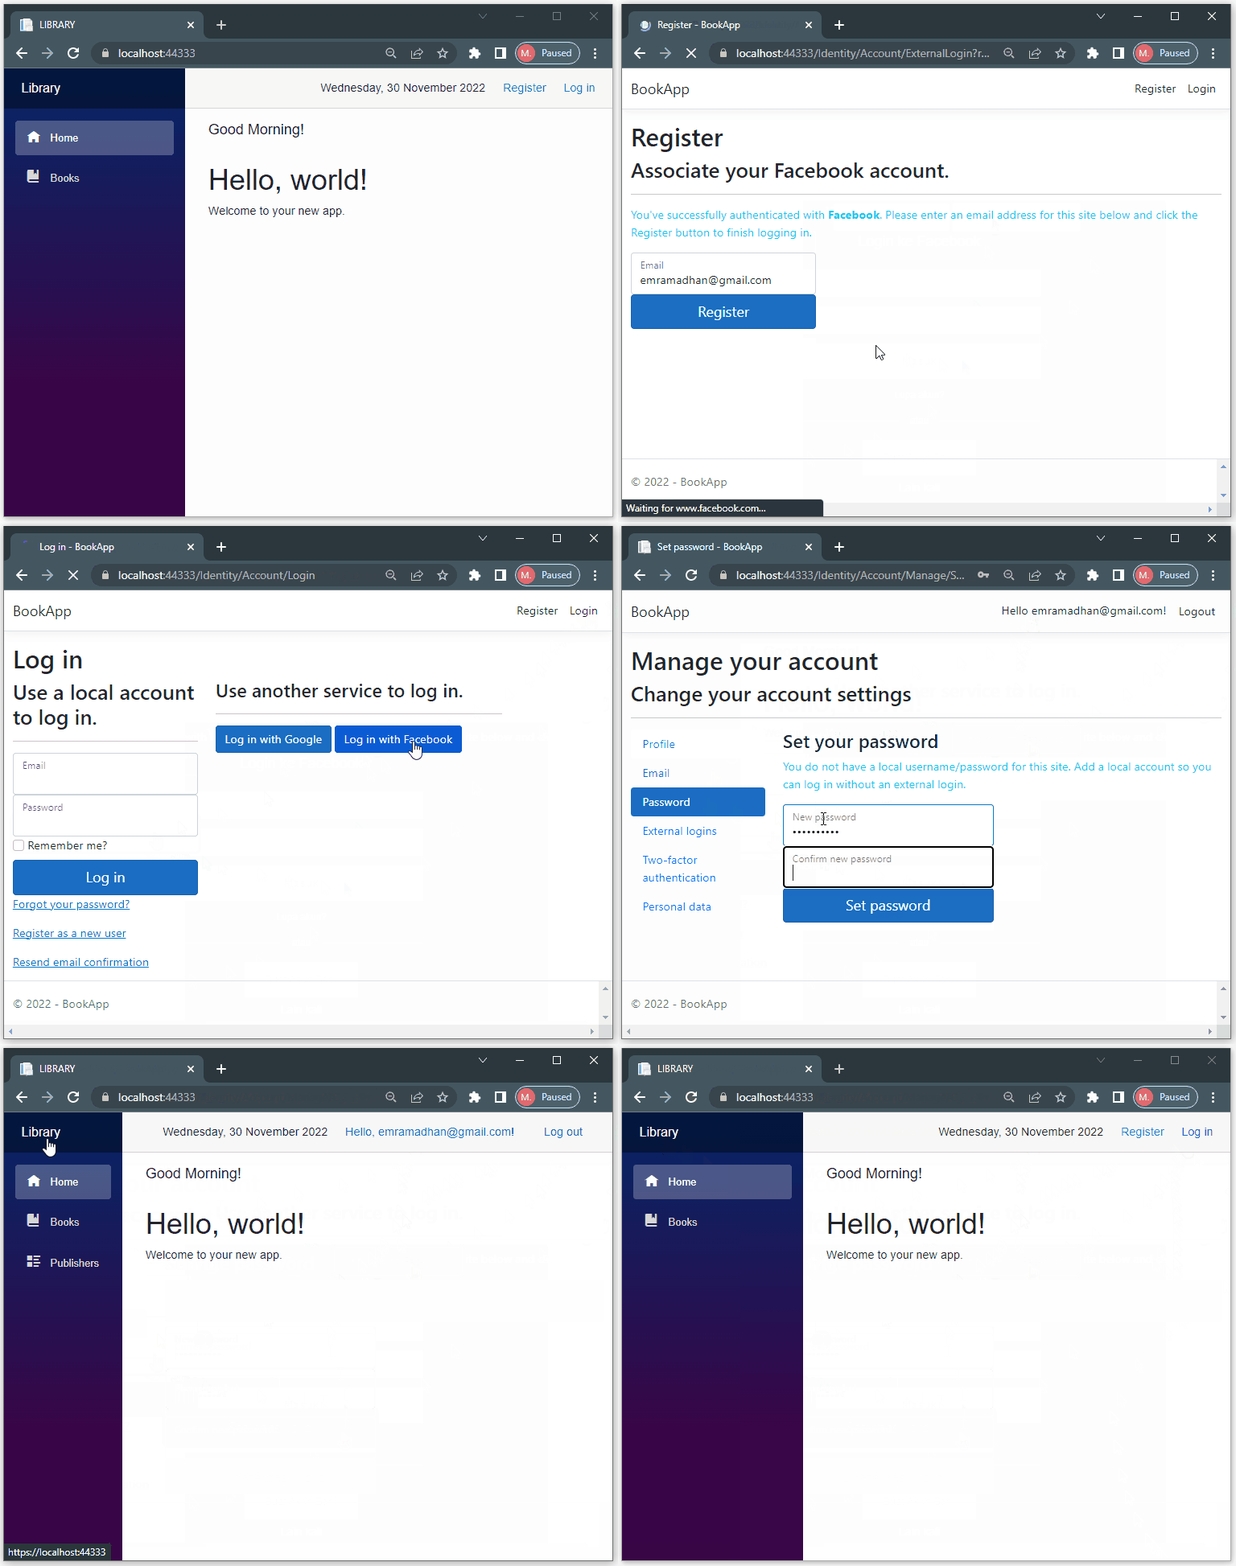
Users can log in using their Facebook account even if they are not registered. For an unregistered user, the user must register and set the password after signing in.
- Run the app, click Log in on the homepage, and follow the steps in Figure 19.
- Of course, like on Google Authentication, you can also register via the Register link.
Authorization
Figure 19 shows that before registering, an unregistered user can only access two menu items, Home and Books. After registering, the user can access three menu items, Home, Books, and Publishers. The user has no role and can't access the fourth menu item, Authors. The menu authorizations are compliant with the specifications in the app.
What about pages and elements authorization? Please check their compliance; see Tables 1, 2, and 3 in the previous post, Blazor Server Project #15: Role-based Authorization.
Registered user
A user can sign in as a registered user with no role, one or more. It is similar to Google authentication. See Figures 22 and 24 in the previous article, Blazor Server Project #16: How to Implement Google Authentication.
Summary
Like on Google Authentication, by integrating Facebook Sign-In into your web app, any user — unregistered users, registered users with no role, one or more — can sign in using their Facebook accounts. Their authorization is compliant with the specification in the app.
Hopefully beneficial. Your feedback will be precious.


