
Blazor Server Project #15: Role-based Authorization
A practical security guide: add role services, specify & implement role-based authorization, assign roles to users, and test the authorization
Table of Contents
- Overview
- Add Role Services
- Specify and Implement Role-based Authorization ▸ Menu authorization ▸ Page and element authorization
- Assign Roles to Users ▸ Register users ▸ View user data ▸ Input roles data ▸ Assign roles to users
- Test the Authorization ▸ Users with no authentication and no authorization ▸ Users with no role ▸ Users with a "User" role ▸ Users with "Admin" and "User" roles
- Summary
- References

This article is the fifteenth in a series covering the Blazor Server Project: (1) How to create a CRUD operation using Dapper (2) Building a dropdown list involves a 1:N relationship (3) How to implement a checkbox list involving an M:N relationships (4) Understanding URL routing and navigation (5) Creating and using page layout (6) How to create a reusable modal dialog component (7) Practical guide to making a master-detail page (8) Master-detail page using dynamic query (9) How to avoid SQL injection attacks (10) Hiding/showing HTML elements (11) Migrate to ASP.NET Core 6.0 (12) Installing ASP.NET Core Identity (13) Integrating Identity tables into the existing project database (14) Authentication and authorization (15) Role-based authorization (16) How to implement Google Authentication (17) Facebook Authentication and Authorization (18) How to configure Twitter Authentication (19) How to Customize Password Policy (20) Account Lockout Policy
These articles are for anyone who wants to learn how to build Blazor Server applications in a practical approach through some sample projects. It will be straightforward if you have some experience with C#, HTML, CSS, and SQL.
Overview
Role-based authorization assigns the same permissions to multiple users based on their roles. For example, only users with the role "Admin" can delete data; a user must belong to two roles, "Admin" and "User" roles, to add data.
In Blazor Server Project #14, I applied simple authorization for users with no role. Now I will cover how to restrict access based on the roles of individual users. After opening the project, the steps are as follows: ▸ add role services ▸ specify and implement role-based authorization ▸ assign roles to users ▸ test the authorization.
Add Role Services
- This project is a continuation of the Blazor Server Project #14.
- If you don't have the project, you can download it via the link below.
- Open the project in Visual Studio 2022.
- Add the role-based authorization services,
.AddRoles<IdentityRole>(), intoIdentityHostingStartup.csfile.
Listing 1 BookApp/Areas/Identity/IdentityHostingStartup.cs
...

         services.AddDbContext<BookAppContext> ...
         services.AddDefaultIdentity<IdentityUser> ...
            .AddRoles<IdentityRole>()
            .AddEntityFrameworkStores<BookAppContext>();
...
The listing starts and ends with an ellipsis (…); it shows only part of the file. The bold text is the added code.
Specify and Implement Role-based Authorization
We will specify and implement menu, page, and element authorization based on roles. To limit access to:
- an element such as a menu item, button, etc., use the
AuthorizeViewcomponent - a whole page, use the
[Authorize]attribute.
Menu authorization
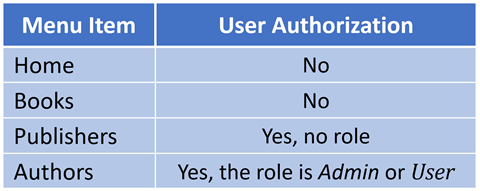
Table 1 specifies the menu authorization to display the item depending on the user's role. The implementation is in Listing 2.
Listing 2 BookApp/Shared/NavMenu.razor
...
   <AuthorizeView>
      <li class="nav-item px-3">
         <NavLink class="nav-link" href="listPublisher">
            <span class="oi oi-list-rich" aria-hidden="true"></span>
            Publishers
         </NavLink>
      </li>
   </AuthorizeView>
   <AuthorizeView Roles="Admin, User">
      <li class="nav-item px-3">
         <NavLink class="nav-link" href="listAuthor">
            <span class="oi oi-people" aria-hidden="true"></span>
            Authors
         </NavLink>
      </li>
   </AuthorizeView>
...- Showing Home and Books menu items don't require authorization. So, both don't require
AuthorizeViewcomponent. - Displaying the Publishers menu item requires authorization without any role. Just add
AuthorizeViewcomponent with no role. - The Authors menu item is only for authorized users with the User role. Add
AuthorizeViewcomponent withRoles="User"parameter.
Page and element authorization
Table 2 specifies the role-based authorization for pages and elements.

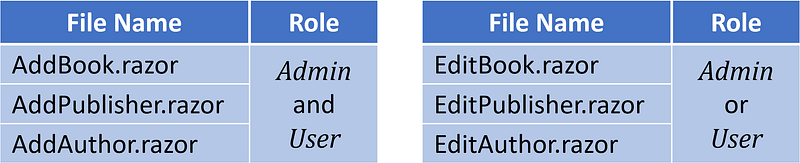
Users can bypass the Add and Edit buttons to navigate the pages: AddBook, AddPublisher, AddAuthor, EditBook, EditPublisher, and EditAuthor, via the address bar. So, we must also limit access to those pages. See Table 3.
Listing 3a BookApp\Pages\ListBook.razor
...
<tr>
...
<th class="sort-th"
@onclick="@(() => SortTable("PubName"))">
Publisher
<span class="fa @(SetSortIcon("PubName"))"></span>
</th>
<AuthorizeView Roles="Admin, User">
<th>Action</th>
</AuthorizeView>
</tr>
...
<td>
<hr style="padding:0px; margin:0px;">
@book.PubName
</td>
<td>
<AuthorizeView Roles="Admin, User">
<hr style="padding:0px; margin:0px;">
<a class="btn btn-primary"
href='/editBook/@book.ISBN'>
 Edit 
</a> 
</AuthorizeView>
<AuthorizeView Roles="Admin">
<a class="btn btn-warning" @onclick="() =>
OpenDialog((long)book.ISBN,book.Title)">
Delete
</a>
</AuthorizeView>
</td>
...
<button class="btn btn-custom" @onclick=@(async ()=>
await NavigateToPage("next"))>▶
</button> 
<AuthorizeView Roles="Admin, User">
<button class="btn btn-primary"
onclick="window.location.href='/addBook'">
Add new book
</button>
</AuthorizeView>
...- No authorization is required to display the
ListBook.razorpage. So, it doesn't require[Authorize]attribute. - Only users with the Admin role authorize to delete data. Add
AuthorizeViewcomponent withRoles=”Admin”parameter. - Users with the Admin or User role have the authorization to edit data. Add
AuthorizeViewcomponent withRoles="Admin, User"parameter. - Only users with two roles, User and Admin, can add data. At first, I added the following code.
Listing 3b BookApp\Pages\ListBook.razor
...
   <AuthorizeView Roles="Admin">
      <AuthorizeView Roles="User">
         <button class="btn btn-primary"
            onclick="window.location.href='/addBook'">
            Add new book
         </button>
      </AuthorizeView>
   </AuthorizeView>
...- It didn't work! So, I replaced it with the following code.
Listing 3c BookApp\Pages\ListBook.razor
...
      <AuthorizeView Roles="Admin, User">
         <button class="btn btn-primary"
            onclick="window.location.href='/addBook'">
            Add new book
         </button>
      </AuthorizeView>
...
Of course, the code in Listing 3c is not true. Therefore, add two [Authorize] attributes with Roles = “Admin” and Roles = “Admin” parameters into the AddBook.razor file. See Listing 4.
Listing 4 BookApp\Pages\AddBook.razor
@page "/addBook"
@attribute [Authorize(Roles = "Admin")]
@attribute [Authorize(Roles = "User")]
...- Only users with two roles, Admin and User, have the authorization to add data.
Listing 5 BookApp\Pages\EditBook.razor
@page "/editBook/{isbn:long}"
@attribute [Authorize(Roles = "Admin, User")]
...- The code in Listing 5 limits access to the EditBook.razor page to users who are a member of
AdminorUserrole.
So do the other pages. See Listing 6 to 11.
Listing 6 BookApp\Pages\ListPublisher.razor
@page "/listPublisher"
@attribute [Authorize]
...
<AuthorizeView Roles="Admin, User">
<a class="btn btn-primary" href='/addPublisher/-1'>
Add new publisher
</a>
</AuthorizeView>
...
<tr>
...
<AuthorizeView Roles="Admin, User">
<th>Action</th>
</AuthorizeView>
</tr>
...
<tr>
...
<td>
<AuthorizeView Roles="Admin, User">
<hr style="padding:0px; margin:0px;">
<a class="btn btn-primary"
href='/editPublisher/@publisher.Id'>
 Edit 
</a> 
</AuthorizeView>
<AuthorizeView Roles="Admin">
<a class="btn btn-warning" @onclick="() =>
OpenDialog(publisher.Id,publisher.Name)">
Delete</a>
</AuthorizeView>
</td>
</tr>
...Listing 7 BookApp\Pages\ListAuthor.razor
@page "/listAuthor"
@attribute [Authorize(Roles = "Admin, User")]
...
<AuthorizeView Roles="Admin, User">
<a class="btn btn-primary" href='/addAuthor/0'>Add new author</a>
</AuthorizeView>
...
<tr>
...
<AuthorizeView Roles="Admin, User">
<th>Action</th>
</AuthorizeView>
</tr>
...
<td>
<AuthorizeView Roles="Admin, User">
<hr style="padding:0px; margin:0px;">
<a class="btn btn-primary"
href='/editAuthor/@author.Id'>
 Edit 
</a> 
</AuthorizeView>
<AuthorizeView Roles="Admin">
<a class="btn btn-warning" @onclick="() =>
OpenDialog(author.Id,author.LName)">
Delete
</a>
</AuthorizeView>
</td>
...Listing 8 BookApp\Pages\AddPublisher.razor
@page "/addPublisher/{isbnDummy:long}"
@attribute [Authorize(Roles = "Admin")]
@attribute [Authorize(Roles = "User")]
...
Listing 9 BookApp\Pages\AddAuthor.razor
@page "/addAuthor/{isbnDummy:long}"
@attribute [Authorize(Roles = "Admin")]
@attribute [Authorize(Roles = "User")]
...
Listing 10 BookApp\Pages\EditPublisher.razor
@page "/editPublisher/{id:int}"
@attribute [Authorize(Roles = "Admin, User")]
...
Listing 11 BookApp\Pages\EditAuthor.razor
@page "/editAuthor/{id:int}"
@attribute [Authorize(Roles = "Admin, User")]
...
Assign Roles to Users
The identity database consists of seven tables.
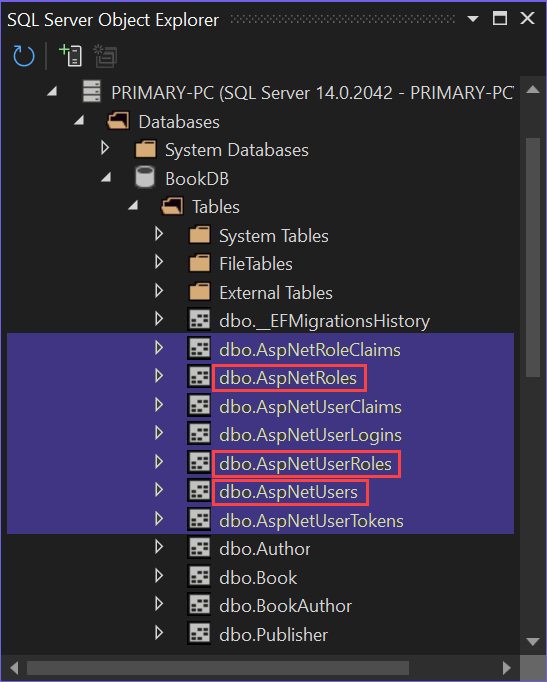
AspNetRoles, AspNetUsers, and AspNetUserRoles tables store the data of roles, users, and users' roles.
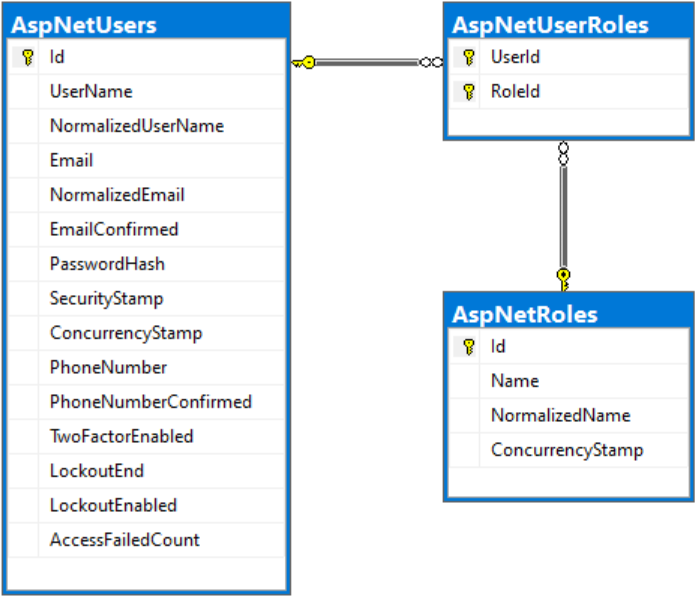
A user may belong to no role or one or more roles. Conversely, a role may belong to one or more users. Figure 2 shows the relationship between the three tables I created using SQL Server Management Studio.
Before assigning roles to users, data of the users and roles must first exist.
Register users
In the previous project, Blazor Server Project #14, we registered the first user, [email protected].
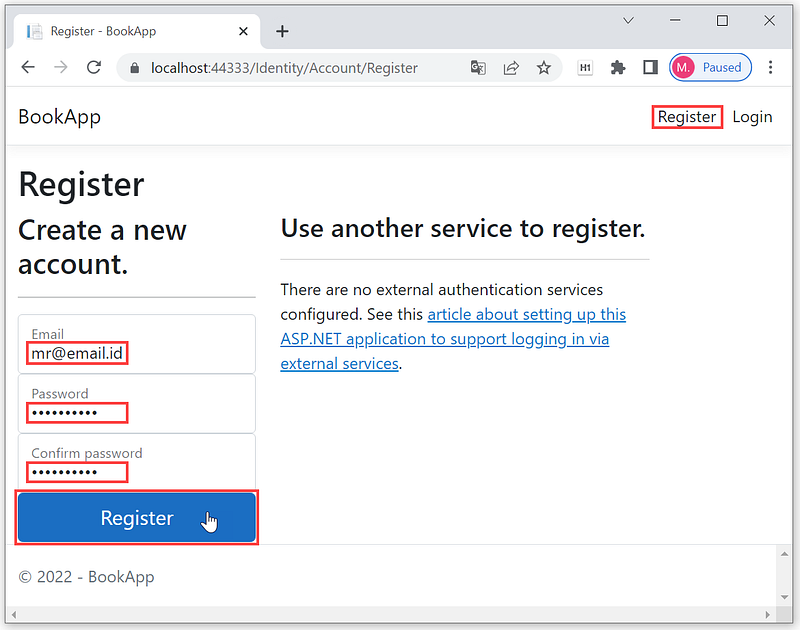
For now, register the three other users: (1) [email protected] (2) [email protected] (3) [email protected]
View users data
- Open SQL Server Object Explorer by selecting > View > SQL Server Object Explorer from the menu.
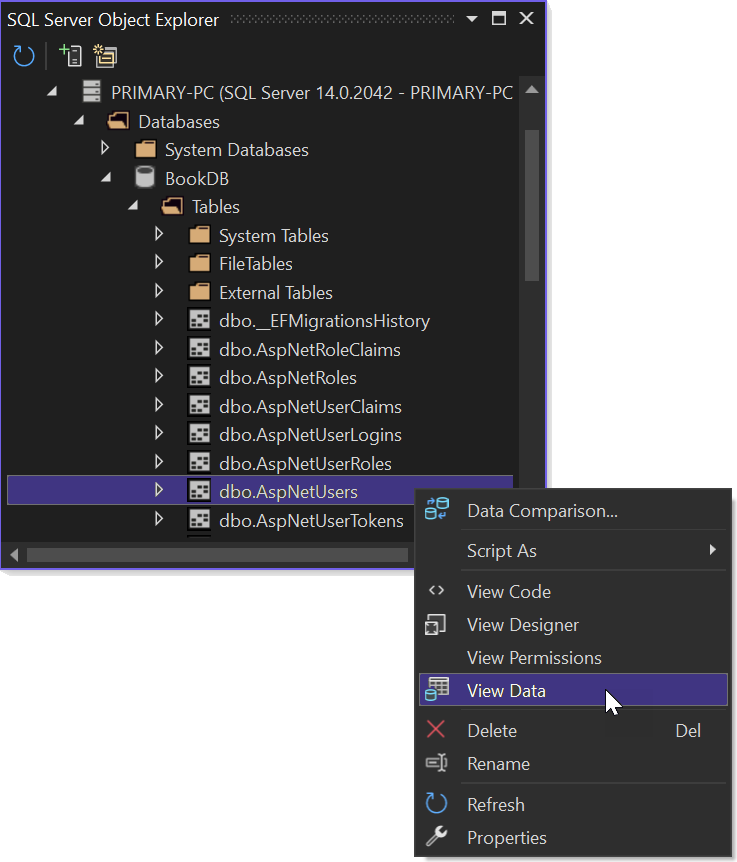
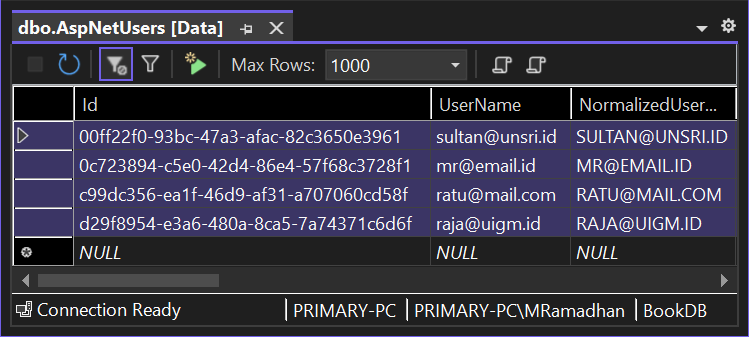
- From SQL Server Object Explorer, right-click on the AspNetUsers table to open the context menu, then select View Data.
- The following screenshot shows the list of registered users.
Input roles data
- From SQL Server Object Explorer, right-click on the AspNetRoles table to open the context menu, then select View Data.
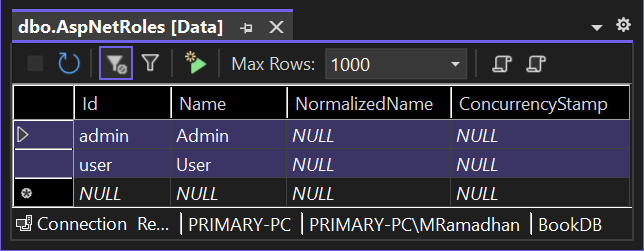
- Input data as in Figure 6 above.
Assign roles to users
- View data of AspNetUserRoles table.
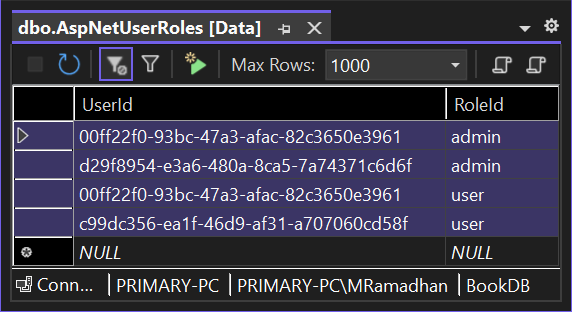
- Assign roles to users as in Figure 7.
Test the Authorization
We will test the authorization for the following: ⦁ user with no authentication and no authorization ⦁ user with no role ⦁ user with a User role ⦁ user with two roles: User and Admin
Users with no authentication and no authorization
Press the F5 key to start debugging. If there are no errors, the following homepage appears.
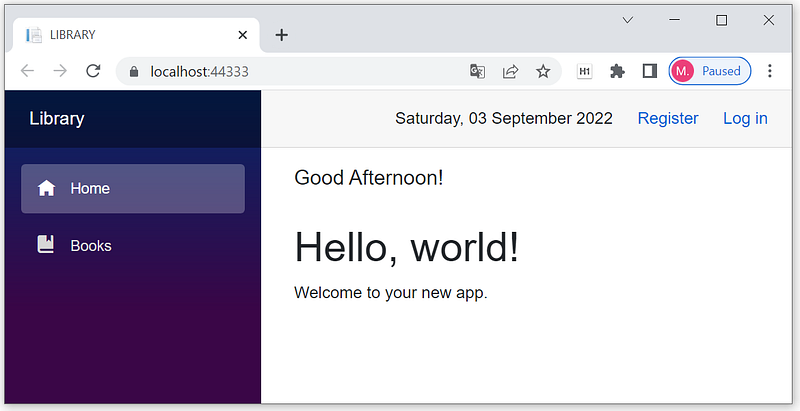
- There are only two menu items, Home and Books. It corresponds to the specifications in Table 1.
- Click the Books menu item.
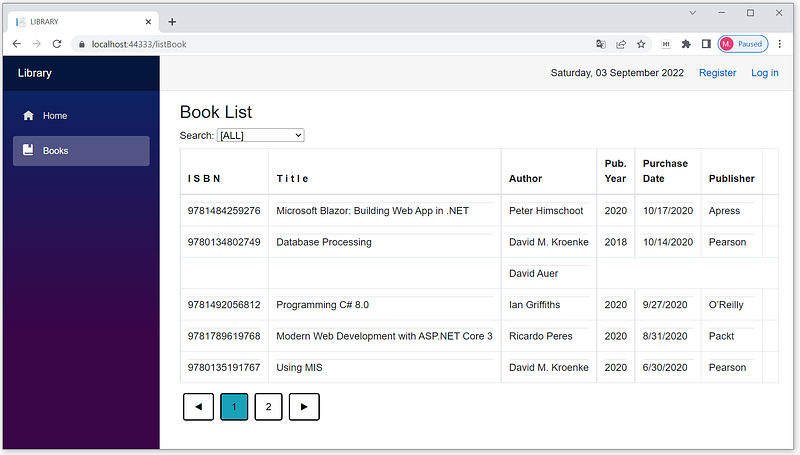
- The list of books appears with no Add, Edit, and Delete buttons. It matches the specifications in Table 2.
Users with no role
- Use [email protected] to log in and display the following homepage.
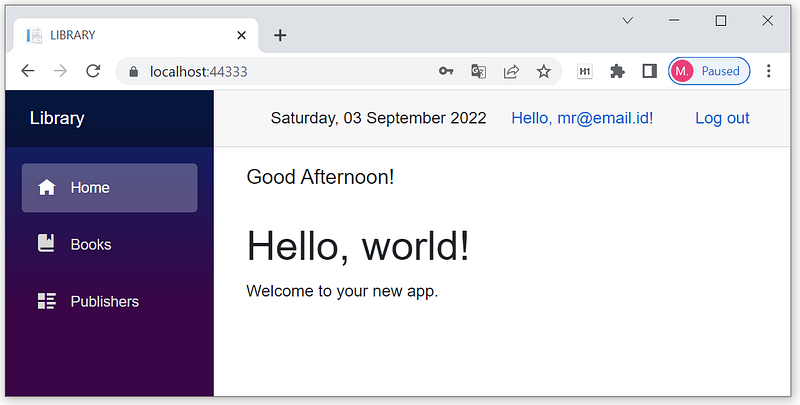
- There are three menu items, Home, Books, and Publishers. It suits the specifications in Table 1.
- Click the Publishers menu item.
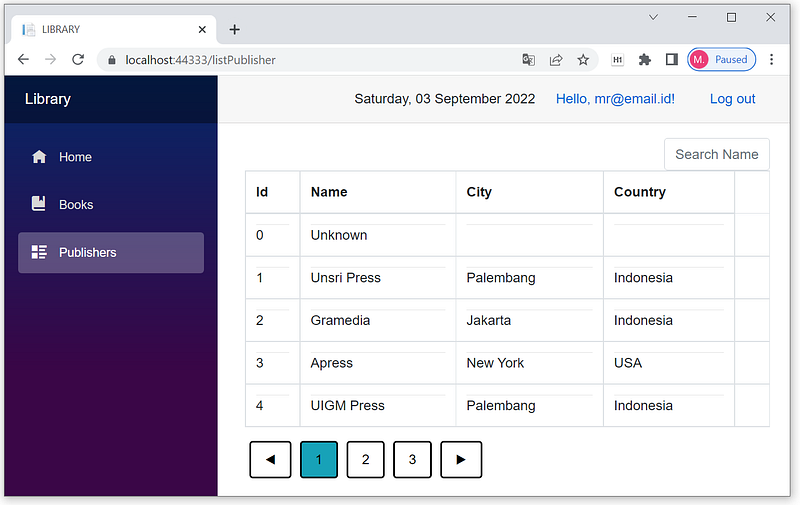
- It displays the list of publishers with no Add, Edit, and Delete buttons. It conforms to the specifications in Table 2.
Users with a "User" role
- After logging out, log in using [email protected], and the following homepage appears.
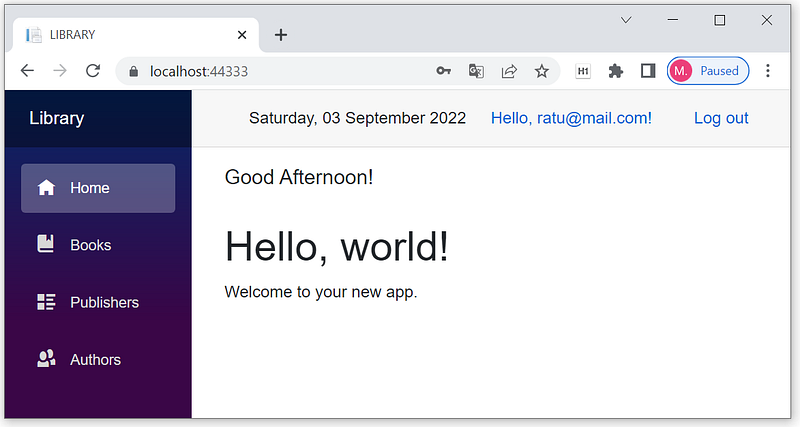
- There are four menu items, Home, Books, Publishers, and Authors. It accommodates the specifications in Table 1.
- Click the Authors menu item.
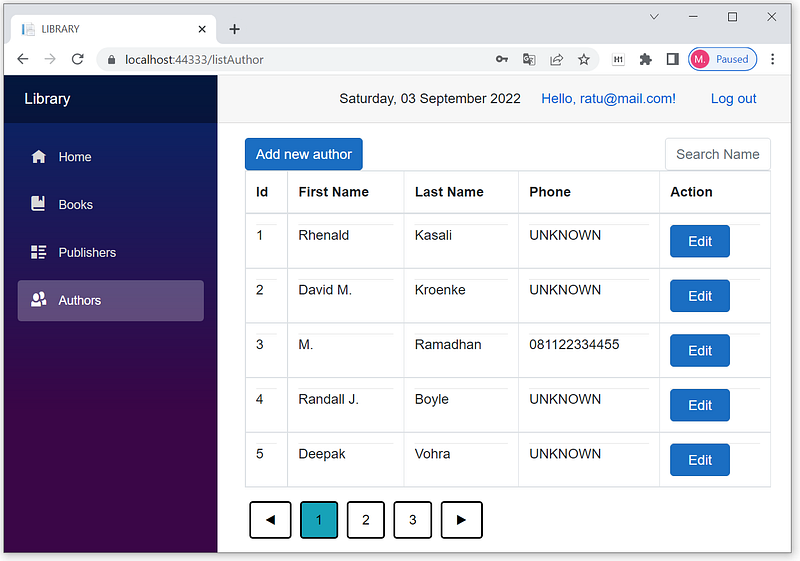
- The list of authors appears with the Edit button and no Delete button. It corresponds to the specifications in Table 2. It also shows the Add new author button conforming to the code in Listing 7.
- Click the Edit button, and the following page appears.
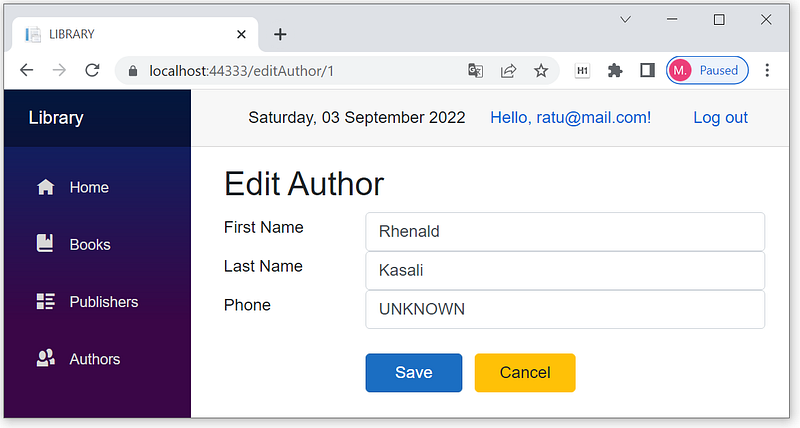
- Only users with Admin or User roles authorize to edit data. It suits the specifications in Table 3.
- Click the Add new author button. The following message appears.
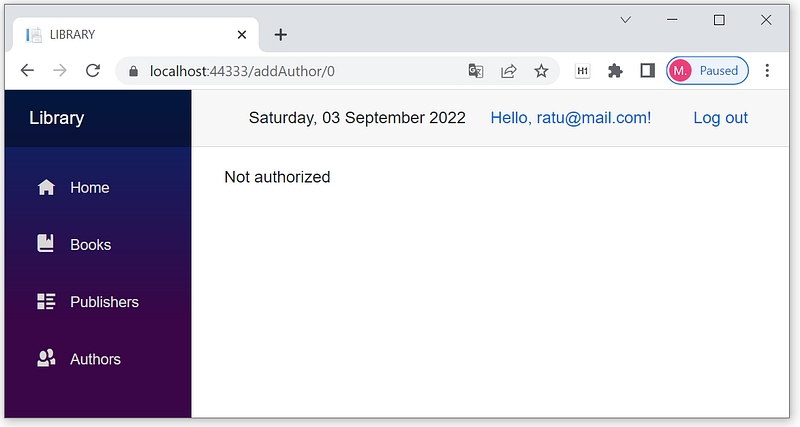
- Only users with two roles, User and Admin, can add data. Others can't. It conforms to the specifications in Table 3.
Users with "Admin" and "User" roles
- Use [email protected] to log in. It corresponds to the specifications in Table 1 to display the homepage with four menu items, Home, Books, Publishers, and Authors.
- Click the Authors menu item.
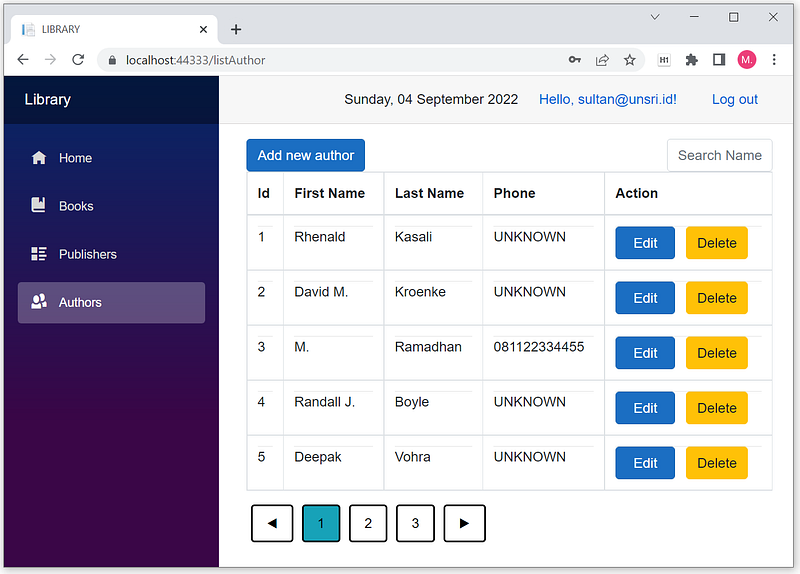
- It accommodates the specifications in Table 2 to display the list of authors with the Edit and Delete buttons. It also shows the Add new author button corresponding to the code in Listing 7.
- Click the Add new author button. It displays the following page.
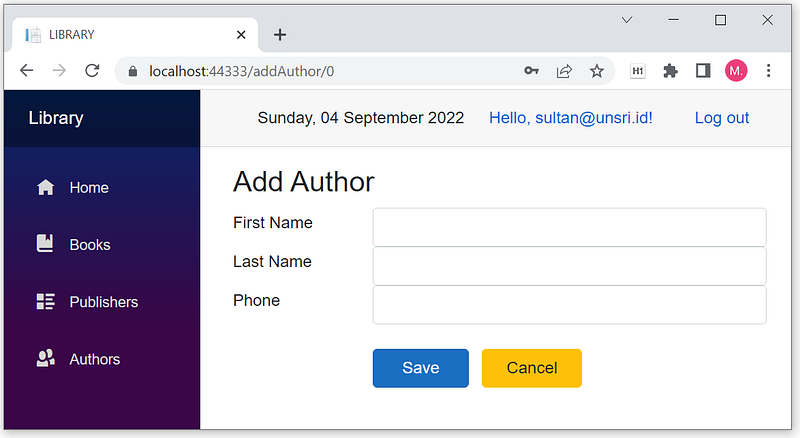
- Users with two roles, User and Admin, have the authorization to add data. It matches the specifications in Table 3.
Summary
Role-based authorization groups permissions into roles and assigns those roles to users. Use AuthorizeView component with Roles parameter to limit access to elements such as menu items, buttons, etc., and so does [Authorize] attribute to restrict access to a whole page.


