
Blazor Server Project #20: Account Lockout Policy
A straightforward guide to customizing ASP.NET Core Identity for the lockout policy
Table of Contents
▸ Introduction ▸ Lockout Policy in ASP.NET Core Identity ▸ Configure Lockout ▸ Summary ▸ References

This article is the twentieth in a series covering the Blazor Server Project: (1) How to create a CRUD operation using Dapper (2) Building a dropdown list involves a 1:N relationship (3) How to implement a checkbox list involving an M:N relationships (4) Understanding URL routing and navigation (5) Creating and using page layout (6) How to create a reusable modal dialog component (7) Practical guide to making a master-detail page (8) Master-detail page using dynamic query (9) How to avoid SQL injection attacks (10) Hiding/showing HTML elements (11) Migrate to ASP.NET Core 6.0 (12) Installing ASP.NET Core Identity (13) Integrating Identity tables into the existing project database (14) Authentication and authorization (15) Role-based authorization (16) How to implement Google Authentication (17) Facebook Authentication and Authorization (18) How to configure Twitter Authentication (19) How to Customize Password Policy (20) Account Lockout Policy
These articles are for anyone who wants to learn how to build Blazor Server applications in a practical approach through some sample projects. It will be straightforward if you have some experience with C#, HTML, CSS, and SQL.
Introduction
Lockout is a security mechanism implemented in addition to a password policy to protect user accounts from unauthorized access further. A lockout mechanism typically involves automatically disabling an account after several failed login attempts or other suspicious activity, such as repeated password attempts, failed security question attempts, or other signs of suspicious behavior.
The purpose of a lockout mechanism is to prevent attackers from guessing or cracking passwords through brute force attacks or other automated methods. On the other hand, password policies typically involve setting rules around password complexity, length, and frequency of change and prohibiting the use of common passwords or other weak authentication factors.
While a strong password policy can help ensure that user accounts are protected by passwords that are difficult to guess or crack, it is not foolproof. Attackers can still access user accounts through brute force attacks or other automated methods, especially if they can simultaneously launch attacks against many accounts.
By implementing a lockout mechanism in addition to a strong password policy, organizations can further enhance the security of their user accounts by preventing automated attacks that attempt to guess or crack passwords. This can help to protect sensitive user data and other resources from unauthorized access and reduce the risk of security breaches and data loss.
Lockout Policy in ASP.NET Core Identity
- Open Blazor Server Project #19 with Visual Studio.
- Run the project and click the Login button.
- Type the wrong password, click the Log in button, and the system will display messages.
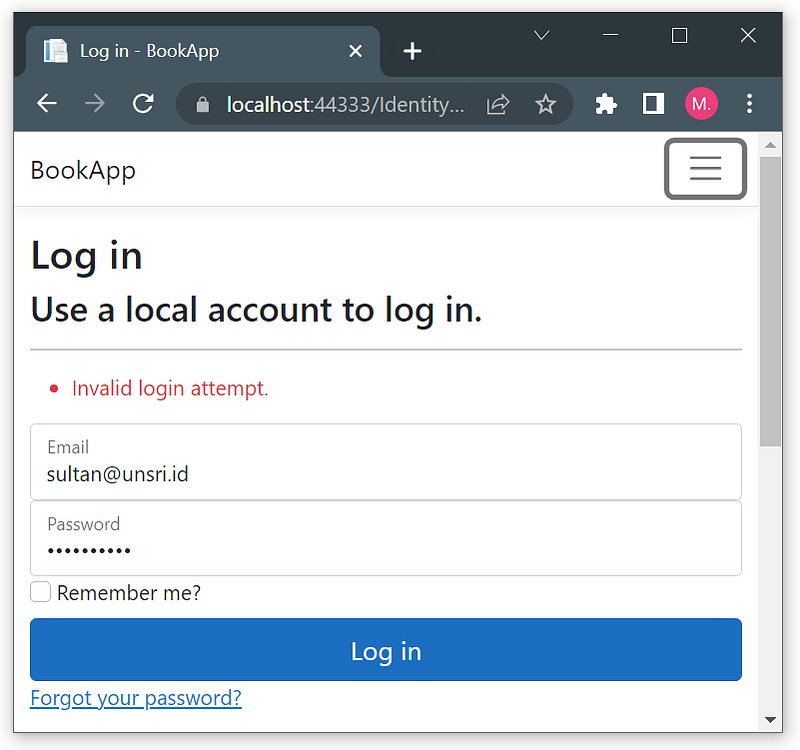
- No matter how often you type your wrong password, the app responds similarly; the lockout policy is disabled.
- Lockout is set in the
PasswordSignInAsyncmethod in theLogin.cshtml.csfile.
Listing 1 The contents of Login.cshtml.cs file
...
      var result = await _signInManager.PasswordSignInAsync(Input.Email,
          Input.Password, Input.RememberMe, lockoutOnFailure: false);
...- You can enable the lockout by changing the value of
lockoutOnFailuretotrue. - In Blazor Server using ASP.NET Core Identity, the following messages will appear after typing your wrong password five times.
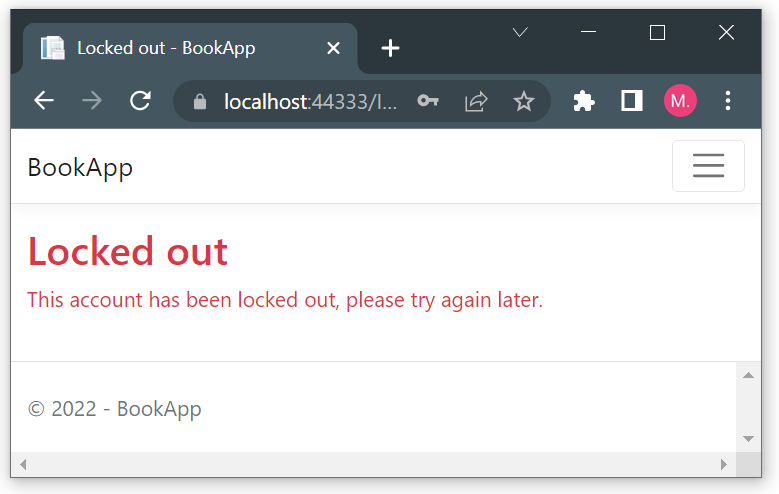
- Users are locked out for 5 minutes after the maximum number of failed access attempts.
Configure Lockout
- Of Course, you can change the default value by adding the code in Listing two into the
Startup.csfile.
Listing 2 The contents of Startup.cs file
...
    public void ConfigureServices(IServiceCollection services)
    {
       ...
       services.Configure<IdentityOptions>(options =>
       {
          options.Lockout.DefaultLockoutTimeSpan = TimeSpan.FromMinutes(20);
          options.Lockout.MaxFailedAccessAttempts = 3;
          options.Lockout.AllowedForNewUsers = true;
       });
       ...
    }
...- The
MaxFailedAccessAttemptsis set to3, which means the user will be locked out after three failed login attempts. - The
DefaultLockoutTimeSpanis set to20 minutes, which means the user will be locked out for 4 minutes after being locked out due to too many failed login attempts. - Additionally, the
AllowedForNewUsersoption is set totrue, which means new users can also be locked out if they exceed the maximum number of allowed failed login attempts.
Summary
By default, the Lockout feature is disabled. However, it’s a good security practice to enable this feature and configure it based on the specific security requirements of the application.
Hopefully beneficial. Your feedback will be precious.


