Build The Famous Snake Game With Python’s Turtle Module

As a kid, I am sure everybody has played the famous snake game. As a matter of fact, it was one of the first mobile games that came into the market. Wouldn’t it be cool to build it by yourself? Hell Yeah! In this article, I am going to use Python’s Turtle Module to build it from scratch.
Agenda:
- What Is Python’s Turtle Module?
- Start Building The Game
- Set Up The Screen
- Create Snake’s Head
- Functions To Move The Snake
- Add Some Food
- Build Snake’s Body
- Add Border Collisions
- Add Body Collisions
- Add Scores
What Is Python’s Turtle Module?
I’m sure everybody has used a drawing board as a kid. Now, imagine, instead of manually drawing on the board, you could command the system to draw for you. Isn’t that cool? Python’s turtle module lets you do that. It basically lets you create a drawing board and command a turtle to draw for you.
Let’s move ahead and start building the game. I have used PyCharm with Python version 2.7 for this article.
Start Building The Game
Let’s understand this game before we start building. There are two elements in this game — snake and food. The player has to move the snake such that it touches(eats) the food and grows in size. The snake dies if it touches its own body or the boundaries of the window. On an obvious note, the player needs to win and hence avoid dying.
Set Up The Screen
To start using the module, you need to import it like any other module in python.
import turtle
The function turtle.Screen() is used to create a window. In this case, our window is win for the game. Give this window a name with the function window.title(“Kalgi’s Snake Game”). Set the background color for the window with the function window.bgcolor(“Color”). Set the window height and width with the function window.setup(width=X, height=Y). The function window.tracer() turns off the screen updates. We do not need any screen updates other than the scoreboard and hence set to 0.
#set up the screen
win = turtle.Screen()
win.title("Kalgi's snake game")
win.bgcolor("blue")
win.setup(width=600,height=600)
win.tracer(0)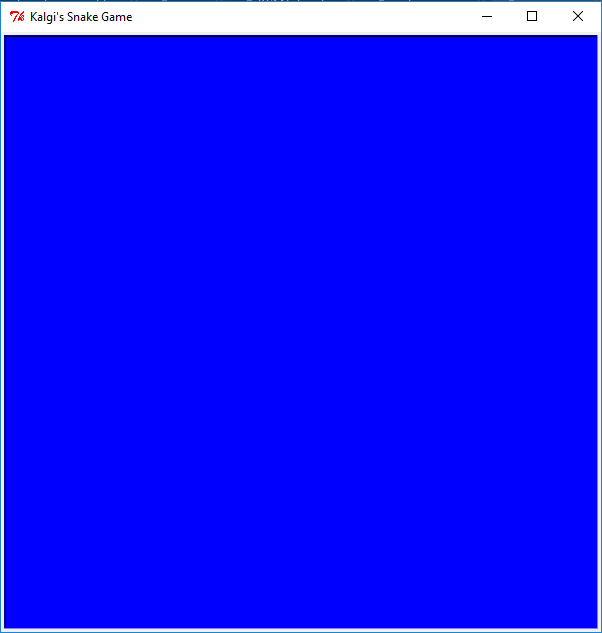
Create Snake’s Head
Once you’ve created the window, the next thing we need is a snakehead. Snake is basically a turtle(in python language) that moves around. Create a turtle with the function turtle.Turtle() and assign it the name head. We set the head speed to 0 as we’re just initializing in this section and the head does not need to move. We use the function turtle_name.speed() for this. Next, we need to initialize the head shape and color. We use the functions turtle_name.shape() and turtle_name.color().
Do we need to draw the paths taken by the snake? No! The function turtle_name.penup() makes sure that the path taken by the snake is not drawn. I want my snakehead’s position to be the center of the window and the direction to be “stop”. We use the functions turtle_name.goto() and turtle_name.direction() for it.
#Snake Head
head = turtle.Turtle()
head.speed(0)
head.shape("square")
head.color("black")
head.penup()
head.goto(0, 100)
head.direction = "stop"
Once the head is created, I need the main game loop which is always set to true. I am going to update my window using the function window.update(). This function basically updates my screen continuously with the loop.
# Main game loop
while True:
    win.update()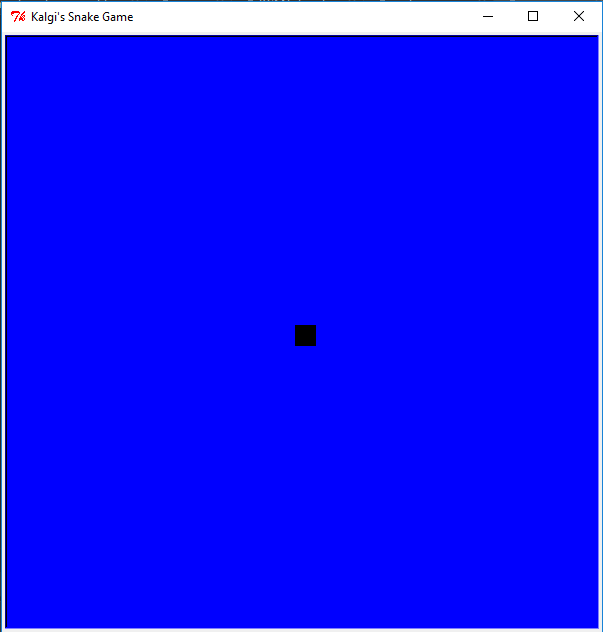
Functions To Move the Snake
Now that we have created a snake lets go ahead and make the snake move. We define a function called move(). If the head goes up, the ‘y’ coordinate is increased, if the head goes down, the ‘y’ coordinate decreases, if the head moves right, the ‘x’ coordinate increases and if the head moves left, the ‘x’ coordinate decreases.
def move():
    if head.direction == "up":
        y = head.ycor() #y coordinate of the turtle
        head.sety(y + 20)

    if head.direction == "down":
        y = head.ycor() #y coordinate of the turtle
        head.sety(y - 20)

    if head.direction == "right":
        x = head.xcor() #y coordinate of the turtle
        head.setx(x + 20)

    if head.direction == "left":
        x = head.xcor() #y coordinate of the turtle
        head.setx(x - 20)
The function does nothing until it’s called. So we need to call the function every time we update the screen or the window. Update the main game loop as follows:
#Main Game Loop
while: True
    win.update()
    move()
You can try executing the code so far and you’ll notice that the snake moves but very fast. That’s the default behavior for the move function. To slow this down, we need to use the time module. Go to the import section of your code and import the time module. We initialize a variable called delay to 0.1. And then call the function time.sleep(delay) to reduce turtle speed.
import turtle
import time
delay=0.1
# Main game loop
while True:
    wn.update()
    move()
    time.sleep(delay)
We’ve made the functions for moving the turtle up, down, left and right. But how does the computer know what up, down, left and right is? We need to define a function for each of these directions and set the head.direction to up, down, right and left.
Note: The snake cannot go right from left, left from right, top from down and down from the top.
def go_up():
    if head.direction != "down":
        head.direction = "up"

def go_down():
    if head.direction != "up":
        head.direction = "down"

def go_right():
    if head.direction != "left":
        head.direction = "right"

def go_left():
    if head.direction != "right":
        head.direction = "left"
We need the system to listen to our control key presses. We add a function called win.listen() that listens to the key presses. Every keypress needs to be bound to a function that carries out an action. We use the function win.onkeypress(function, “key”) for the same.
# keyboard bindings
win.listen()
win.onkey(go_up, "w")
win.onkey(go_down, "s")
win.onkey(go_right, "d")
win.onkey(go_left, "a")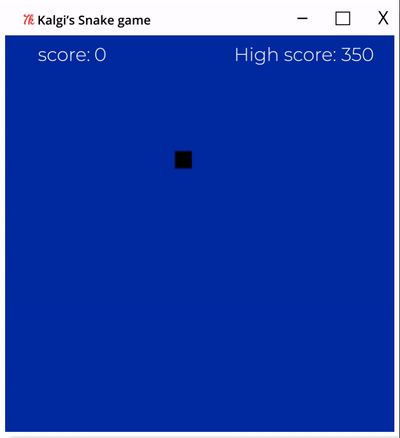
Add Some Food
Food again is a turtle that remains stationary until it’s been touched(eaten). Once the snake eats the food, it takes up another random position and the game continuous. Let’s go ahead and create a turtle for food in a similar way. We are going to use the same functions as we used for creating the snakehead.
# Snake food
food = turtle.Turtle()
food.speed(0)
food.shape("circle")
food.color("red")
food.penup()
food.shapesize(0.50, 0.50)
food.goto(0, 0)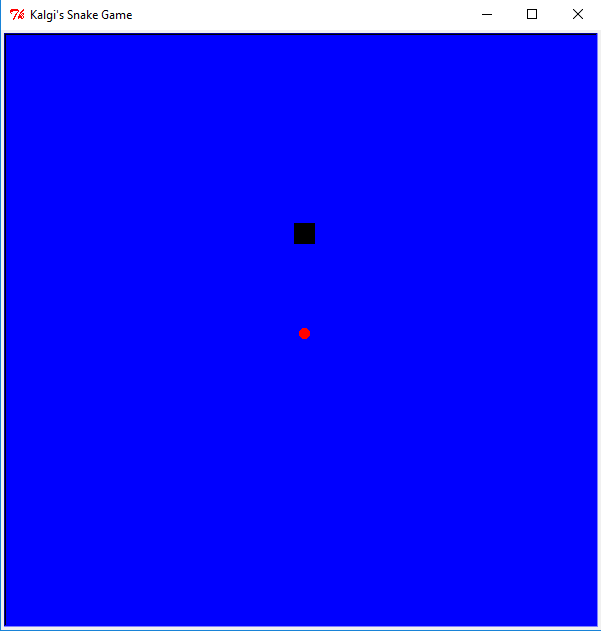
Now that we’ve created the snakehead and the food and given functionalities to move, the snake is supposed to eat the food when it touches it and the food needs to take up a new position. I am going to calculate the distance between the two objects with the function head.distance(food). If the distance is less than 15(food and head come in contact), the food is re-positioned to a random position anywhere within the window. Let’s go ahead and add this feature in the main game loop.
if head.distance(food) <15:
# move the food to a random position on screen
x = random.randint(-290, 290)
y = random.randint(-290, 290)
food.goto(x, y)
Build Snake’s Body
Now we need a functionality that increases the snake body every time it touches food. We use arrays for this purpose. We create an array called segments, which is initialized to empty.
segments = []We need to add a segment to the snake’s body every time it touches the food. We already have a condition that checks for the head’s collision with food. Create a new turtle and name it new_segment, define its speed, shape, and color and append it to the segments array.
# add a segment
        new_segment = turtle.Turtle()
        new_segment.speed(0)
        new_segment.shape("square")
        new_segment.color("grey")
        new_segment.penup()
        segments.append(new_segment)
Adding the segment to the snakehead is not enough. Those segments need to move when the snakehead moves. The logic I’ve used moves the last segment which is in the position x to x-1 and x-1 to x-2 and so on.
# move the end segment in reverse order
    for index in range(len(segments)-1, 0, -1):
        x = segments[index-1].xcor()
        y = segments[index-1].ycor()
        segments[index].goto(x, y)
But the segment which is right above the head is a special case. Where does that go? It goes in the place of the head.
# Move segment 0 to where the head is
if len(segments) &gt; 0:
x = head.xcor()
y = head.ycor()
segments[0].goto(x, y)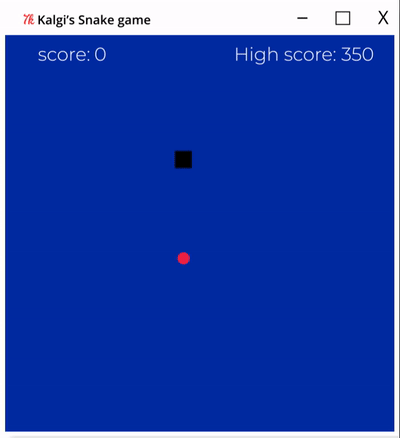
Add Border Collisions
We need to make sure that the snake dies when it collides with the border. We already have the coordinates of the border, we just need to reset the snakehead position when it touches those coordinates. Also, the snake needs to stop moving and hence change the direction to stop.
# Check for collision
    if head.xcor() > 290 or head.xcor() < -290 or head.ycor() > 290 or head.ycor() < -290:
        time.sleep(1)
        head.goto(0, 0)
        head.direction = "stop"
Also, the segments need to disappear when the snake dies. For this, all we need to do is, set the segment’s position outside the window coordinates. Now when the game restarts we need fresh new segment and hence clear the segment list.
# Hide the segments
        for segment in segments:
           segment.goto(1000, 1000)

        # clear segment list
        segments = []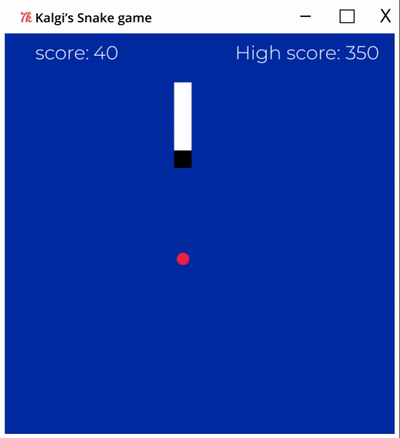
Add Body Collisions
The snake needs to die when it touches itself. So we’re going to go through the entire segments list and check if the distance between the segment and head is less than 20. If it is, reset the head position and head direction.
# Check for head collision
    for segment in segments:
        if segment.distance(head) < 20:
            time.sleep(1)
            head.goto(0, 0)
            head.direction = "stop"

# Hide the segments
            for segment in segments:
                segment.goto(1000, 1000)

# clear segment list
            segment.clear()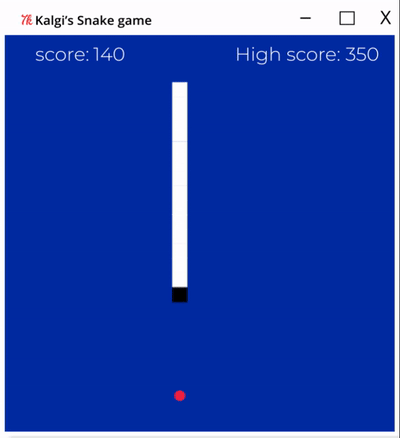
Add Scores
Turtle module has an amazing feature that allows you to write on the screen. I am going to start by creating a turtle to use it as a pen.
pen = turtle.Turtle()
pen.speed(0)
pen.shape("square")
pen.color("white")
pen.penup()
pen.hideturtle()
pen.goto(0, 260)
pen.write("Score: 0 High Score: {}".format(high_score), align="center", font=("Courier", 24, "normal"))
Let’s initialize a variable called score to 0 and high_score also to 0.
# score
score = 0
high_score = 0
We need to analyze the situations when the score increases. First one is when the head collides with the food. Increase the score and update the high_score. We use the pen.write() to write the score on the screen.
# Increase the score
        score = score+10

        if score > high_score:
            high_score = score
We need to reset the score when the snakehead collides with the border and with its own segment. Add the following lines in those two places
# reset score
            score = 0

    # update score
            pen.clear()
            pen.write("score: {} High Score: {}".format(score, high_score), align="center", font=("Courier", 24, "normal"))
And Tadaaaaa!! Your game is ready. Python is a widely-used programming language with 8.2 million developers working with it. You’ll be surprised to see what wonders it can do. Another cool module that allows you to develop games is Pygame.
I hope this Python’s turtle module has helped you get an idea of how games can be built with it. Please do use it to build more such games and let me know in the comments section below. I’d love to play them. If you wish to check out more articles on the market’s most trending technologies like Artificial Intelligence, DevOps, Ethical Hacking, then you can refer to Edureka’s official site.
Do look out for other articles in this series which will explain the various other aspects of Python and Data Science.
15. Python vs C++
16. Scrapy Tutorial
17. Python SciPy
20. Python Basics
23. Python Decorator
32. Python 3.8
34. Python Tutorial
Originally published at https://www.edureka.co on August 23, 2019.


