
How to build a React Native app with Expo
A step by step guide to build a mobile app
There are two different ways first we could use to create the React Native app. The Expo CLI or React Native CLI.
The CLI stands for command-line interface. It is tools that we can use in the command line.
Related Course:
Complete React Native articles:
- How to build a React Native app with Expo
- How to Run the Expo React Native app on the emulator
- Expo folder and file structure
- Expo React Native View, Text and Style
- Expo React Native — using React Hook useState()
- How to Use TextInput Component to Change State in React Native?
- How to Use Expo React Native List and ScrollView
- How and why we use Flatlist in Expo React Native
- What is TouchableOpacity in Expo React Native?
What is the difference between these two Expo CLI and React Native CLI?
Expo CLI
Expo abstracts way from the native code and it makes it much simpler to get up and running with react native. Especially if you are new to it. It acts as a wrapper around our app which is going to provide us with a simplified app development workflow.
A lot of utility features and common tasks like working with the camera or other device features , because of the abstraction of Expo, it does offer a little less flexibility because we are limited to what Expo exposes to us, but it does make making these apps much simpler especially if you are a new to react native.
React Native CLI
The react native CLI does not abstract away from the native code. It requires a bit more effort and configuration to get up and running now.
To create a react native app this way is considered to be a pure react native app because it contains no additional utility features or configuration.
It consists only the bare essentials and that means you have to import all the libraries to achieve different things, like working with the camera.
Using expo is kind of like a beginner series to react native.
At some point in the future if you ever wanted to switch from Expo to have the bare-bones approach, you can do that by simply ejecting the project at any point.
Workflow
The first thing we need to do right here is download node.js .
Why we installed node is to get the NPM node package manager so that we can install other things
We copy it and paste it inside a terminal or command prompt and then press ENTER.
npm install -g expo-cliWhat this does is to install Expo CLI globally on your computer.
Next, we are going to create our first react native project so you can see down here now
Create a new project
Go to the terminal now to create a new project
We say Expo in it for initialize and then the name of your project
expo init my-projectWe need to navigate to the directory in your terminal where you want to create this project.
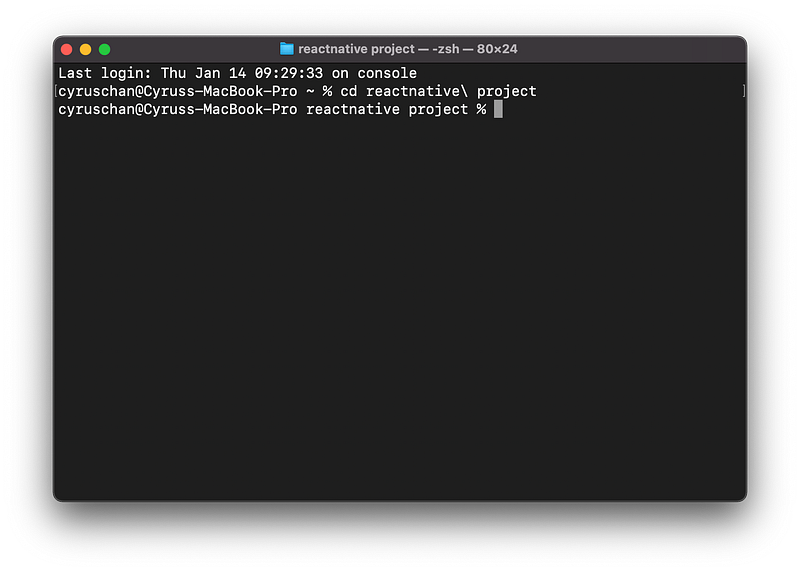
To navigate around just use CD for change directory and then the name of the directory. For example if you want to go to a folder inside the apps directory called “reactnative project”, you need to say
cd reactnative\ projectIt would take you into that folder once you press ENTER
and if you want to go up a level you could say
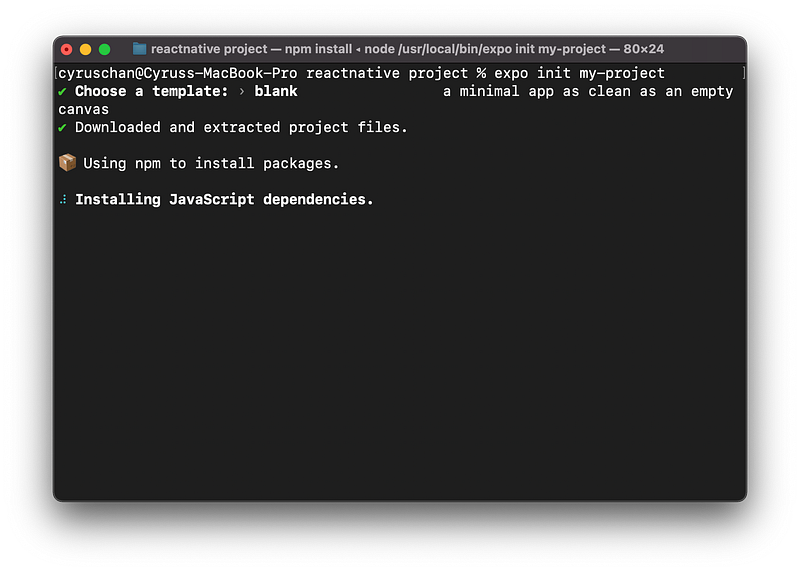
cd ..This is where I want to create the project named “my-project” so we need to type following command and press ENTER
expo init my-projectIt is going to give you a few different options right here. We can use
a blank workflow in the manage workflow or we can use tabs or minimal etc.

We are going to go use a blank project in a managed workflow and it is going to create a new project for us.
Once it’s done that you can see to get started you can type “cd my project” to
go into that directory and then “npm start”
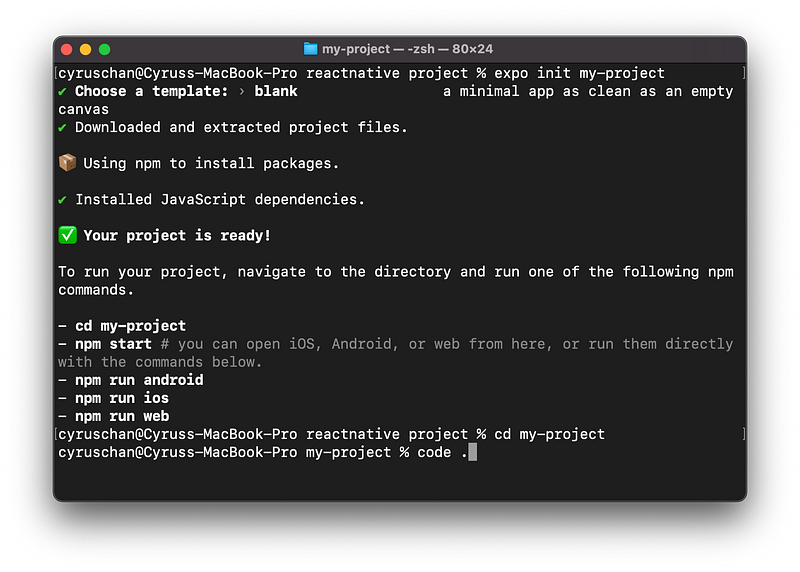
We are going to say “cd my-project” and then before we type “npm start”, we are going to open the visual studio code in this directory from the terminal we can type “code .” in current directory and press ENTER.
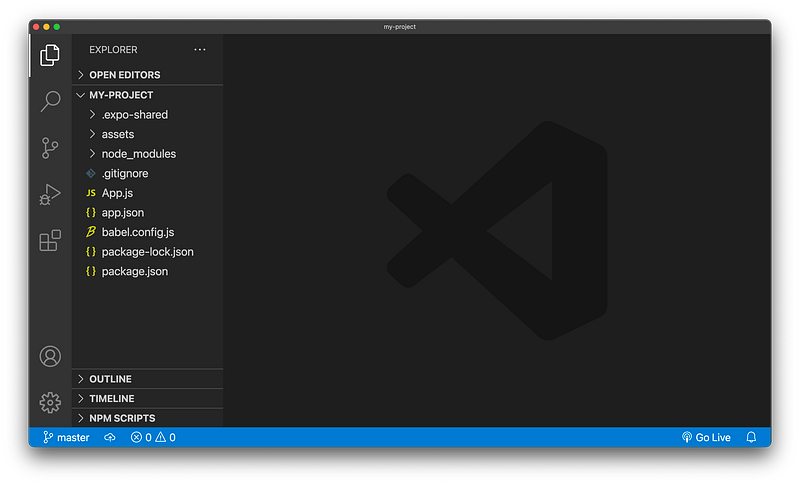
We got all of these different folders and files down and we going to open up the terminal in Visual Studio Code.
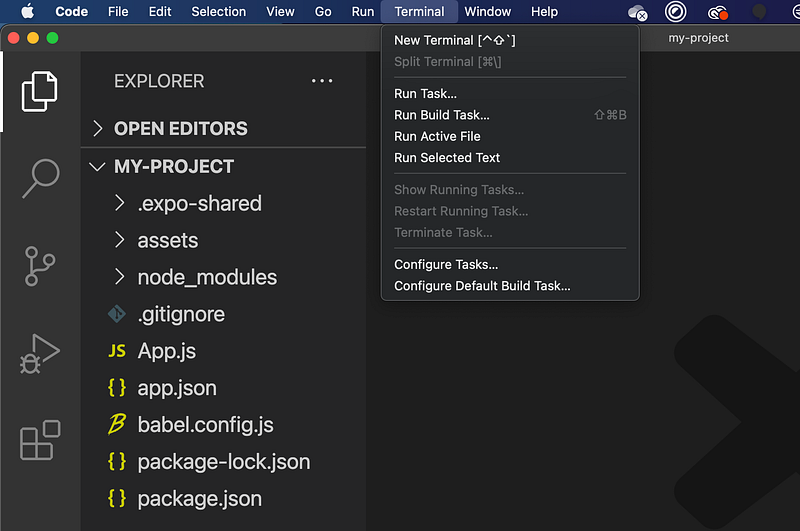
Next thing we are gonna do is type “npm start” and press ENTER.
It is going to run expo start under the hood and it will open up a new tab in the browser.
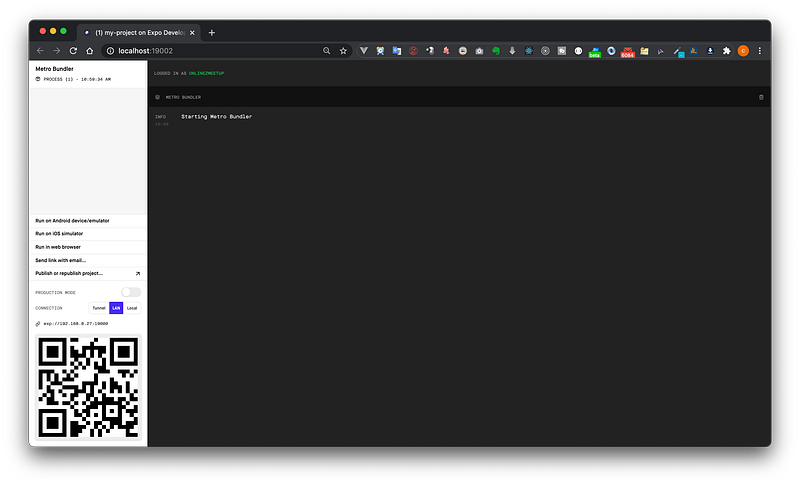
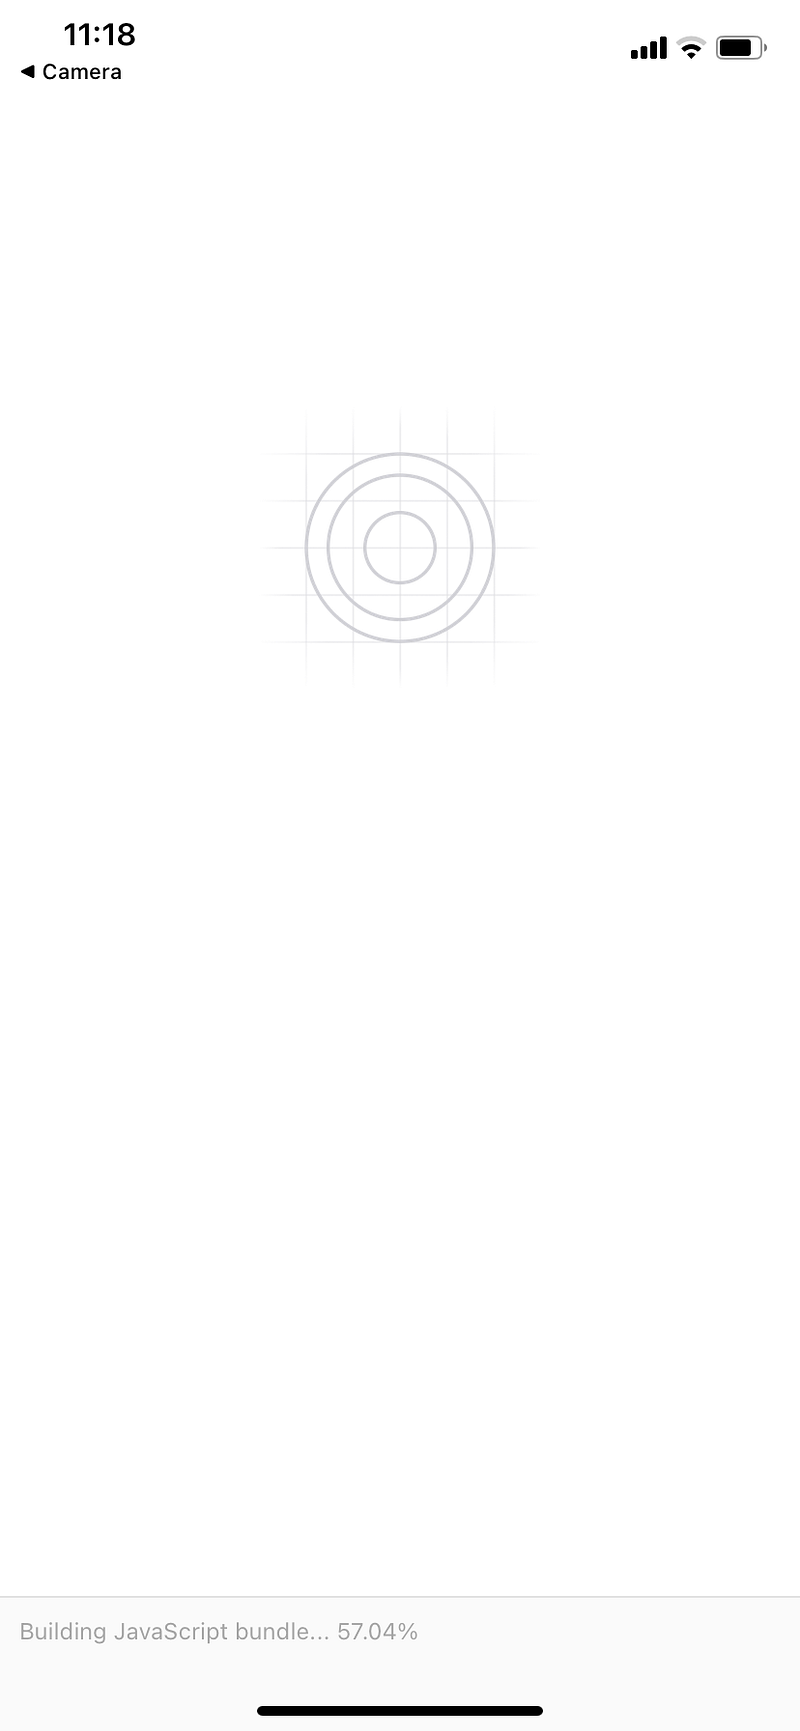
We could use the QR code at the bottom left to test our app directly on our device.
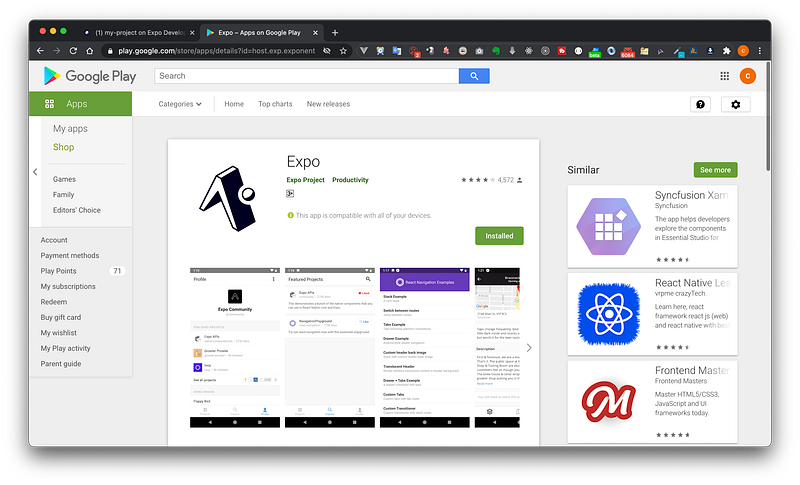
What we need to do is to install an app on your phone called Expo clients. Once we have done that we can just scan this QR code with the camera of the phone.
It should allow you to open up your native app inside the Expo Client, so that you can preview it.
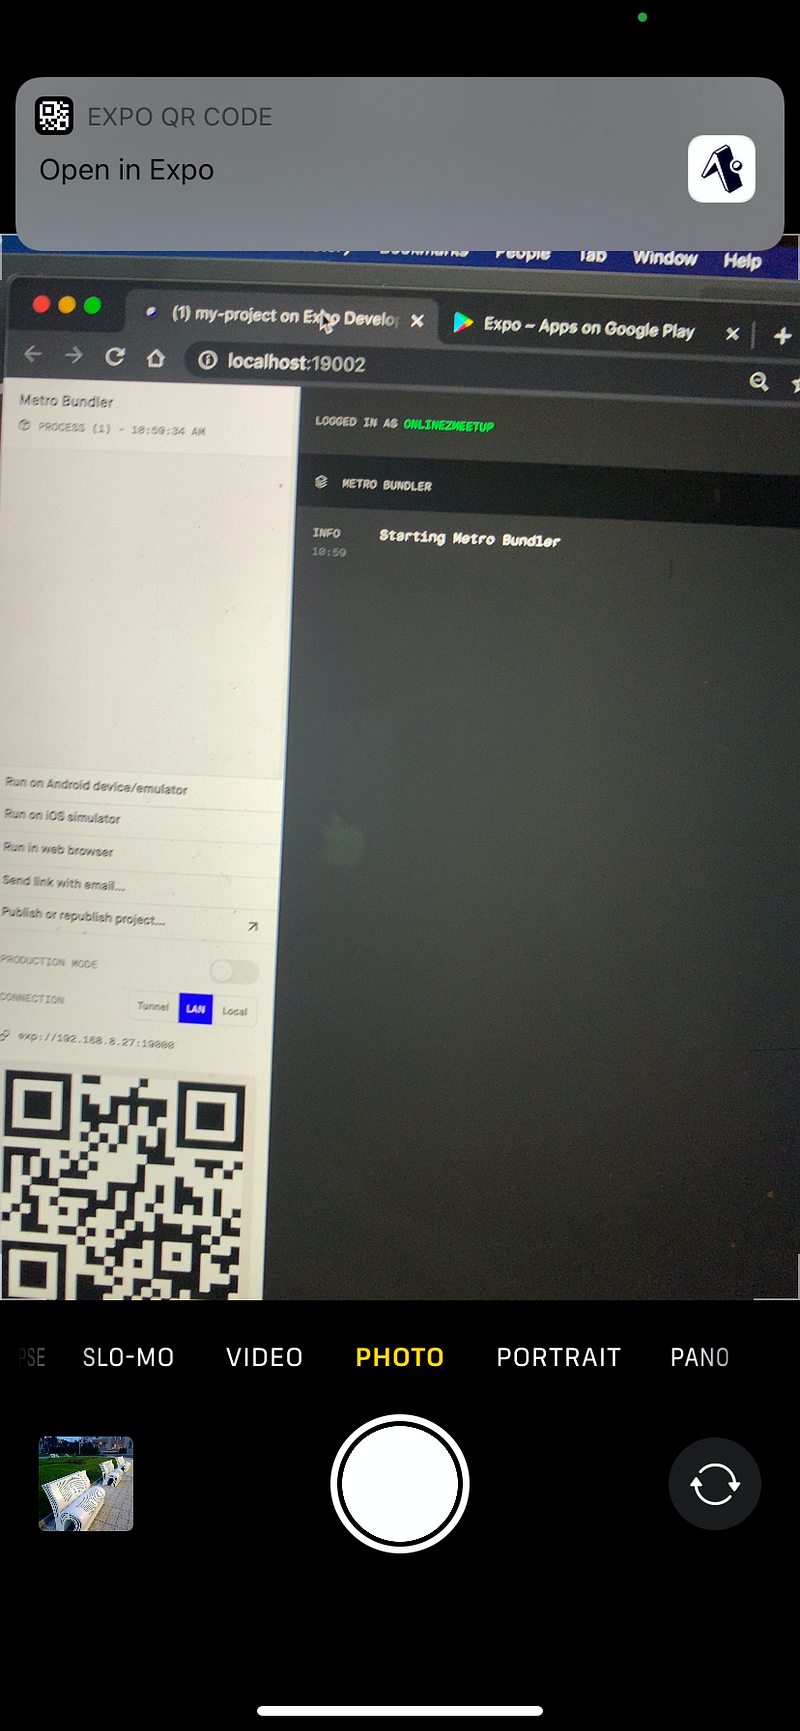
Once this app is installed you can then open up your camera on the iPhone or a QR code reader of Expo Client on Android, scan that QR code.
Then it is going to open up that project inside expo client, so basically what is happening behind the scenes is expo servers are hosting our app and the Expo Client is connecting to those servers so we can preview the app in our own device.

Subscribe Youtube:
Follow Us:


