
CS50’s Web Programming with Python and JavaScript 2020 — Learn Django and Selenium
Introduction
Django is an open source web framework based on Python which is consist of models, views, and templates. It was named after Django Reinhardt.
One of the advantages for me is that it provides a convenient administrator page to manipulate models without a lot of commands. There are many tutorials for Django on the internet.
This topic is just a brief teaser for Django. It includes the following sections. The example code is my note from CS50 web programming course.
- Installation
- The example of creating a simple project and the application
- Create a single model
- Create migrations
- Manage the database from Shell
- Many to one relationship
- Many to many relationship: ManyToManyField
- Create templates
- Config administrator interface
- Handle POST request
- Users, login, logout
- Use static files
- Django built-in test framework
- Using Selenium with Python
- Project3:ShoppingCart-React-Template
About this Series
This series aims to wrap up contents of CS50’s Web Programming with Python and JavaScript.
- Article 1: Review CSS, Sass, and RWD
- Article 2: Review APIs, ORM and SQL
- Article 3: Review JavaScript, SPA, and CSS animation
- Article 4: this article
- Article 5: CI/CD, Containerization, Scalability, Caching, and Security
Other references to Django
Build Single page application with React and Django series.
Installation
Option 1. install Django directly
- Use pip to install Django
pip install djangoOption 2. install Django on the virtual environment (refer to Django Web Framework from Meta, 2023)
Django recommends using virtual environment to build Python applications.
The virtual environment is an isolated environment having its copy of the interpreter, libraries, and scripts so that there’s no clash with the global installation of Python.
- Install virtualenv/venv
# for Python2
python3 -m pip install virtualenv

# for Python3
python3 -m pip install venv- Create the virtual environment and install Django
mkdir django_space
cd django_space

python3 -m venv django

#activate
source django/bin/activate
python3 -m pip install --upgrade pip

#install Django
pip3 install django==4.2
python3 django version

#deactivate
deactivate
The example of creating a simple project and the application
- Create a project by using the following commands
django-admin startproject django_practice
cd django_practice
python manage.py startapp app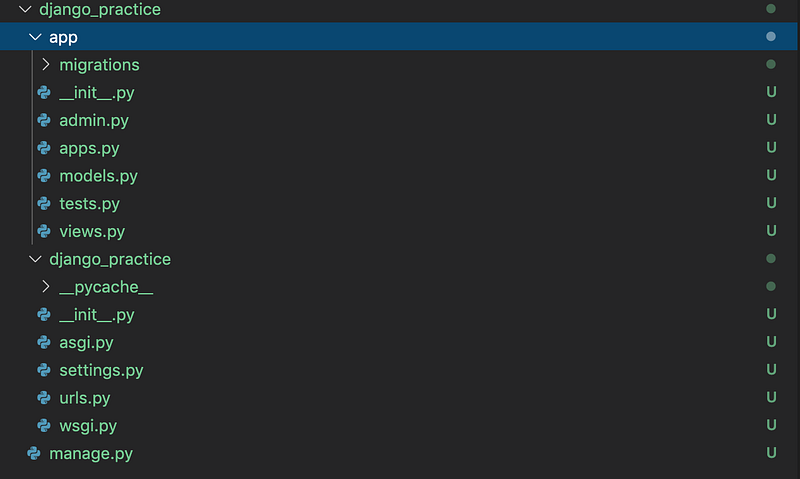
- Edit django_practice/app/views.py
from django.http import HttpResponse
from django.shortcuts import render
# Create your views here.
def index(request):
return HttpResponse('Hello')- Create routes for the app: create urls.py (django_practice/app/urls.py)
from django.urls import path
from . import views
urlpatterns = [
path("", views.index, name = "index")
]- Edit routes for the project: edit urls.py (django_practice/urls.py)
from django.contrib import admin
from django.urls import path, include
urlpatterns = [
path('', include('app.urls')),
path('admin/', admin.site.urls),
]- Run the project
python manage.py runserver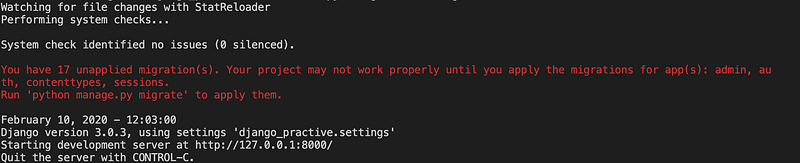
Create a single model
Create a class in django_practice/app/models.py
from django.db import models
# Create your models here.
class Flight(models.Model):
    origin = models.CharField(max_length = 64)
    destination = models.CharField(max_length = 64)
    duration = models.IntegerField()

    def __str__(self):
        return f"{self.id} - {self.origin} to {self.destination}"
Create migrations
- Register the application to the project: edit django_practice/settings.py
INSTALLED_APPS = [
    'first.apps.appConfig',
    ...
]
2. The following command will look through model files, look for any changes that have been made to those model files, and automatically generate a migration
python manage.py makemigrations
3.Check the content of the migrations
python manage.py sqlmigrate app 0001
4.Apply the migrations
python manage.py migrate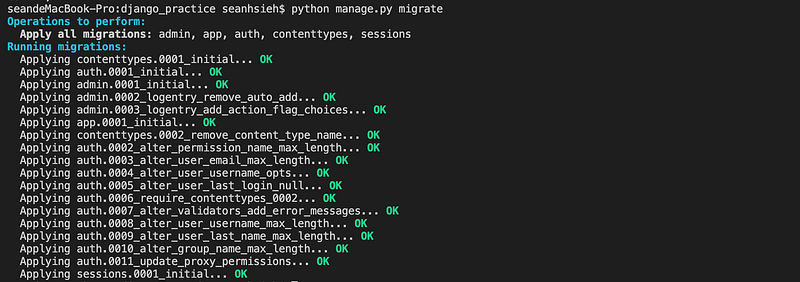
Manage the database by using Shell
- Open shell by using the following command
python manage.py shell- Create an instance and insert it
from app.models import Flightf = Flight(origin="New york", destination="London", duration=415)
f.save()
exit- List all
from app.models import FlightFlight.objects.all()
f = Flight.objects.first()
f.origin- Update
from app.models import Flight

f = Flight.objects.get(pk=1)
f.origin = 'Taiwan'
f.save()- Delete
f.delete()Many to one relationship
In Django, we can use foreign key for the many to one relationship.
Key terms
- key
-
primary_key: has a unique value for each row -ForeignKey: other tables own theprimary_key - on_delete: we can control the actions when deleting the object by specify the on_delete parameter
-
CASCADE: delete the object containing theForeignKey-PROTECT: prevent the deletion of the referenced object -RESTRICT: prevent the deletion of the referenced object by raising theRestrictedError
Steps
1.Modify the django_practice/app/models.py
from django.db import models
#Create your models here.
class Airport(models.Model):
    code = models.CharField(max_length = 3)
    city = models.CharField(max_length = 64)
    def __str__(self):
        return f"{self.city} {self.code}"

class Flight(models.Model):
    origin = models.ForeignKey(Airport, on_delete=models.CASCADE, related_name="departures")
    destination = models.ForeignKey(Airport, on_delete=models.CASCADE, related_name="arrivals")
    duration = models.IntegerField()
    def __str__(self):
        return f"{self.id} - {self.origin} to {self.destination}"
2.Update the database
python manage.py makemigrations
python manage.py migrate
3.Open the shell
python manage.py shell4.Insert a record
from app.models import Flight, Airportjfk = Airport(code="JFK", city="New York City")
lhr = Airport(code="LHR", city="London")
jfk.save()
lhr.save()f = Flight(origin=jfk, destination=lhr, duration=415)
f.save()5. Select all fights which has departure to JFK
jfk.departures.all()Many to many relationship: ManyToManyField
1.Modify the django_practice/app/models.py
from django.db import models# Create your models here.class Passenger(models.Model):
first = models.CharField(max_length = 64)
last = models.CharField(max_length = 64)
flights = models.ManyToManyField(Flight, blank = True, related_name="passenger")def __str__(self):
return f"{self.first} {self.last}"2.Update the database
python manage.py makemigrations
python manage.py migrate
3.Open shell
python manage.py shell4.Insert a record
from app.models import Flight, Passengerp = Passenger(first="alice", last="adams")
f = Flight.objects.get(pk = 1)
p.save()
p.flights.add(f)
p.flights.all()5.Modify the view.py
context = {
    "flight": flight,
    "passengers": flight.passenger.all()
}
return render(request, 'first/flight.html', context)Create templates
- Edit routes for the app: edit django_practice/urls.py
from django.urls import path
from . import views
urlpatterns = [
path("", views.index, name = "index"),
path("<int:flight_id>", views.flight, name = "flight")
]- Edit django_practice/view.py : add two functions
from django.http import HttpResponse, Http404
from django.shortcuts import render
from .models import Flight# Create your views here.
def index(request):context = {
"flights": Flight.objects.all()
}return render(request, 'app/index.html', context)def flight(request, flight_id):
try:
flight = Flight.objects.get(pk = flight_id)
except Flight.DoesNotExist:
raise Http404("Flight does not exist.")context = {
"flight": flight
}return render(request, 'app/flight.html', context)- Create a folder called templates and a subfolder called first
- Create the base.html in the templates/first folder
<!DOCTYPE html>
<html lang="en">
<head>
    <title>{% block header %}{% endblock%}</title>
</head><body>
{% block body %}
{% endblock%}
</body>
</html>- Create the index.html in the templates/first folder
{% extends "app/base.html" %}{% block heading %}
Flight
{% endblock %}{% block body %}
<ul>
{% for flight in flights %}
<li>
<a href="{% url 'flight' flight.id%}">{{flight}}</a>
</li>
{% endfor %}
</ul>
{% endblock %}- Add a new view template flight.html
{% extends "app/base.html" %}{% block heading %}
Flight
{% endblock %}{% block body %}
<h1>Flight: {{flight.id}}</h1>
<ul>
<li>{{flight.origin}}</li>
<li>{{flight.destination}}</li>
<li>{{flight.duration}}</li>
</ul>
<h1>Passengers</h1>
<ul>
{% for passenger in passengers %}
<li>{{passenger}}</li>
{% empty %}
<li>No passengers</li>
{% endfor %}
</ul>
<hr><a href="{% url 'index'%}">Back to full listing</a>
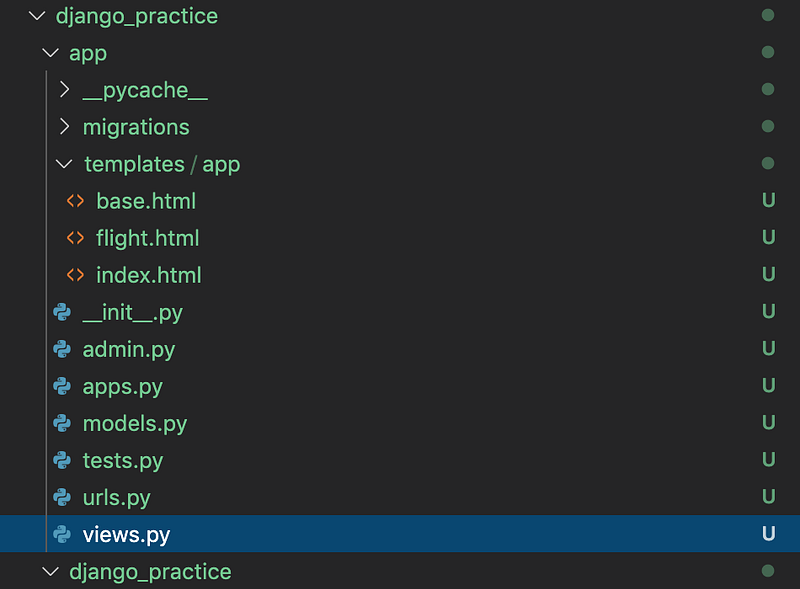
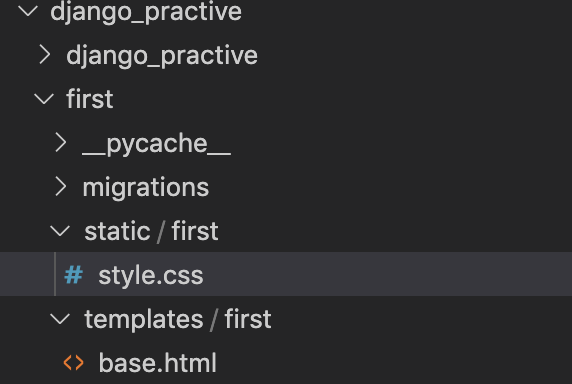
{% endblock %}- The file structure will be the following screen-shot
- Run the project
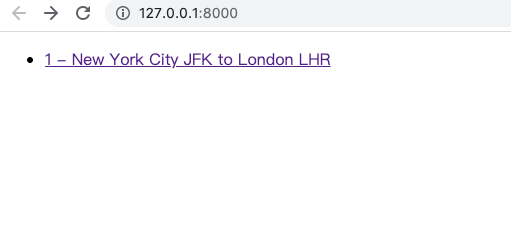
python manage.py runserver- Visit http://127.0.0.1:8000
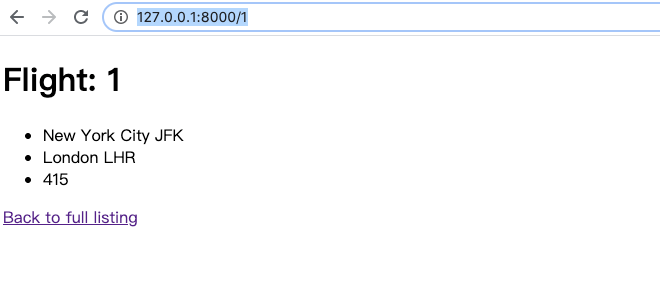
- Visit http://127.0.0.1:8000/1
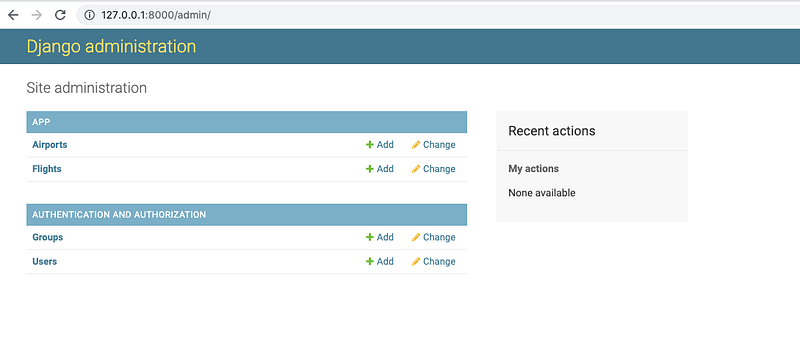
Config administrator interface
Django provides a built-in page called Admin to be easy to add or modify existing data
- Register models: edit the django_practice/admin.py
from django.contrib import admin
from .models import Airport, Flight, Passenger
# Register your models here.
admin.site.register(Airport)
admin.site.register(Flight)
admin.site.register(Passenger)- create a first user account
python manage.py createsuperuserThe route of the administrator page is built-in in the django_practice/urls.py
from django.contrib import admin
from django.urls import path, include
urlpatterns = [
path(‘’, include(‘app.urls’)),
path(‘admin/’, admin.site.urls),
]- Run the project
python manage.py runserver- login to the admin page
http://localhost:8000/admin
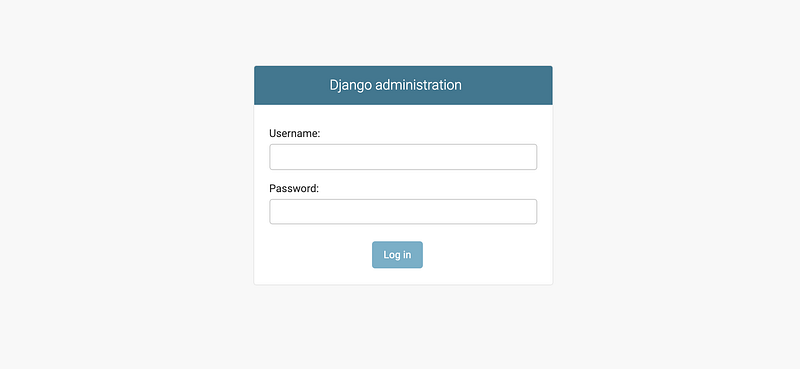
- Login the admin page
Customize administrator page
There are some common extension methods.
- filter_horizontal
- admin.StackedInline
- admin.ModelAdmin
from django.contrib import admin
from .models import Airport, Flight, Passenger
# Register your models here.
class PassengerInline(admin.StackedInline):
model = Passenger.flights.through
extra = 1# Extended models
class FlightAdmin(admin.ModelAdmin):
inlines = [PassengerInline]class PassengerAdmin(admin.ModelAdmin):
filter_horizontal= ("flights",)admin.site.register(Airport)
admin.site.register(Flight, FlightAdmin)
admin.site.register(Passenger, PassengerAdmin)POST request
- Edit routes for the app: edit urls.py in the application folder
from django.urls import path
from . import views
urlpatterns = [
path("", views.index, name = "index"),
path("<int:flight_id>", views.flight, name = "flight"),
path("<int:flight_id>/book", views.book, name = "book")
]- Edit flight.html
<h2>Add a passenger</h2>
{% if non_passengers %}
    <form action="{% url 'book' flight.id%}" method="post">
    {% csrf_token %}
        <select name="passenger">
        {% for passenger in non_passengers %}
            <option value="{{ passenger.id}}">{{passenger}}</option>
        {% endfor %}
        </select>
        <input type="submit" value="book a flight"/>
    </form>
{% else %}
    <div>No passengers to add</div>
{% endif %}- Edit view.py in the application: add a new function
from django.http import HttpResponse, Http404, HttpResponseRedirect
from django.shortcuts import render, reverse
from .models import Flight, Passenger
def flight(request, flight_id):
try:
flight = Flight.objects.get(pk = flight_id)
except Flight.DoesNotExist:
raise Http404("Flight does not exist.")context = {
"flight": flight
}return render(request, 'first/flight.html', context)def book(request, flight_id):
try:
passenger_id = int(request.POST["passenger"])
passenger = Passenger.objects.get(pk = passenger_id)
flight = Flight.objects.get(pk = flight_id)
except KeyError:
return render(request, 'first/error.html', {"message": "No selection."})
except Flight.DoesNotExist:
return render(request, 'first/error.html', {"message": "No flight."})
except Passenger.DoesNotExist:
return render(request, 'first/error.html', {"message": "No passenger."})passenger.flights.add(flight)
return HttpResponseRedirect(reverse("flight", args = (flight_id, )))The example of users login, logout
- Edit view.py
from django.http import HttpResponse
from django.shortcuts import render
from django.contrib.auth import authenticate, login, logout
def user_index(request):
if not request.user.is_authenticated:
return render(request, 'users/login.html', {"message": "None."})
context = {
"user": request.user
}
return render(request, 'users/user.html', context)def logout_view(request):
logout(request)
user = authenticate(request, username = username, password = password)
return render(request, 'users/login.html', {"message": "Logout."})def login_view(request):
username = request.POST["username"]
password = request.POST["password"]
user = authenticate(request, username = username, password = password)if user is not None:
login(request, user)
return HttpResponseRedirect(reverse("user")
else:
return render(request, 'users/error.html', {"message": "Invalid credential."})- Add users/user.html
{% extends "first/base.html" %}{% block heading %}
<h1>Login</h1>
{% if message %}
<div> {{message}} </div>
{% endif %}
<form action="{% url 'login' %}" method="post">
{% csrf_token %}
<input name="username" type="text"/>
<input name="password" type="password"/>
<input type="submit" value="login"/>
</form>
{% endblock %}- Register a new user
from django.http import HttpResponse
from django.shortcuts import render
# Create your views here.
def index(request):
return HttpResponse('Hello')- Open shell
python manage.py shell- Create a new user
from django.contrib.auth.models import Useru = Users.objects.create_user("John", "[email protected]", "John")
u.save()Use static files
- Modify base.html: add {% load static %}
{% load static %}<!DOCTYPE html>
<html lang="en">
<head>
<title>{% block header %}{% endblock%}</title>
<link rel="stylesheet" href="{% static 'first/styles.css' %}"></head><body>
{% block body %}
{% endblock%}
</body></html>- The folder structure will looks like the following screen-shot
Django built-in test framework
Test the database with models
1.Edit models.py
class Flight(models.Model):
    ...
def is_valid_flight(self):
return (self.origin != self.destination) and (self.duration >= 0)2.Edit test.py
The setUp function is going to run before any tests ever run. The following code will create objects in a separated database.
from django.test import TestCasefrom .models import Airport, Flight,class ModelsTestCase(models.Model):
def setUp(self):
a1 = Airport.objects.create(code="AAA", city="City A")
a2 = Airport.objects.create(code="BBB", city="City B")Flight.objects.create(origin=a1, destination=a2, duration=100)
Flight.objects.create(origin=a1, destination=a1, duration=200)
Flight.objects.create(origin=a1, destination=a2, duration=100)3.Define test cases: the test cases should include test true and false
- assertFalse
- assertTrue
- assertEqual
- assertNotEqual
import unittestclass Tests(unittest.TestCase):
def test_1(self):
    self.assertFalse(is_prime(1))
def test_2(self):
self.assertTrue(is_prime(2))def test_1(self):
self.assertFalse(is_prime(1))def test_departures_count(self):
a = Airport.objects.get(code="AAA")
self.assertEqual(a.departures.count(), 3)def test_arrivals_count(self):
a = Airport.objects.get(code="AAA")
self.assertEqual(a.arrivals.count(), 1)def test_valid_flight(self):
a1 = Airport.objects.get(code="AAA")
a2 = Airport.objects.get(code="BBB")
f = Flight.objects.create(origin=a1, destination=a2, duration=100)
self.assertTrue(a.is_valid_flight())def test_invalid_flight_destination(self):
a = Airport.objects.get(code="AAA")
f = Flight.objects.create(origin=a, destination=a1)
self.assertFalse(a.is_valid_flight())def test_invalid_flight_duration(self):
a1 = Airport.objects.get(code="AAA")
a2 = Airport.objects.get(code="BBB")
f = Flight.objects.create(origin = a1, destination = a2, duration=-100)
self.assertTrue(a.is_valid_flight())4. Run: type the following command
python manage.py testTest the server’s with simulated client requests
- Check the status code and the context of the response
from django.test import Client, TestCase...def test_index(self):
c = Client()
response = c.get("/")
self.assertEqual(response.status_code, 200)
self.assertEqual(response.context["flights"].count(), 2)# test true
def test_valid_flight_page(self)
a1 = Airport.objects.get(code="AAA")
f = Flight.objects.get(origin=a1, destination=a1)
c = Client()
response = c.get(f"/{f.id}")
self.assertEqual(response.status_code, 200)# test false
def test_invalid_flight_page(self)
max_id = Flight.objects.all().aggregate(Max("id"))["id_max"]
c = Client()
response = c.get(f"/{max_id.id + 1}")
self.assertEqual(response.status_code, 404)# test true
def test_flight_page_passengers(self)
f = Airport.objects.get(pk=1)
p = Passenger.objects.get(first = "Alice", last = "Adams")
f.passengers.add(p)c = Client()
response = c.get(f"/{f.id}")
self.assertEqual(response.status_code, 200)
self.assertEqual(response.context["passengers"], 1)# test false
def test_flight_page_passengers(self)
f = Airport.objects.get(pk=1)
p = Passenger.objects.get(first = "Alice", last = "Adams")
f.passengers.add(p)c = Client()
response = c.get(f"/{f.id}")
self.assertEqual(response.status_code, 200)
self.assertEqual(response.context["non_passengers"], 1)Using Selenium with Python
Use web driver to control the browser
1.Install selenium
pip install selenium2.Download chrome driver from the official website. https://sites.google.com/a/chromium.org/chromedriver/home
3.Copy the drier to a specific path
4.Manipulate the browser by using the following code
from selenium import webdriver
chromepath = '/Users/seanhsieh/Downloads/chromedriver'
driver = webdriver.Chrome(chromepath)
driver.get(uri)
plus = driver.find_element_by_id(id)
plus.click()Test the web page
- Test the title
def test_title(self):
    driver.get(file_uri("..."))
    self.assertEqual(driver.title, "Counter")
Project3: ShoppingCart-React-Template
Function requirements
- Menu: the template uses the products from Pinnochio’s Pizza & Subs
- Adding items
- Registration, Login, Logout
- Shopping Cart
- Placing an Order
- Viewing Orders: admin can view orders from the admin page
- Personal Touch: allowing site administrators to mark orders as complete and allowing users to see the status of their pending or completed orders,
Implementations: ShoppingCart-React-Template
- This is a shopping cart template project. Users can apply theirs menus on it
Summary
Thanks for your patient. I am Sean. I work as a software engineer.
This article is my note. Please feel free to give me advice if any mistakes. I am looking forward to your feedback.
Please feel free to clap if this article can help you. Thank you.
You can also subscribe my page on Facebook.
Related topics
How to use the two-way binding in Knout.js and ReactJS?
Learn how to use SignalR to build a chatroom application
My reflection of
IT & Network:
Database:
Software testing:
Debugging:
DevOps:


