
OpenCV — Image Basics
Create Image From Scratch — #PyVisionSeries — Episode #02
Hi, This is all about OpenCV. Welcome!
Index:
01 step # Open & closing Windows02 step # Create a New Black Image03 step # Basic Drawing: Lines, Rect & Circles04 step # Put Text on Image05 step # Saving an Image06 step # Run It All Together & Check outImage BASIC w/ OpenCV
OpenCV library already contains many popular algorithms for computer vision, including object detection and tracking algorithms already built into the library.
To guarantee that OpenCV is up and running, Go to the Anaconda Prompt window, CTRL + C, and type:
conda install -c menpo opencvLet's get your feet wet!
00step # This is a continuation of this post
Again, to guarantee that OpenCV is up and running, Go to the Anaconda Prompt window, CTRL + C, and type:

conda install -c menpo opencv
01 step # Open & Closing Windows
Let´s define a safe method of working with images on the window.
Importing libs:
import cv2
import numpy as np
import matplotlib.pyplot as plt
%matplotlib inline
Here is the util method:
def openImg(title, img):
  img = cv2.imread(img)
  while True:
    cv2.imshow(title, img)
    #if we waited at least 1 sec AND we´ve pressed the ESC
    if cv2.waitKey(1) & 0xFF == 27:
      break
cv2. destroyAllWindows()
Please, hit ESC to close the external window.
openImg('PUPPY', 'DATA/00_puppy.jpg')This will open an external window to work images inside OpenCV.
02 step # Create a New Black Image
A Blank new image (actually, a black:)
blank_img = np.zeros(shape=(512,512,3), dtype=np.int16)Shaped as:
blank_img.shape(512, 512, 3)Showing using MatPlotLib lib:
plt.imshow(blank_img)<matplotlib.image.AxesImage at 0x1664fba8730>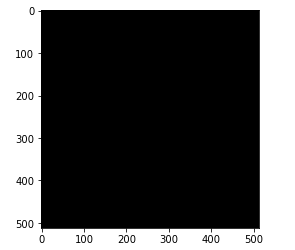
03 step # Basic Drawing: Lines, Rect & Circles
For rect:
cv2.rectangle(blank_img, pt1=(100,100), pt2=(400,400), color=(0,255,0), thickness=10);The semicolon is to get rid of the output.
plt.imshow(blank_img)<matplotlib.image.AxesImage at 0x16650f3d2b0>
For circle:
cv2.circle(blank_img, center=(250,250), radius=220, color=(255,0,0), thickness=8);Showing image:
plt.imshow(blank_img)<matplotlib.image.AxesImage at 0x16650f9b5b0>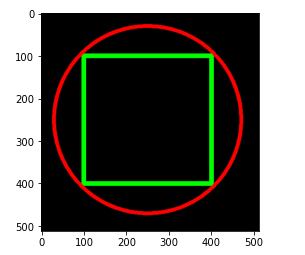
For line(s):
cv2.line(blank_img, pt1=(200,100), pt2=(200, 400), color=(0,0,255), thickness=10);cv2.line(blank_img, pt1=(100,250), pt2=(200, 400), color=(0,0,255), thickness=10);cv2.line(blank_img, pt1=(300,100), pt2=(400, 200), color=(0,0,255), thickness=10);cv2.line(blank_img, pt1=(400,200), pt2=(300, 250), color=(0,0,255), thickness=10);cv2.line(blank_img, pt1=(300,250), pt2=(400, 350), color=(0,0,255), thickness=10);cv2.line(blank_img, pt1=(400,350), pt2=(300, 400), color=(0,0,255), thickness=10);Showing image:
plt.imshow(blank_img)<matplotlib.image.AxesImage at 0x16650ff87f0>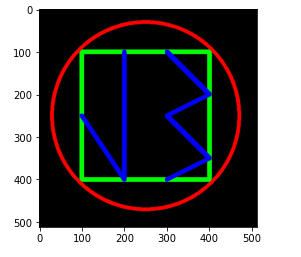
04 step # Put Text on Image
font = cv2.FONT_HERSHEY_SIMPLEXcv2.putText(blank_img, text='J3',org=(400,500), fontFace=font, fontScale=3, color=(255,255,255), thickness=5, lineType=cv2.LINE_AA );Showing image:
plt.imshow(blank_img)<matplotlib.image.AxesImage at 0x16651058280>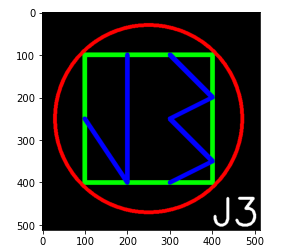
05 step # Saving an Image
# To a Filename
# Using cv2.imwrite() method # Saving the image
cv2.imwrite(filename, blank_img)TrueAn image must have been saved inside /DATA folder.
06 step # Run It All Together & Check out
Run and Check it out!
openImg('PUPPY', 'DATA/savedImage.jpg')And finally:
print("That´s it! Thank you once again!\nI hope will be helpful.")That´s it! Thank you once again! I hope will be helpful.
👉Jupiter notebook link :)
👉Github (EX_02)
Credits & References:
Jose Portilla — Python for Computer Vision with OpenCV and Deep Learning — Learn the latest techniques in computer vision with Python, OpenCV, and Deep Learning!
Posts Related:
00 Episode#Hi Python Computer Vision — PIL! — An Intro To Python Imaging Library #PyVisionSeries
01 Episode# Jupyter-lab — Python — OpenCV — Image Processing Exercises #PyVisionSeries
02 Episode# OpenCV — Image Basics — Create Image From Scratch #PyVisionSeries
03 Episode# OpenCV — Morphological Operations — How To Erode, Dilate, Edge Detect w/ Gradient #PyVisionSeries
04 Episode# OpenCV — Histogram Equalization — HOW TO Equalize Histograms Of Images — #PyVisionSeries
05 Episode# OpenCV — OpenCV — Resize an Image — How To Resize Without Distortion
07 Episode# YOLO — Object Detection — The state of the art in object detection Framework!
08 Episode# OpenCV — HaashCascate — Object Detection — Viola–Jones object detection framework — #PyVisionSeries