avatarsimbu

Free AI web copilot to create summaries, insights and extended knowledge, download it at here

5691

Abstract

:fit:800/1*CrGlUujpXKc_PMC4ox7gnw.png"><figcaption>Copy secret value</figcaption></figure><h2 id="f2cd">Set the token version</h2><p id="0a9c">In</p><figure id="f8d3"><img src="https://cdn-images-1.readmedium.com/v2/resize:fit:800/1*DCyqNKyZQlLqldQZKU3FFQ.png"><figcaption>Selecting the application registration manifest</figcaption></figure><p id="9204">set the access token version:</p><figure id="ab9b"><img src="https://cdn-images-1.readmedium.com/v2/resize:fit:800/1*rMcEZ9e6Btvnv8bscS3jTg.png"><figcaption>Editing the manifest.</figcaption></figure><p id="d525">And</p><figure id="8fb0"><img src="https://cdn-images-1.readmedium.com/v2/resize:fit:800/1*XnYYBdTL_0jLMCTNAEvsyg.png"><figcaption>Saving manifest changes</figcaption></figure><p id="d4f5">the changes.</p><h2 id="9abc">Secure requests to the recipes API with a gateway policy to validate a JWT token</h2><p id="cd18">Go to the new registered App Overview under Azure Active Directory and make a note of the ClientID</p><figure id="a532"><img src="https://cdn-images-1.readmedium.com/v2/resize:fit:800/1*EN0AyfHWHLgHHZhMJ3FftQ.png"><figcaption>Azure registered application — Essentials</figcaption></figure><p id="ee48">Then click on the</p><figure id="1999"><img src="https://cdn-images-1.readmedium.com/v2/resize:fit:800/1*pJnygZ7WaKhcHphko68xgg.png"><figcaption></figcaption></figure><p id="5c4c">and copy the OpenID Connect metadata document URI.</p><p id="756d">In your API Management service select APIs, Recipes, All operations and click on <b></></b> under Inbound processing to edit the policy as below, substituting <tenantid> and <registeredapp-clientid>.</registeredapp-clientid></tenantid></p><div id="f8d7"><pre><span class="hljs-tag"><<span class="hljs-name">policies</span>></span> <span class="hljs-tag"><<span class="hljs-name">inbound</span>></span> <span class="hljs-tag"><<span class="hljs-name">base</span> /></span> <span class="hljs-tag"><<span class="hljs-name">set-backend-service</span> <span class="hljs-attr">backend-id</span>=<span class="hljs-string">"LocalRecipesAPI"</span> /></span> <span class="hljs-tag"><<span class="hljs-name">validate-jwt</span> <span class="hljs-attr">header-name</span>=<span class="hljs-string">"Authorization"</span> <span class="hljs-attr">failed-validation-httpcode</span>=<span class="hljs-string">"401"</span> <span class="hljs-attr">failed-validation-error-message</span>=<span class="hljs-string">"Unauthorized. Access token is missing or invalid."</span>></span> <span class="hljs-tag"><<span class="hljs-name">openid-config</span> <span class="hljs-attr">url</span>=<span class="hljs-string">"https://login.microsoftonline.com/&lt;TenantID&gt;/v2.0/.well-known/openid-configuration"</span> /></span> <span class="hljs-tag"><<span class="hljs-name">required-claims</span>></span> <span class="hljs-tag"><<span class="hljs-name">claim</span> <span class="hljs-attr">name</span>=<span class="hljs-string">"aud"</span> <span class="hljs-attr">match</span>=<span class="hljs-string">"any"</span>></span> <span class="hljs-tag"><<span class="hljs-name">value</span>></span><span class="hljs-tag"><<span class="hljs-name">RegisteredApp-ClientID</span>></span><span class="hljs-tag"></<span class="hljs-name">value</span>></span> <span class="hljs-tag"></<span class="hljs-name">claim</span>></span> <span class="hljs-tag"></<span class="hljs-name">required-claims</span>></span> <span class="hljs-tag"></<span class="hljs-name">validate-jwt</span>></span> <span class="hljs-tag"></<span class="hljs-name">inbound</span>></span> <span class="hljs-tag"><<span class="hljs-name">outbound</span>></span> <span class="hljs-tag"><<span class="hljs-name">base</span> /></span> <span class="hljs-tag"></<span class="hljs-name">outbound</span>></span> <span class="hljs-tag"><<span class="hljs-name">on-error</span>></span> <span class="hljs-tag"><<span class="hljs-name">base</span> /></span> <span class="hljs-tag"></<span class="hljs-name">on-error</span>></span> <span class="hljs-tag"><<span class="hljs-name">backend</span>></span> <span class="hljs-tag"><<span class="hljs-name">forward-request</span> <span class="hljs-attr">timeout</span>=<span class="hljs-string">"10"</span> /></span> <span class="hljs-tag"></<span class="hljs-name">backend</span>></span> <span class="hljs-tag"></<span class="hljs-name">policies</span>></span></pre></div><figure id="10cd"><img src="https://cdn-images-1.readmedium.com/v2/resize:fit:800/1*ZR89MhEkSzHefGuhysAUlw.png"><figcaption>Inbound processing policies</figcaption></figure><p id="c492">Now try to retrieve the recipes in the browser and we should see a 401 unauthorised response.</p><figure id="6635"><img src="https://cdn-images-1.readmedium.com/v2/resize:fit:800/1*RYawjOjDM93MyVnfh89jqA.png"><figcaption>Secured gateway returning unauthorised</figcaption></figure><figure id="a324"><img src="https://cdn-images-1.readmedium.com/v2/resize:fit:800/1*BItWMsrHIdG5WHjMCmY1sg.png"><figcaption>Gateway log excerpt, no auth token.</figcaption></figure><h2 id="9831">Access the secured API with Postman</h2><p id="5e82">Now we are going to switch to use <a href="https://www.postman.com">Postman</a> as our client to make it easier to make OAuth2 secured requests.</p><p id="0ecb">Download and install and run the <a href="https://www.postman.com">Postman client</a>.</p><p id="af58">Add a new

Options

Get request to the Postman client that uses the locally hosted gateway:</p><figure id="00ea"><img src="https://cdn-images-1.readmedium.com/v2/resize:fit:800/1*4isL4FMdPA61mqOuzQMrsQ.png"><figcaption>Postman request</figcaption></figure><p id="f256">Click on the request settings and turn off SSL certificate verification:</p><figure id="9dbf"><img src="https://cdn-images-1.readmedium.com/v2/resize:fit:800/1*AlqY3a-clNX3WIQseWjrJA.png"><figcaption>Postman request settings</figcaption></figure><p id="ba26">Click Send to test it works, you should get a 401 back:</p><figure id="4e60"><img src="https://cdn-images-1.readmedium.com/v2/resize:fit:800/1*sO0jhubb4HHgv-2rm8ANaw.png"><figcaption>Postman unauthorised reqquest</figcaption></figure><p id="501e">Next select the Authorisation tab and complete it with the following values:</p><figure id="7621"><img src="https://cdn-images-1.readmedium.com/v2/resize:fit:800/1*RbeY_yIONC4jmTpauHHxlA.png"><figcaption>Postman Auth type settings</figcaption></figure><figure id="dbe8"><img src="https://cdn-images-1.readmedium.com/v2/resize:fit:800/1*_r6xTkiCfDUUrh9wlx99Gg.png"><figcaption>Postman Auth settings</figcaption></figure><p id="5521">You can copy all the values from your application registration, the overview page has the Client ID, and a link to the endpoints to complete the Auth and Access token URLs, make sure you use the v2 endpoints.</p><p id="e415">The client secret is the one you noted in the previous step, if lost then create a new secret.</p><p id="98b6">The scope can be copied from the Expose an API section.</p><p id="5313">Once completed click on</p><figure id="330e"><img src="https://cdn-images-1.readmedium.com/v2/resize:fit:800/1*B-UtoRVyo7QYbJX5wTGcEQ.png"><figcaption></figcaption></figure><p id="980e">and follow along in your browser, you will need to enable pop-ups if suppressed by the browser.</p><figure id="2d24"><img src="https://cdn-images-1.readmedium.com/v2/resize:fit:800/1*ZO3qDzP3D3YU3sh5Mlil9Q.png"><figcaption>Browser authentication with Postman</figcaption></figure><figure id="f5d7"><img src="https://cdn-images-1.readmedium.com/v2/resize:fit:800/1*lQ9bVrZmY4baSL90mxRttg.png"><figcaption>Postman successful Browser Authentication</figcaption></figure><p id="35ed">When the token is retrieved click</p><figure id="eb4c"><img src="https://cdn-images-1.readmedium.com/v2/resize:fit:800/1*2wIM9Sz83ZWhYUURhzffkg.png"><figcaption></figcaption></figure><p id="e4cf">and retry the request.</p><p id="1e62">If you have issue getting a token use Fiddler and the logs in the Docker Gateway container to debug your issues.</p><p id="6c4b">If you have issues with the token being invalid you can decode and check its contents at <a href="https://jwt.io">jwt.io</a> and the reason it was rejected in the Docker Gateway container logs.</p><h2 id="621f">Ta Da</h2><figure id="8754"><img src="https://cdn-images-1.readmedium.com/v2/resize:fit:800/1*dkBOgKs4Vv338b4H-M8mDw.png"><figcaption>Postman — Successful secured gateway request</figcaption></figure><figure id="118d"><img src="https://cdn-images-1.readmedium.com/v2/resize:fit:800/1*1BbcS6SCFHFztmNiqMP35A.png"><figcaption>Self hosted gateway log excerpt for a successful request.</figcaption></figure><figure id="c769"><img src="https://cdn-images-1.readmedium.com/v2/resize:fit:800/1*GOUjHUIDpFRAIMEFbeyTsw.png"><figcaption>Azure gateway dashboard</figcaption></figure><h2 id="0c47">BackBurner</h2><p id="121c">We only authenticate against the Azure AD, the registered Azure App uses delegated permissions of the Authenticated user, this will need to be more granular in the real world using roles and attributes.</p><p id="0715">More details will be added in a future post once the application requires more granular access e.g. roles, user and administrator.</p><h2 id="b7e3">XP</h2><p id="465e">The API is secured at the edge (Gateway) we can still use swagger and the localhost API endpoints, locally unsecured and don’t need to add any code to the Web API project.</p><p id="b0fe">Make sure that you use the v2 endpoints</p><figure id="79f5"><img src="https://cdn-images-1.readmedium.com/v2/resize:fit:800/1*JTCSQ59IOr29tJFXTh2fiw.png"><figcaption>Application endpoints</figcaption></figure><p id="ec85">If you use the V1 endpoints your are likely to encounter the following issues accessing the API through the gateway.</p><figure id="efed"><img src="https://cdn-images-1.readmedium.com/v2/resize:fit:800/1*IHTWfvBAIsALDi3wjsfEwQ.png"><figcaption>v1 endpoints — Invalid Issuer</figcaption></figure><figure id="5097"><img src="https://cdn-images-1.readmedium.com/v2/resize:fit:800/1*3Lz7q6GEkrkhcxUzSIYY-Q.png"><figcaption>v1 enpoints — Token signature mismatch (kid)</figcaption></figure><h2 id="11d7">Links</h2><ul><li><a href="https://docs.microsoft.com/en-us/azure/active-directory/develop/app-objects-and-service-principals">Application and service principal objects in Azure Active Directory</a></li><li><a href="https://tointegrationandbeyond.com/blogs/index.php/2020/06/13/authorization-with-azure-api-management/">Authorisation with Azure API Management</a></li><li><a href="https://jwt.io">Decode JWT tokens</a></li><li><a href="https://auth0.com/docs/secure/tokens/json-web-tokens/json-web-token-claims">JSON Web Token Claims</a></li><li><a href="https://docs.microsoft.com/en-gb/azure/api-management/api-management-howto-add-products?WT.mc_id=Portal-fx&amp;tabs=azure-portal">Create and publish a product</a></li><li><a href="https://platform.deloitte.com.au/articles/oauth2-client-credentials-flow-on-azure-api-management">OAuth 2.0 Authorisation with the Client Credentials Flow on Azure API Management</a></li></ul></article></body>

Join Medium to view all my articles.

Flutter — Microsoft API Management secured with AD — Secure Gateway

This is the third part of a series to show how to secure your Flutter applications using Microsoft technologies:

  1. Web API — Setting up your Web API with Visual Studio.
  2. APIM Service — Creating an API management service in Azure.
  3. Secure Gateway — Securing requests through the API gateway.
  4. MSAL — Authenticating your Flutter app on iOS.
  5. MSAL — Authenticating your Flutter app on Android.
  6. MSAL — Authenticating your Flutter app on the Web.
  7. Hosted API — Hosting your Web API’s in Azure.
  8. Secure Hosted API — Secure requests with the APIM Gateway

This article shows you how to secure your new API via the gateway with Azure Active Directory and then authenticate and access the secured API with Postman.

Register the API application in Azure

Go to

Selecting Azure AD

and under Manage select

Selecting App registrations

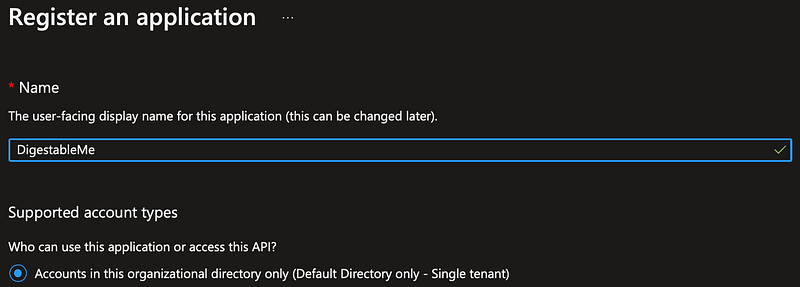
and register the new application:

Register a new application in Azure AD

Now we need to configure the registration…

Add Web Platform

Select the new registration and under Manage click on

then ‘_Add a platform_’ under platform configurations:
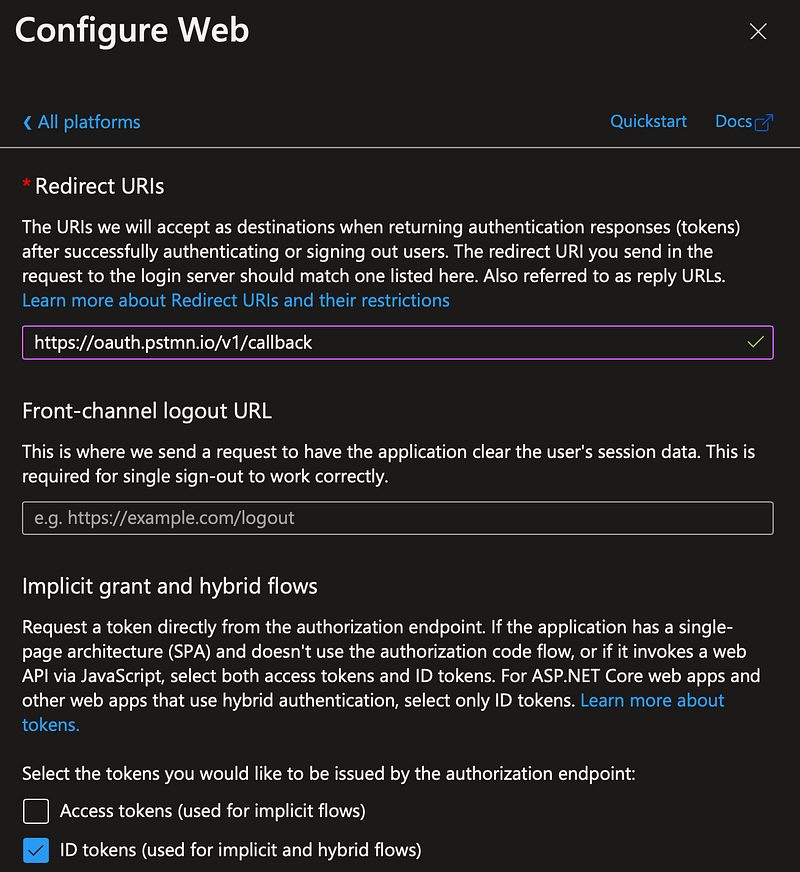
Add web platform to App registration
Configure Web platform for App registration

Add the recipes API

Select

Selecting expose an API

then ‘_Add a scope_’ under manage, accept the generated Application ID URI and click

Save and continue button

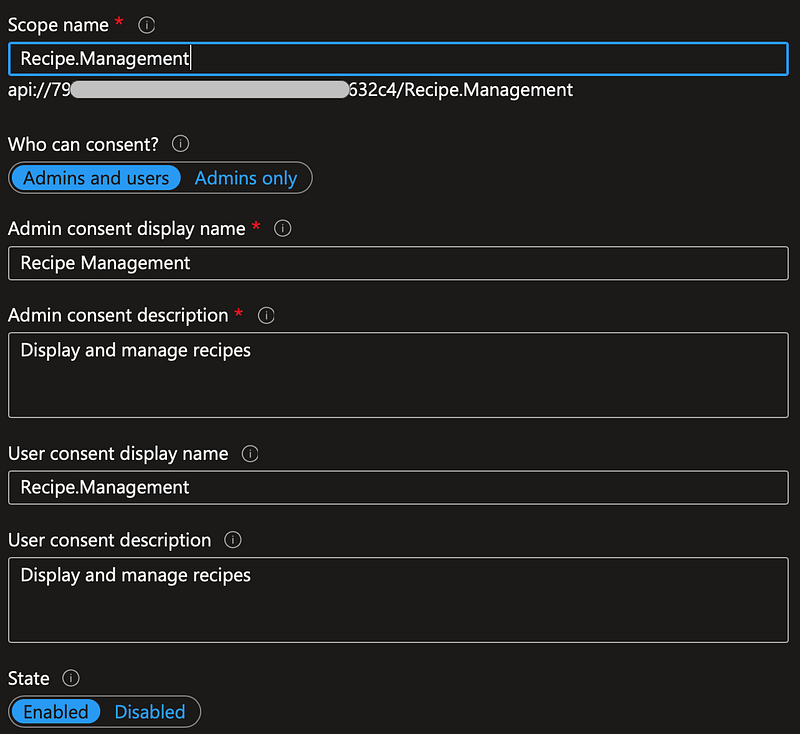
and complete the scope details:

API scope details

Add permissions to the use the Recipes API

Select

Selection API permissions

clicking ‘_Add a permission_’, selecting the ‘_My APIs_’ tab and selecting the registered App

Selecting the reqistered App

then click the Recipe Management checkbox to select the new scope:
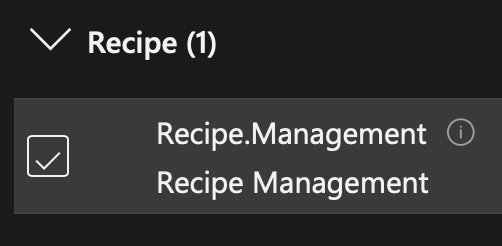
Selecting Recipe Management scope

and add the permission.

Add an application secret
Selecting secrets
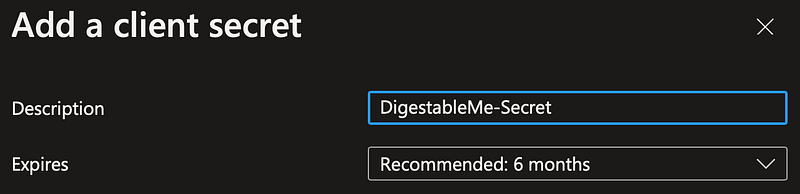
Adding a new client secret
Naming new secret

Copy and save the secret, you only get one chance to do this, if you lose it then recreate the secret.
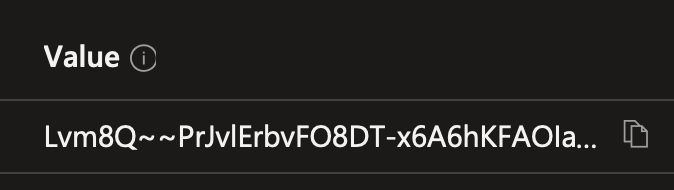
Copy secret value

Set the token version

In

Selecting the application registration manifest

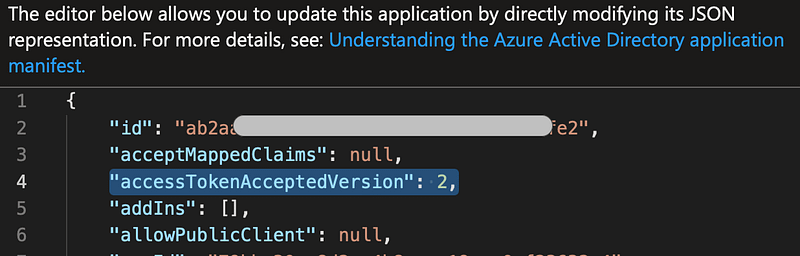
set the access token version:

Editing the manifest.

And

Saving manifest changes

the changes.

Secure requests to the recipes API with a gateway policy to validate a JWT token

Go to the new registered App Overview under Azure Active Directory and make a note of the ClientID
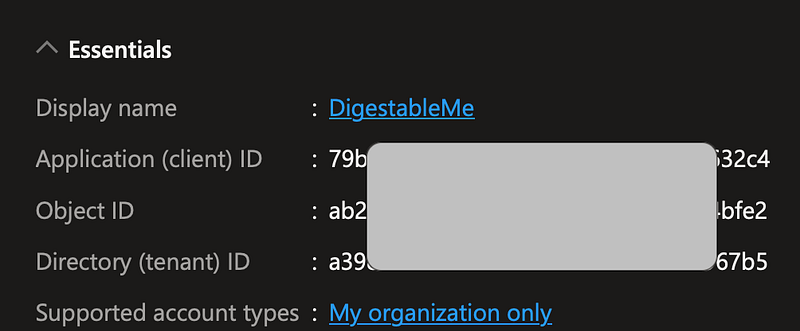
Azure registered application — Essentials

Then click on the

and copy the OpenID Connect metadata document URI.

In your API Management service select APIs, Recipes, All operations and click on </> under Inbound processing to edit the policy as below, substituting and .

<policies>
    <inbound>
        <base />
        <set-backend-service backend-id="LocalRecipesAPI" />
        <validate-jwt header-name="Authorization" failed-validation-httpcode="401" failed-validation-error-message="Unauthorized. Access token is missing or invalid.">
            <openid-config url="https://login.microsoftonline.com/<TenantID>/v2.0/.well-known/openid-configuration" />
            <required-claims>
                <claim name="aud" match="any">
                    <value><RegisteredApp-ClientID></value>
                </claim>
            </required-claims>
        </validate-jwt>
    </inbound>
    <outbound>
        <base />
    </outbound>
    <on-error>
        <base />
    </on-error>
    <backend>
        <forward-request timeout="10" />
    </backend>
</policies>
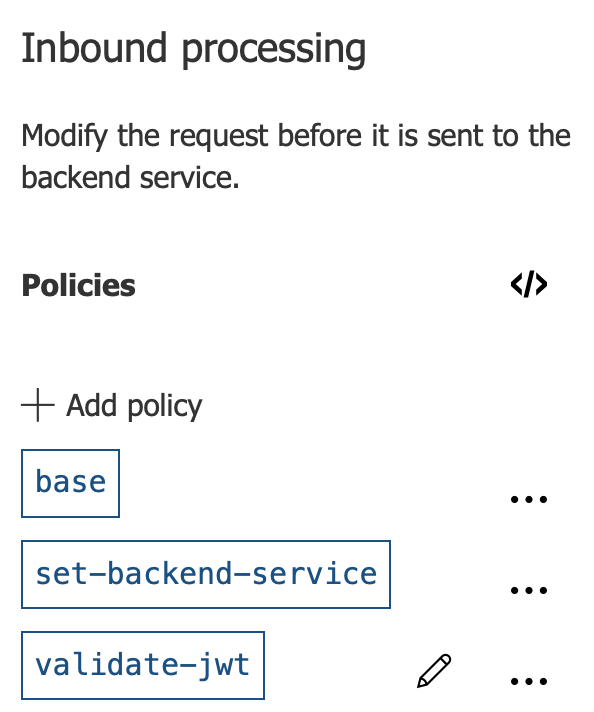
Inbound processing policies

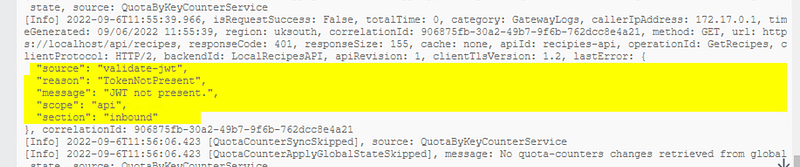
Now try to retrieve the recipes in the browser and we should see a 401 unauthorised response.
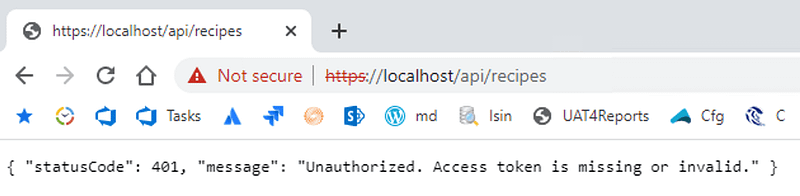
Secured gateway returning unauthorised
Gateway log excerpt, no auth token.

Access the secured API with Postman

Now we are going to switch to use Postman as our client to make it easier to make OAuth2 secured requests.

Download and install and run the Postman client.

Add a new Get request to the Postman client that uses the locally hosted gateway:
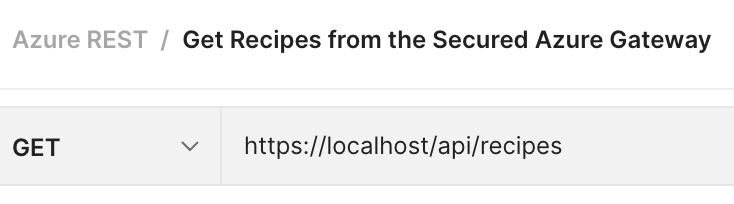
Postman request

Click on the request settings and turn off SSL certificate verification:

Postman request settings

Click Send to test it works, you should get a 401 back:
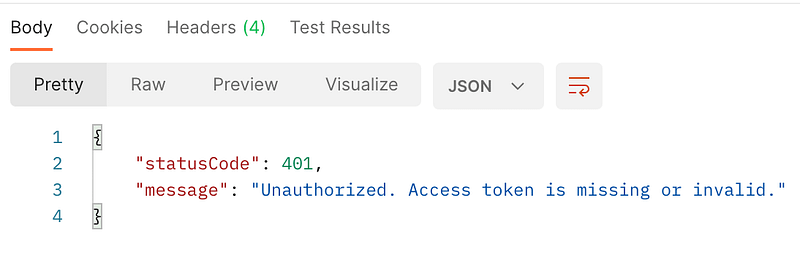
Postman unauthorised reqquest

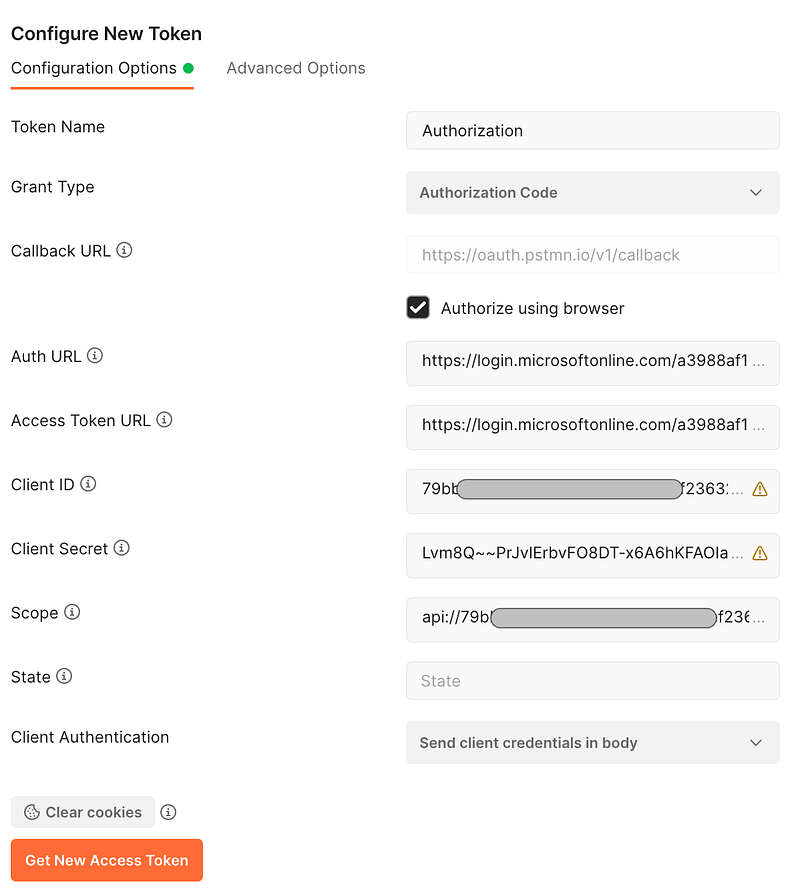
Next select the Authorisation tab and complete it with the following values:
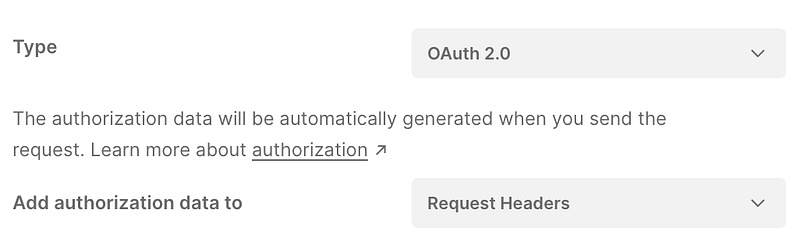
Postman Auth type settings
Postman Auth settings

You can copy all the values from your application registration, the overview page has the Client ID, and a link to the endpoints to complete the Auth and Access token URLs, make sure you use the v2 endpoints.

The client secret is the one you noted in the previous step, if lost then create a new secret.

The scope can be copied from the Expose an API section.

Once completed click on

and follow along in your browser, you will need to enable pop-ups if suppressed by the browser.
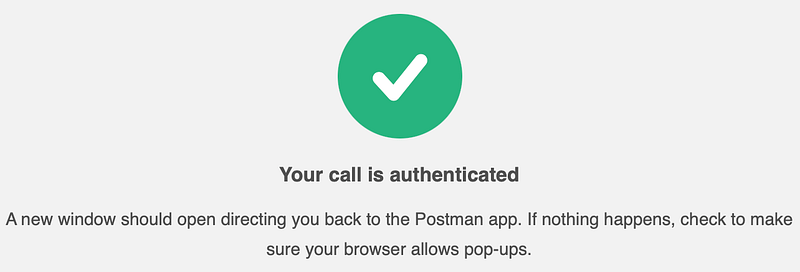
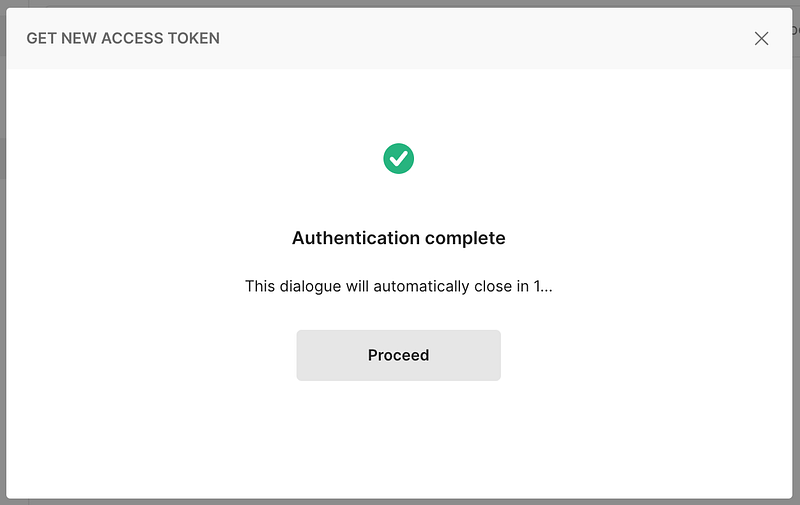
Browser authentication with Postman
Postman successful Browser Authentication

When the token is retrieved click

and retry the request.

If you have issue getting a token use Fiddler and the logs in the Docker Gateway container to debug your issues.

If you have issues with the token being invalid you can decode and check its contents at jwt.io and the reason it was rejected in the Docker Gateway container logs.

Ta Da
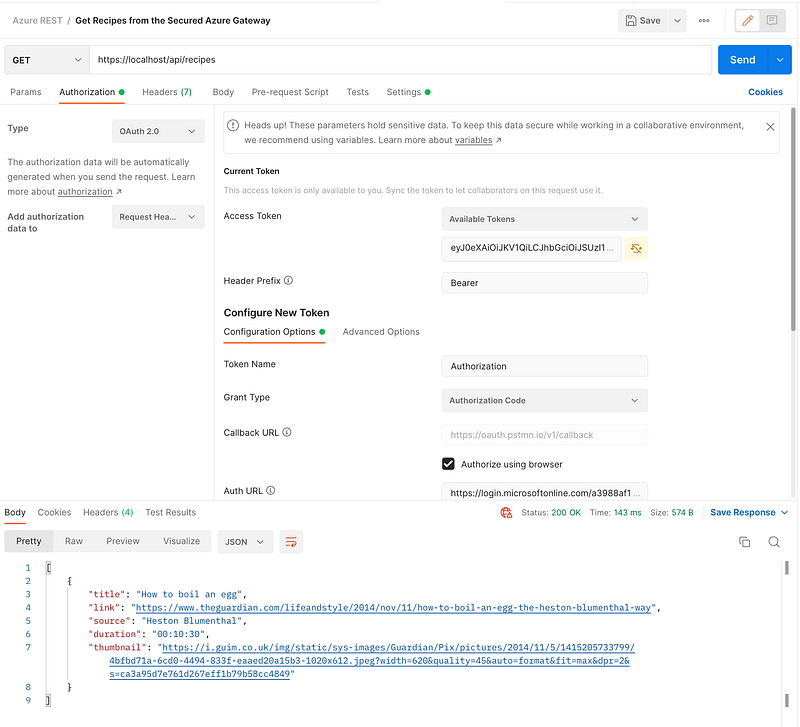
Postman — Successful secured gateway request
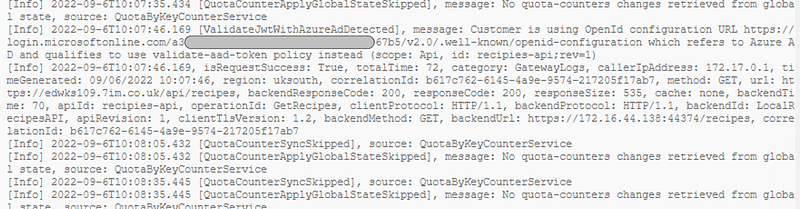
Self hosted gateway log excerpt for a successful request.
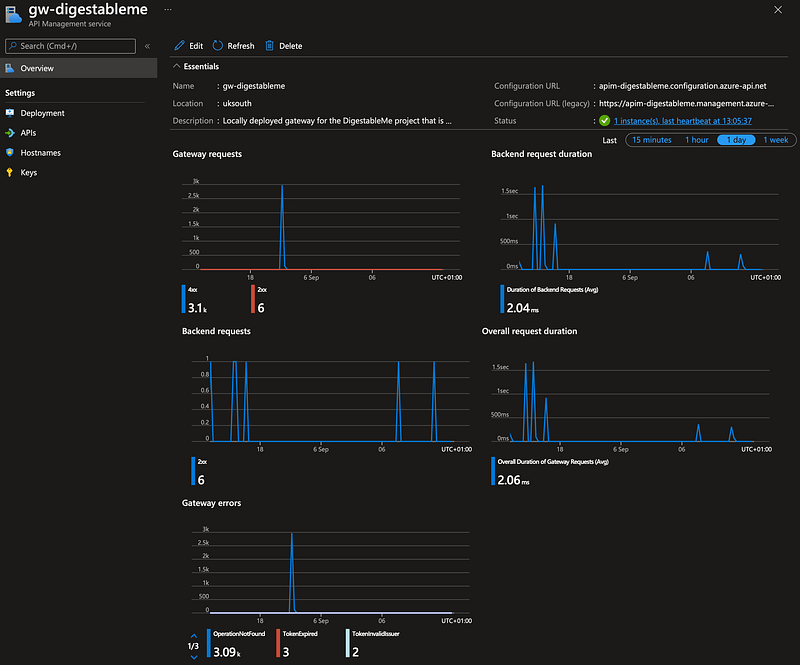
Azure gateway dashboard

BackBurner

We only authenticate against the Azure AD, the registered Azure App uses delegated permissions of the Authenticated user, this will need to be more granular in the real world using roles and attributes.

More details will be added in a future post once the application requires more granular access e.g. roles, user and administrator.

XP

The API is secured at the edge (Gateway) we can still use swagger and the localhost API endpoints, locally unsecured and don’t need to add any code to the Web API project.

Make sure that you use the v2 endpoints
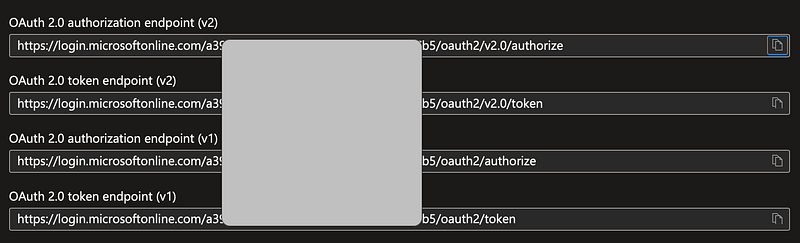
Application endpoints

If you use the V1 endpoints your are likely to encounter the following issues accessing the API through the gateway.


v1 endpoints — Invalid Issuer
v1 enpoints — Token signature mismatch (kid)

Links

Flutter
Mobile
Mobile App Development
API
Programming
Recommended from ReadMedium