
Chapter 20: Advanced CSS Selectors and JavaScript Selector Functions
A Complete Frontend Developer Textbook for Beginners (2023 Edition)

This is the textbook version of Lesson 20 of 100 from the Udemy video course: A Complete Frontend Developer Course for Beginners
← Chapter 19: CSS Flexbox Alignment and JavaScript Function Declaration
Overview
This lesson covers the following HTML attributes, CSS selectors, and JavaScript functions for the first time:
HTML
CSS
- id selectors
- universal selectors
- type selectors
- pseudo-element selectors
- class selectors
- pseudo-class selectors
- attribute selectors
JS
- document.querySelector()
- document.querySelectorAll()
- document.getElementsByTagName()
- document.getElementById()
- document.getElementsByClassName()
- document.getElementsByName()
This lesson begins with this Codepen. Code along with me to increase retention!
Lecture
In this lesson, we formally introduce all the possible CSS selectors we can use to select the HTML tags we want to style. Then in the next lesson, we apply what we learn to make our submenus appear only when we hover over the menu tabs.
Let’s begin!
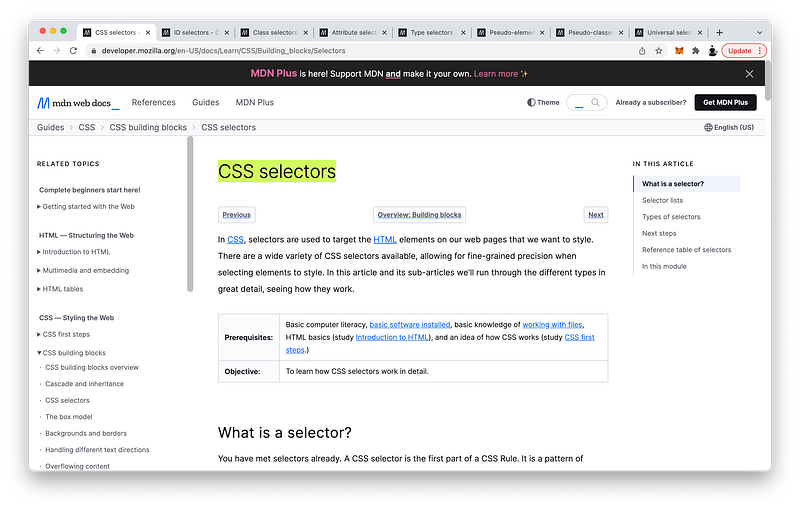
Type Selectors
There are six different kinds of selectors we can use. The first kind is the type selectors which we learned to use right away in Lesson 1.
1. Type SelectorsBasically, we simply write the name of the tag we want to style:
menu {
 list-style-type: none;
 margin: 0;
 padding: 0;
}
And CSS will apply our style properties to any and all tags having that name.
If multiple selectors share the same styles, we can combine them into a list using commas. For example, both the ul tag and menu tag share these same styles:
ul {
 list-style-type: none;
 margin: 0;
 padding: 0;
 display: flex;
 flex-direction: row;
 justify-content: space-evenly;
 height: 100%;
 align-items: center;
}
menu {
list-style-type: none;
margin: 0;
padding: 0;
}If we want, we can combine them like this:
ul, menu {

}
Then, we cut out their shared properties:
ul {
 display: flex;
 flex-direction: row;
 justify-content: space-evenly;
 height: 100%;
 align-items: center;
}
menu {
}And then paste:
ul, menu {
 list-style-type: none;
 margin: 0;
 padding: 0;
}
As you can see, everything still works! Written this way, it can be a lot easier to read and understand.
What if there are shared properties that we want to apply to every tag in the HTML document?
Instead of creating a very long list of all the possible tags in the HTML language, we can simply use a special type selector called the universal selector like this:
* {}
For example, let’s change all the color to yellow:
* {
 color: yellow;
}
As you can see, the universal selector is just an asterisk.
Pseudo-Element Selectors
Related to the type selectors are the pseudo-element selectors.
2: Pseudo-Element SelectorsAs the name implies, these selectors behave as if we had added new elements into the HTML document. Hence, the “pseudo”.
Tags and elements are often used interchangeably. However, for clarity, I generally say tags when referring to the HTML document, and elements when referring to the JavaScript DOM Tree.
For example, let’s say we want to change the color of only the first letter of all our menu tabs:
<html>
 <head></head>
 <body>
  <header>
   <ul>
    <li>
     <h2>Measure</h2>
     <menu>
      <li onclick="console.log('This h3 has been clicked!')">Add</li>
      <li onclick="remove()">Remove</li>
     </menu>
    </li>
    <li>
     <h2>Note</h2>
     <menu>
      <li onclick="addWholeNote()">Whole</li>
      <li>Half</li>
      <li>Quarter</li>
     </menu>
    </li>
    <li>
     <h2>Accidental</h2>
     <menu>
      <li>Sharp</li>
      <li>Flat</li>
      <li>Natural</li>
     </menu>
    </li>
    <li>
     <h2>Rest</h2>
     <menu>
      <li>Whole</li>
      <li>Half</li>
      <li>Quarter</li>
     </menu>
    </li>
    <li>
     <h2>Learn</h2>
     <menu>
      <li>Piano Playing</li>
      <li>Sight Reading</li>
      <li>Ear Training</li>
      <li>Rhythm Training</li>
     </menu>
    </li>
   </ul>
  </header>
  <main>
   <h1></h1>
  </main>
  <footer></footer>
 </body>
</html>
The long way is to use a span element like this:
...
 <h2><span>M</span>easure</h2>
...
Then in the CSS, we write:
span {
 color: orange;
}
To change the color of the first letter of all 5 menu tabs, we would have to insert the span element 5 times!
Or, we can simply use a pseudo-element selector called ::first-letter:
::first-letter {
 color: orange;
}
Notice that pseudo-elements always begin with 2 colons!
Written like this, as you can see, this selector targets every textNode. The reason is because it’s actually a shorthand for:
*::first-letter {
 color: orange;
}
To target only the menu tabs, we can simply swap out the universal type selector for a type selector of h2:
h2::first-letter {
color: orange;
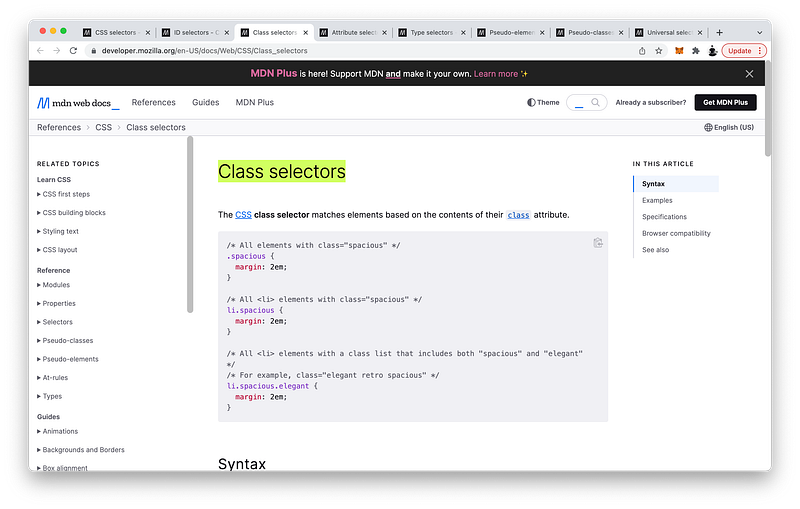
}Class Selectors
Now, what if we want to individually target a select group of tags?
3: Class SelectorsWe can do this by putting them into the same class. For example, let’s say we want to italicize this first li, this second li, and this third li:
<html>
 <head></head>
 <body>
  <header>
   <ul>
    <li>
     <h2>Measure</h2>
     <menu>
      <li onclick="console.log('This h3 has been clicked!')">Add</li>
      <li onclick="remove()">Remove</li>
     </menu>
    </li>
    <li>
     <h2>Note</h2>
     <menu>
      <li onclick="addWholeNote()">Whole</li>
      <li>Half</li>
      <li>Quarter</li>
     </menu>
    </li>
    <li>
     <h2>Accidental</h2>
     <menu>
      <li>Sharp</li>
      <li>Flat</li>
      <li>Natural</li>
     </menu>
    </li>
    <li>
     <h2>Rest</h2>
     <menu>
      <li>Whole</li>
      <li>Half</li>
      <li>Quarter</li>
     </menu>
    </li>
    <li>
     <h2>Learn</h2>
     <menu>
      <li>Piano Playing</li>
      <li>Sight Reading</li>
      <li>Ear Training</li>
      <li>Rhythm Training</li>
     </menu>
    </li>
   </ul>
  </header>
  <main>
   <h1></h1>
  </main>
  <footer></footer>
 </body>
</html>
Step 1:
On those tags, we add an attribute called class:
<html>
 <head></head>
 <body>
  <header>
   <ul>
    <li>
     <h2>Measure</h2>
     <menu>
      <li class="" onclick="console.log('This h3 has been clicked!')">Add</li>
      <li onclick="remove()">Remove</li>
     </menu>
    </li>
    <li>
     <h2>Note</h2>
     <menu>
      <li onclick="addWholeNote()">Whole</li>
      <li class="">Half</li>
      <li>Quarter</li>
     </menu>
    </li>
    <li>
     <h2>Accidental</h2>
     <menu>
      <li>Sharp</li>
      <li>Flat</li>
      <li class="">Natural</li>
     </menu>
    </li>
    <li>
     <h2>Rest</h2>
     <menu>
      <li>Whole</li>
      <li>Half</li>
      <li>Quarter</li>
     </menu>
    </li>
    <li>
     <h2>Learn</h2>
     <menu>
      <li>Piano Playing</li>
      <li>Sight Reading</li>
      <li>Ear Training</li>
      <li>Rhythm Training</li>
     </menu>
    </li>
   </ul>
  </header>
  <main>
   <h1></h1>
  </main>
  <footer></footer>
 </body>
</html>
Step 2:
We assign them to the same class name. It can be whatever we like, but like function names, it should be semantic. Okay, let’s call this class: emphasis
<html>
 <head></head>
 <body>
  <header>
   <ul>
    <li>
     <h2>Measure</h2>
     <menu>
      <li class="emphasis" onclick="console.log('This h3 has been clicked!')">Add</li>
      <li onclick="remove()">Remove</li>
     </menu>
    </li>
    <li>
     <h2>Note</h2>
     <menu>
      <li onclick="addWholeNote()">Whole</li>
      <li class="emphasis">Half</li>
      <li>Quarter</li>
     </menu>
    </li>
    <li>
     <h2>Accidental</h2>
     <menu>
      <li>Sharp</li>
      <li>Flat</li>
      <li class="emphasis">Natural</li>
     </menu>
    </li>
    <li>
     <h2>Rest</h2>
     <menu>
      <li>Whole</li>
      <li>Half</li>
      <li>Quarter</li>
     </menu>
    </li>
    <li>
     <h2>Learn</h2>
     <menu>
      <li>Piano Playing</li>
      <li>Sight Reading</li>
      <li>Ear Training</li>
      <li>Rhythm Training</li>
     </menu>
    </li>
   </ul>
  </header>
  <main>
   <h1></h1>
  </main>
  <footer></footer>
 </body>
</html>
Finally, step 3:
In the CSS, we write dot, then the name of our class:
.emphasis {

}
The style we want is:
.emphasis {
 font-style: italic;
}
Awesome!
As you can see, class selectors always begin with a dot.
Let’s create one more class for clarity. Let’s say this time we want to uppercase this first li, and this third li:
...
 <h2>Accidental</h2>
 <menu>
  <li>Sharp</li>
  <li>Flat</li>
  <li class="emphasis">Natural</li>
 </menu>
...
Again, in the HTML we assign them to the same class name. For example: extra-emphasis
...
 <h2>Accidental</h2>
 <menu>
  <li class="extra-emphasis">Sharp</li>
  <li>Flat</li>
  <li class="emphasis">Natural</li>
 </menu>
...
Unlike function names, we should not use camelCasing for CSS names because CSS and HTML codes are case-insensitive. Instead, the convention is to separate the words using hyphens:
class="extra-emphasis"This is called kebab-casing because it kind of looks like there’s a stick holding the words together like a kebab!

You may have heard or seen another popular convention called snake_casing using underscores instead of hyphens. This convention is used in JavaScript code instead of kebab-casing because the hyphen is misinterpreted as a minus sign. We will cover this topic in detail in Unit 4.
For this third li, we can simply add another class name like this:
...
 <h2>Accidental</h2>
 <menu>
  <li class="extra-emphasis">Sharp</li>
  <li>Flat</li>
  <li class="emphasis extra-emphasis">Natural</li>
 </menu>
...
Yes, a single tag can belong to as many class names as we like as long as we separate them with a space.
Then, in the CSS we write:
.extra-emphasis {

}
The style we want is:
.extra-emphasis {
 text-transform: uppercase;
}
Looks great! Since this third li belongs to both the emphasis and extra-emphasis classes, we can give it a different style like this:
.emphasis.extra-emphasis {

}
For example, the style we want is:
.emphasis.extra-emphasis {
 text-decoration-line: underline;
}
Awesome! This combination selector tells CSS to apply this style only to the tags that belong to both the emphasis and extra-emphasis classes.
Like pseudo-elements, this class selector is actually a shorthand for:
*.emphasis.extra-emphasis {
 text-decoration-line: underline;
}
To make this class selector more specific, we can switch out the universal type selector for this type selector instead:
li.emphasis.extra-emphasis {
 text-decoration-line: underline;
}
Why is this useful?
As we lightly discussed in Lesson 4, when multiple selectors target the same tags and styles, priority will be given to the selector that is most specific.
In the next lesson, we will formally cover CSS Specificity in great detail.
Pseudo-Class Selectors
In Lesson 3, we introduced pseudo-class selectors for the first time. Now, let’s formally explain why they exist.
4: Pseudo-Class SelectorsLike pseudo-elements, as the name implies, pseudo-classes act as if we had applied a class attribute to some tags. Hence, the “pseudo”.
For example, let’s say we want to target all the first li in each menu:
<html>
 <head></head>
 <body>
  <header>
   <ul>
    <li>
     <h2>Measure</h2>
     <menu>
      <li class="emphasis" onclick="console.log('This h3 has been clicked!')">Add</li>
      <li onclick="remove()">Remove</li>
     </menu>
    </li>
    <li>
     <h2>Note</h2>
     <menu>
      <li onclick="addWholeNote()">Whole</li>
      <li class="emphasis">Half</li>
      <li>Quarter</li>
     </menu>
    </li>
    <li>
     <h2>Accidental</h2>
     <menu>
      <li class="extra-emphasis">Sharp</li>
      <li>Flat</li>
      <li class="emphasis extra-emphasis">Natural</li>
     </menu>
    </li>
    <li>
     <h2>Rest</h2>
     <menu>
      <li>Whole</li>
      <li>Half</li>
      <li>Quarter</li>
     </menu>
    </li>
    <li>
     <h2>Learn</h2>
     <menu>
      <li>Piano Playing</li>
      <li>Sight Reading</li>
      <li>Ear Training</li>
      <li>Rhythm Training</li>
     </menu>
    </li>
   </ul>
  </header>
  <main>
   <h1></h1>
  </main>
  <footer></footer>
 </body>
</html>
We could assign a class name to each one of these li’s.
Or, we can simply use this pseudo-class selector:
:first-child {

}
For example, the style we want is:
:first-child {
 color: greenyellow;
}
As you can see, pseudo-classes always begin with 1 colon!
As you just witnessed, using pseudo-classes instead of classes helps us to avoid writing redundant markup in our HTML code.
HTML stands for Hyper Text Markup Language, or just markup for short. Likewise, CSS stands for Cascading Style Sheet, or style for short. As for JavaScript, we sometimes just say script for short.
Like pseudo-elements, this pseudo-class selector is actually a shorthand for:
*:first-child {
 color: greenyellow;
}
To make it more specific, we can swap the universal type selector for li:
li:first-child {
 color: greenyellow;
}
Moreover, pseudo-classes serve another purpose. They help us to target tags that are in a specific state.
For example, let’s say whenever the user hovers over these menu tabs, we want to change the color to white:
<html>
 <head></head>
 <body>
  <header>
   <ul>
    <li>
     <h2>Measure</h2>
     <menu>
      <li class="emphasis" onclick="console.log('This h3 has been clicked!')">Add</li>
      <li onclick="remove()">Remove</li>
     </menu>
    </li>
    <li>
     <h2>Note</h2>
     <menu>
      <li onclick="addWholeNote()">Whole</li>
      <li class="emphasis">Half</li>
      <li>Quarter</li>
     </menu>
    </li>
    <li>
     <h2>Accidental</h2>
     <menu>
      <li class="extra-emphasis">Sharp</li>
      <li>Flat</li>
      <li class="emphasis extra-emphasis">Natural</li>
     </menu>
    </li>
    <li>
     <h2>Rest</h2>
     <menu>
      <li>Whole</li>
      <li>Half</li>
      <li>Quarter</li>
     </menu>
    </li>
    <li>
     <h2>Learn</h2>
     <menu>
      <li>Piano Playing</li>
      <li>Sight Reading</li>
      <li>Ear Training</li>
      <li>Rhythm Training</li>
     </menu>
    </li>
   </ul>
  </header>
  <main>
   <h1></h1>
  </main>
  <footer></footer>
 </body>
</html>
We can easily achieve this using this pseudo-class selector (which we used for the first time in Lesson 17):
h2:hover {
 color: white;
}
Let’s test it out!
Hovering now…
Awesome, right? 😄
The first letter is not changing because a pseudo-element selector is more specific than a pseudo-class selector:
h2::first-letter {
 color: orange;
}h2:hover {
color: white;
}Again, we will cover CSS Specificity in detail in the next lesson.
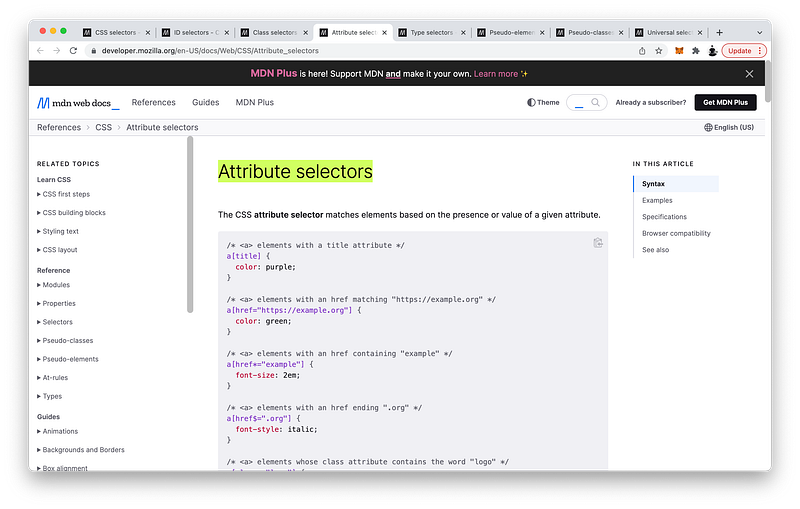
Attribute Selectors
A HTML document that is free of unnecessary and redundant markup makes it easier to understand and change, and therefore much more maintainable over a long period of time.
5: Attribute SelectorsLike pseudo-classes, we can use attribute selectors to avoid having to create class attributes in our HTML code.
For example, let’s say we want to target any tags that have an onclick attribute:
<html>
 <head></head>
 <body>
  <header>
   <ul>
    <li>
     <h2>Measure</h2>
     <menu>
      <li class="emphasis" onclick="console.log('This h3 has been clicked!')">Add</li>
      <li onclick="remove()">Remove</li>
     </menu>
    </li>
    <li>
     <h2>Note</h2>
     <menu>
      <li onclick="addWholeNote()">Whole</li>
      <li class="emphasis">Half</li>
      <li>Quarter</li>
     </menu>
    </li>
    <li>
     <h2>Accidental</h2>
     <menu>
      <li class="extra-emphasis">Sharp</li>
      <li>Flat</li>
      <li class="emphasis extra-emphasis">Natural</li>
     </menu>
    </li>
    <li>
     <h2>Rest</h2>
     <menu>
      <li>Whole</li>
      <li>Half</li>
      <li>Quarter</li>
     </menu>
    </li>
    <li>
     <h2>Learn</h2>
     <menu>
      <li>Piano Playing</li>
      <li>Sight Reading</li>
      <li>Ear Training</li>
      <li>Rhythm Training</li>
     </menu>
    </li>
   </ul>
  </header>
  <main>
   <h1></h1>
  </main>
  <footer></footer>
 </body>
</html>
We can easily do this with this attribute selector:
[onclick] {

}
For example, the style we want is:
[onclick] {
 cursor: pointer;
}
Let’s test it out.
Hovering now…
Great! As you can see, attribute selectors are always enclosed inside a set of brackets.
[onclick] {
 cursor: pointer;
}
Again, this attribute selector is a shorthand for:
*[onclick] {
 cursor: pointer;
}
If we only want to target li tags that have an onclick attribute, we can simply replace the universal type selector with the type selector of li:
li[onclick] {
 cursor: pointer;
}
We can get even more specific with attribute selectors by including a value selector. If we want, we can target li tags that have an onclick attribute equal to “addWholeNote()”:
li[onclick="addWholeNote()"] {

}
For example, the style we want is:
li[onclick="addWholeNote()"] {
 cursor: help;
}
Let’s test it out. It’s this li here:
...
 <h2>Note</h2>
 <menu>
  <li onclick="addWholeNote()">Whole</li>
  <li class="emphasis">Half</li>
  <li>Quarter</li>
 </menu>
...
Hovering now…
Awesome! There are many other value selectors we can choose from. For example, since a class is an attribute in the HTML code:
...
 <h2>Note</h2>
 <menu>
  <li onclick="addWholeNote()">Whole</li>
  <li class="emphasis">Half</li>
  <li>Quarter</li>
 </menu>
...
We can easily recreate this class selector:
.emphasis {}
Using an attribute selector like this:
[class~="emphasis"] {

}
Remember, class attributes can have as many class names as we like:
...
 <h2>Accidental</h2>
 <menu>
  <li class="extra-emphasis">Sharp</li>
  <li>Flat</li>
  <li class="emphasis extra-emphasis">Natural</li>
 </menu>
...
Therefore, the tilde value selector tells CSS to target any class attributes that contain emphasis inside their list of values:
class="emphasis extra-emphasis"Though this class selector is semantically equivalent to this class attribute selector:
.emphasis {

}[class~="emphasis"] {
}They do not have the same specificity. Again, we will discuss CSS Specificity in detail in the next lesson.
To review, pseudo-elements, pseudo-classes, and attribute selectors are useful because they can help us cut down on excess elements and classes in our HTML code.
If we don’t consider the maintainability of our HTML markup, we may incur technical debt.
The greater the technical debt, the harder it will be to refactor our code later on for ourselves and our team members.
A terminology that’s borrowed from finance, technical debt accrues interest over time and can compound out-of-control! Hence, you may have heard about the dreaded monolithic codebase (on the verge of technical bankruptcy) that few engineers want to touch… 😬
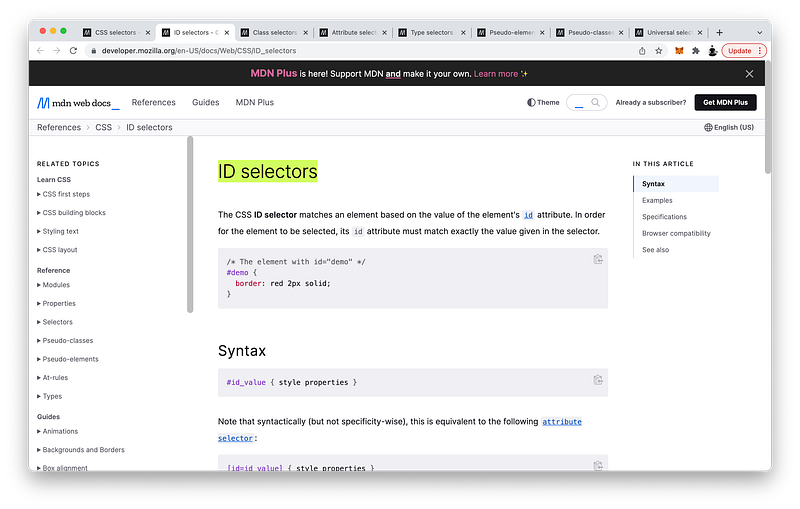
ID Selectors
So far, all the selectors we have covered search through the entire HTML Tree to find any and all tags that match our search criteria.
What if we just want to target only one specific tag?
6: ID SelectorsWe can, using ID selectors (which we first saw in Lesson 17).
Step 1:
In the HTML, on the tag that we want to target, add an attribute called id:
...
<h2>Rest</h2>
<menu>
<li id="">Whole</li>
<li>Half</li>
<li>Quarter</li>
</menu>
...Assign it a unique name using kebab casing just like class names. For example:
...
<h2>Rest</h2>
<menu>
<li id="whole-rest">Whole</li>
<li>Half</li>
<li>Quarter</li>
</menu>
...Step 2:
In the CSS, to target this specific tag, we can use an attribute selector like usual because id is just another attribute:
[id="whole-rest"] {
}For example, the style we want is:
[id="whole-rest"] {
cursor: zoom-in;
}Let’s test it out.
Hovering now…
Awesome! Like class selectors, there is a nice shorthand we can use to specifically target an id:
#whole-rest {
}For example, the style we want is:
#whole-rest {
cursor: grab;
}Let’s test it out.
Hovering now…
Great! As you can see, ID selectors always begin with a hashtag. Again, though these two methods are semantically identical:
[id="whole-rest"] {
cursor: zoom-in;
}#whole-rest {
cursor: grab;
}They do not have the same specificity. In fact, the ID selector has the highest specificity in the CSS document! It is second only to inline CSS in the HTML document. Again, we will cover CSS Specificity in detail in the next lesson.
Let’s do one more for clarity. To target this first li tag in the HTML document, we add an attribute called id:
...
<h2>Learn</h2>
<menu>
<li id="">Piano Playing</li>
<li>Sight Reading</li>
<li>Ear Training</li>
<li>Rhythm Training</li>
</menu>
...Then, we give it a unique name. For example:
...
<h2>Learn</h2>
<menu>
<li id="learn-piano-playing">Piano Playing</li>
<li>Sight Reading</li>
<li>Ear Training</li>
<li>Rhythm Training</li>
</menu>
...Like our social security number, only one tag can use this id name in the entire HTML document.
To target this tag for styling, in the CSS we write:
#learn-piano-playing {
}For example, the style we want is:
#learn-piano-playing {
cursor: wait;
}Let’s test it out.
Hovering now…
Awesome! Like all the previous selectors we discussed, this ID selector is a shorthand for:
*#learn-piano-playing {
cursor: wait;
}To make it more specific, we can switch the universal type selector with li:
li#learn-piano-playing {
cursor: wait;
}This tells CSS to target only an li tag that has the correct id as well.
This might seem redundant because an id is already unique. However, a possible use case is when a single external CSS file is used by multiple HTML documents. In such cases, the same id name may have been used on different tags.
Anyway, this use case is probably quite rare. Just wanted you to know that it’s possible if the need ever arises!
JavaScript Refactoring
Let’s now learn about some premade JavaScript functions that correspond to the CSS selectors we just covered. But first, let’s refactor our previous JavaScript code to reduce technical debt.
In Lesson 5, we learned that inline JavaScript is not a best practice, so let’s refactor it into another function.
<html>
<head></head>
<body>
<header>
<ul>
<li>
<h2><span>M</span>easure</h2>
<menu>
<li class="emphasis" onclick="console.log('This h3 has been clicked!')">Add</li>
<li onclick="remove()">Remove</li>
</menu>
</li>
<li>
<h2>Note</h2>
<menu>
<li onclick="addWholeNote()">Whole</li>
<li class="emphasis">Half</li>
<li>Quarter</li>
</menu>
</li>
<li>
<h2>Accidental</h2>
<menu>
<li class="extra-emphasis">Sharp</li>
<li>Flat</li>
<li class="emphasis extra-emphasis">Natural</li>
</menu>
</li>
<li>
<h2>Rest</h2>
<menu>
<li id="whole-rest">Whole</li>
<li>Half</li>
<li>Quarter</li>
</menu>
</li>
<li>
<h2>Learn</h2>
<menu>
<li id="learn-piano-playing">Piano Playing</li>
<li>Sight Reading</li>
<li>Ear Training</li>
<li>Rhythm Training</li>
</menu>
</li>
</ul>
</header>
<main>
<h1></h1>
</main>
<footer></footer>
</body>
</html>Firstly, let’s cut out the code. Then, let’s replace it with a function. Let’s call it addMeasure():
...
<h2><span>M</span>easure</h2>
<menu>
<li class="emphasis" onclick="addMeasure()">Add</li>
<li onclick="remove()">Remove</li>
</menu>
...In our JavaScode file, let’s create that function:
function addMeasure() {
}Then, paste in the code we cut out:
function addMeasure() {
console.log('This h3 has been clicked!');
}But, let’s change the message to:
function addMeasure() {
console.log("Now adding a measure...");
}Single quotes still work but the convention is to use double quotes in order to reserve single quotes for actual quotations.
Finally, let’s test it out.
Clicking now…
Awesome!
Another refactor we can do is to rename this remove() function to make it more semantic:
...
<h2><span>M</span>easure</h2>
<menu>
<li class="emphasis" onclick="addMeasure()">Add</li>
<li onclick="remove()">Remove</li>
</menu>
...It’s not clear right away what this function actually removes, so let’s clarify it:
...
<h2><span>M</span>easure</h2>
<menu>
<li class="emphasis" onclick="addMeasure()">Add</li>
<li onclick="removeMeasure()">Remove</li>
</menu>
...Don’t forget to update the JavaScript file as well:
function removeMeasure() {
console.log("Now removing a measure...");
}As a sanity check, let’s test this function too.
Clicking now..
Great! Much clearer, right? 😄
Whenever possible, we should regularly take some time off to review our code and look for opportunities to reduce technical debt. Senior engineers not only care that the code works as intended, but that it is also easily maintainable by others.
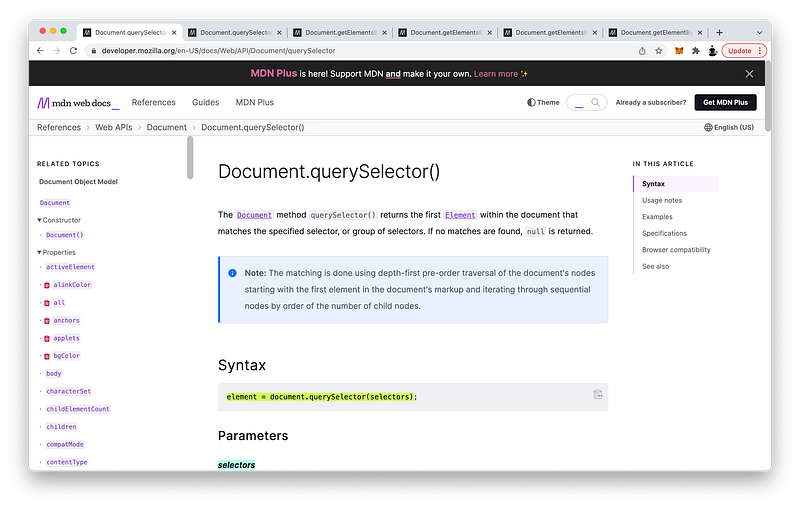
querySelector()
Right away in Lesson 1, we learned that the JavaScript function:
document.querySelector()Works like CSS selectors. We know that querySelector() is a function because it has parentheses.
document.querySelector()The dot tells us that this function is a child of document:
document.querySelector()In Lesson 3, we learned that
documentrepresents the DOM Tree. Besides being a virtual copy of the entire HTML document, it also has many built-in helper functions likequerySelector().
How does this function work?
As we’ve done countless times, we simply provide it with a CSS selector as an input. For example, to target li’s using the type selector:
document.querySelector("li")Just like in console.log(), we must put li inside quotes. Words and phrases inside quotes are known as strings in JavaScript to differentiate them from other JavaScript code.
To see that it works, let’s log this entire command to the Console:
console.log(document.querySelector("li"))Console window:
<li> ... </li>Great! This is the output we expect.
Is log() a function too?
Of course, because it has parentheses!
console.log(document.querySelector("li"))The dot tells us that this function is a child of console:
console.log(document.querySelector("li"))In Unit 4, I will clarify exactly what I mean by “child” when we learn about Object-Oriented Programming.
Though this long command looks a little intimidating, let’s break it down to see that it’s actually quite simple.
This CSS selector is an input to the function querySelector():
"li" => querySelector("li")Then, the output of querySelector():
querySelector("li") => li element (the first li it finds)Becomes the input to the log() function:
li element => log(li element)Finally, the output of the log() function is printed to the Console:
log(li element) => <li> ... </li> => ConsoleNo matter how nested or complex a JavaScript command is, if we start from the innermost parentheses, and work our way out, following the inputs and outputs, we can understand any JavaScript command.
Let’s see what the Console outputs if we remove the parentheses from the querySelector() function:
console.log(document.querySelector)Console window:
function querySelector() { [native code] }Believe it or not, this is the function declaration of the querySelector() function!
In other words, the presence of parentheses tells JavaScript to execute the function declaration. Otherwise, it will not.
querySelector => function declaration
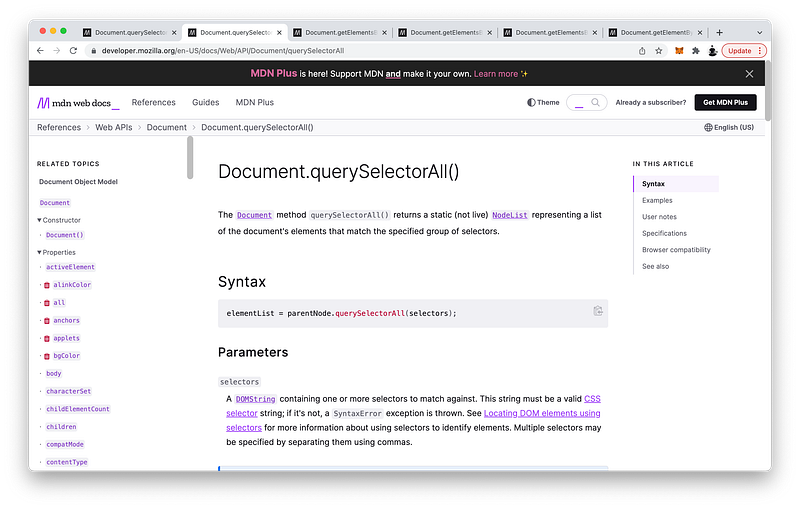
querySelector() => executes function declarationquerySelectorAll()
Like CSS selectors, the querySelector() function searches through the entire DOM Tree. But unlike CSS selectors, this function only outputs the first element it finds, whereas CSS selectors target every element that matches the search criteria.
A built-in JavaScript helper function that does exactly this is called:
querySelectorAll()Just like querySelector(), it is also a child of document:
document.querySelectorAll()Let’s test it out. But first, let’s comment out the last command to keep our Console clean:
// console.log(document.querySelector)Let’s give this function the same type selector as an input:
document.querySelectorAll("li")And like before, let’s log the output to the Console:
console.log(document.querySelectorAll("li"))Console window:
// [object NodeList] (20)
["<li/>","<li/>","<li/>","<li/>","<li/>","<li/>","<li/>","<li/>","<li/>","<li/>","<li/>","<li/>","<li/>","<li/>","<li/>","<li/>","<li/>","<li/>","<li/>","<li/>"]Great! As expected, every li element is printed to the Console.
What you’re seeing is called an Array, which we will study in Unit 4.
Let’s see if querySelectorAll() also works for the universal type selector:
console.log(document.querySelectorAll("*"))Console window:
// [object NodeList] (51)
["<html/>","<head/>","<meta/>","<title/>","<meta/>","<link/>","<link/>","<link/>","<style/>","<script/>","<script/>","<script/>","<body/>","<header/>","<ul/>","<li/>","<h2/>","<span/>","<menu/>","<li/>","<li/>","<li/>","<h2/>","<menu/>","<li/>","<li/>","<li/>","<li/>","<h2/>","<menu/>","<li/>","<li/>","<li/>","<li/>","<h2/>","<menu/>","<li/>","<li/>","<li/>","<li/>","<h2/>","<menu/>","<li/>","<li/>","<li/>","<li/>","<main/>","<h1/>","<footer/>","<script/>","<script/>"]Awesome, looks like every tag is accounted for!
How about a pseudo-element selector:
console.log(document.querySelectorAll("h2::first-letter"))Console window:
// [object NodeList] (0)
[]Great! As expected, there should be none because pseudo-elements are not real elements. They only behave like elements for styling purposes.
How about a class selector:
console.log(document.querySelectorAll("li.emphasis"))Console window:
// [object NodeList] (3)
["<li/>","<li/>","<li/>"]Awesome! How about a pseudo-class selector:
console.log(document.querySelectorAll("li:first-child"))Console window:
// [object NodeList] (6)
["<li/>","<li/>","<li/>","<li/>","<li/>","<li/>"]Great! What about an attribute selector:
console.log(document.querySelectorAll("li[onclick]"))Console window:
// [object NodeList] (3)
["<li/>","<li/>","<li/>"]Perfect! Finally, how about an ID selector?
console.log(document.querySelectorAll("li#whole-rest"))Console window:
// [object NodeList] (1)
["<li/>"]Wonderful! Since we expect only one element from an ID selector, it is more performant to just use querySelector():
console.log(document.querySelector("li#whole-rest"))This way, JavaScript can stop searching through the DOM Tree as soon as it finds that one element.
We have learned that HTML code and CSS code are case-insensitive, but JavaScript code is case-sensitive.
Since querySelector() relies on the HTML id attribute value:
...
<h2>Rest</h2>
<menu>
<li id="whole-rest">Whole</li>
<li>Half</li>
<li>Quarter</li>
</menu>
...Let’s see what happens if we capitalize a letter:
...
<h2>Rest</h2>
<menu>
<li id="whole-Rest">Whole</li>
<li>Half</li>
<li>Quarter</li>
</menu>
...Our JavaScript command stops working!
console.log(document.querySelector("li#whole-rest"))Console Window:nullIn fact, if we check, our CSS declaration stops working too!
#whole-rest {
cursor: grab;
}Why?
The reason is because JavaScript code is case-sensitive without exception. And by extension, HTML attribute values and CSS selectors are case-sensitive too!
Please bear this in mind!
In other words, not all HTML and CSS codes are case-insensitive although promulgated as such. If we follow the convention of writing all our markups and styles in lowercase, this becomes a moot point.
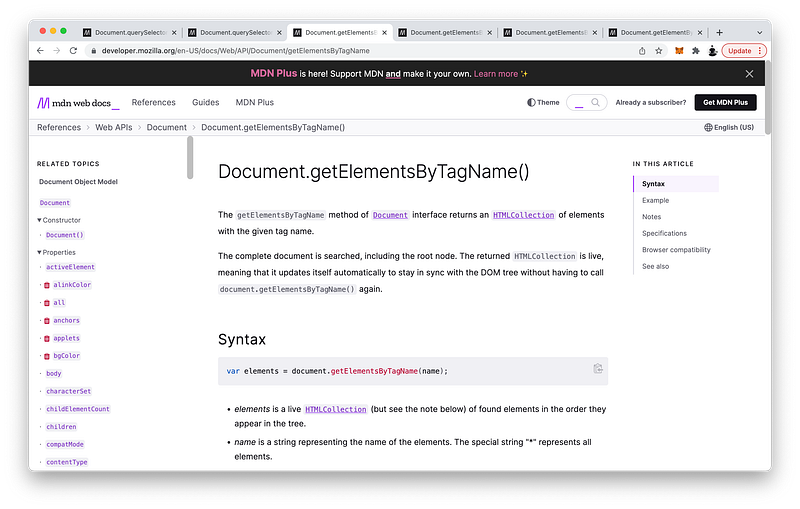
Selector Functions
For better performance, there are three JavaScript helper functions we can use instead of querySelectorAll(). Each corresponds to the three attributes we cover. Plus, there’s also a more performant helper function for a type selector as well.
Instead of using querySelectorAll() for a type selector:
console.log(document.querySelectorAll("li"))We can use:
document.getElementsByTagName("li")Let’s log it to the Console to compare:
console.log(document.getElementsByTagName("li"))Console window:
// [object HTMLCollection]
{
"0": {},
...
"19": {}
}As we can see, the difference is that querySelectorAll() outputs a list:
// [object NodeList] (20)
...Whereas getElementsByTagName() outputs a collection:
// [object HTMLCollection]
...The collection you see is called an Object Literal, which we will study in Unit 4.
getElementsByTagName() is more performant than querySelectorAll() because JavaScript can simply search through just the tag names.
If you’re wondering,
getElementsByPseudoElement()does not exist because pseudo-elements are not really elements.
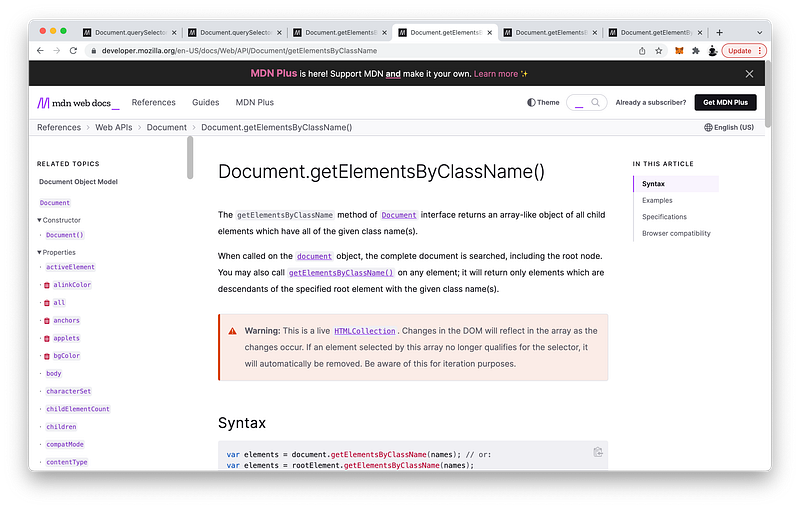
Similarly, instead of using querySelectorAll() for a class selector:
console.log(document.querySelectorAll(".emphasis"))We can use:
console.log(document.getElementsByClassName("emphasis"))Notice that the input to
getElementsByClassName()is just the name of the class. (There’s no dot!)
Console window:
// [object HTMLCollection]
{
"0": {},
"1" {},
"2": {}
}Again, the difference is that querySelectorAll() outputs a list whereas getElementsByClassName() outputs a collection.
getElementsByClassName() is more performant than querySelectorAll() because JavaScript can simply search through just the class names.
If you’re wondering,
getElementsByPseudoClass()does not exist either.
As for attribute selectors, unfortunately there is no helper function called getElementsByAttribute(). As we have seen, attribute selectors usually contain a value selector as well, thus making them more complex.
[class~="emphasis"] {

}Moreover, attribute selectors are not used as frequently as the other selectors.
Having said that, there is one exception for the attribute called name:
...
<h2>Learn</h2>
<menu>
<li id="learn-piano-playing">Piano Playing</li>
<li>Sight Reading</li>
<li name="">Ear Training</li>
<li>Rhythm Training</li>
</menu>
...For example:
...
<h2>Learn</h2>
<menu>
<li id="learn-piano-playing">Piano Playing</li>
<li>Sight Reading</li>
<li name="learn-ear-training">Ear Training</li>
<li>Rhythm Training</li>
</menu>
...Instead of using querySelectorAll() for this attribute selector:
console.log(document.querySelectorAll("[name='learn-ear-training']"))We can use:
console.log(document.getElementsByName("learn-ear-training"))Console window:
// [object NodeList] (1)
["<li/>"]In this case, both outputs a list.
The reason for this exception is because the name attribute is used very frequently inside of forms, which we will explore in a future lesson.
Finally, instead of using querySelector() for an ID selector:
console.log(document.querySelector("#learn-piano-playing"))We can use:
console.log(document.getElementById("learn-piano-playing"))Console window:
<li id="learn-piano-playing">Piano Playing</li>This function is much more performant because JavaScript doesn’t even have to search through the DOM Tree at all since there is only one possibility.
Again, be careful of case sensitivity.
<li id="learn-piano-playing">Piano Playing</li>
≠
<li id="learn-Piano-playing">Piano Playing</li>The finished Codepen:
Summary
Let’s review all the HTML, CSS, and then JavaScript that we covered in this lesson.
HTML
In this lesson, we covered three HTML attributes.
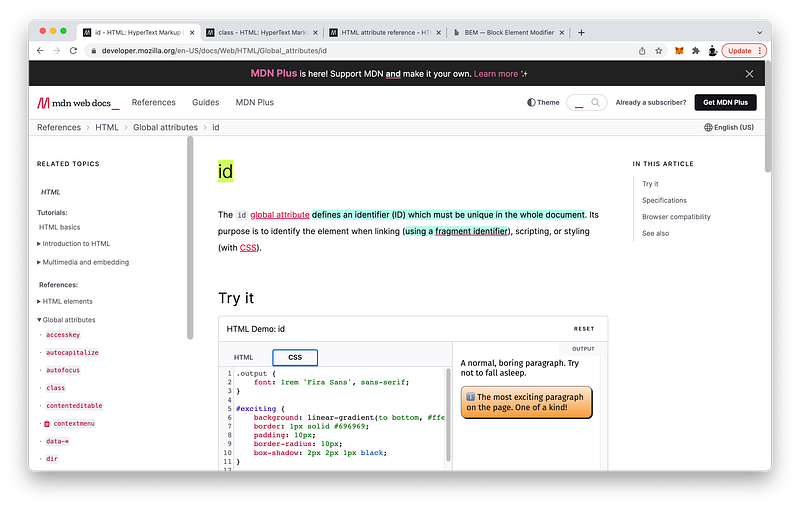
The id attribute allows us to uniquely define exactly one tag in the entire HTML document.
<li id="learn-piano-playing">Piano Playing</li>In Lesson 17, we saw how this id attribute can be used as a fragment identifier for linking using the anchor tag:
<a href="#learn-piano-playing">Link</a>In this lesson, we learned how it can also be used for styling via an ID selector:
#learn-piano-playing {
 cursor: wait;
}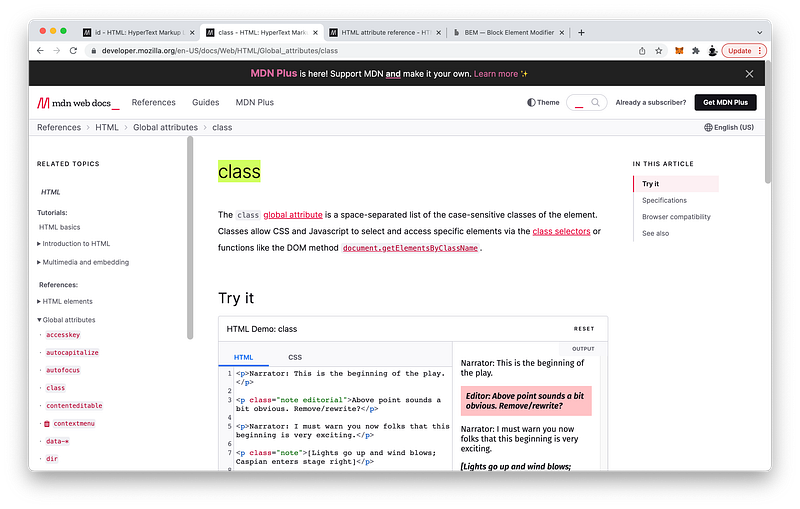
<li class="emphasis">Half</li>The class attribute, on the other hand, allows us to define a set of tags that we can target for styling via a class selector:
.emphasis {
 font-style: italic;
}
A single tag can belong to multiple classes. All we have to do is separate the class names with a space:
<li class="emphasis extra-emphasis">Natural</li>If students are like tags, class names are like classrooms. The same tags can belong to multiple class names, just like the same students can belong to multiple classrooms.
<li name="learn-ear-training">Ear Training</li>Finally, we were lightly introduced to the name attribute which we can target via an attribute selector:
[name="learn-ear-training"] {}
Again,
nameattributes are use frequently within forms which we will study in a future lesson.
For easy code comprehension, id names, class names, and all attribute values in general should follow some conventions:
First of all, they should be semantic — in essence, human-readable.
<li id="learn-piano-playing">Piano Playing</li>Multiple words should follow kebab casing using hyphens, and they cannot start with a number.
The next lesson will explain why they cannot start with a number when we study JavaScript variables.
If you expect to write lots of complex CSS with many people, perhaps consider following the BEM naming convention, which is much more robust.
Again, HTML and CSS codes are generally case-insensitive and should be written in all lowercase. However, JavaScript code is case-sensitive, without exception. Therefore, be aware that HTML attribute values are actually case-sensitive when they are used as CSS selectors for styling and scripting!
CSS
These three aforementioned HTML attributes have corresponding CSS selectors to give us flexibility and control.
To target a tag by an id attribute, we can use an ID selector:
To target a tag by a class attribute, we can use a class selector:
To target a tag by a name attribute, or any attribute in general, we can use an attribute selector:
Attribute selectors are quite powerful because we can further specify a variety of value selectors as well.
[class~="whole-rest"]Besides targeting tags by attributes, we can simply target them by their tag names using type selectors:
And if we ever want to target every tag in the HTML document, we can simply use the universal type selector:
Multiple selectors can be combined into a list using commas:
ul, menu {
 list-style-type: none;
 margin: 0;
 padding: 0;
}
Using pseudo-elements, we can target imaginary elements which save us from creating redundant tags in our HTML code:
As you can see, there are quite a few options, and we will make use of most of them throughout this course.
::first-letterLikewise, using pseudo-classes, we can target groups of tags without having to create redundant class attributes throughout our HTML document:
Also, with pseudo-classes, we can target tags that are in special states. As you can see, there are many to choose from. We will definitely make use of most of them throughout this course!
:hoverJavaScript
CSS selectors also have corresponding JavaScript selector functions as well to give us even more flexibility and control.
document.querySelector() is a built-in JavaScript function. We know this because it has parentheses:
document.querySelector()The dot tells us that the querySelector() function is a child of document:
document.querySelector()All functions can accept inputs inside these parentheses:
document.querySelector(input)Formally, these inputs are known as parameters. For the querySelector() function, it expects a CSS selector as an input:
document.querySelector(CSS Selector)After it executes, it will output the first element it finds that matches the search criteria:
document.querySelector(CSS Selector) => outputFormally, outputs from functions are known as the return value:
function(parameters) => return valueIf we want JavaScript to return all the elements that match the search criteria, we can use the built-in function called querySelectorAll():
Similarly, this function expects a CSS selector as a parameter, and after execution, it will return a list of all matching elements:
document.querySelectorAll(CSS selector) => list of matching elementsHowever, this function may not be the most performant. If we want JavaScript to search for elements by tag name, it is more performant to use the function getElementsByTagName():
This function simply expects the name of the tag as a parameter, and will return a collection of elements it finds:
document.getElementsByTagName(tag name) => collection of matching elementsIf we want JavaScript to search for elements by class name, it is more performant to use the function getElementsByClassName():
Likewise, this function simply expects the name or names of the classes as a parameter, and will return a collection of elements it finds:
document.getElementsByClassName(class names) => collection of matching elementsIf we want JavaScript to search for elements by the name attribute, it is more performant to use the function getElementsByName():
Likewise, this function simply expects the value of the name attribute as a parameter, but will return a list of elements it finds:
document.getElementsByName(name attribute value) => list of matching elementsFinally, if we want JavaScript to search for only one element with a specific ID, it is much more performant to use the function getElementById():
Likewise, this function simply expects the value of the id attribute as a parameter, and will return the one element it finds:
document.getElementById(id attribute value) => elementThese functions are built into the JavaScript language because they are commonly used. Moreover, they are more performant than querySelector() and querySelectorAll() because they do not have to search through the entire DOM Tree.
Again, all these functions expect a parameter that is inside of quotes:
document.getElementById("learn-piano-playing")Formally, these quoted values are known as strings to distinguish them from other primitives in JavaScript.
Primitives are the most basic data types of a language, e.g., letters and numbers. In JavaScript, there are seven primitive data types, of which strings are one of them. In Unit 4, we will formally introduce all of them side-by-side for comparison.
To review, all functions have parentheses wherein we can provide inputs called parameters:
function(parameters)After execution, the functions will output a return value:
function(parameters) => executing... => return valueTake away the parentheses, the function will not execute and we simply get the function declaration:
function without () => function declarationIf you can commit this mental model into your memory, you will have the intuition to quickly grok any complex functions calls.
As you have seen, function calls can be nested inside other function calls. Moreover, functions can also call other functions, and even be the inputs and outputs of other functions too! For this reason, they have a special status as first-class citizens in the JavaScript language — a topic that we will explore in depth in Unit 4.
Lastly, it is worth reiterating that wherever possible, we will make the habit to take the time to refactor our code to minimize technical debt. Again, this is a best practice in our industry to keep the codebase readable and maintainable at large scales.
Concept Quiz
Take my Programming Concept Quiz to check your understanding! For every correct choice, you will earn SW Coins which you can redeem for coupons towards the purchase of any of my Udemy courses!
Sample Quiz Questions for Lesson 20:
Question 1:
menu {}
This selector targets:
- the first
menutag - all the
menutags
Question 2:
menu, ul {}
This selector targets:
- the first
menuandultags - all the
menuandultags
Question 3:
* {}
This selector targets every tag in the HTML document.
- True
- False
Question 4:
::first-letter {}
This selector targets the first letter of every textNode.
- True
- False
Question 5:
::first-letter and *::first-letter are NOT equivalent.
- True
- False
Question 6:
Which selector targets the first letter of only the h2 tags?
::first-letterh2::first-letter*::first-letter
Question 7:
Which is an appropriate class name?
extraEmphasisextra-Emphasisextra-emphasis
Question 8:
Which selector does NOT target every tag with a class name of emphasis?
*.emphasisli.emphasis.emphasis
Question 9:
.emphasis.extra-emphasis {}
This selector targets:
- tags that have an
emphasisclass ORextra-emphasisclass - tags that have an
emphasisclass ANDextra-emphasisclass
Question 10:
Which selector does NOT activate whenever a user hovers over any h2 tags?
:hover*:hoverh2:hoverh1:hover
Question 11:
Which selector does NOT target a tag that has an id of whole-rest?
#whole-rest.whole-rest[id=”whole-rest”]
Question 12:
Which selector does NOT target tags that have a class of emphasis?
.emphasis[class~=”emphasis”][class=”emphasis”]
Question 13:
document.querySelector(“li”) return all the li tags it finds.
- True
- False
Question 14:
document.querySelectorAll(“li”) return the first li tag it finds.
- True
- False
Question 15:
Which is equivalent to document.querySelectorAll(“li”):
document.getElementsByTagName(“li”)document.getElementsByClassName(“li”)document.getElementsByName(“li”)document.getElementById(“li”)
Question 16:
Which is equivalent to document.querySelectorAll(“.emphasis”):
document.getElementsByTagName(“emphasis”)document.getElementsByClassName(“emphasis”)document.getElementsByName(“emphasis”)document.getElementById(“emphasis”)
Question 17:
Which is equivalent to document.querySelectorAll(“[name='learn-ear-training']”):
document.getElementsByTagName(“learn-ear-training”)document.getElementsByClassName(“learn-ear-training”)document.getElementsByName(“learn-ear-training”)document.getElementById(“learn-ear-training”)
Question 18:
Which is equivalent to document.querySelector(“#learn-piano-playing”):
document.getElementsByTagName(“learn-piano-playing”)document.getElementsByClassName(“learn-piano-playing”)document.getElementsByName(“learn-piano-playing”)document.getElementById(“learn-piano-playing”)
Question 19:
Which is NOT a string?
“whole-rest”whole-rest‘whole-rest’
Question 20:
“whole-rest” and “whole-Rest” are equivalent.
- True
- False
Question 21:
Which is the correct mental model for a function?
- function(parameters) => input
- function(return value) => parameters
- function(output) => input
- function(parameters) => return value
Question 22:
Without the parentheses, we simply get the function declaration.
- True
- False
Question 23:
The best practice is to always take time to refactor to reduce technical debt.
- True
- False
→ Programming Concept Quiz for Chapter 20
Coding Exercises
Check out my Interactive Coding Exercises to put to practice what you have learned! There, you will also find interactive hints to help you understand each line of code. Likewise, for every correct solution, you will earn SW Coins which you can redeem for coupons towards the purchase of any of my Udemy courses!
→ Interactive Coding Exercises for Chapter 20
Syntax Flashcards
Review what you have learned by playing my Syntax Flashcard Game! These flashcards are designed to help you commit to memory all the new code syntaxes you learned in this lesson. Likewise, for every correct answer, you will earn SW Coins which you can redeem for coupons towards the purchase of any of my Udemy courses!
→ Syntax Flashcard Game for Chapter 20
Next Steps
Congrats on completing Unit 3: Lesson 2 of 20! 🎉
Unit 1: 100% Completed
Unit 2: 100% Completed
Unit 3: 10% Completed
Unit 4: 0% Completed
Unit 5: 0% Completed
Bonus Unit 6: 0% Completed
Bonus Unit 7: 0% Completed
Overall Progress: 20% Completed→ Join Remote Frontend Cohort Program
Next Lesson
Finally, we’re ready to implement the feature we want: Hide all the submenus, and whenever the user hovers over the menu tabs, the corresponding submenu should reappear! In the next lesson, we will learn about a powerful type of CSS selectors called combinators that will enable us to do just that. Conveniently, it’s also the perfect opportunity to formally explain CSS Specificity once and for all. As for JavaScript, we’re also ready to learn about an important programming concept known as getters and setters. With that, the purpose and power of JavaScript will become obvious, and JavaScript coding will become much more interactive and fun!
→ Chapter 21: Advanced CSS Combinators and JavaScript Getters and Setters (coming soon)
When you use my referral link above 👆 to become a Medium member, all proceeds will be donated towards the construction of the Silicon Wat Campus for children in Ukraine and Cambodia ❤️