
Chapter 19: CSS Flexbox Alignment and JavaScript Function Declaration
A Complete Frontend Developer Textbook for Beginners (2023 Edition)

This is the textbook version of Lesson 19 of 100 from the Udemy video course: A Complete Frontend Developer Course for Beginners
← Chapter 18: CSS Web Fonts and Colors
Overview
This lesson covers the following HTML tags, CSS properties, and JavaScript topics for the first time:
HTML
CSS
JS
This lesson begins with a fresh Codepen. Open a new one and code along with me to increase retention!
Lecture
Having gone through Unit 1 and Unit 2, we are ready to try and build a music editor similar to Flat’s:
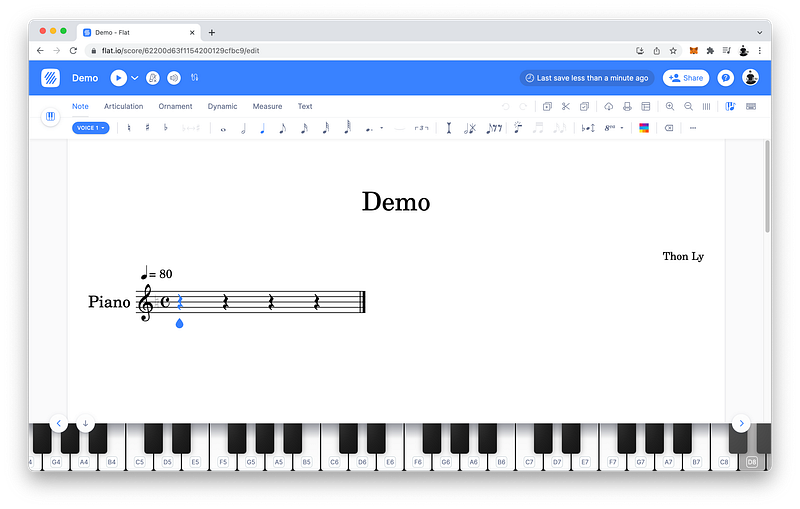
In this lesson, we will focus on creating a similar layout and menu. To accomplish this, we will learn about CSS Box Alignment for Flexbox.
Flexbox Layout
Like always, we start with the html tree:
HTML Window:<html></html>Which has a head and a body:
<html>
 <head></head>
 <body></body>
</html>
For our layout, let’s create a header, a main, and a footer like we usually do:
<html>
 <head></head>
 <body>
  <header></header>
  <main></main>
  <footer></footer>
 </body>
</html>
Our HTML Tree looks great! Now let’s embellish it with some CSS:
CSS Window:
As we have done in many previous lessons, to ensure that our layout encompasses the entire viewport, in the body:
body {

}
We set the width to 100vw, the height to 100vh, and the margin to 0 to remove the default margin:
body {
 width: 100vw;
 height: 100vh;
 margin: 0;
}
Now we’re ready to use Flexbox on our layout. To do this, we set the display to flex:
body {
 width: 100vw;
 height: 100vh;
 margin: 0;
 display: flex;
}
To stack our sections into a column, we set the flex-direction to column:
body {
 width: 100vw;
 height: 100vh;
 margin: 0;
 display: flex;
 flex-direction: column;
}
Now we’re ready to partition our sections.

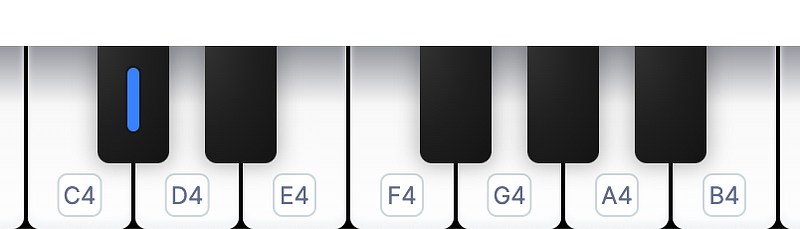
Since one octave of a piano is divided into 12 black and white keys:
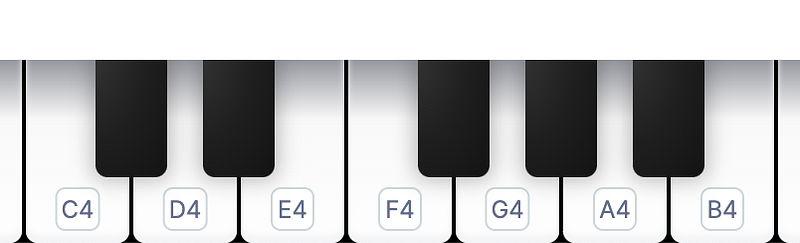
As you can see, an octave is a repeating pattern from C to B. In this example, this is the 4th octave.
Let’s also divide our viewport into 12 fractions per the language of music.
12 piano keys => 12 flex fractionsLet’s give the header a flex of 1 fraction, and a background-color of blueviolet:
header {
 flex: 1;
 background-color: blueviolet;
}
Let’s give the main a flex of 8 fractions, and a background-color of lightgray:
main {
 flex: 8;
 background-color: lightgray;
}
Finally, let’s give the footer the remainder with a flex of 3 fractions, and a background-color of black:
footer {
 flex: 3;
 background-color: black;
}
Looks great! 😁
If Flexbox is still confusing, please review Lesson 14.
Menu Tabs
We’re now ready to create the menu inside our header! Like before, let’s start with the HTML:
<html>
 <head></head>
 <body>
  <header>

  </header>
  <main></main>
  <footer></footer>
 </body>
</html>
To create a menu, we typically use a list tag, and there are two types. The ordered list tag:
<html>
 <head></head>
 <body>
  <header>
   <ol></ol>
  </header>
  <main></main>
  <footer></footer>
 </body>
</html>
Which is rendered as a numbered list on the UI window. Or, the unordered list tag:
<html>
 <head></head>
 <body>
  <header>
   <ul></ul>
  </header>
  <main></main>
  <footer></footer>
 </body>
</html>
Which is rendered as a bulleted list on the UI window.
Since a numbered list is not necessary for our menu, let’s use the ul tag:
<html>
 <head></head>
 <body>
  <header>
   <ul>
</ul>
</header>
<main></main>
<footer></footer>
</body>
</html>Inside a list tag, we add a list item tag for each item in our list:
<html>
<head></head>
<body>
<header>
<ul>
<li></li>
<li></li>
<li></li>
<li></li>
<li></li>
   </ul>
  </header>
  <main></main>
  <footer></footer>
 </body>
</html>Like Flat’s menu, let’s include a Measure tab:

Which will allow our users to add and remove a measure to the score:

In music, we group notes into measures to make them easier to read — just like indenting our HTML tags to make them more readable!
Let’s also include the Note tab:

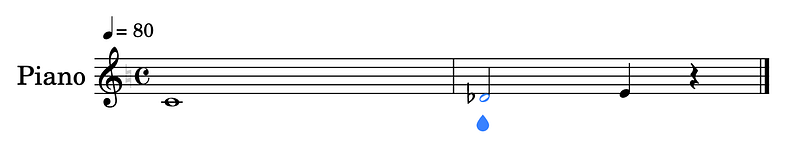
Which will allow our users to add Whole notes:

Half notes:

And Quarter notes:

These note symbols indicate how long the pitch (sound) should last. There are smaller subdivisions like eighth notes and sixteenth notes, but will be ignored for simplicity.
Let’s also include an Accidental tab:
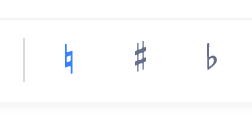
Which will allow our users to add Sharps:

And Flats:
As you can see, the sharps and flats are the black keys:
Whereas Naturals:

Are the white keys:
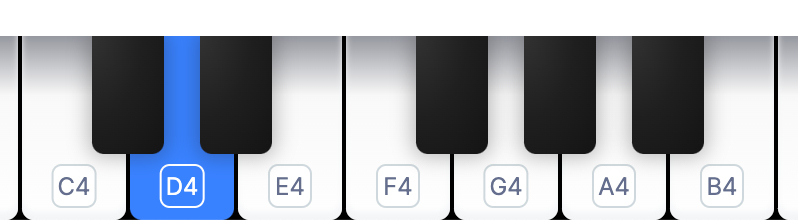
To be precise, this only occurs in the scale of C Major. This is the default scale of the piano which we will use throughout this course for simplicity.
Let’s also include a Rest tab, which will contain the silent notes:

Like the musical notes, the silent notes can be Whole:

Half:

Or, Quarter:

Similarly, there are smaller subdivisions like eighth rests and sixteenth rests, but will also be ignored for simplicity.
Finally, let’s include something unique to our music app! Let’s create a Learn tab, where beginner music students can practice:
- Piano Playing
- Sight Reading
- Ear Training
- Rhythm Training
Each one will be explained in detail when we develop them into fun little games for beginner music students!
To review, our menu will have a Measure tab:
<html>
 <head></head>
 <body>
  <header>
   <ul>
    <li>Measure</li>
    <li></li>
    <li></li>
    <li></li>
    <li></li>
   </ul>
  </header>
  <main></main>
  <footer></footer>
 </body>
</html>
A Note tab:
<html>
 <head></head>
 <body>
  <header>
   <ul>
    <li>Measure</li>
    <li>Note</li>
    <li></li>
    <li></li>
    <li></li>
   </ul>
  </header>
  <main></main>
  <footer></footer>
 </body>
</html>
An Accidental tab:
<html>
 <head></head>
 <body>
  <header>
   <ul>
    <li>Measure</li>
    <li>Note</li>
    <li>Accidental</li>
    <li></li>
    <li></li>
   </ul>
  </header>
  <main></main>
  <footer></footer>
 </body>
</html>
A Rest tab:
<html>
 <head></head>
 <body>
  <header>
   <ul>
    <li>Measure</li>
    <li>Note</li>
    <li>Accidental</li>
    <li>Rest</li>
    <li></li>
   </ul>
  </header>
  <main></main>
  <footer></footer>
 </body>
</html>
And, a Learn tab:
<html>
 <head></head>
 <body>
  <header>
   <ul>
    <li>Measure</li>
    <li>Note</li>
    <li>Accidental</li>
    <li>Rest</li>
    <li>Learn</li>
   </ul>
  </header>
  <main></main>
  <footer></footer>
 </body>
</html>
You may have noticed that Flat has many more features than this, but since this course is not a music course, we will only cover the very basics of music.
But, enough to help us learn HTML, CSS, and JavaScript in a thorough and fun way! 😁
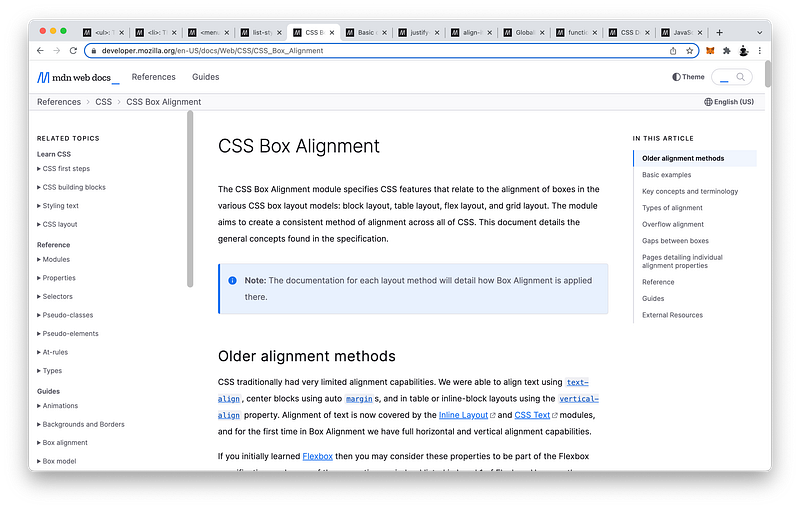
CSS Box Alignment
Let’s now style our menu texts!
html {

}
Let’s give them the standard font-size of 12pt, and a color of white:
html {
 font-size: 12pt;
 color: white;
}
For the font-family, let’s import the Inter typeface from Google which Flat uses:
@import url(https://fonts.googleapis.com/css2?family=Inter);html {
font-size: 12pt;
color: white;
font-family: Inter;
}And in case there are issues loading this typeface on our user’s machine, let’s also include sans-serif as a backup:
html {
 font-size: 12pt;
 color: white;
 font-family: Inter, sans-serif;
}
Let’s remove the default bullets:
ul {

}
By setting the list-style-type to none:
ul {
 list-style-type: none;
}
Let’s also remove the default margin, and the default padding:
ul {
 list-style-type: none;
 margin: 0;
 padding: 0;
}
Now we’re ready to use Flexbox to effortlessly spread out and center our menu tabs horizontally and vertically using CSS Box Alignment.
Again, to do this, on the parent:
ul {
 list-style-type: none;
 margin: 0;
 padding: 0;
}
We set the display to flex, and the flex-direction to row:
ul {
list-style-type: none;
margin: 0;
padding: 0;
display: flex;
flex-direction: row;
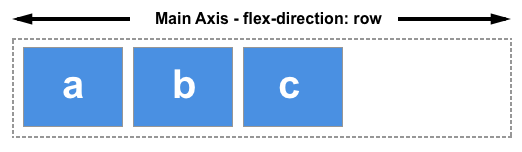
}In Lesson 14, we learned that when the flex-direction is row, the Main Axis is horizontal while the Cross Axis is vertical:
Flex-Direction: RowMain Axis: Horizontal
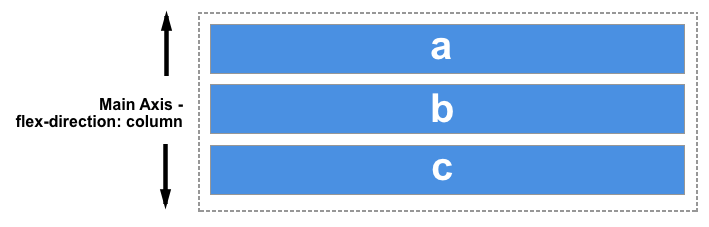
Cross Axis: VerticalIf the flex-direction was
column, the Main Axis would be vertical while the Cross Axis would be horizontal.
To align our menu tabs along the Main Axis, we use justify-content:
ul {
 list-style-type: none;
 margin: 0;
 padding: 0;
 display: flex;
 flex-direction: row;
 justify-content:
}
We can set it to space-between:
ul {
 list-style-type: none;
 margin: 0;
 padding: 0;
 display: flex;
 flex-direction: row;
 justify-content: space-between;
}space-around:
ul {
 list-style-type: none;
 margin: 0;
 padding: 0;
 display: flex;
 flex-direction: row;
 justify-content: space-around;
}space-evenly:
ul {
 list-style-type: none;
 margin: 0;
 padding: 0;
 display: flex;
 flex-direction: row;
 justify-content: space-evenly;
}
And others.
To align our menu tabs along the Cross Axis, first we make sure the Cross Axis takes up 100% of the parent:
ul {
list-style-type: none;
margin: 0;
padding: 0;
display: flex;
flex-direction: row;
justify-content: space-evenly;
height: 100%;
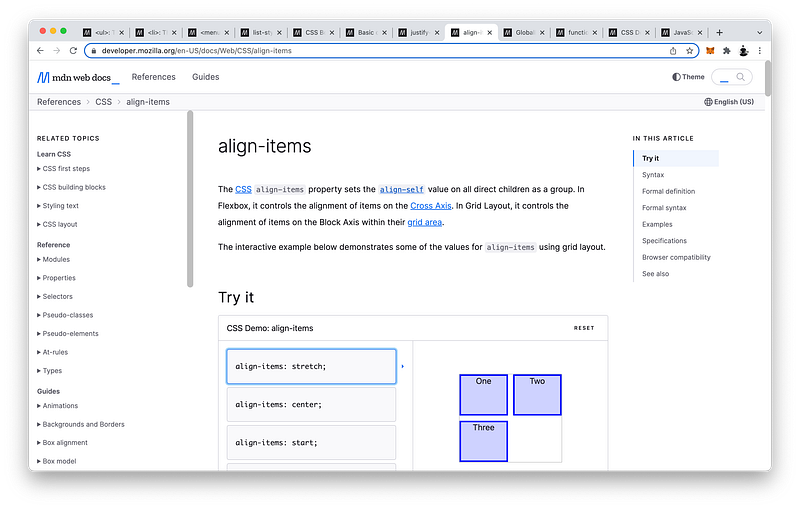
}Then, we can use align-items:
ul {
 list-style-type: none;
 margin: 0;
 padding: 0;
 display: flex;
 flex-direction: row;
 justify-content: space-evenly;
 height: 100%;
 align-items:
}
We can set it to flex-end:
ul {
 list-style-type: none;
 margin: 0;
 padding: 0;
 display: flex;
 flex-direction: row;
 justify-content: space-evenly;
 height: 100%;
 align-items: flex-end;
}flex-start:
ul {
 list-style-type: none;
 margin: 0;
 padding: 0;
 display: flex;
 flex-direction: row;
 justify-content: space-evenly;
 height: 100%;
 align-items: flex-start;
}center:
ul {
 list-style-type: none;
 margin: 0;
 padding: 0;
 display: flex;
 flex-direction: row;
 justify-content: space-evenly;
 height: 100%;
 align-items: center;
}
And others.
As Flexboxes, our menu tabs are automatically responsive to any device screen size!
Try stretching and contracting the viewport horizontally and vertically!
Submenu Items
Let’s now create the submenus! Let’s reserve h1 for the title of the music score inside the main:
<html>
 <head></head>
 <body>
  <header>
   <ul>
    <li>Measure</li>
    <li>Note</li>
    <li>Accidental</li>
    <li>Rest</li>
    <li>Learn</li>
   </ul>
  </header>
  <main>
   <h1></h1>
  </main>
  <footer></footer>
 </body>
</html>
And let’s use h2 for the menu tabs:
<html>
 <head></head>
 <body>
  <header>
   <ul>
    <li>
     <h2>Measure</h2>
    </li>
    <li>
     <h2>Note</h2>
    </li>
    <li>
     <h2>Accidental</h2>
    </li>
    <li>
     <h2>Rest</h2>
    </li>
    <li>
     <h2>Learn</h2>
    </li>
   </ul>
  </header>
  <main>
   <h1></h1>
  </main>
  <footer></footer>
 </body>
</html>
As for the submenu items, let’s group them inside a menu tag:
<html>
 <head></head>
 <body>
  <header>
   <ul>
    <li>
     <h2>Measure</h2>
     <menu>

     </menu>
    </li>
    <li>
     <h2>Note</h2>
     <menu>

     </menu>
    </li>
    <li>
     <h2>Accidental</h2>
     <menu>

     </menu>
    </li>
    <li>
     <h2>Rest</h2>
     <menu>

     </menu>
    </li>
    <li>
     <h2>Learn</h2>
     <menu>

     </menu>
    </li>
   </ul>
  </header>
  <main>
   <h1></h1>
  </main>
  <footer></footer>
 </body>
</html>
Again, the Measure submenu items are:
<html>
 <head></head>
 <body>
  <header>
   <ul>
    <li>
     <h2>Measure</h2>
     <menu>
      <li>Add</li>
      <li>Remove</li>
     </menu>
    </li>
    <li>
     <h2>Note</h2>
     <menu>

     </menu>
    </li>
    <li>
     <h2>Accidental</h2>
     <menu>

     </menu>
    </li>
    <li>
     <h2>Rest</h2>
     <menu>

     </menu>
    </li>
    <li>
     <h2>Learn</h2>
     <menu>

     </menu>
    </li>
   </ul>
  </header>
  <main>
   <h1></h1>
  </main>
  <footer></footer>
 </body>
</html>
The Note submenu items are:
<html>
 <head></head>
 <body>
  <header>
   <ul>
    <li>
     <h2>Measure</h2>
     <menu>
      <li>Add</li>
      <li>Remove</li>
     </menu>
    </li>
    <li>
     <h2>Note</h2>
     <menu>
      <li>Whole</li>
      <li>Half</li>
      <li>Quarter</li>
     </menu>
    </li>
    <li>
     <h2>Accidental</h2>
     <menu>

     </menu>
    </li>
    <li>
     <h2>Rest</h2>
     <menu>

     </menu>
    </li>
    <li>
     <h2>Learn</h2>
     <menu>

     </menu>
    </li>
   </ul>
  </header>
  <main>
   <h1></h1>
  </main>
  <footer></footer>
 </body>
</html>
The Accidental submenu items are:
<html>
 <head></head>
 <body>
  <header>
   <ul>
    <li>
     <h2>Measure</h2>
     <menu>
      <li>Add</li>
      <li>Remove</li>
     </menu>
    </li>
    <li>
     <h2>Note</h2>
     <menu>
      <li>Whole</li>
      <li>Half</li>
      <li>Quarter</li>
     </menu>
    </li>
    <li>
     <h2>Accidental</h2>
     <menu>
      <li>Sharp</li>
      <li>Flat</li>
      <li>Natural</li>
     </menu>
    </li>
    <li>
     <h2>Rest</h2>
     <menu>

     </menu>
    </li>
    <li>
     <h2>Learn</h2>
     <menu>

     </menu>
    </li>
   </ul>
  </header>
  <main>
   <h1></h1>
  </main>
  <footer></footer>
 </body>
</html>
The Rest submenu items are:
<html>
 <head></head>
 <body>
  <header>
   <ul>
    <li>
     <h2>Measure</h2>
     <menu>
      <li>Add</li>
      <li>Remove</li>
     </menu>
    </li>
    <li>
     <h2>Note</h2>
     <menu>
      <li>Whole</li>
      <li>Half</li>
      <li>Quarter</li>
     </menu>
    </li>
    <li>
     <h2>Accidental</h2>
     <menu>
      <li>Sharp</li>
      <li>Flat</li>
      <li>Natural</li>
     </menu>
    </li>
    <li>
     <h2>Rest</h2>
     <menu>
      <li>Whole</li>
      <li>Half</li>
      <li>Quarter</li>
     </menu>
    </li>
    <li>
     <h2>Learn</h2>
     <menu>

     </menu>
    </li>
   </ul>
  </header>
  <main>
   <h1></h1>
  </main>
  <footer></footer>
 </body>
</html>
Finally, the Learn submenu items are:
<html>
 <head></head>
 <body>
  <header>
   <ul>
    <li>
     <h2>Measure</h2>
     <menu>
      <li>Add</li>
      <li>Remove</li>
     </menu>
    </li>
    <li>
     <h2>Note</h2>
     <menu>
      <li>Whole</li>
      <li>Half</li>
      <li>Quarter</li>
     </menu>
    </li>
    <li>
     <h2>Accidental</h2>
     <menu>
      <li>Sharp</li>
      <li>Flat</li>
      <li>Natural</li>
     </menu>
    </li>
    <li>
     <h2>Rest</h2>
     <menu>
      <li>Whole</li>
      <li>Half</li>
      <li>Quarter</li>
     </menu>
    </li>
    <li>
     <h2>Learn</h2>
     <menu>
      <li>Piano Playing</li>
      <li>Sight Reading</li>
      <li>Ear Training</li>
      <li>Rhythm Training</li>
     </menu>
    </li>
   </ul>
  </header>
  <main>
   <h1></h1>
  </main>
  <footer></footer>
 </body>
</html>
As we did for ul, let’s also remove the default bullets, margin, and padding for all our submenus:
menu {
 list-style-type: none;
 margin: 0;
 padding: 0;
}
Both the ul tags and menu tags represent unordered lists of items.
Then, what’s the difference?
ul tags are generally used to contain items for display, and our menu tabs match this use case.
ul => displayed itemsOn the other hand, menu tags are usually intended to contain items that are interactive, and our submenus match this use case.
menu => interactive itemsSoon, in a future lesson, we will learn how to hide all the submenus, and whenever the user hovers over the menu tabs, the corresponding submenu will reappear!
JavaScript Function
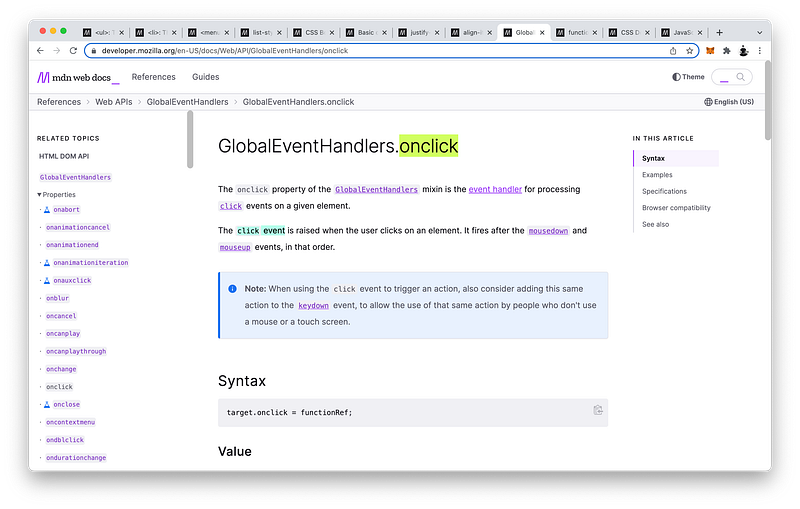
In Lesson 5, we learned how to include inline JavaScript in our HTML code by adding event listeners as attributes on our HTML tags.
Let’s now learn about another very useful event listener called onclick:
<html>
 <head></head>
 <body>
  <header>
   <ul>
    <li>
     <h2>Measure</h2>
     <menu>
      <li onclick="" >Add</li>
      <li>Remove</li>
     </menu>
    </li>
    <li>
     <h2>Note</h2>
     <menu>
      <li>Whole</li>
      <li>Half</li>
      <li>Quarter</li>
     </menu>
    </li>
    <li>
     <h2>Accidental</h2>
     <menu>
      <li>Sharp</li>
      <li>Flat</li>
      <li>Natural</li>
     </menu>
    </li>
    <li>
     <h2>Rest</h2>
     <menu>
      <li>Whole</li>
      <li>Half</li>
      <li>Quarter</li>
     </menu>
    </li>
    <li>
     <h2>Learn</h2>
     <menu>
      <li>Piano Playing</li>
      <li>Sight Reading</li>
      <li>Ear Training</li>
      <li>Rhythm Training</li>
     </menu>
    </li>
   </ul>
  </header>
  <main>
   <h1></h1>
  </main>
  <footer></footer>
 </body>
</html>
As you might have guessed from the name, when this li tag is clicked:
<html>
 <head></head>
 <body>
  <header>
   <ul>
    <li>
     <h2>Measure</h2>
     <menu>
      <li onclick="">Add</li>
      <li>Remove</li>
     </menu>
    </li>
    <li>
     <h2>Note</h2>
     <menu>
      <li>Whole</li>
      <li>Half</li>
      <li>Quarter</li>
     </menu>
    </li>
    <li>
     <h2>Accidental</h2>
     <menu>
      <li>Sharp</li>
      <li>Flat</li>
      <li>Natural</li>
     </menu>
    </li>
    <li>
     <h2>Rest</h2>
     <menu>
      <li>Whole</li>
      <li>Half</li>
      <li>Quarter</li>
     </menu>
    </li>
    <li>
     <h2>Learn</h2>
     <menu>
      <li>Piano Playing</li>
      <li>Sight Reading</li>
      <li>Ear Training</li>
      <li>Rhythm Training</li>
     </menu>
    </li>
   </ul>
  </header>
  <main>
   <h1></h1>
  </main>
  <footer></footer>
 </body>
</html>
JavaScript will execute whatever code we write inside the parentheses. For example, let’s log to the Console:
<html>
 <head></head>
 <body>
  <header>
   <ul>
    <li>
     <h2>Measure</h2>
     <menu>
      <li onclick="console.log('This li has been clicked!')" >Add</li>
      <li>Remove</li>
     </menu>
    </li>
    <li>
     <h2>Note</h2>
     <menu>
      <li>Whole</li>
      <li>Half</li>
      <li>Quarter</li>
     </menu>
    </li>
    <li>
     <h2>Accidental</h2>
     <menu>
      <li>Sharp</li>
      <li>Flat</li>
      <li>Natural</li>
     </menu>
    </li>
    <li>
     <h2>Rest</h2>
     <menu>
      <li>Whole</li>
      <li>Half</li>
      <li>Quarter</li>
     </menu>
    </li>
    <li>
     <h2>Learn</h2>
     <menu>
      <li>Piano Playing</li>
      <li>Sight Reading</li>
      <li>Ear Training</li>
      <li>Rhythm Training</li>
     </menu>
    </li>
   </ul>
  </header>
  <main>
   <h1></h1>
  </main>
  <footer></footer>
 </body>
</html>
Inside double quotes, we have to use single quotes around our texts!
There are a few other ways besides using single quotes which we will cover in Unit 4.
Okay, let’s test it out!
Clicking now…
Console Window:"This li has been clicked!"Awesome!
Let’s create another onclick:
<html>
 <head></head>
 <body>
  <header>
   <ul>
    <li>
     <h2>Measure</h2>
     <menu>
      <li onclick="console.log('This li has been clicked!')">Add</li>
      <li onclick="" >Remove</li>
     </menu>
    </li>
    <li>
     <h2>Note</h2>
     <menu>
      <li">Whole</li>
      <li>Half</li>
      <li>Quarter</li>
     </menu>
    </li>
    <li>
     <h2>Accidental</h2>
     <menu>
      <li>Sharp</li>
      <li>Flat</li>
      <li>Natural</li>
     </menu>
    </li>
    <li>
     <h2>Rest</h2>
     <menu>
      <li>Whole</li>
      <li>Half</li>
      <li>Quarter</li>
     </menu>
    </li>
    <li>
     <h2>Learn</h2>
     <menu>
      <li>Piano Playing</li>
      <li>Sight Reading</li>
      <li>Ear Training</li>
      <li>Rhythm Training</li>
     </menu>
    </li>
   </ul>
  </header>
  <main>
   <h1></h1>
  </main>
  <footer></footer>
 </body>
</html>
But this time, let’s execute a function called remove() using external JavaScript:
<html>
 <head></head>
 <body>
  <header>
   <ul>
    <li>
     <h2>Measure</h2>
     <menu>
      <li onclick="console.log('This li has been clicked!')">Add</li>
      <li onclick="remove()">Remove</li>
     </menu>
    </li>
    <li>
     <h2>Note</h2>
     <menu>
      <li>Whole</li>
      <li>Half</li>
      <li>Quarter</li>
     </menu>
    </li>
    <li>
     <h2>Accidental</h2>
     <menu>
      <li>Sharp</li>
      <li>Flat</li>
      <li>Natural</li>
     </menu>
    </li>
    <li>
     <h2>Rest</h2>
     <menu>
      <li>Whole</li>
      <li>Half</li>
      <li>Quarter</li>
     </menu>
    </li>
    <li>
     <h2>Learn</h2>
     <menu>
      <li>Piano Playing</li>
      <li>Sight Reading</li>
      <li>Ear Training</li>
      <li>Rhythm Training</li>
     </menu>
    </li>
   </ul>
  </header>
  <main>
   <h1></h1>
  </main>
  <footer></footer>
 </body>
</html>
To actually create this function, in the JavaScode code, we write function:
functionThen, the name of this function:
function removeThen, parentheses:
function remove()Followed by curly braces:
function remove() {

}
To represent the body of this function just like CSS declarations:
html {
 font-size: 12pt;
 color: white;
 font-family: Inter, sans-serif;
}
Inside this function declaration, we can write any code we want JavaScript to execute. For example:
function remove() {
 console.log("Now removing a measure...")
}
We can add as many instructions as we want, but just like CSS, we end each instruction with a semicolon:
function remove() {
 console.log("Now removing a measure...");
}
To be exact, semicolons are sometimes optional in JavaScript. It’s a pretty complex subject known as Semicolon Injection which we will cover in Unit 4.
Let’s test it out!
Clicking now…
Awesome!
To recap what’s happening, when this second li is clicked:
<html>
 <head></head>
 <body>
  <header>
   <ul>
    <li>
     <h2>Measure</h2>
     <menu>
      <li onclick="console.log('This li has been clicked!')">Add</li>
      <li onclick="remove()">Remove</li>
     </menu>
    </li>
    <li>
     <h2>Note</h2>
     <menu>
      <li>Whole</li>
      <li>Half</li>
      <li>Quarter</li>
     </menu>
    </li>
    <li>
     <h2>Accidental</h2>
     <menu>
      <li>Sharp</li>
      <li>Flat</li>
      <li>Natural</li>
     </menu>
    </li>
    <li>
     <h2>Rest</h2>
     <menu>
      <li>Whole</li>
      <li>Half</li>
      <li>Quarter</li>
     </menu>
    </li>
    <li>
     <h2>Learn</h2>
     <menu>
      <li>Piano Playing</li>
      <li>Sight Reading</li>
      <li>Ear Training</li>
      <li>Rhythm Training</li>
     </menu>
    </li>
   </ul>
  </header>
  <main>
   <h1></h1>
  </main>
  <footer></footer>
 </body>
</html>
JavaScript executes the function called remove():
function remove() {
 console.log("Now removing a measure...");
}
Which contains the instruction to log to the Console the message:
function remove() {
 console.log("Now removing a measure...");
}
As you can see, a function is a very powerful JavaScript construct that allows us to store instructions that we can execute at a later time!
To help you remember the syntax of a function, let’s do one more! When this li is clicked:
<html>
 <head></head>
 <body>
  <header>
   <ul>
    <li>
     <h2>Measure</h2>
     <menu>
      <li onclick="console.log('This li has been clicked!')">Add</li>
      <li onclick="remove()">Remove</li>
     </menu>
    </li>
    <li>
     <h2>Note</h2>
     <menu>
      <li onclick="" >Whole</li>
      <li>Half</li>
      <li>Quarter</li>
     </menu>
    </li>
    <li>
     <h2>Accidental</h2>
     <menu>
      <li>Sharp</li>
      <li>Flat</li>
      <li>Natural</li>
     </menu>
    </li>
    <li>
     <h2>Rest</h2>
     <menu>
      <li>Whole</li>
      <li>Half</li>
      <li>Quarter</li>
     </menu>
    </li>
    <li>
     <h2>Learn</h2>
     <menu>
      <li>Piano Playing</li>
      <li>Sight Reading</li>
      <li>Ear Training</li>
      <li>Rhythm Training</li>
     </menu>
    </li>
   </ul>
  </header>
  <main>
   <h1></h1>
  </main>
  <footer></footer>
 </body>
</html>
Please execute the function called addWholeNote():
<html>
 <head></head>
 <body>
  <header>
   <ul>
    <li>
     <h2>Measure</h2>
     <menu>
      <li onclick="console.log('This li has been clicked!')">Add</li>
      <li onclick="remove()">Remove</li>
     </menu>
    </li>
    <li>
     <h2>Note</h2>
     <menu>
      <li onclick="addWholeNote()">Whole</li>
      <li>Half</li>
      <li>Quarter</li>
     </menu>
    </li>
    <li>
     <h2>Accidental</h2>
     <menu>
      <li>Sharp</li>
      <li>Flat</li>
      <li>Natural</li>
     </menu>
    </li>
    <li>
     <h2>Rest</h2>
     <menu>
      <li>Whole</li>
      <li>Half</li>
      <li>Quarter</li>
     </menu>
    </li>
    <li>
     <h2>Learn</h2>
     <menu>
      <li>Piano Playing</li>
      <li>Sight Reading</li>
      <li>Ear Training</li>
      <li>Rhythm Training</li>
     </menu>
    </li>
   </ul>
  </header>
  <main>
   <h1></h1>
  </main>
  <footer></footer>
 </body>
</html>
Again, to create this function, we write function:
functionThen, the name:
function addWholeNoteThen, parentheses:
function addWholeNote()Followed by curly braces:
function addWholeNote() {

}
Inside of which, we want to execute:
function addWholeNote() {
 console.log("Now adding a whole note...");
}
Let’s test it out!
Clicking now…
Awesome!
For now, these functions are just placeholders. Over time, we will gradually develop each one!
In JavaScript, we can immediately tell that something is a function if it has parentheses:
HTML Window:<html>
<head></head>
<body>
<header>
<ul>
<li>
<h2>Measure</h2>
<menu>
<li onclick="console.log('This li has been clicked!')">Add</li>
<li onclick="remove()">Remove</li>
</menu>
</li>
<li>
<h2>Note</h2>
<menu>
<li onclick="addWholeNote()">Whole</li>
<li>Half</li>
<li>Quarter</li>
</menu>
</li>
<li>
<h2>Accidental</h2>
<menu>
<li>Sharp</li>
<li>Flat</li>
<li>Natural</li>
</menu>
</li>
<li>
<h2>Rest</h2>
<menu>
<li>Whole</li>
<li>Half</li>
<li>Quarter</li>
</menu>
</li>
<li>
<h2>Learn</h2>
<menu>
<li>Piano Playing</li>
<li>Sight Reading</li>
<li>Ear Training</li>
<li>Rhythm Training</li>
</menu>
</li>
</ul>
</header>
<main>
<h1></h1>
</main>
<footer></footer>
</body>
</html>JavaScript Window:function remove() {
console.log("Now removing a measure...");
}function addWholeNote() {
console.log("Now adding a whole note...");
}You may have also noticed that the function name cannot have spaces:
function addWholeNote() {
console.log("Now adding a whole note...");
}Instead, we simply combine the words and capitalize them:
add whole note => addWholeNoteThis is called camel-cased because it kind of resembles the humps of a camel!

Moreover, the first word is never capitalized for function names:
add whole note => addWholeNoteThe reason is because this convention is reserved for a special JavaScript construct called the
classwhich we will cover in Unit 4.
The finished Codepen:
All in all, functions are crucial to JavaScript and have many important use cases!
To help you become comfortable with functions as soon as possible, beginning with this unit, we will practice creating increasingly more complex functions with each new lesson.
Then in Unit 4, we will thoroughly explain exactly how functions work under the hood!
Summary
Like usual, let’s summarize all the main points using MDN as a reference. Let’s begin with HTML.
HTML
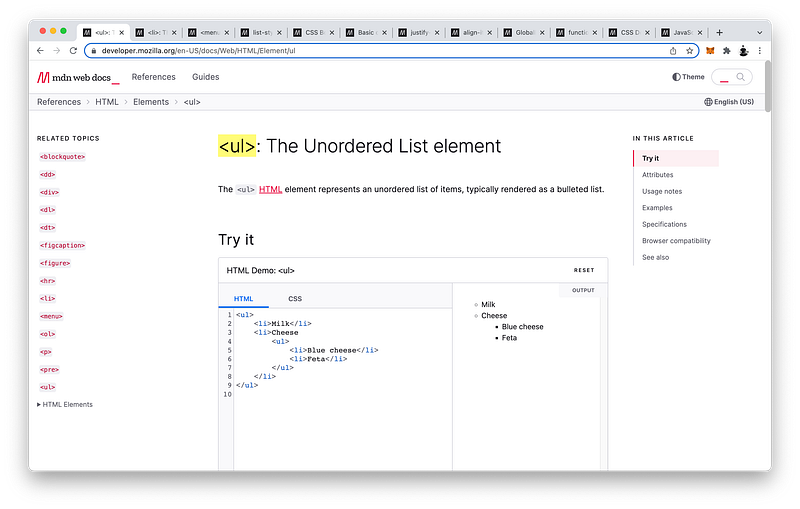
In this lesson, we learned how to use the ul (unordered list) tag to represent an unordered list of items:
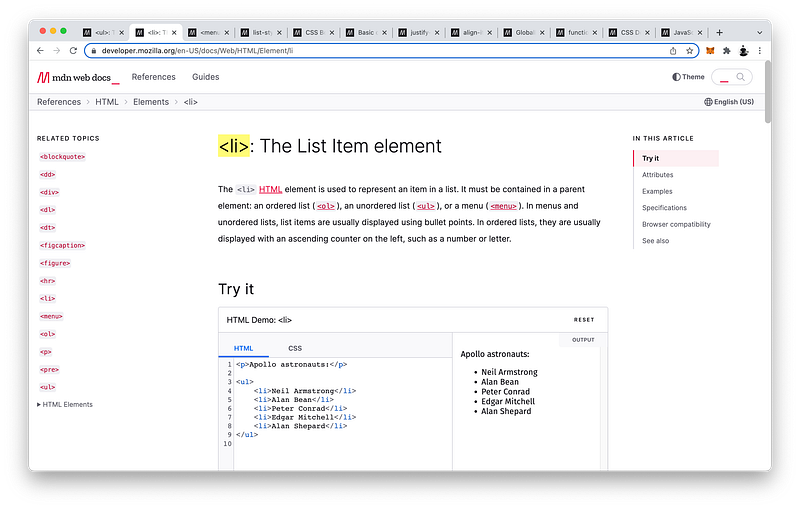
And for each item, we learned how to use the li (list item) tag which are rendered as bulleted items in the UI window:
Then, we learned about another unordered list tag: menu
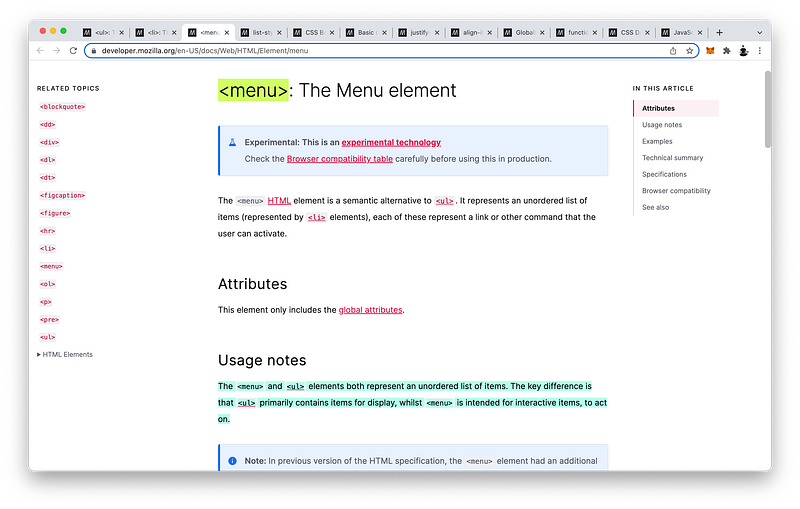
The key difference is that it is intended for interactive items, whereas the ul tag is intended for just display.
CSS
Let’s now review the CSS! For both our list tags, we learned how to use the list-style-type to remove the default bullets which are disc:
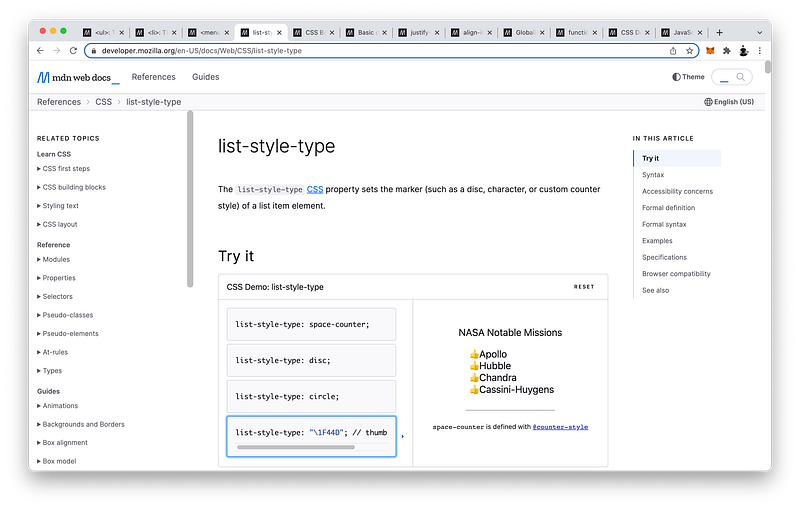
If we want, we can change them to:
list-style-type: circle;Or, any emoji:
list-style-type: "\1F44D";Etc!
Then, we learned about CSS Box Alignment:
For Flexbox items, to align them along the Main Axis, we use justify-content:

To align them along the Cross Axis, we use align-items:
Again, when the flex-direction is row, the Main Axis is horizontal:
While the Cross Axis is vertical:

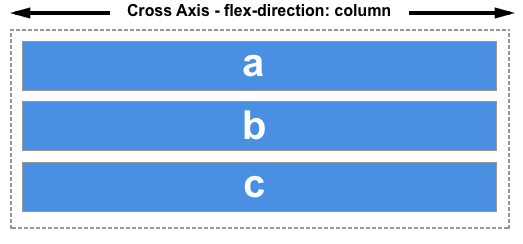
On the other hand, when the flex-direction is column, the Main Axis is vertical:
While the Cross Axis is horizontal:
For justify-content, we can set it to:
startcenterspace-betweenspace-aroundspace-evenly- etc!
For align-items, we can set it to:
stretchcenterstartend- etc!
JavaScript
Finally, let’s review the JavaScript! In this lesson, we learned a new event handler called onclick:
As the name implies, what it does is it handles the click event.
click event => onclickIn our examples, we showed how to use it as an attribute on the tag that we wanted to click:
<li onclick="" >Add</li>There are two ways to create event handlers: content attributes or IDL attributes. We covered the former in this lesson. The latter will be covered in Unit 4.
First, we showed how to log a message to the Console using inline JavaScript:
<li onclick="console.log('This h3 has been clicked!')">Add</li>Then, we showed how to do the same thing using external JavaScript:
<li onclick="remove()">Remove</li>To do this, we learned about JavaScript functions which allow us to store JavaScript statements to execute at a later time:
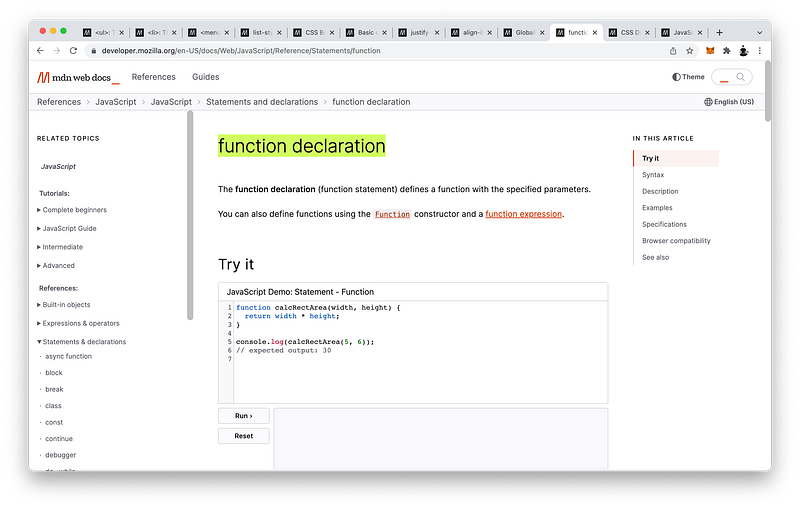
To declare a function, first we write function:
functionThen, the name of the function:
function removeThen, parentheses:
function remove()Followed by curly braces:
function remove() {}
Like CSS declarations, we can have as many JavaScript statements as we like:
As long as we end each statement with a semicolon:
function remove() {
 console.log("Now removing a measure...");
}Again, semicolons are sometimes optional in JavaScript. It’s a pretty complex subject known as Semicolon Injection which we will cover in Unit 4.
Lastly, we pointed out some conventions we should follow when naming our functions:
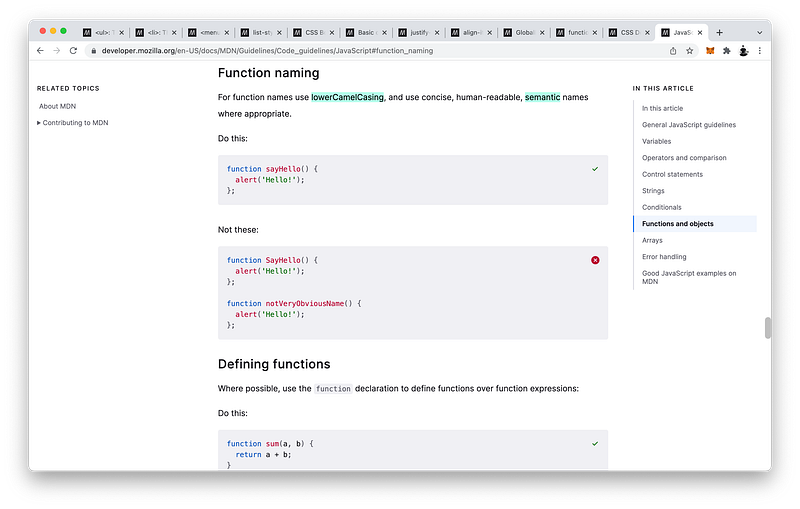
Firstly, the function name should be semantic which basically means it should be obvious what it does from just reading its name:
function addWholeNote() {
 console.log("Now adding a whole note...");
}Ideally, it should begin with a verb to signify that some action will be triggered.
Secondly, if the function name has multiple words, they should be combined and capitalized. This is called camel-casing:
add whole note => addWholeNoteFinally, the first letter of the function name should always be lower-cased:
addWholeNoteAgain, whenever you see parentheses, know that the name that precedes them is a function!
addWholeNote()The reason is because parentheses are reserved for functions only.
You may have seen that JavaScript classes have parentheses too. Believe it or not, classes are actually functions too which we will discuss in Unit 4.
Concept Quiz
Take my Programming Concept Quiz to check your understanding! For every correct choice, you will earn SW Coins which you can redeem for coupons towards the purchase of any of my Udemy courses!
Sample Quiz Questions for Lesson 19:
Question 1:
Which is NOT a list tag:
ulollimenu
Question 2:
Which list tag is NOT used to create an unordered list of items:
ulolmenu
Question 3:
Which list tag is used to create a list of interactive items:
ulolmenu
Question 4:
Which list tag is NOT used to create a list for display:
ulolmenu
Question 5:
Which CSS statement removes the bullet points:
list-style-type: disc;list-style-type: none;
Question 6:
Per CSS Box Alignment, we use which property to align items along the Main Axis:
justify-contentalign-items
Question 7:
Per CSS Box Alignment, we use which property to align items along the Cross Axis:
justify-contentalign-items
Question 8:
If the flex-direction is row, the Main Axis is:
- horizontal
- vertical
Question 9:
If the flex-direction is column, the Cross Axis is:
- horizontal
- vertical
Question 10:
Which is NOT an event handler:
onloadhoveronclick
Question 11:
Inside double quotes, we must use single quotes:
- True
- False
Question 12:
We should NOT end each JavaScript statement with a semicolon.
- True
- False
Question 13:
A function declaration does NOT require:
- function
- name
- ()
- *
- {}
Question 14:
A function enables us to execute a set of instructions at a later time.
- True
- False
Question 15:
The function name should begin with an action verb.
- True
- False
Question 16:
Which is an appropriate function name:
- add whole note
- AddWholeNote
- addwholenote
- addWholeNote
Question 17:
Which is NOT a function:
- console.log()
- addWholeNote
- addWholeNote()
→ Programming Concept Quiz for Chapter 19
Coding Exercises
Check out my Interactive Coding Exercises to put to practice what you have learned! There, you will also find interactive hints to help you understand each line of code. Likewise, for every correct solution, you will earn SW Coins which you can redeem for coupons towards the purchase of any of my Udemy courses!
→ Interactive Coding Exercises for Chapter 19
Syntax Flashcards
Review what you have learned by playing my Syntax Flashcard Game! These flashcards are designed to help you commit to memory all the new code syntaxes you learned in this lesson. Likewise, for every correct answer, you will earn SW Coins which you can redeem for coupons towards the purchase of any of my Udemy courses!
→ Syntax Flashcard Game for Chapter 19
Next Steps
Congrats on completing Unit 3: Lesson 1 of 20! 🎉
Unit 1: 100% Completed
Unit 2: 100% Completed
Unit 3: 5% Completed
Unit 4: 0% Completed
Unit 5: 0% Completed
Bonus Unit 6: 0% Completed
Bonus Unit 7: 0% Completed
Overall Progress: 19% Completed→ Join Remote Frontend Cohort Program
Next Lesson
Again, our goal is to hide all the submenus, and whenever our users hover over the menu tabs, the corresponding submenu should reappear. To prepare us for this, we will need to learn some advanced CSS selectors such as pseudo-elements and pseudo-classes. As for JavaScript, we will learn all the corresponding advanced selector functions. Get ready to take everything you learn in Unit 1 and Unit 2 to the next level!
→ Chapter 20: Advanced CSS Selectors and JavaScript Selector Functions
When you use my referral link above 👆 to become a Medium member, all proceeds will be donated towards the construction of the Silicon Wat Campus for children in Ukraine and Cambodia ❤️