
Chapter 18: CSS Web Fonts and Colors
A Complete Frontend Developer Textbook for Beginners (2023 Edition)

This is the textbook version of Lesson 18 of 100 from the Udemy video course: A Complete Frontend Developer Course for Beginners
← Chapter 17: HTML Content Tags and Styles
Overview
This lesson covers the following HTML tags, CSS properties, and JavaScript commands for the first time:
HTML
None.
CSS
JS
None.
This lesson begins with this Codepen. Code along with me to increase retention!
Lecture
In this last lesson of Unit 2, let’s learn how to change the font and color of all our text contents!
HTML Window:<html>
<head></head>
<body>
<header>
<q cite="https://flat.io">
<strong>Write music online, together.</strong>
</q>
<blockquote cite="https://flat.io">
<b>Flat</b>
is a
<s>collaborative</s>
music notation platform for
<mark>
beginner composers and professionals
<u>alike.</u>
</mark>
<sup>[1]</sup>
</blockquote>
<figure>
<img src="https://prod-site.flat-cdn.com/img/f42b25c.webp" height="170" />
<figcaption>
[1]
<cite>Flat.io</cite>
</figcaption>
</figure>
</header>
<main>
<dl>
<dt>Note</dt>
<dd>Indicates a pitch and rhythmic value when written on a staff.</dd>
<dt>
Staff
<sub>[a]</sub>
</dt>
<dd>Consists of five horizontal lines that are evenly spaced.</dd>
</dl>
<hr />
<small>
[a] The plural form of staff is
<em>staves.</em>
</small>
<hr />
</main>
<footer>
<address>
<a href="mailto:[email protected]">[email protected]</a>
<br />
London, England
</address>
<small>
© 2021
<br />
Last edited on
<time>9/7/21</time>
</small>
</footer>
</body>
</html>To set a font for the entire document, it’s customary to declare it at the root level:
html {

}
The font is like metadata that describe the overall document, so this makes sense. Moreover, by declaring it at the highest level of the HTML Tree, all the children and their descendants inherit all the font properties by default.
There are six properties that affect the font. Let’s begin with the font-family.
Font Family
html {
font-family:
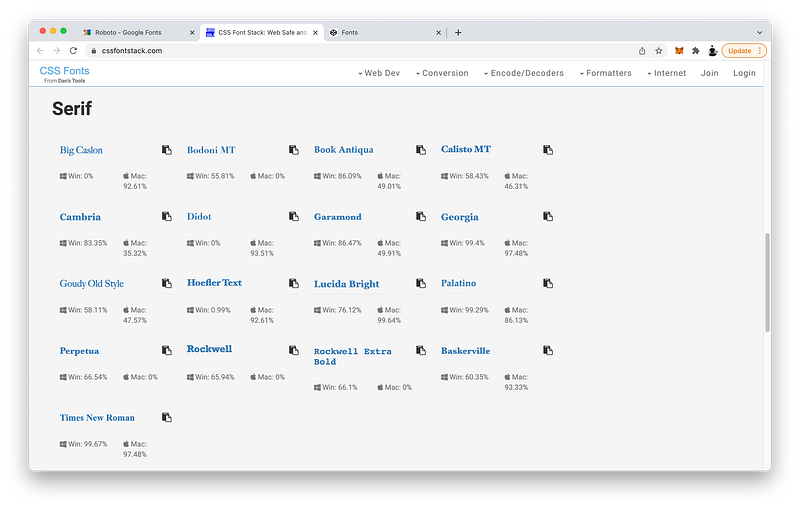
}The most generic font families are serif and sans-serif.
The default is serif:
html {
 font-family: serif;
}
As you can see, the main characteristic of this family is the pointy edges of each letter.
Now, compare this with sans-serif:
html {
 font-family: sans-serif;
}
As you can see, this family has no pointy edges. Consequently, each letter is nice and smooth. As a matter of fact, sans is a Latin word that means without.
serif = with pointy edges
sans-serif = without pointy edges
There are many font typefaces that make use of these serifs:
And there are many others that do not:
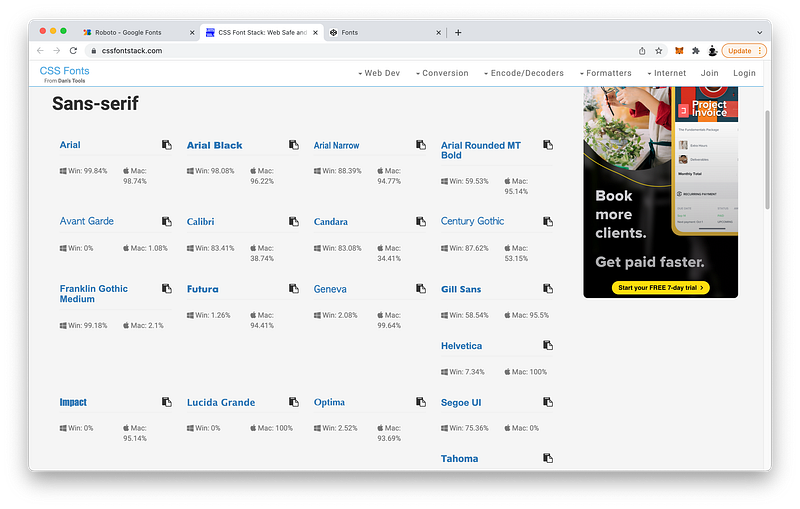
For example, Geneva:
html {
 font-family: Geneva, sans-serif;
}
If want to use a more specific typeface like Geneva, it is a best practice to also include the generic family the typeface belongs to:
html {
 font-family: Geneva, sans-serif;
}
This way, if the user’s machine does not support the typeface, CSS can at least default to something similar.
As indicated here:
Mac: 99.64%
Win: 2.08%
Geneva is widely supported on Mac computers, but not on Windows.
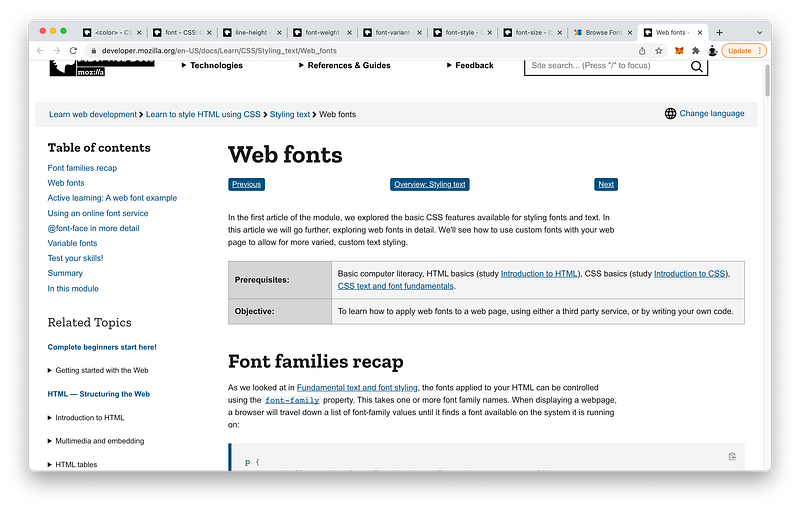
If we want a typeface that is supported everywhere, we can use a web font instead of a system font like Geneva.
For example, at Google Fonts, with category of sans-serif, we can choose a typeface of Roboto:
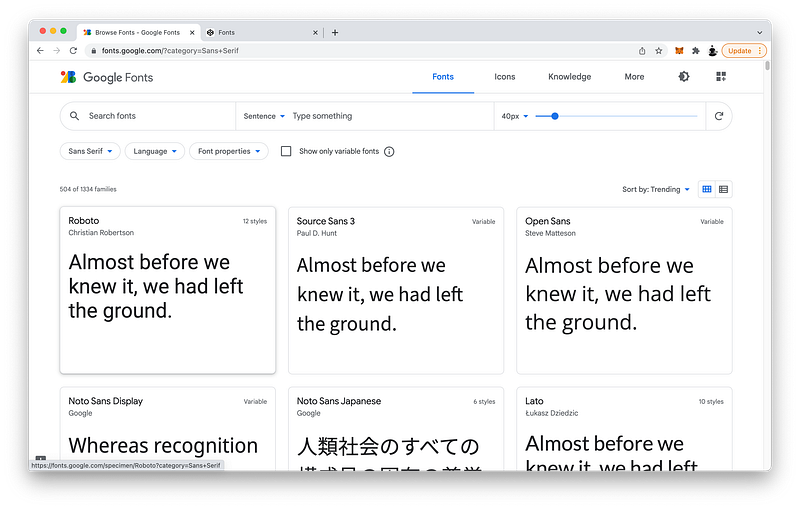
Let’s try to add it:
html {
 font-family: Roboto, Geneva, sans-serif;
}
Why is it not working…?
To make a web font work, we need to first import it.
To do that, go back to Google Fonts:
- Select Roboto
- Select the Style you want
- Select @import
- Then copy the CSS code
Now, paste this code at the top:
@import url('https://fonts.googleapis.com/css2?family=Roboto:wght@100&display=swap');html {
font-family: Roboto, Geneva, sans-serif;
}Looks awesome, right? 😎
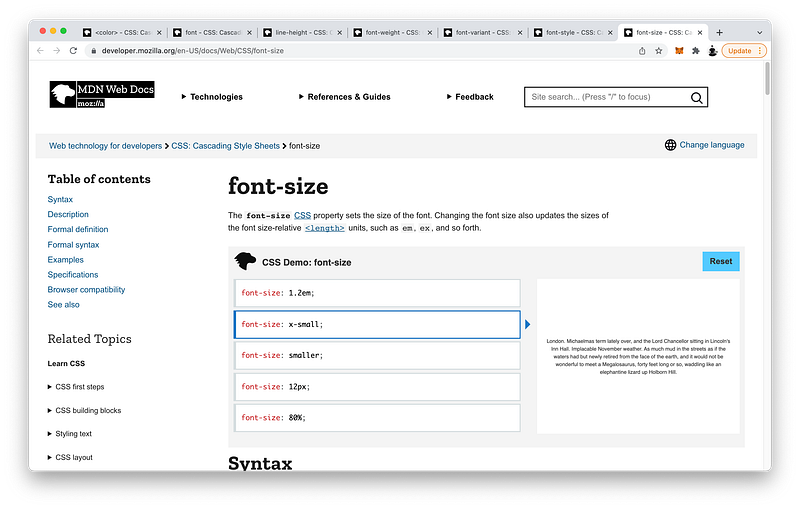
Font Size
Let’s now look at font-size:
html {
 font-family: Roboto, Geneva, sans-serif;
 font-size:
}
First, let’s begin with absolute units.
Of course, we can always use px. For example:
html {
 font-family: Roboto, Geneva, sans-serif;
 font-size: 32px;
}
Or, we can use the point system of typography. In this example, 32px is equivalent to:
html {
 font-family: Roboto, Geneva, sans-serif;
 font-size: 24pt;
}
We can also use simple keywords like:
html {
 font-family: Roboto, Geneva, sans-serif;
 font-size: xx-large;
}
Which is also equivalent to 32px.
Again, by specifying xx-large at the root level, every child and every descendant inherit this font-size by default.
root: absolute unitWhen specifying the font-size of these descendants, the best practice is to use relative units instead.
descendants: relative unitsFor example, if we use percentages on the body element:
body {
 font-size: 50%;
}
Its font-size is now half of the default size it inherited from the root.
As you can see, this also means every child and descendant of body now inherit this new font-size instead.
To drive this point home, let’s go down one more generation to the children of body.
In the header for example, what do you think will happen if we specify:
header {
 font-size: 50%;
}
As you can see, its font-size is halved yet again.
Instead of using percentages, we can use the decimal form called em.
For example in main, we can set the font-size to:
main {
 font-size: 0.5em;
}
Which is 50% written as a decimal.
In the footer, let’s look at another relative unit. If we set the font-size to:
footer {
 font-size: 0.5em;
}
We know it will be half of the font-size of body, which is its nearest ancestor.
What if we want it to be relative to the root font-size instead?
We can with the unit called root em:
footer {
font-size: 0.5rem;
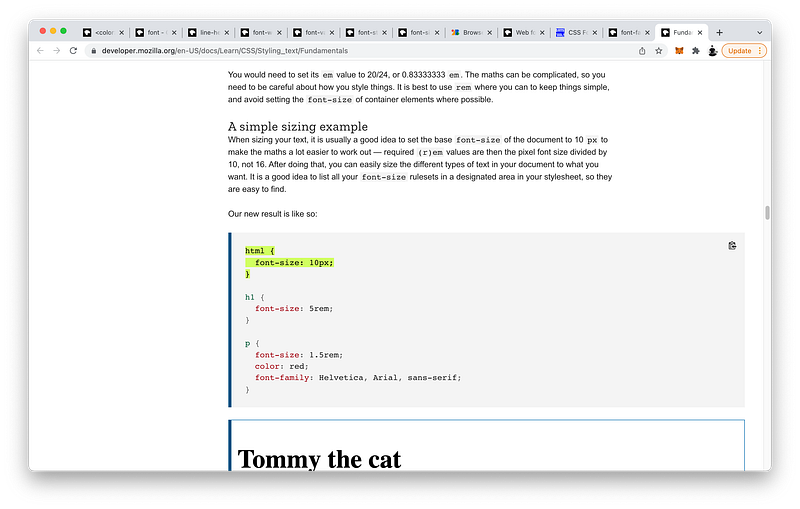
}Lastly, for your information, it is possible to make the font-size dynamic by making it relative to the viewport. For example:
html {
 font-family: Roboto, Geneva, sans-serif;
 font-size: 10vw;
}
The finished Codepen:
To recap, the best practice is to specify the font-size as an absolute unit at the root of the HTML Tree. Relative to this font-size at the highest ancestor, we specify the font-size of all the descendants in relative units.
Structured in this responsive and accessible way, one simple change at the top trickles down to all the descendants automatically.
Font Shorthand
Let’s now look at the remaining font properties.
By default, font-style is set to normal:
html {
 font-family: Roboto, Geneva, sans-serif;
font-size: 10vw; font-style: normal;
}If we want, we can change it to:
html {
 font-family: Roboto, Geneva, sans-serif;
font-size: 10vw; font-style: italic;
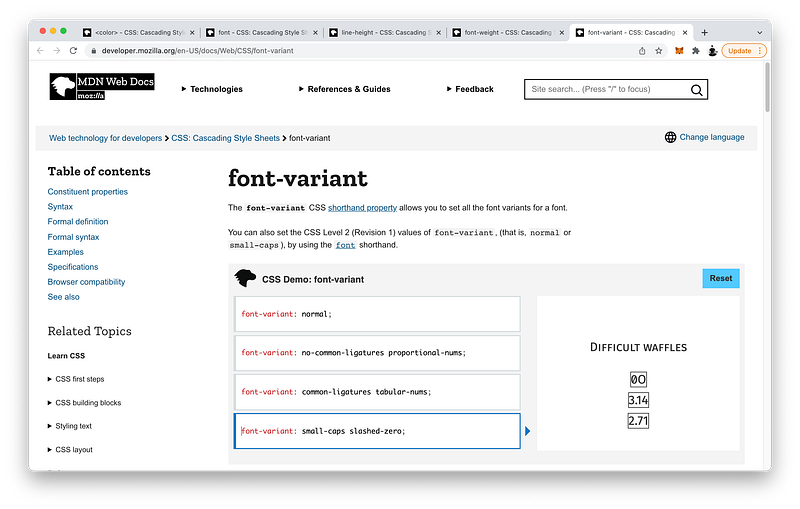
}By default, font-variant is set to normal as well:
html {
 font-family: Roboto, Geneva, sans-serif;
font-size: 10vw; font-style: italic;
font-variant: normal;
}If we want, we can change it to:
html {
 font-family: Roboto, Geneva, sans-serif;
font-size: 10vw; font-style: italic;
font-variant: small-caps;
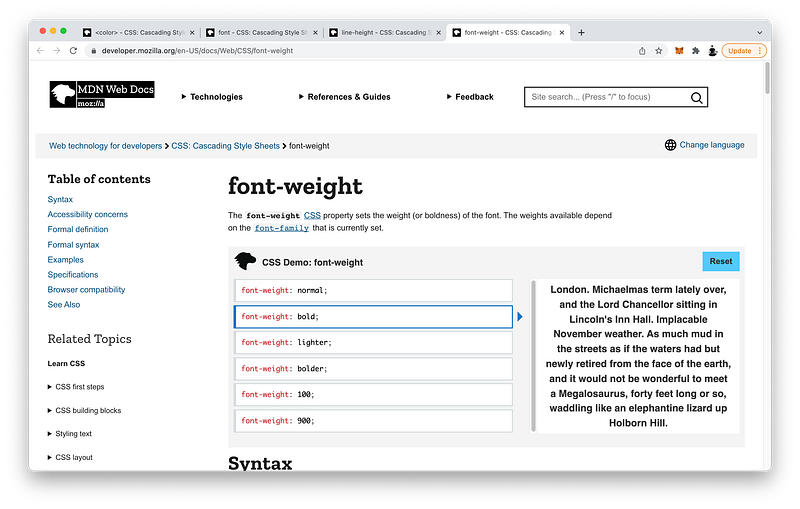
}By default, font-weight is also set to normal:
html {
 font-family: Roboto, Geneva, sans-serif;
font-size: 10vw; font-style: italic;
font-variant: small-caps;
font-weight: normal;
}If we want, we can change it to a number between 1 and 1000. For example:
html {
 font-family: Roboto, Geneva, sans-serif;
font-size: 10vw; font-style: italic;
font-variant: small-caps;
font-weight: 700;
}Or, we can simple keywords like:
html {
 font-family: Roboto, Geneva, sans-serif;
font-size: 10vw; font-style: italic;
font-variant: small-caps;
font-weight: bold;
}Which is equivalent to 700.
Or:
html {
 font-family: Roboto, Geneva, sans-serif;
font-size: 10vw; font-style: italic;
font-variant: small-caps;
font-weight: bolder;
}Which is 1 font-weight heavier than the parent element.
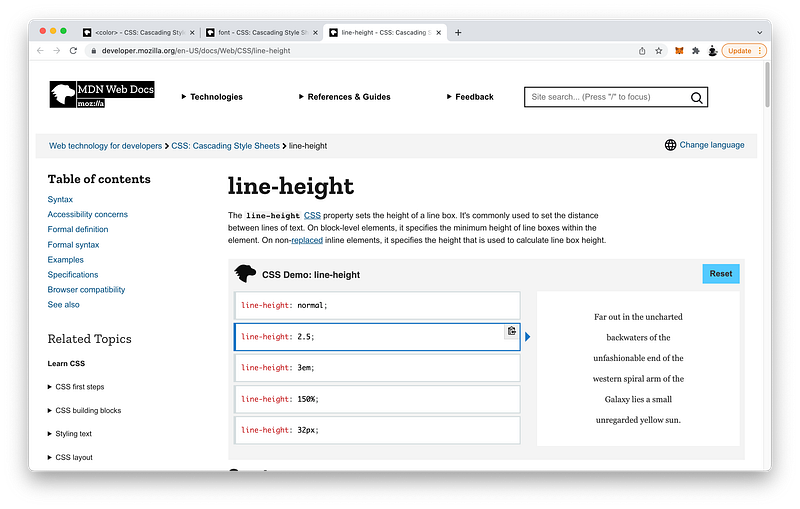
Finally, line-height is set to normal by default as well:
html {
 font-family: Roboto, Geneva, sans-serif;
font-size: 10vw; font-style: italic;
font-variant: small-caps;
font-weight: 700;
line-height: normal;
}If we want, we can double it for example:
html {
 font-family: Roboto, Geneva, sans-serif;
font-size: 10vw; font-style: italic;
font-variant: small-caps;
font-weight: 700;
line-height: 2;
}As you can see, line-height sets the distance between lines of texts.
To review, there are six properties that affect the font:
- font-family
- font-size
- font-style
- font-variant
- font-weight
- line-height
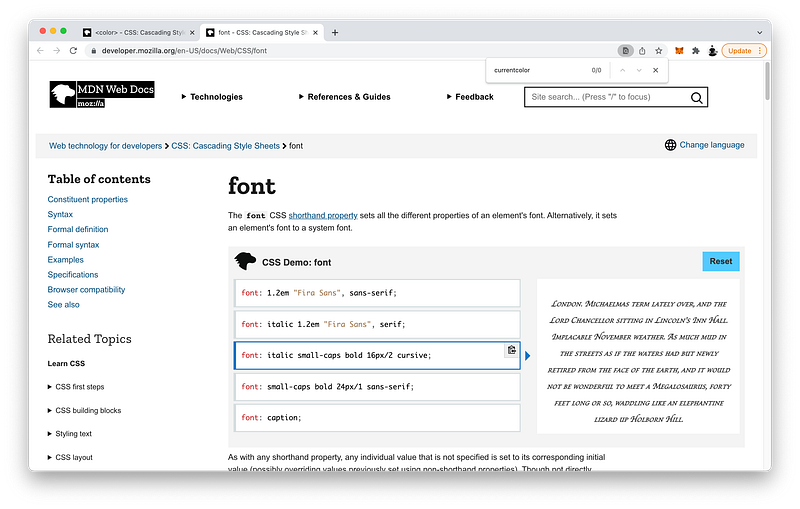
Since they all belong together, we have the option to write them all in just one line using the font shorthand like this:
html {
 font: italic small-caps bold 10vw / 2 Roboto, Geneva, sans-serif;
}
The style, variant, and weight must appear before the size:
html {
 font: italic small-caps bold 10vw / 2 Roboto, Geneva, sans-serif;
}
The line-height must appear immediately after the size separated by a slash:
html {
 font: italic small-caps bold 10vw / 2 Roboto, Geneva, sans-serif;
}
The family must appear last:
html {
 font: italic small-caps bold 10vw / 2 Roboto, Geneva, sans-serif;
}
For this font shorthand to work, the size and family must be specified at the minimum:
html {
 font: italic small-caps bold 10vw / 2 Roboto, Geneva, sans-serif;
}
Color Property
Finally, let’s look at color in greater detail using the address element as an example:
address {

}
As we have seen in the previous lesson, to change the text color of the address‘s textNodes, we can specify a color property. For example:
address {
color: red;
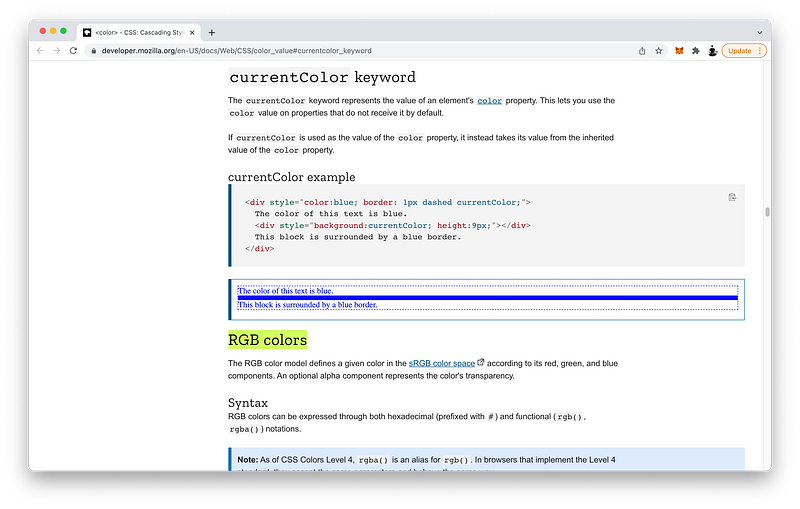
}When we specify a color property, we can also use it for another purpose. The color property is linked to a special keyword called currentColor.
For example, let’s add a red border around the address element. To do this, we can write:
address {
 color: red;
 border: 3px solid red;
}
But since currentColor is linked to the color property which is red, we can write this instead:
address {
 color: red;
 border: 3px solid currenColor;
}
And it still works!
However, there is a rule we have to remember:
currentColor is linked to the color property that is defined in the current element or its parent or ancestor. Whichever is nearest has priority.
currentColor: nearest ancestor's colorLet’s demonstrate this. First, let’s try deleting the color property inside the address element:
address {
 [deleted]
 border: 3px solid currenColor;
}
The border has turned to black.
Why is that?
Since there is no color property at the current element, CSS will travel up to its parent which is the footer to see if there is a color property.
<html>
<head></head>
<body>
<header>
...
</header>
<main>
...
</main>
<footer>
<address>
<a href="[email protected]">[email protected]</a>
<br />
London, England
</address>
<small>
© 2021
<br />
Last edited on
<time>9/7/21</time>
</small>
</footer>
</body>
</html>Since the footer has no color property either, CSS will travel up again to the body to check.
<html>
<head></head>
<body>
<header>
...
</header>
<main>
...
</main>
<footer>
<address>
<a href="[email protected]">[email protected]</a>
<br />
London, England
</address>
<small>
© 2021
<br />
Last edited on
<time>9/7/21</time>
</small>
</footer>
</body>
</html>Since body has no color property either, CSS will travel up yet again to html:
<html>
<head></head>
<body>
<header>
...
</header>
<main>
...
</main>
<footer>
<address>
<a href="[email protected]">[email protected]</a>
<br />
London, England
</address>
<small>
© 2021
<br />
Last edited on
<time>9/7/21</time>
</small>
</footer>
</body>
</html>CSS will keep looking up the HTML Tree until it finds a color property. If it reaches the root tag without finding a color property, it will use the default color of black.
Let’s prove this by defining a color property on the body:
body {
 color: green;
}
As you can see, it works!
To drive this point home, let’s try to change the color of a to green as well by using currentColor. We can achieve this using the :link pseudo-class:
a:link {
 color: currentcolor;
}
Awesome!
Again, this works because the a tag is a descendant of the body tag where the color property is defined.
Why is having the keyword currentColor useful?
currentColor acts like a variable that contains the value of the color property. And we can use it on any descendants.
By simply changing the color here at the top of the HTML Tree in only one location:
body {
 color: red;
}
We can quickly change all the colors of the descendants in the HTML Tree.
In effect, this makes creating color themes effortless. CSS variables like currentColor are a very powerful concept which we will explore in great detail in Unit 4.
The finished Codepen:
Summary
In this lesson, we learned that a best practice is to declare all our default font properties and color at the top of the HTML Tree on the html tag:
From here, every descendant inherits any CSS properties we declare by default.
To set the font of our texts, we begin by specifying the font-family we like to have:
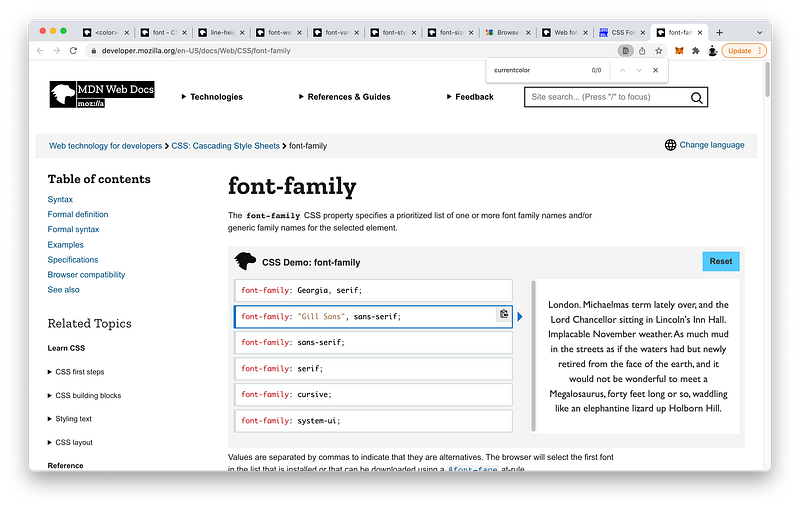
A best practice is to declare a list of family names from the most specific to the most generic.
font-family: "Gill Sans", sans-serif;This way, if the user’s machine does not support the specific font-family, CSS can simply default to the generic one.
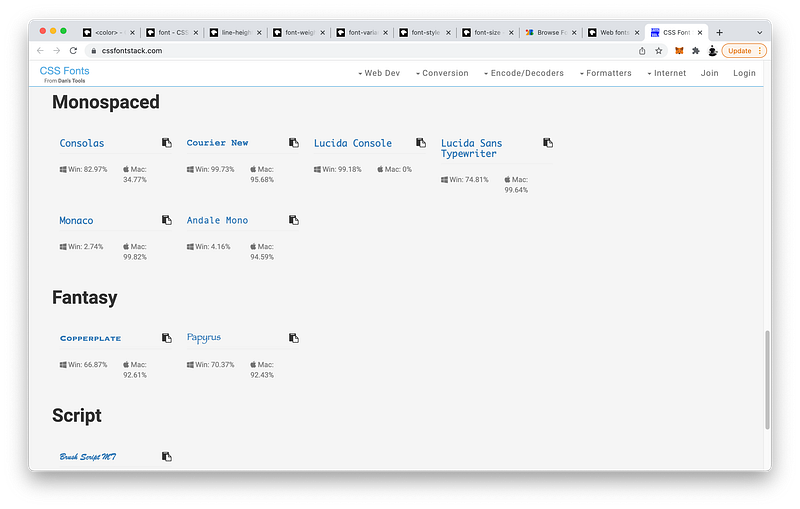
Most font families are categorized as serif which have pointy edges, or sans-serif, which have smooth edges.
Other font categories are:
- monospaced
- fantasy
- script
If we want a typeface that is guaranteed to be supported everywhere, we can use web fonts:
Google offers many web fonts we can choose from:
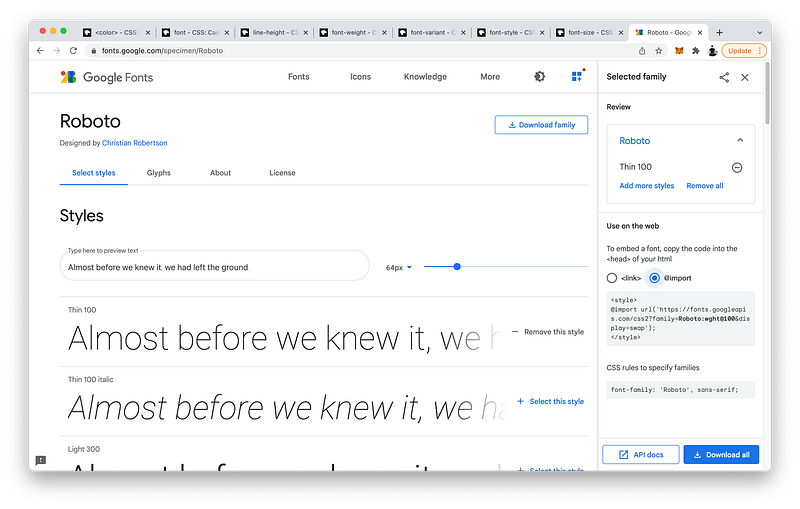
We just need to import the ones we want into our CSS code:
@import url('https://fonts.googleapis.com/css2?family=Roboto:wght@100&display=swap');The next font property we can set is the font-size:
We can use absolute units like pixels, points, or keywords. Or, we can use relative units like percentages, em’s, or rem’s.
In fact, we can even make the font-size dynamic by relating it to the viewport width or viewport height!
Other font properties we can set are:
The font-style:
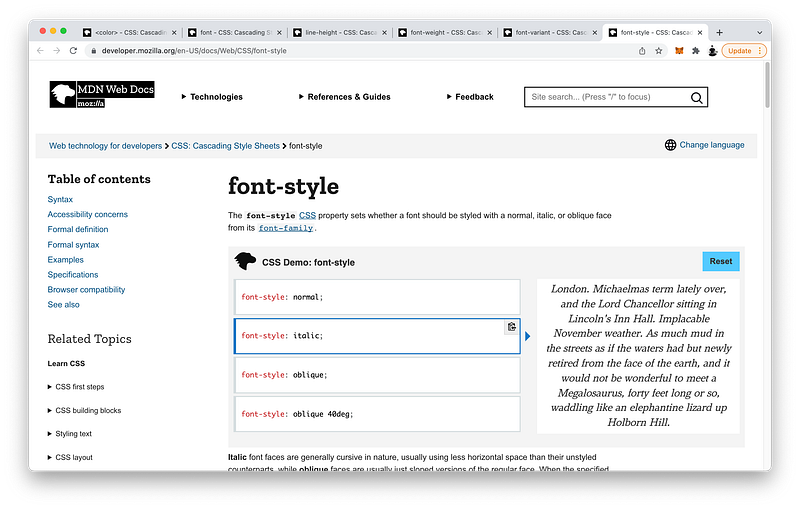
We can make it normal, italic, or oblique.
For the font-variant, we can make it normal, or small-caps for example:
For the font-weight, we can make it normal, or bold for example:
Finally, for the line-height, we can make it normal, or 2.5 for example:
For our convenience, we can declare all these font properties at once using the font shorthand:
We just need to remember that:
- The style, variant, and weight must appear before the size.
- The line-height must appear immediately after the size separated by a slash.
- The family must appear last.
At a minimum, the family and size must be specified.
Lastly, we looked at a special keyword called currentColor which acts like a variable that points to the value of the color property of the nearest ancestor.
By changing just the value of the color property, all descendants that use the variable currentColor will inherit it automatically.
<div style="color:blue; border: 1px dashed currentColor;">
  The color of this text is blue.
  <div style="background:currentColor; height:9px;"></div>
  This block is surrounded by a blue border.
</div>
Consequently, this makes creating color themes effortless!
Concept Quiz
Take my Programming Concept Quiz to check your understanding! For every correct choice, you will earn SW Coins which you can redeem for coupons towards the purchase of any of my Udemy courses!
Sample Quiz Questions for Lesson 18:
Question 1:
A best practice is to declare default font properties at what level of the HTML Tree?
htmlbodymain
Question 2:
Which font-family has pointy edges?
serifsans-serif
Question 3:
Which font-family has smooth edges?
serifsans-serif
Question 4:
It is a best practice to always include a generic font-family.
- True
- False
Question 5:
A web font is NOT guaranteed to be supported everywhere.
- True
- False
Question 6:
To use a web font, we need to @import it.
- True
- False
Question 7:
Which is NOT an absolute unit?
pxptxx-largevw
Question 8:
Which is NOT a relative unit?
%emremvhxx-small
Question 9:
50% is equivalent to:
50em5em0.5em
Question 10:
Which unit is relative to the font-size of the root element?
emrem
Question 11:
Which unit is relative to the font-size of the parent element?
emrem
Question 12:
In the shorthand, which font property cannot appear before the font-size?
- font-style
- font-variant
- font-weight
- font-family
Question 13:
In the shorthand, the line-height must appear immediately after the font-size separated by a slash.
- True
- False
Question 14:
In the shorthand, which font property is NOT required?
- font-size
- font-family
- line-height
Question 15:
The variable currentColor is linked to which property?
- background-color
- border-color
- color
Question 16:
Changing the value of the color property will affect which tags that use currentColor?
- all ancestors above the color property
- all descendants below the color property
Question 17:
The variable currentColor points to the value of the color property of the nearest:
- ancestor
- descendant
→ Programming Concept Quiz for Chapter 18
Coding Exercises
Check out my Interactive Coding Exercises to put to practice what you have learned! There, you will also find interactive hints to help you understand each line of code. Likewise, for every correct solution, you will earn SW Coins which you can redeem for coupons towards the purchase of any of my Udemy courses!
→ Interactive Coding Exercises for Chapter 18
Syntax Flashcards
Review what you have learned by playing my Syntax Flashcard Game! These flashcards are designed to help you commit to memory all the new code syntaxes you learned in this lesson. Likewise, for every correct answer, you will earn SW Coins which you can redeem for coupons towards the purchase of any of my Udemy courses!
→ Syntax Flashcard Game for Chapter 18
Next Steps
Congrats on completing Unit 2: Lesson 13 of 13! 🎉
Unit 1: 100% Completed
Unit 2: 100% Completed
Unit 3: 0% Completed
Unit 4: 0% Completed
Unit 5: 0% Completed
Bonus Unit 6: 0% Completed
Bonus Unit 7: 0% Completed
Overall Progress: 18% Completed→ Join Remote Frontend Cohort Program
Next Unit
Now that we know how to properly structure and layout our HTML code, in Unit 3 our focus can shift to learning about the latest CSS syntax in depth. But like usual, HTML and JavaScript are interleaved to reinforce our understanding of their interrelationships.
Hence, the Title of Unit 3: CSS Concerto 😁

Again, as a model and for inspiration, we will look at Flat’s beautiful music editor. Notice the menu bar in the header, the music score in the main, and the virtual piano in the footer. As we progress through this Unit, we will build these sections piece by piece. By the end, all three sections will be connected and interactive. For example, clicking on any piano key will generate the corresponding musical note on the score sheet instantly! Sounds awesome, right? To make it play the actual sound, however, you will need to wait until Unit 4: JavaScript Concerto 😆
Next Lesson
In the first lesson of this Unit, we will begin by creating the overall layout of our music editor. To make this easy and responsive, we will use CSS Flexbox not only for our layout, but for aligning our elements and textNodes both horizontally and vertically. To start, we will apply these new concepts to perfectly distribute and center our menu options. Finally, we will end by introducing the most important programming construct in JavaScript: the function. Get ready to write increasingly more JavaScript code going forward!
→ Chapter 19: CSS Flexbox Alignment and JavaScript Function Declaration
When you use my referral link above 👆 to become a Medium member, all proceeds will be donated towards the construction of the Silicon Wat Campus for children in Ukraine and Cambodia ❤️


