
Chapter 1: Hello World
A Complete Frontend Developer Textbook for Beginners (2023 Edition)

This is the textbook version of Lesson 1 of 100 from the Udemy video course: A Complete Frontend Developer Course for Beginners
Overview
This lesson covers the following HTML, CSS, and JavaScript topics:
HTML
CSS
JS
To get the most from my lecture, please create a new Codepen and code along with me!
Don’t just watch me code! 👀
If necessary, pause, slow down, or speed up the video!
For students who prefer reading over watching, you can find nice transcripts of all my videos (with lots of diagrams and side notes) at my Medium.
Medium Textbook: transcripts + diagrams + side notesAt the end of each lecture, you are expected to code on your own. If you can do all three (read, watch, and code along with me), you will have no problem at all! 😎
Watch Video + Code Along + Read Textbook = A+ Student!Lecture
Hello World! 👋
Since Codepen is where we will spend most of our time, let’s go over it again — but this time in more detail.
Codepen
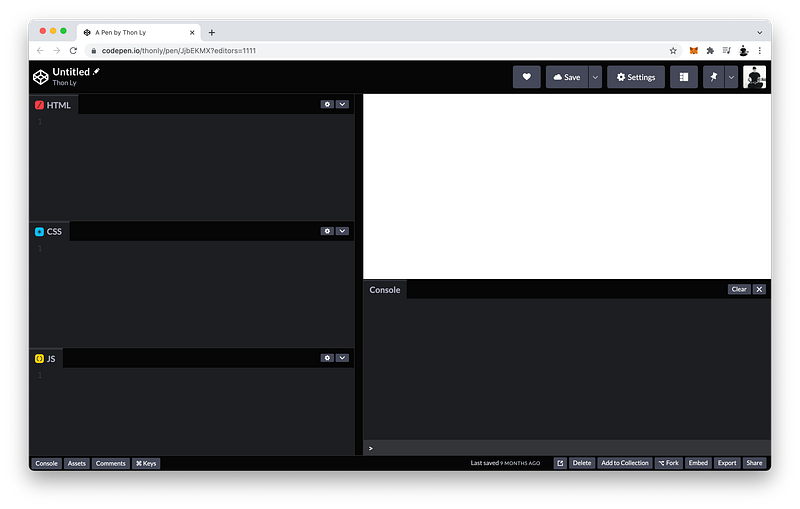
As the name suggests, this first window (top left) is where we write our HTML code. This second window (middle left) is where we write our CSS code. And this third window (bottom left) is where we write our JavaScript code.
Top Left: HTML Window
Middle Left: CSS Window
Bottom Left: JS Window
These three codes get rendered by the browser into this window (top right) for the users of our website to see and interact with.
Top Right: UI WindowFinally, this Console window (bottom right) is a special window for developers to easily interact with all the codes.
Bottom Right: Console WindowIn other words, this window (top right) is the User Interface (UI) window for the users, whereas this window (bottom right) is the “UI” window for the developers.
UI Window => Users
Console Window => Developers
Hello World
Let’s say “Hello” to the World which coders like to do at the start of a project.
HTML Window:Hello WorldIn the HTML, we can simply write Hello World, and it will appear in the UI window for our users to see.
UI Window:Hello WorldThat’s simple and all, but what if we want to give it a color?
Our data, in this case, is the text Hello World. To style it, we need to give this data more structure.
We can do this using HTML tags.
HTML Window:<p>Hello World</p>For example, we can use the p tag which stands for the paragraph tag.
Notice that these tags do not appear in the UI window.
UI Window:Hello WorldWe add these tags so that in the CSS window, we can select it like this:
CSS Window:p {}
Then, inside the curly braces, we can give it a color of orange:
CSS Window:p {
color: orange;
}Also, we can select this tag using JavaScript like this:
JS Window:document.querySelector("p")To verify that this tag was indeed selected, we can enter the same code in the Console window:
Console Window:document.querySelector("p")Then press Enter:
Console Window:<p>Hello World</p>And there it is! 😁
Codepen
The finished Codepen for this lesson:
Summary
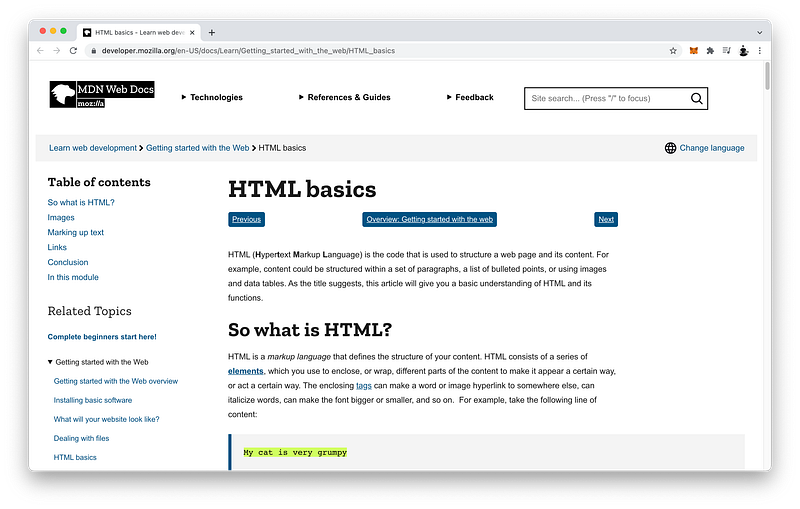
Let’s review what we have learned so far by referencing MDN. You can find the links to these articles in the Resource section of this lecture:
[TK: add screenshot here]
HTML Tags
Our data structure can be as simple as plain text like this in our HTML, and it will still appear in the UI for our users to see:
My cat is very grumpyBut to go beyond just plain text, our data needs more structure. We can do this by applying HTML tags like this:
<p>My cat is very grumpy</p>Basically, the syntax of every HTML tag has these parts:
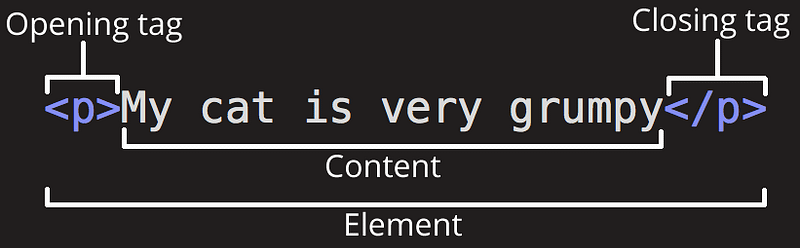
The plain text is known as the Content:
<p>My cat is very grumpy</p>The content is enclosed by an opening tag and a closing tag:
<p>My cat is very grumpy</p>Both tags are surrounded by angle brackets. The only difference is that the closing tag has an additional backslash:
<p>My cat is very grumpy</p>The type of tags is determined by its name:
<p>My cat is very grumpy</p>Clever by design, the more popular the tag, the shorter its name to save you time from typing so much.
Tags: more popular => shorter nameAltogether, these parts make up every HTML tags.
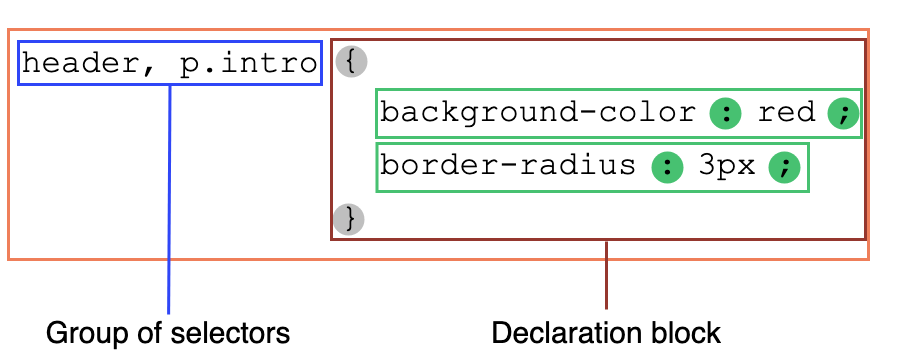
CSS Rulesets
Let’s review our CSS code using MDN as well. For now, it’s okay if you don’t understand everything that is written on MDN.
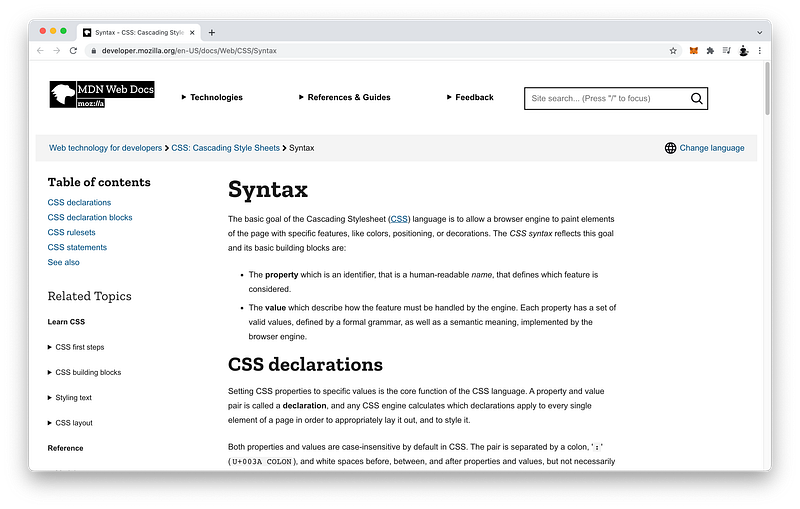
Again, we’re using MDN because it’s a best practice amongst Senior Engineers. Therefore, we should begin familiarizing ourselves with MDN as early as possible.
We apply HTML tags to our texts to give them structure.
That way, in our CSS code, we can select the contents inside our tags using a CSS ruleset like this:
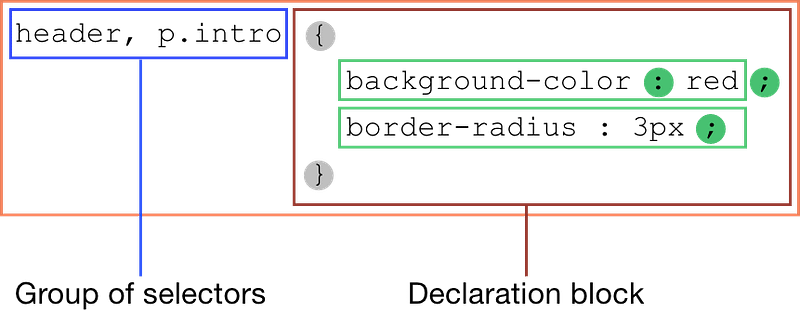
Basically, the syntax begins with a selector. For example, the name of our tag:
header, p.introFollowed by the declaration block enclosed inside curly braces:
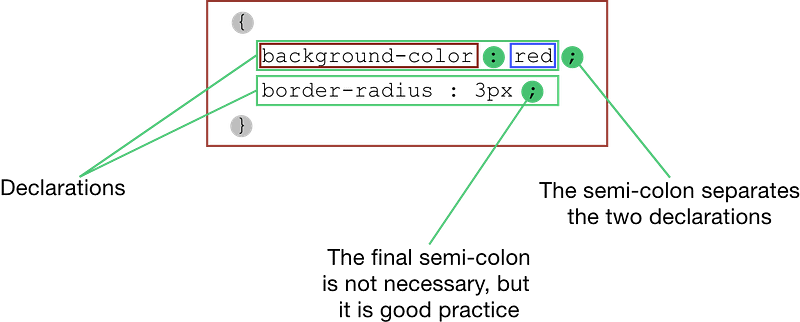
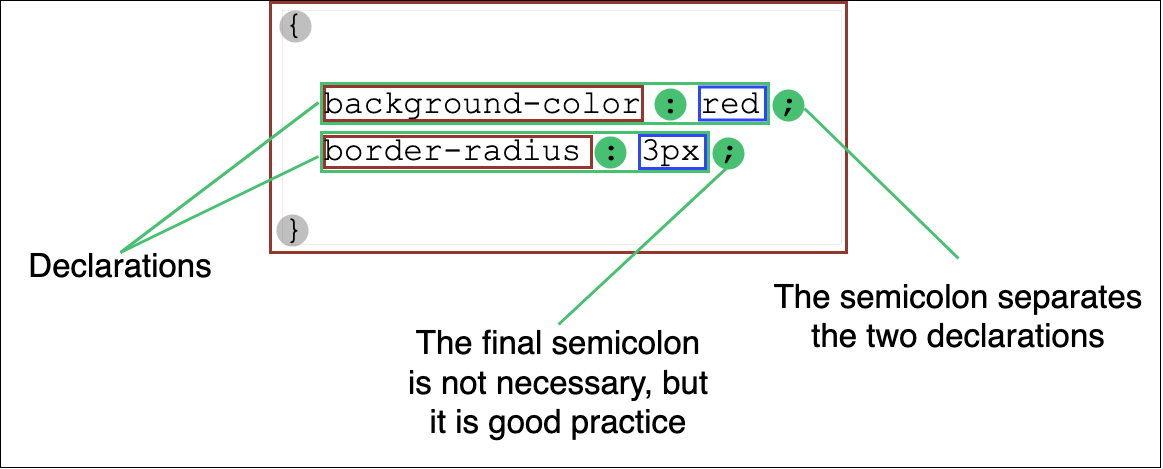
A declaration begins with the name of the property followed by the value separated by a colon:
{
   background-color : red ;
   border-radius : 3px ;
}
We can have as many declarations as we want; we just need to separate them by semicolons:
{
   background-color : red ;
   border-radius : 3px ;
}
JavaScript querySelector()
Finally, let’s review our JavaScript code using MDN.

By applying tags to our HTML code, we can select those tags using CSS code and JavaScript code.
In CSS and JavaScript, tags are referred to as elements. Lesson 3 will explain why!
To select any HTML element using JavaScript, we can use the following JavaScript code:
document.querySelector(selectors)For the selectors, we can type the name of our element inside double quotes:
document.querySelector("p")Keep in mind that HTML and CSS code are not case-sensitive, but JavaScript code is.
HTML/CSS: p = P
JavaScript: p ≠ P
For now, just focus on remembering this syntax. As we progress through the course, your understanding will deepen with practice.
Concept Quiz
Take my Programming Concept Quiz to check your understanding! For every correct choice, you will earn SW Coins which you can redeem for coupons towards the purchase of any of my Udemy courses!
Sample Quiz Questions for Lesson 2:
Question 1:
Do HTML tags appear in the UI window?
- Yes
- No
Question 2:
Which tag is a closing tag?
<p></p>
Question 3:
What is the CSS selector for the p element?
p{}
Question 4:
CSS declaration statements do not need to be inside {} .
- True
- False
Question 5:
What is the CSS declaration statement to make the color blue?
- color blue
- color: blue
- color: blue;
Question 6:
JavaScript code is not case sensitive.
- True
- False
Question 7:
How do we select a p element using JavaScript code?
document.querySelector(p)document.querySelector("p")
→ Programming Concept Quiz for Chapter 1
Coding Exercises
Check out my Interactive Coding Exercises to put to practice what you have learned! There, you will also find interactive hints to help you understand each line of code. Likewise, for every correct solution, you will earn SW Coins which you can redeem for coupons towards the purchase of any of my Udemy courses!
→ Interactive Coding Exercises for Chapter 1
Syntax Flashcards
Review what you have learned by playing my Syntax Flashcard Game! These flashcards are designed to help you commit to memory all the new code syntaxes you learned in this lesson.
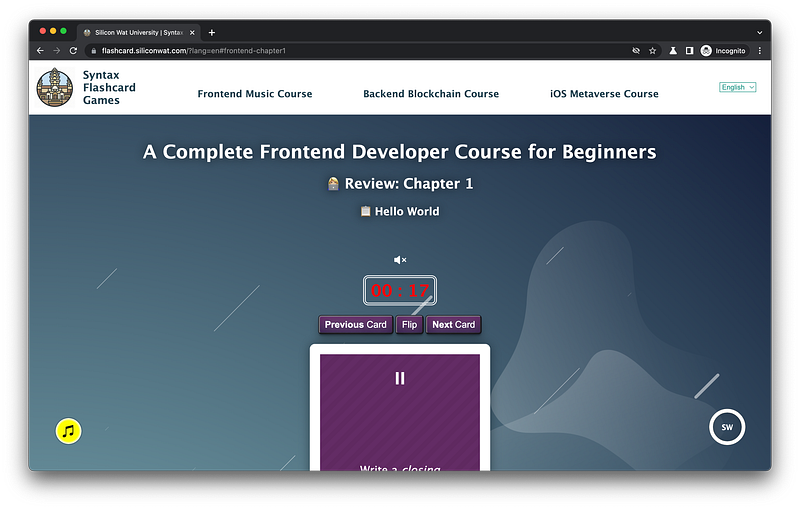
Likewise, for every correct answer, you will earn SW Coins which you can redeem for coupons towards the purchase of any of my Udemy courses!
→ Syntax Flashcard Game for Chapter 1
Next Steps
Now that you have experienced your first coding exercise, I would like to mention some good habits for you to get the most out of these coding exercises.
Step 1: Pass Quiz = at least 80% Correct + 90% ConfidenceMy quizzes are great for checking your understanding. If you’re able to score above 80% and you’re at least 90% confident in your answers, you’re ready to attempt my coding exercise! If not, rewatch my lectures again.
Step 2: Attempt Coding Exercise AloneTry your best to solve the problems yourself before checking my solutions. If you’re stuck, go back and rewatch my lectures pertaining to that problem.
Step 3: If Stuck => Rewatch LecturesThe solutions can be found somewhere in those lectures!
Tip: If necessary, you can lower the speed in the video settings!
Step 4: If Still Stuck => Check SolutionsIf you’re still stuck, then you may check my solutions.
If problems are too easy => Check Solutions anywayOn the other hand, if the problems are easy for you, and the solutions are obvious, check my solutions anyway. My approach may contain insights that you might not have realized.
Tip: If desired, you can increase the speed in the video settings!
If you think your approach is better => Share on Discord ServerIf you think your approach is better, please consider joining my Remote Cohort Program and sharing your insights in our private Discord Server with your fellow students.
Since you’re learning on your own without any supervision, it’s easy to cheat or skip these coding exercises. But if you can commit to doing them properly, you will definitely learn and grow a lot throughout this course.
Unit 1
You have completed the first lesson of this Unit!
Congrats! 🎉
As you have witnessed, we learn all three web languages (HTML, CSS, and JavaScript) together in parallel to help deepen our understanding of their interrelationships. As such, they are like the star musical instruments of an orchestra!
Hence, the Title of Unit 1: HTML/CSS/JS Orchestra 😁
As the Title implies, in this Unit, we simply focus on introducing the star instruments of our orchestra and how they interplay! As the course progresses, each star instrument performs a concerto, culminating in a grand symphony that harmonizes all three instruments. To actualize my analogy, commit yourself to finishing this entire course! 💪😄
→ Join Remote Frontend Cohort Program
Next Lesson
In the next lesson, we will learn about the Console window in more detail. We will learn how to log messages to the Console window from the Console itself and also from JavaScript using the log command. Master this foundational skill and you’re off to a great start!
→ Chapter 2: JavaScript Console
When you use my referral link above 👆 to become a Medium member, all proceeds will be donated towards the construction of the Silicon Wat Campus for children in Ukraine and Cambodia ❤️


