
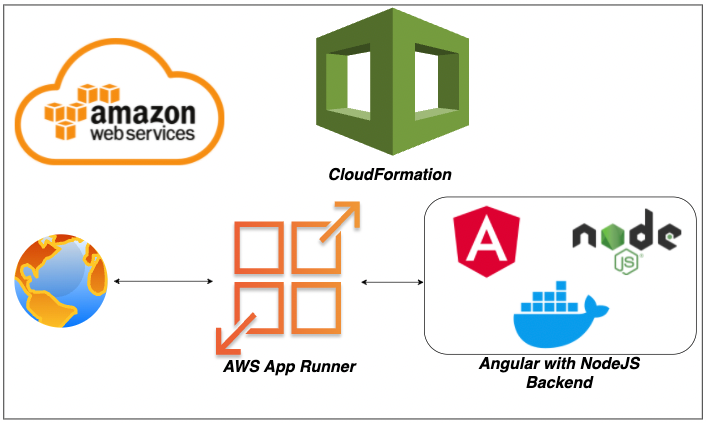
Automate Deploying Angular with NodeJS Docker Image on AWS App Runner through CloudFormation
A step by step guide with an example project
If you want to deploy your application on the managed platform by selecting the runtime, AWS App Runner is the right choice. You can run the whole WebApp with Docker runtime without any worry about the configuration from your side. AWS App Runner is an AWS service that provides a fast, simple, and cost-effective way to deploy straight from source code or a container image directly to a scalable and secure web application in the AWS Cloud.
You can dockerize the Angular with NodeJS Backend and deploy that in the Docker runtime. The Docker images can be pulled from ECR, etc. In this post, we will see how to automate deploying Angular with NodeJS Backend docker image on AWS App Runner through CloudFormation.
- Prerequisites
- Example Project
- Dockerize the Project
- Running the API on Docker
- Creating ECR With CloudFormation
- Pushing Docker Image To ECR
- Creating CloudFormation Template
- Deploy CF Template through Console
- AWS CloudFormation Commands
- Deploy CF Template through CLI
- Testing The WebApp
- Delete The Stack
- CF Example Project
- Summary
- Conclusion
Prerequisites
If you are new to Angular please go through the below link on how to develop and build the Angular project with NodeJS backend.
The other prerequisites to this post are Docker essentials. We are not going to discuss the basics such as what is a container or Docker. Below are the prerequisites you should know before going through this article
Docker Essentials
You need to understand Docker concepts such as creating images, container management, etc. Below are some of the links that you can understand about Docker if you are new.
- Docker Docs
- Docker — A Beginner’s guide to Dockerfile with a sample project
- Docker — Image creation and Management
- Docker — Container Management With Examples
- Understanding Docker Volumes with an example
AWS Prerequisites
Amazon is the leading cloud provider and pioneered Cloud Computing. AWS provides more than 200 services, and it’s very important to know which service you should select for your needs.
If you are new to AWS or just getting started you can see the following article.
Example Project
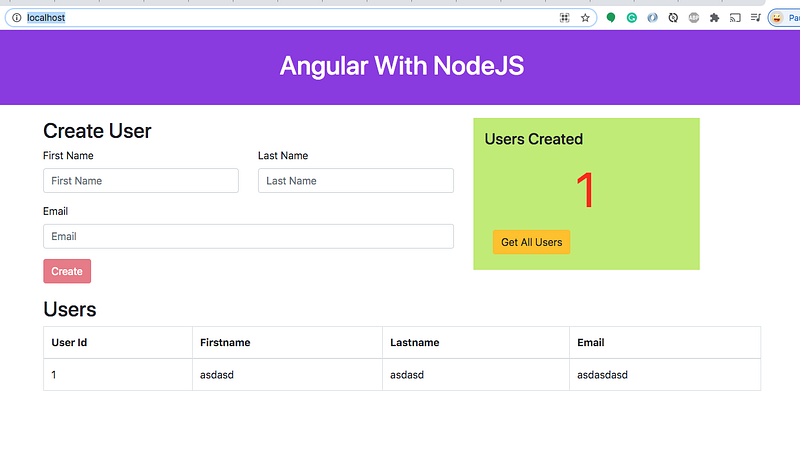
This is a simple project which demonstrates developing and running an Angular application with NodeJS. We have a simple app in which we can add users, count, display them at the side, and retrieve them whenever you want.
If you want to practice your own here is a Github link to this project. You can clone it and run it on your machine as well.
// clone the project
git clone https://github.com/bbachi/angular-nodejs-ecs.git
// install Angular dependencies and start
cd my-app
npm install
npm start// install server side dependencies and start
npm install
npm run devDockerize the Project
AWS App Runner is an AWS service that provides a fast, simple, and cost-effective way to deploy straight from source code or a container image directly to a scalable and secure web application in the AWS Cloud.
Here is the Dockerfile and it is using multi-stage builds to reduce the image size and surface attacks.
Here are the commands to build the image and run it on the Docker engine on your local machine. If you are new to Docker and check this detailed post on this topic.
// build the image
docker build -t angular-node-image .
// list the image you just built
docker imagesRunning the WebApp on Docker
Now, we have the docker image and let’s run the container once it is up and running you can access the web app at http://localhost:80
// running on Image
docker run -d -it -p  80:80 --name ang-node-ui angular-node-image
// list the container
docker ps// logs
docker logs ang-node-ui// exec into running container
docker exec -it ang-node-ui /bin/sh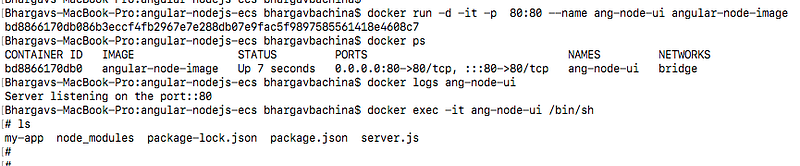
Creating ECR With CloudFormation
First, you need to understand the anatomy of the CloudFormation template. We can’t go through everything here you can look at the AWS Cloudformation docs here.
AWSTemplateFormatVersion: "version date"Description:
StringMetadata:
template metadataParameters:
set of parametersRules:
set of rulesMappings:
set of mappingsConditions:
set of conditionsTransform:
set of transformsResources:
set of resourcesOutputs:
set of outputsThe only required one is the Resources of all these options in the template file. Below is the template YAML file with which we are creating the ECR repository through CloudFormation.
The first one is the version and description. The version has only one value and in the description, you can put anything about your repo or deployment. Since it’s an ECR Repository, I have given the following description.
The next main thing is the Resources section. Since we are creating only one resource which is AWS AppRunner, I have added one resource called ECRRepo. You can name it anything you want and the type is obviously AWS::ECR::Repository. The main thing here is adding a policy text where the users specified only can push the image into the repository. In production, you should create a role here.
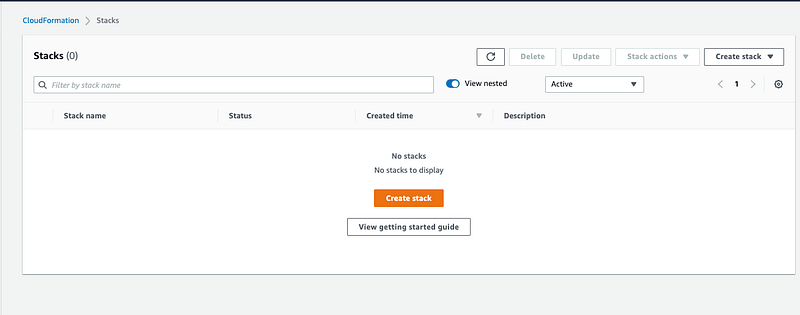
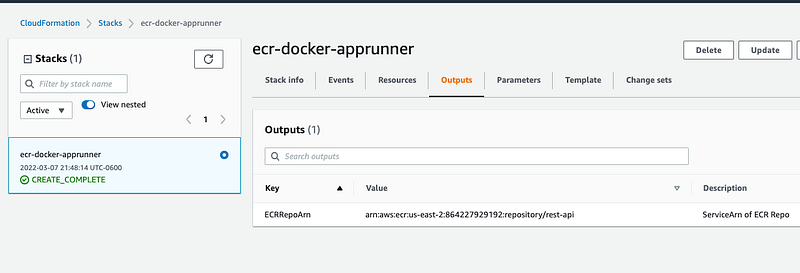
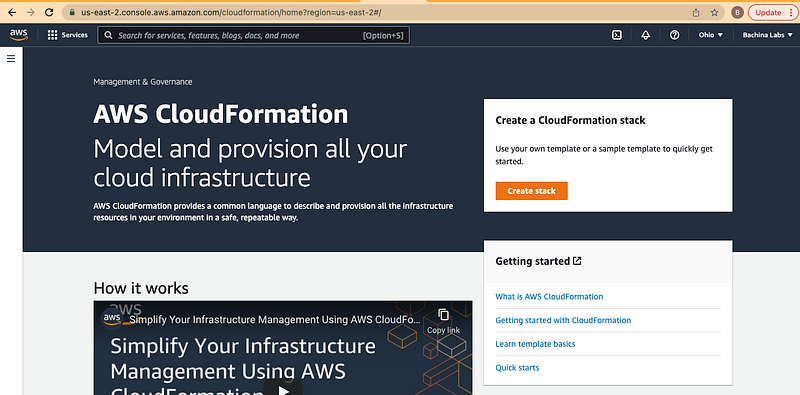
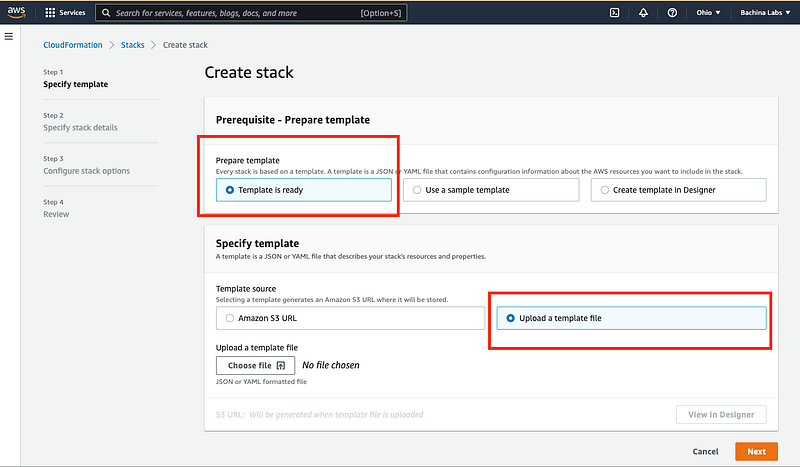
The output section contains the ARN of the ECR repository. Let’s create this stack through AWS Console. You can do it either console or AWS CLI. You can click on the Create Stack button.
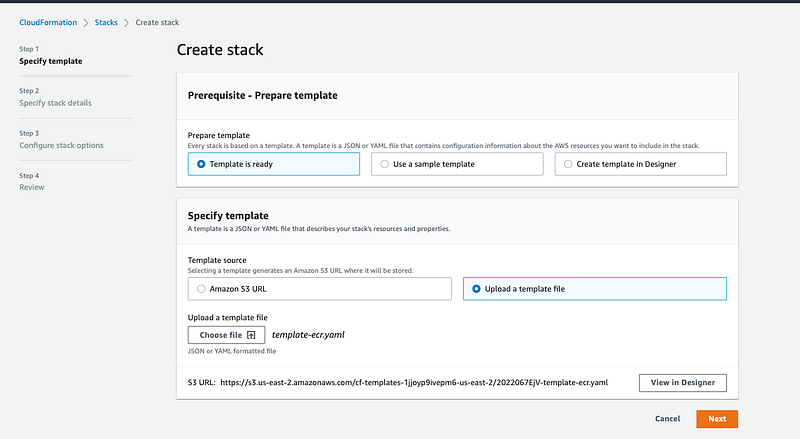
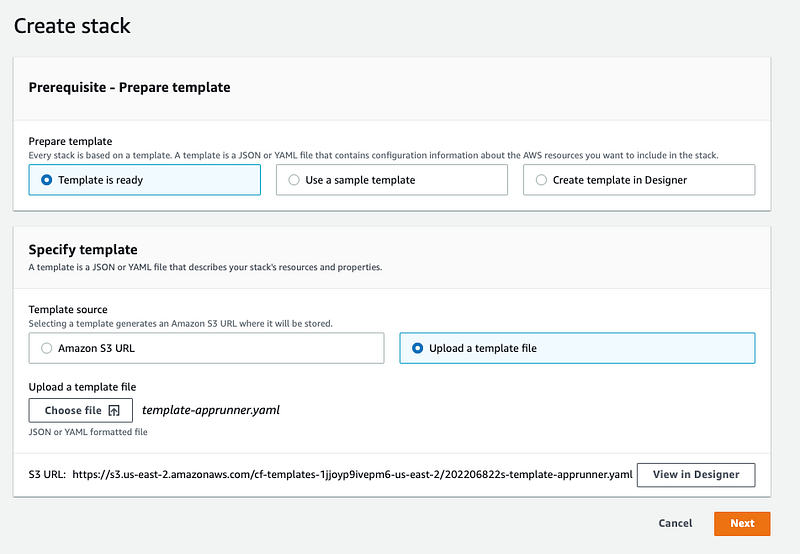
On the next screen, you have to upload the above YAML file by selecting the second option.
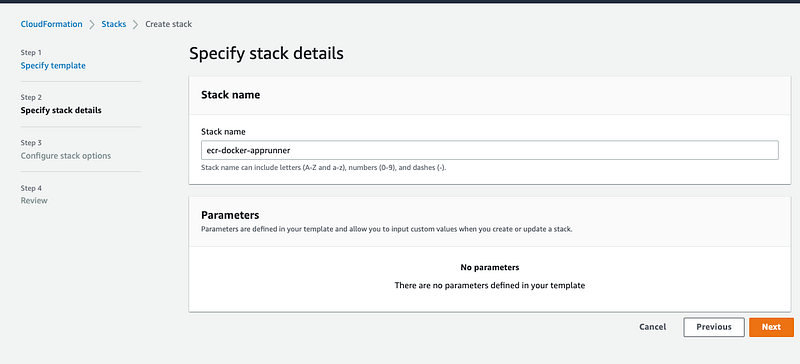
Let’s give a stack name on the next screen.
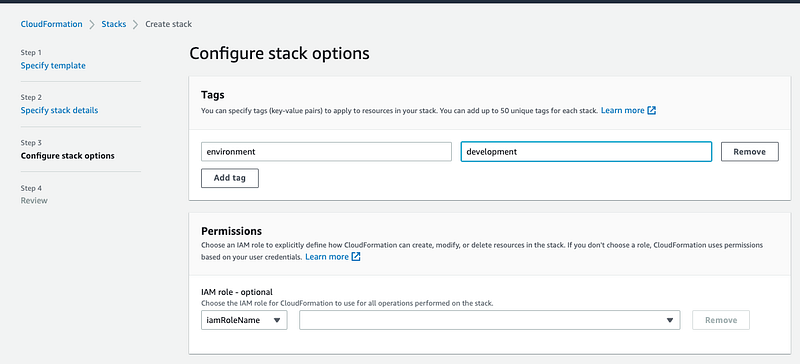
Configure stack options on the below screen.
Finally, you can review and create a stack and it will be created as below.
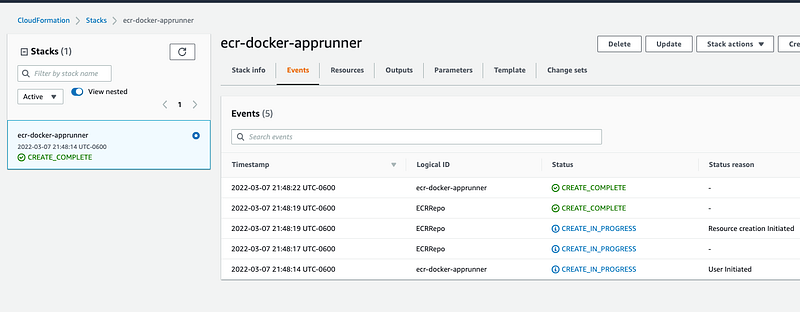
You can see the output ARN in the outputs section.
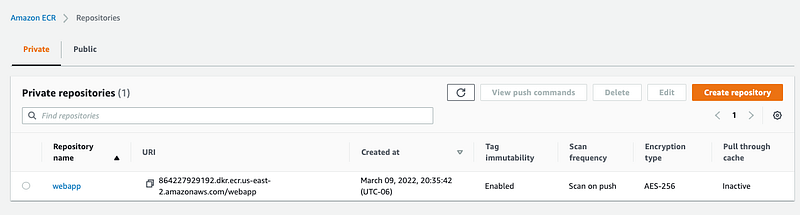
Let’s go and check the ECR console if this repository is created or not.
Pushing Docker Image To ECR
We have created an ECR repository in the above section. Let’s create a docker image from the example project section above with the following command.
docker build -t webapp .
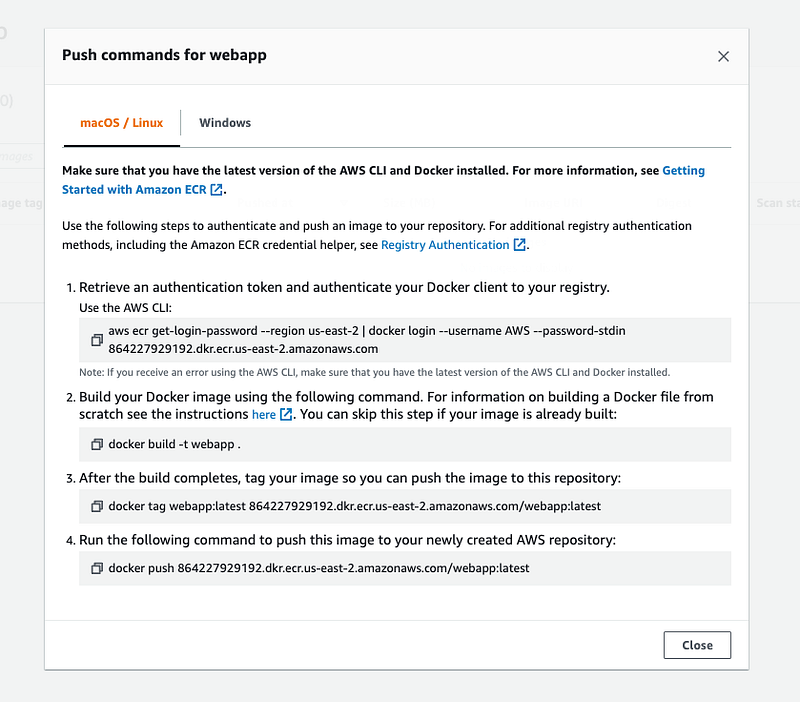
You can view the further instructions after creating the Docker image in the top right corner.
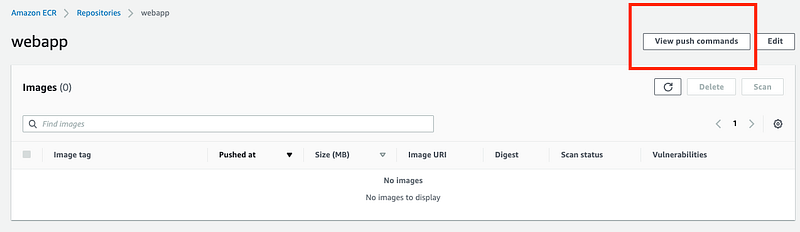
You should authenticate first, then tag and finally push the docker image. Let’s follow these commands.
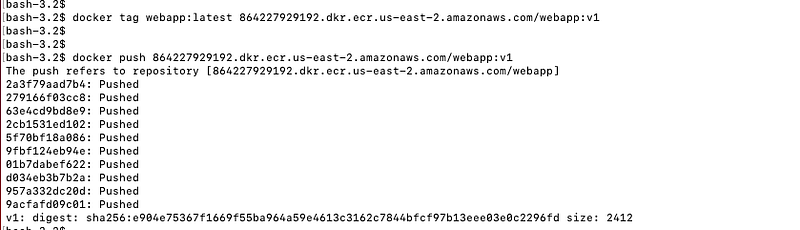
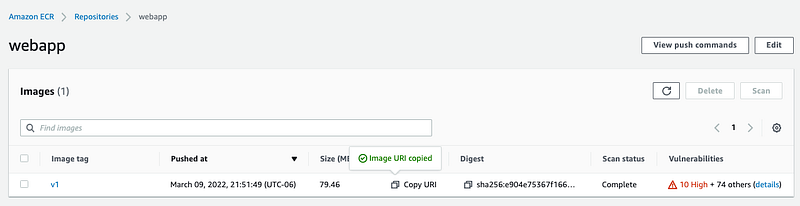
Once the image is pushed, you can view it on the ECR Console.
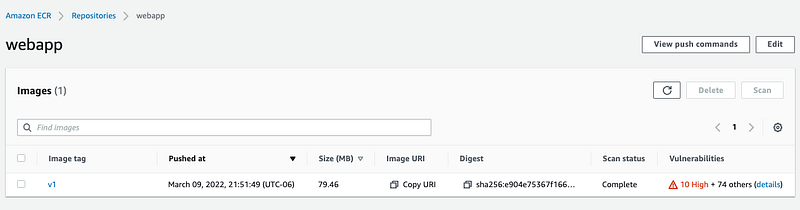
You can view the same thing through the CLI as well.
aws ecr list-images --repository-name webapp
Creating CloudFormation Template
We need to create multiple resources for the AppRunner Template, which we will go through one by one in this section. The initial ones are the version, description, and parameters. The version has only one value and in the description you can put anything about your repo or deployment. Since it’s an Angular WebApp on App runner, I have given the following description. You can provide the parameters while deploying the template.
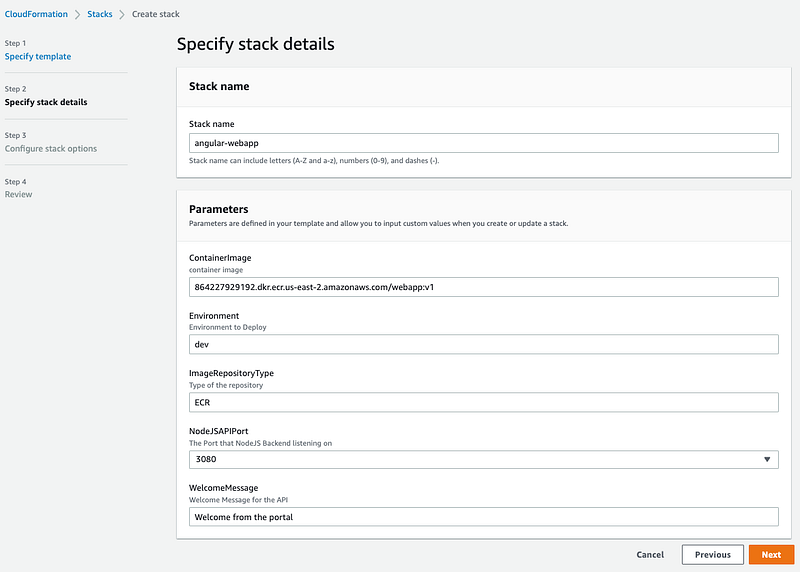
ContainerImage: This is the ECR Image URL. You can fetch it from the ECR Console.
Environment: The environment you want to deploy this stack such as dev, test, prod, etc.
WelcomeMessage: This is the environment variable you want to pass while deploying the template.
ImageRepositoryType: There are two types that App Runner service accepts at this time of writing: ECR and ECR_PUBLIC
You can have conditions on your template so that we can execute something based on that. You can define that under the section called Conditions. Since the App Runner only accepts ECR and ECR_PUBLIC we are putting a condition for that.
The next section is Resources. The first one is to create an AccessRole so that the App Runner service pulls the Docker image from the ECR Repository.
This is the instance role that can control permissions for the containers in the service.
Finally, we have an App Runner service that has all the configuration that pulls the container image from the ECR Repository and create an AppRunner Service for the Angular WebApp.
The cloudFormation resource generates the output as well you can read those and defined them in the Outputs section as below.
Here is the complete file with all the sections.
Deploy CF Template through Console
Let’s go to the CloudFormation console and click on the button Create Stack.
Since we have already created the template in the above section, let’s select the options as below.
Deploy CF Template through Console
Let’s go to the CloudFormation console and click on the button Create Stack.
Since we have already created the template in the above section, let’s select the options as below.
You can input your custom values on the next screen since we have some parameters section in the template. Let’s give the values accordingly.
You can fetch the container image URL from the ECR Console.
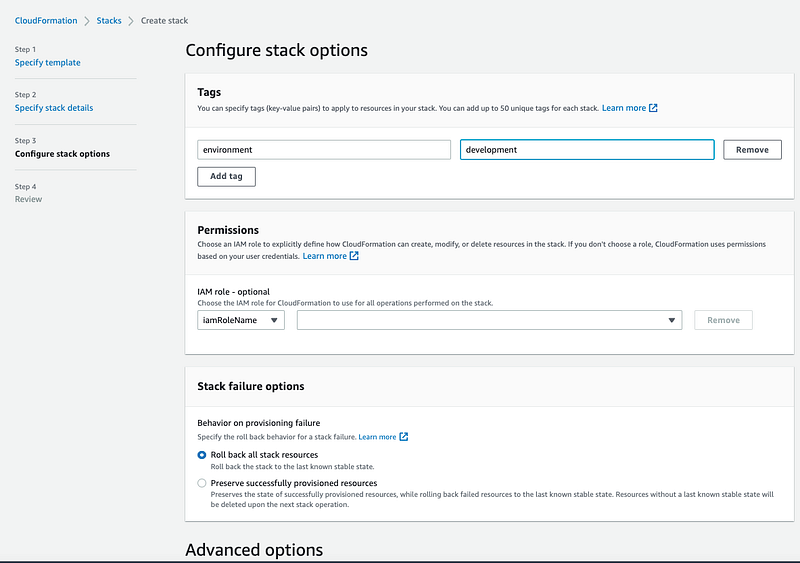
On the next screen, you can configure stack options if any. I have just added tags.
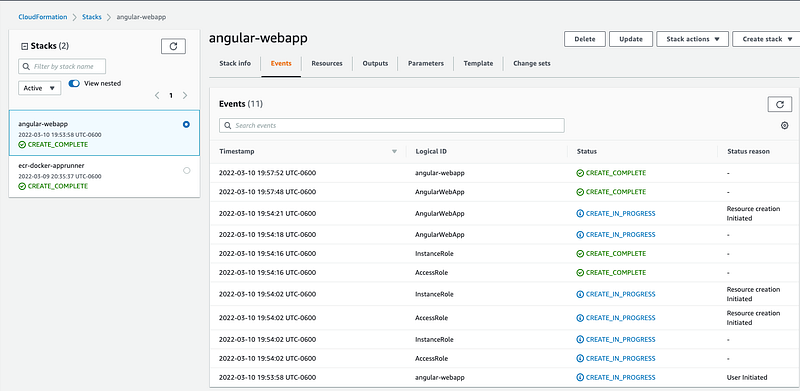
Once you review and click on the create button, you can see that the stack is being created.
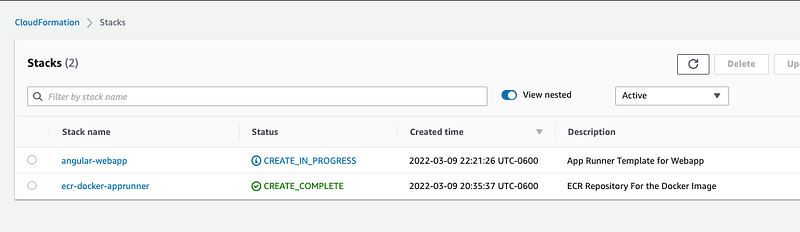
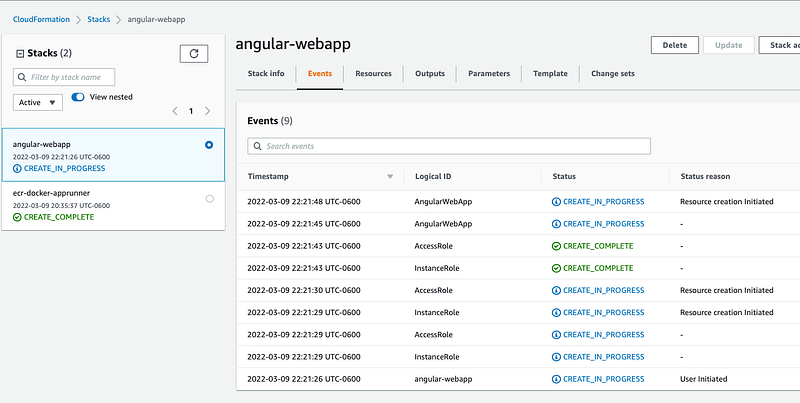
You can see all the steps under the events section as below.
You can see the AppRunner being created as well.
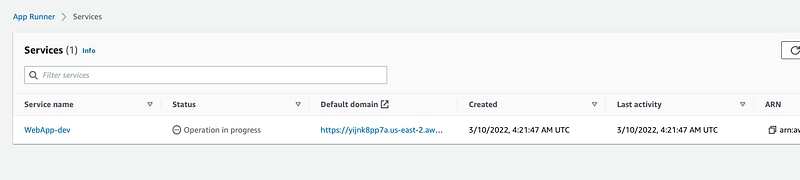
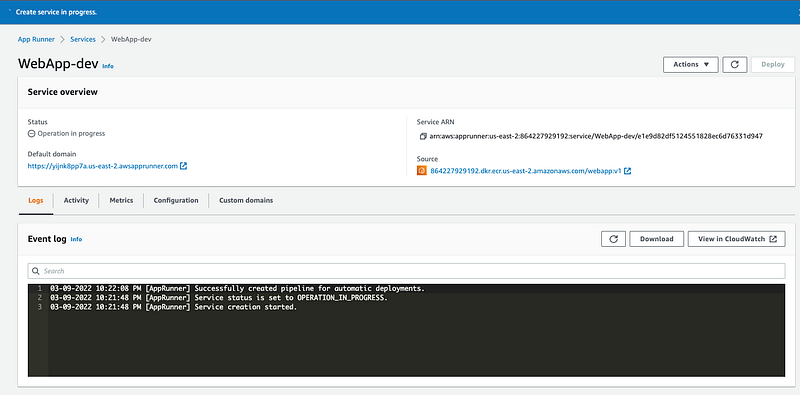
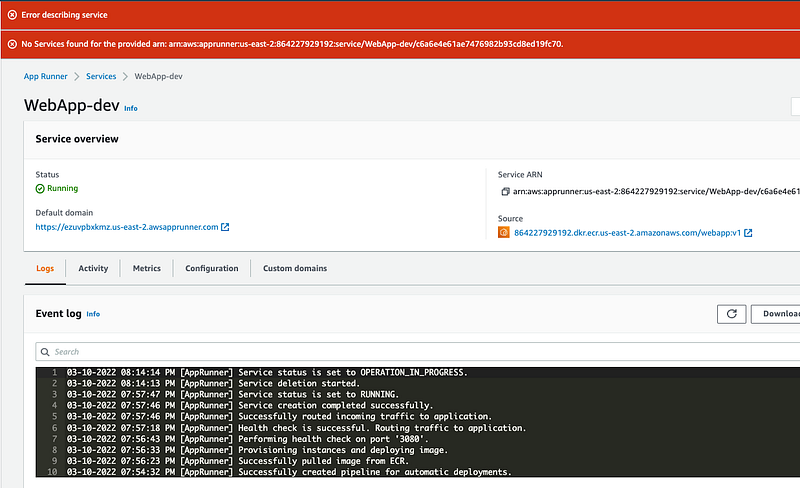
Once successful, you can see the following screens respectively.
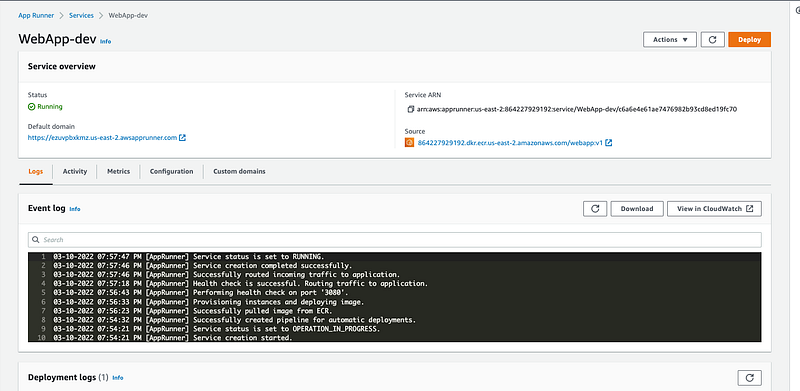
You can see the App running successfully.
AWS CloudFormation Commands
Here are some of the commands that you can run through AWS CLI to create and update the stack. You can explore more on AWS Docs.
// create-stack
aws cloudformation create-stack
     --stack-name myteststack
     --template-body file:///home/testuser/mytemplate.json
      --parameters ParameterKey=Parm1,ParameterValue=test1 ParameterKey=Parm2,ParameterValue=test2
// listing stacks
aws cloudformation list-stacks// describing stack
aws cloudformation describe-stack-events --stack-name <stack name>// updating stack
aws cloudformation update-stack --stack-name mystack --template-url <>// validating template
aws cloudformation validate-templateDeploy CF Template through CLI
Let’s create a resource through CLI with the following command. Make sure you update the command with your path of the file location.
aws cloudformation create-stack
      --stack-name java-api-apprunner
      --template-body <file://file-location>
       --parameters ParameterKey=Environment,ParameterValue=dev     ParameterKey=WelcomeMessage,ParameterValue="Welcome from the CLI"
Let’s list the stacks with the following command.
aws cloudformation list-stacks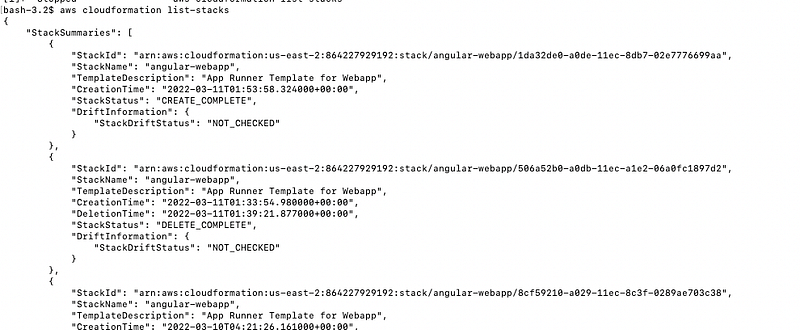
You can see the resources created in the respective screens as below.
You can see the outputs listed on the AWS Cloudformation console.
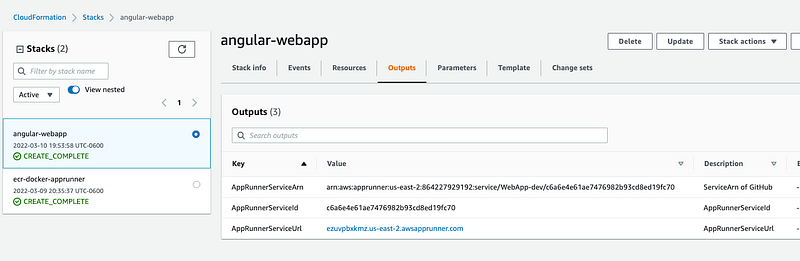
You can see the output here.
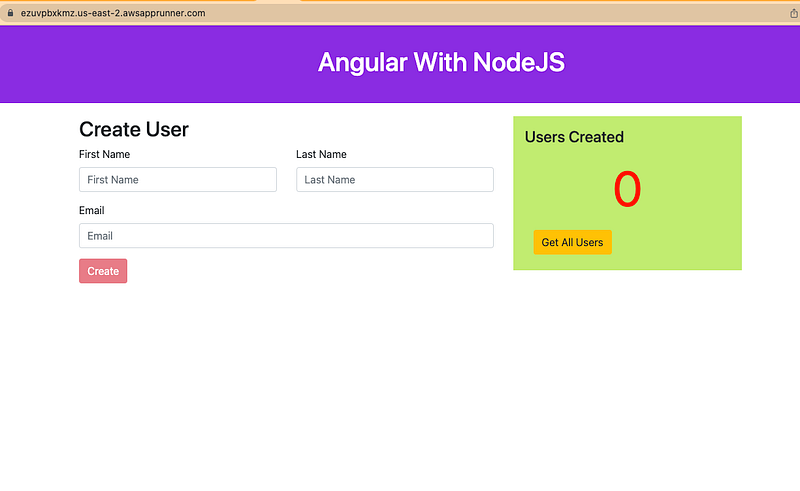
Testing The WebApp
You can test the WebApp with the following URL.
https://ezuvpbxkmz.us-east-2.awsapprunner.com/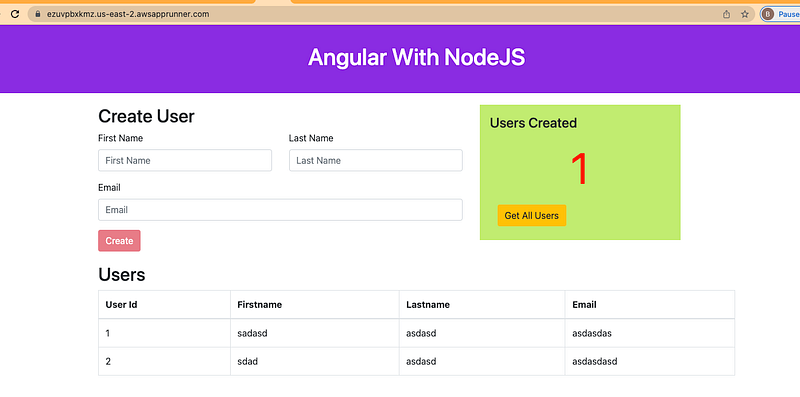
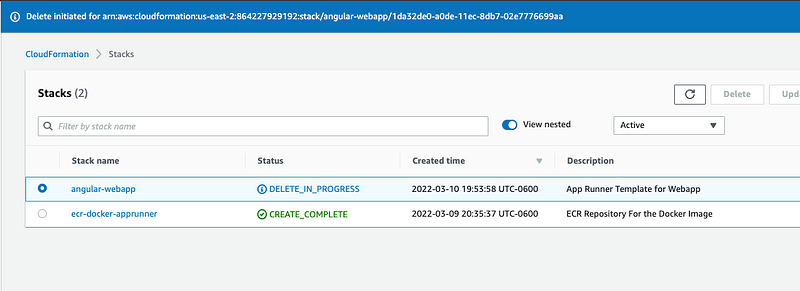
Delete The Stack
You can delete the stack from the console. You can select the stack and delete the stack. When you delete the stack the App Runner service is also deleted.
CF Example Project
Here is an example project you can clone and try on your machine.
https://github.com/bbachi/angular-docker-apprunner-cf.gitSummary
- If you want to deploy your application on the managed platform by selecting the runtime, AWS App Runner is the right choice.
- You can run the whole web app with Docker runtime without any worry about the configuration from your side.
- You can dockerize the Angular App with Backend API and deploy that in the Docker runtime. The Docker images can be pulled from ECR, etc.
- Amazon Elastic Container Registry (ECR) is a fully-managed Docker container registry that makes it easy for developers to store, manage, and deploy Docker container images.
- AWS App Runner is an AWS service that provides a fast, simple, and cost-effective way to deploy straight from source code or a container image directly to a scalable and secure web application in the AWS Cloud.
- CloudFormation is the IaaC tool you can automate the infrastructure creation on AWS.
Conclusion
We have seen how to deploy and create WebApp on AWS App Runner Service. In future posts, we will see how to run this through Jenkins and deploy it in multiple environments.


