
How To Get Started With AWS
A step by step Guide for Absolute Beginner’s
Cloud Computing is everywhere and is the most demanding and sought-after skill that companies are looking for. All most of the companies are either have plans to migrate to the cloud from on-prem or already migrated their workloads. There is a shortage of Cloud Engineers and this is a great time to enter into cloud computing. We have a few cloud providers out there such as GCP, AWS, Azure, OCI, etc.
Amazon Web Services (AWS) is the world’s most comprehensive and broadly adopted cloud platform, offering over 200 fully-featured services from data centers globally. Millions of customers — including the fastest-growing startups, largest enterprises, and leading government agencies — are using AWS to lower costs, become more agile, and innovate faster.
Amazon is the leading cloud provider and pioneered Cloud Computing. AWS provides more than 100 services, and it’s very important to know which service you should select for your needs.
- Creating an Account
- Understand AWS Organizations and Accounts
- Creating Users and Groups
- Logging in With new users
- Managing Resources With AWS Console
- What is AWS CLI
- Managing Resources with AWS CLI
- What is AWS Cloud Shell
- Managing Resources with Cloud Shell
- What is AWS SDK
- Managing Resources with Azure SDK
- Creating a static website
- Managing Resources With Terraform
- Other Example Projects
- Summary
- Conclusion
Creating an Account
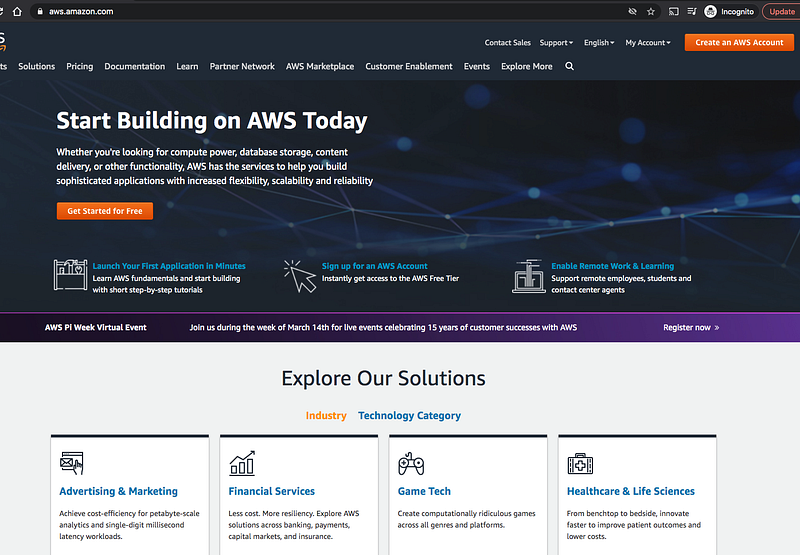
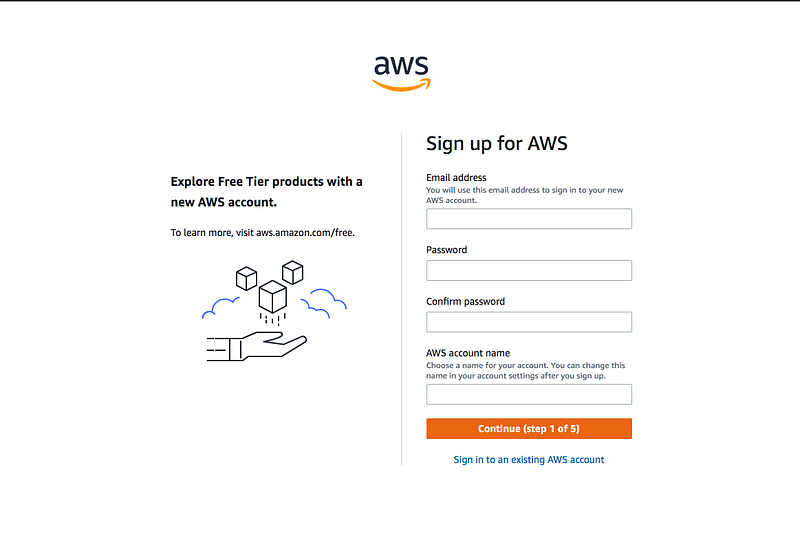
AWS offers a free account and you can get popular services free for 12 months. Let’s start with creating an AWS-free account. Go to this link to create an account.
If you click on the button that says Get Started for free, you will be redirected to the below screen.
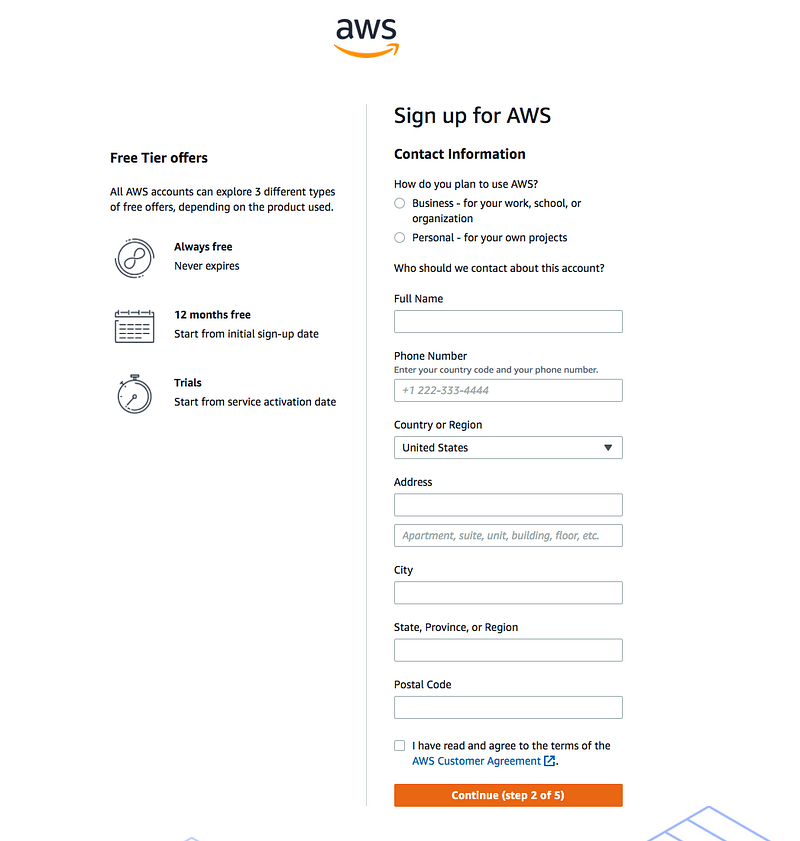
You will be asked some more details on the next screen whether it is used for personal or business and some more personal information.
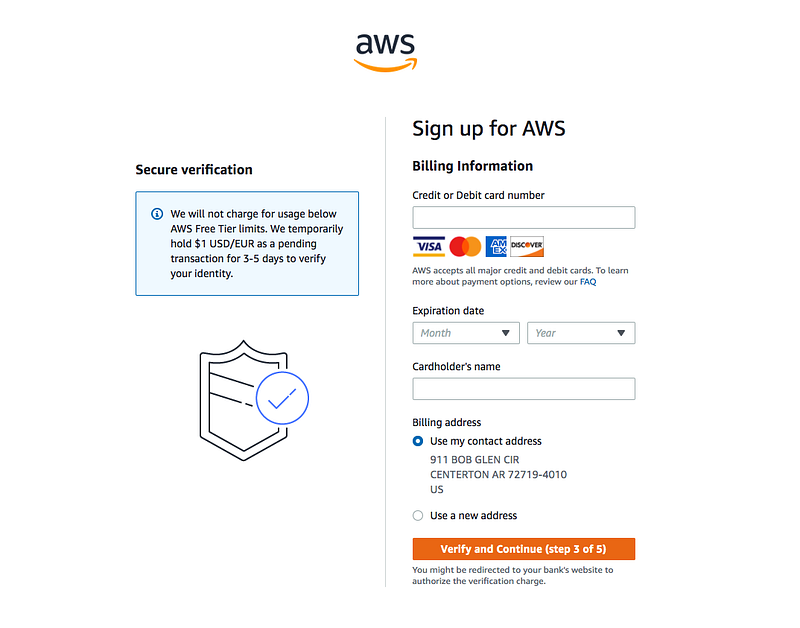
On the next screen, we need to provide your card details.
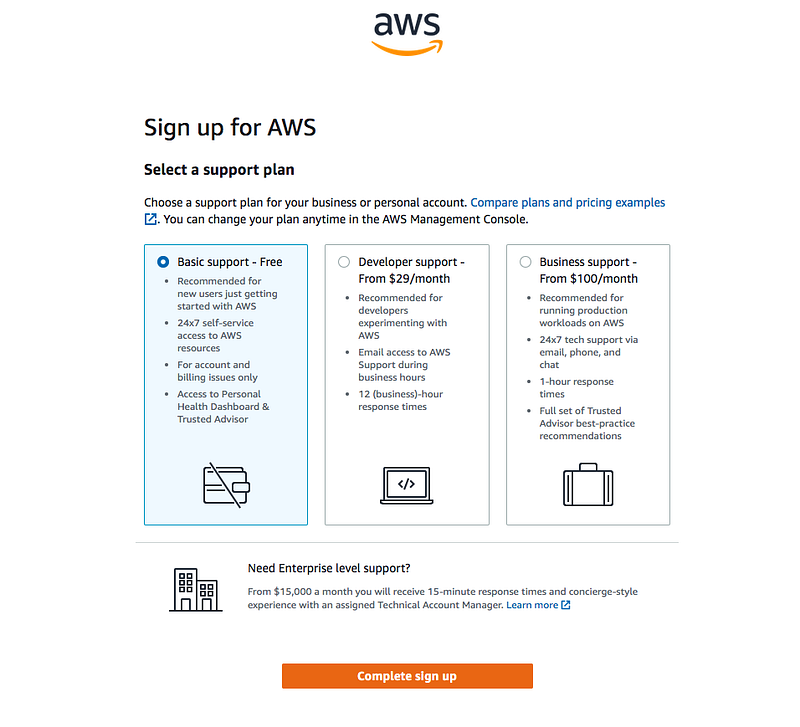
You need to select plans based on your need. You can select the first one for now.
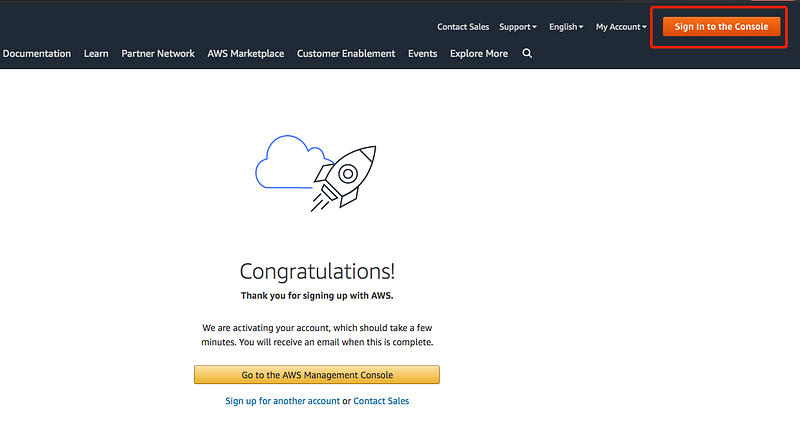
You can see the below screen after completing the signup. You can click on the button that says Sign In to the Console.
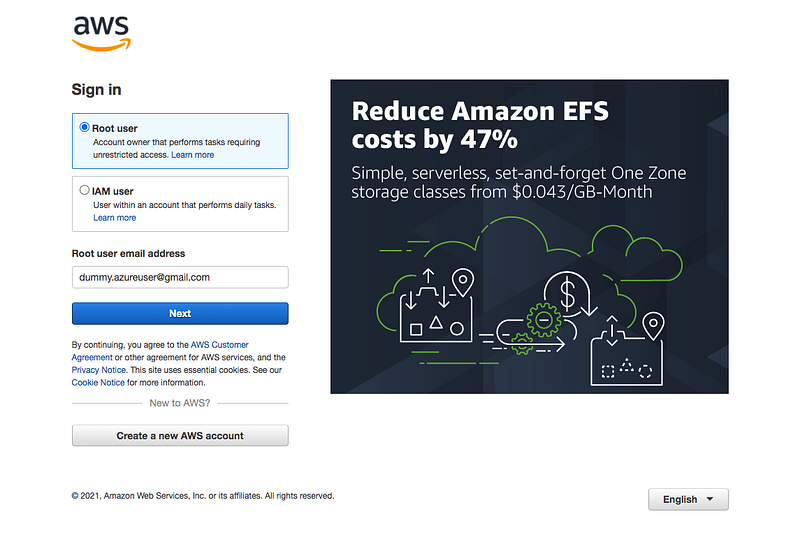
You will be redirected to the login screen. You can select the root user and login with your credentials that you just signed up for.
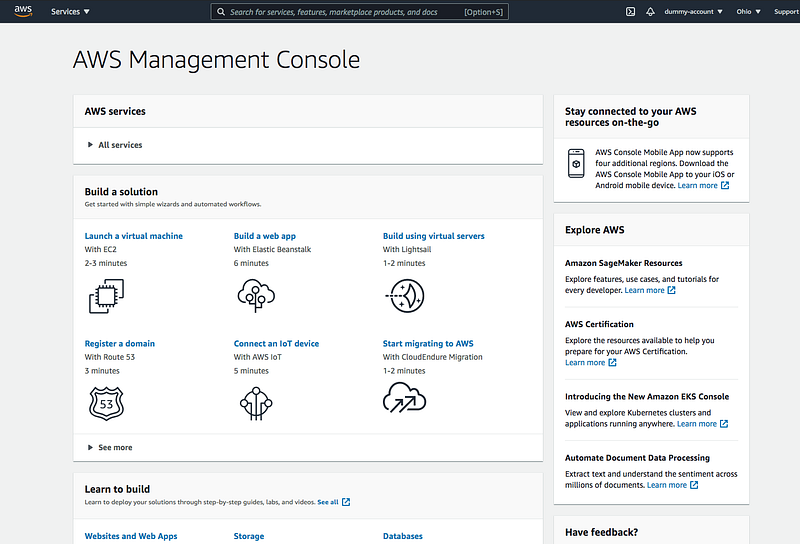
After signing in with your password you will see the AWS Console below. You can search the keyword in the search bar, you can click on the Cloud Shell icon on the top right, etc. Take some time and get familiar with the console.
Understand AWS Organizations and Accounts
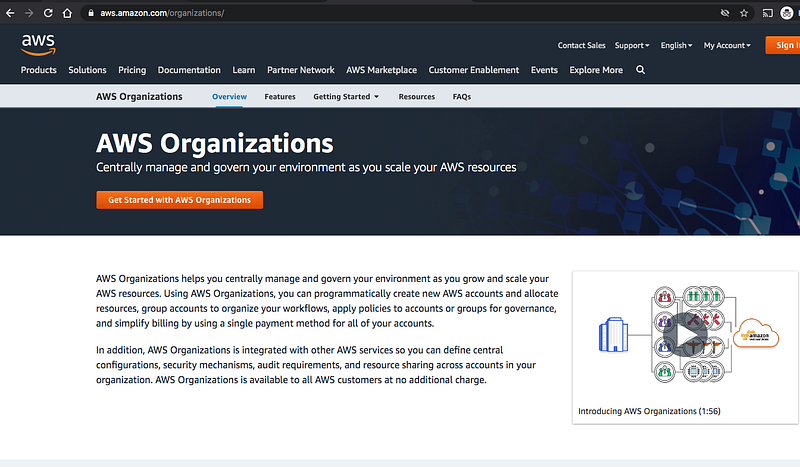
We just created an account and let’s understand what are AWS Organizations. What if you have separate departments and you want to centrally manage these accounts and You can even use a single payment method for all the accounts that you have under the organization. You can go through more here.
From the AWS Docs, AWS Organizations helps you centrally manage and govern your environment as you grow and scale your AWS resources. Using AWS Organizations, you can create accounts and allocate resources, group accounts to organize your workflows, apply policies for governance, and simplify billing by using a single payment method for all of your accounts. AWS Organizations is integrated with other AWS services so you can define central configurations, security mechanisms, audit requirements, and resource sharing across accounts in your organization. AWS Organizations is available to all AWS customers at no additional charge.
You can go to the page and click on the button that says Get Started With AWS Organizations.
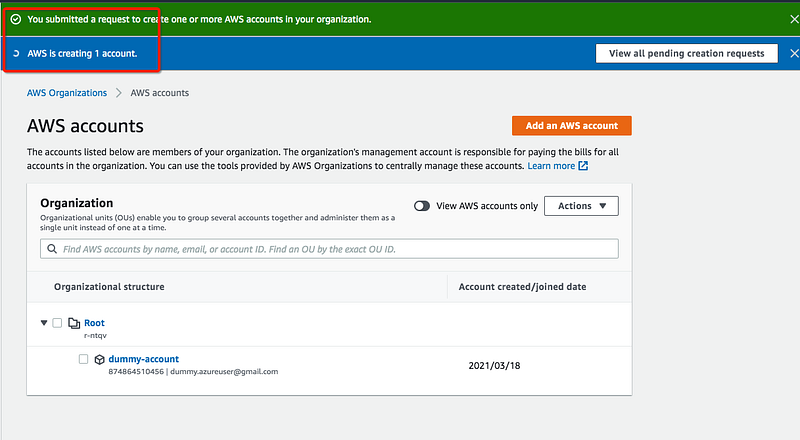
Once logged in, you can see the Organisation structure as below. Whatever the account we created above we can use that account as the parent account to manage the organizational units. This account can be known as a master account for your organization.
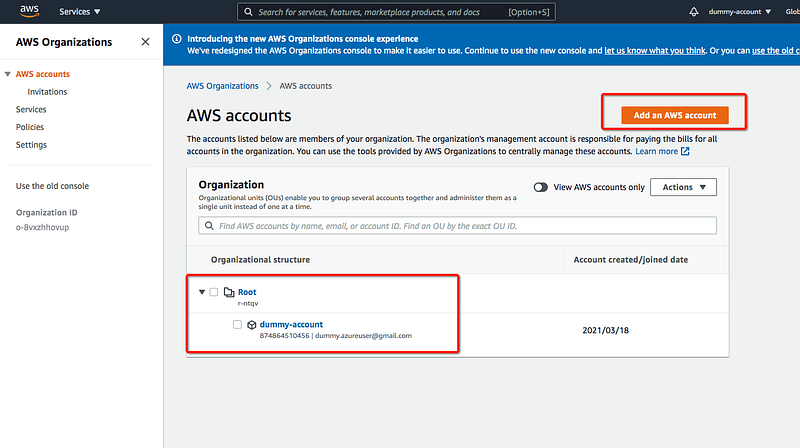
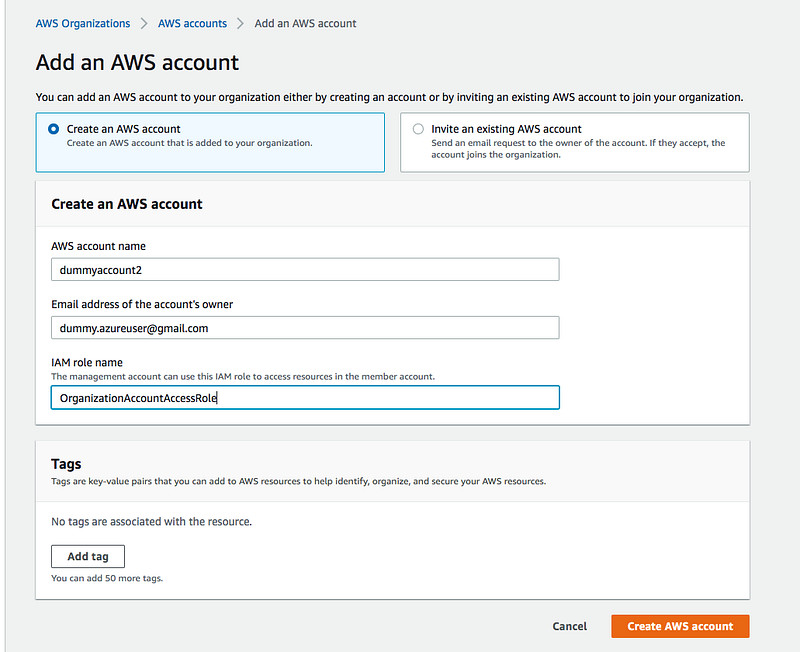
You can click on the button that says Add an AWS account and go to the next page and create another account as below.
It takes some time to create an account
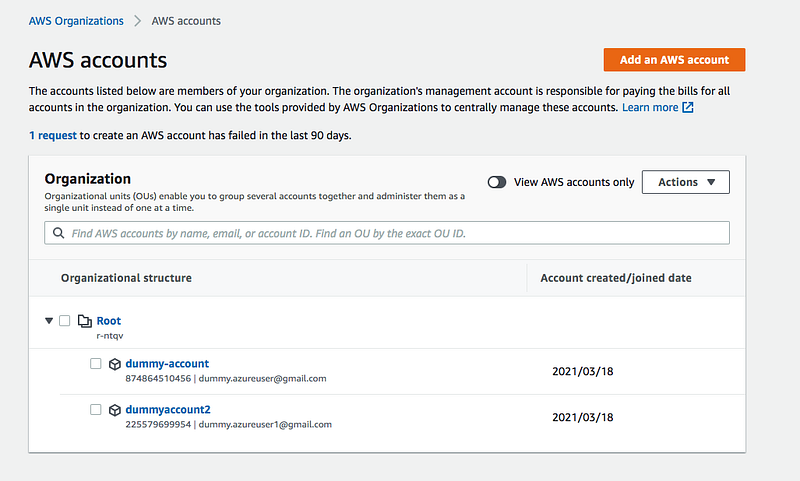
You can see that the second account is added to the master root organization.
You can create a new organizational unit as well

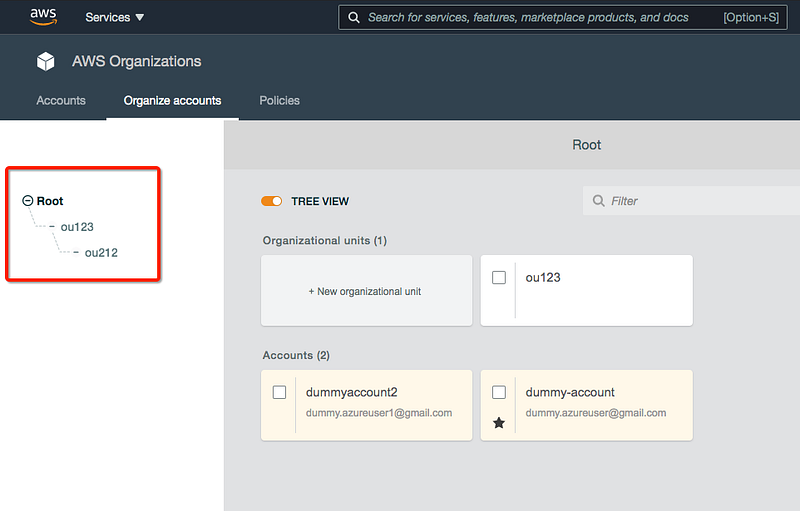
You can go ahead and add as many organizational units as you want and AWS account under it as long as you have a valid email that you didn’t use before with AWS. If you want to remove the AWS account from the organization make sure there is a payment method configured for that account.
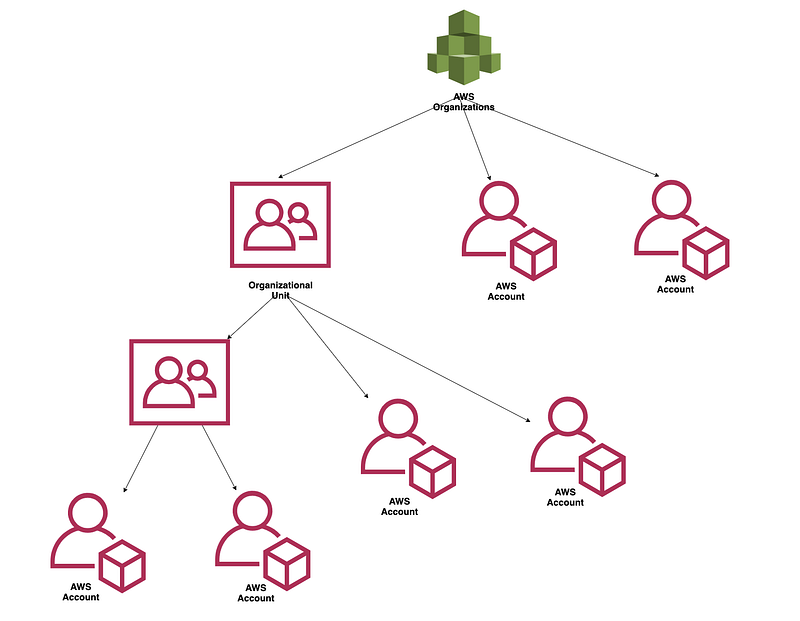
Here is the simple hierarchy.
Creating Users and Groups
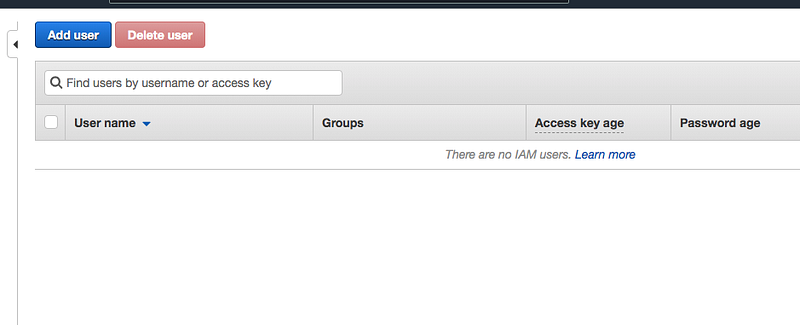
You can create users and groups in the management console or using CLI, etc. One of the best practices is not to use your root account. As soon as you created an account you should create another user for everyday tasks.
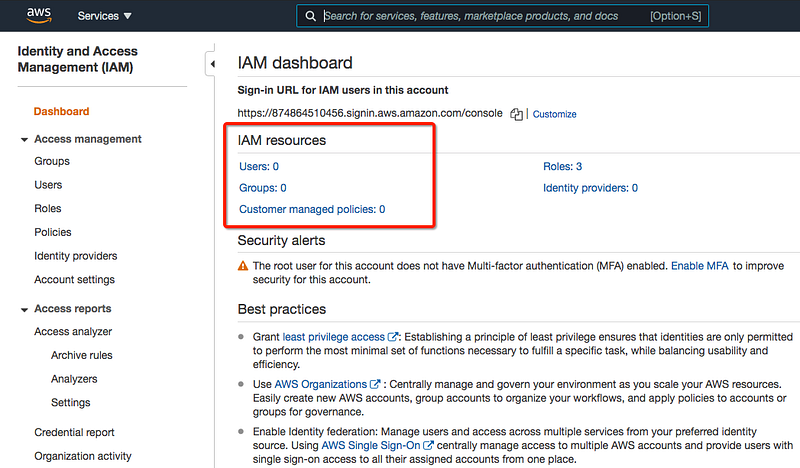
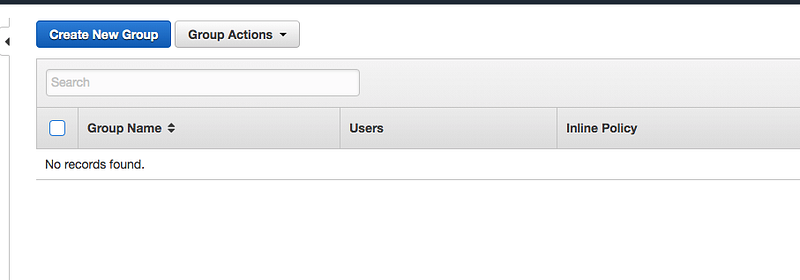
Let’s log into the AWS console as a root user and create another user and groups. You need to access the IAM service to create users and groups.
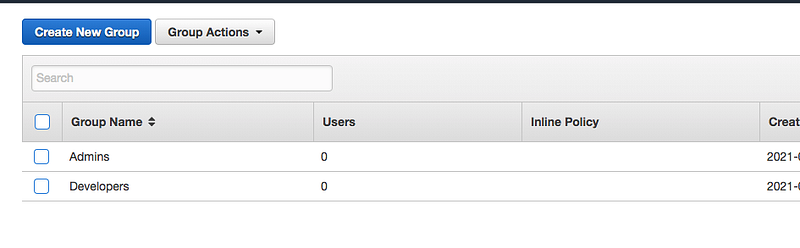
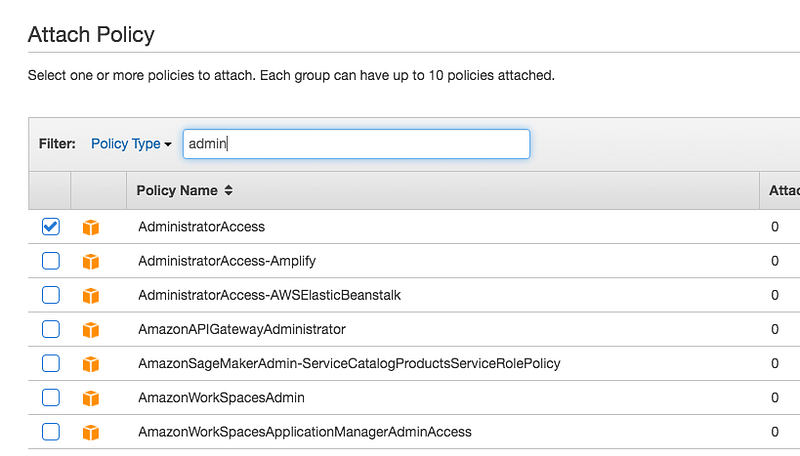
I have created two groups: Developers and admins. You can attach policy on a group level so that it applies to all the users in that group.
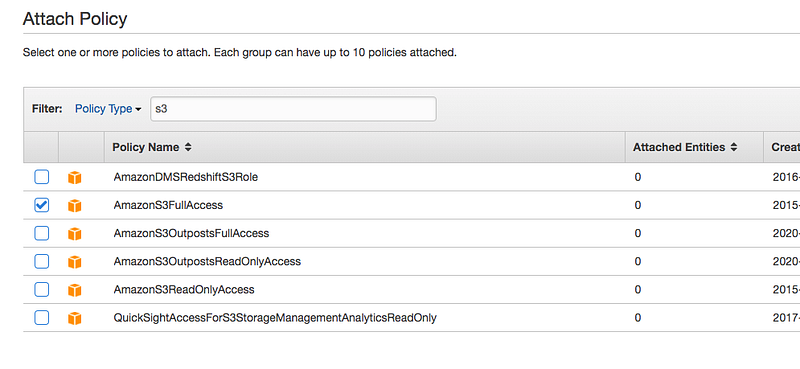
I have added the AmazonS3FullAccess policy for the Developers group and AdminstratorAccess for the Admins.
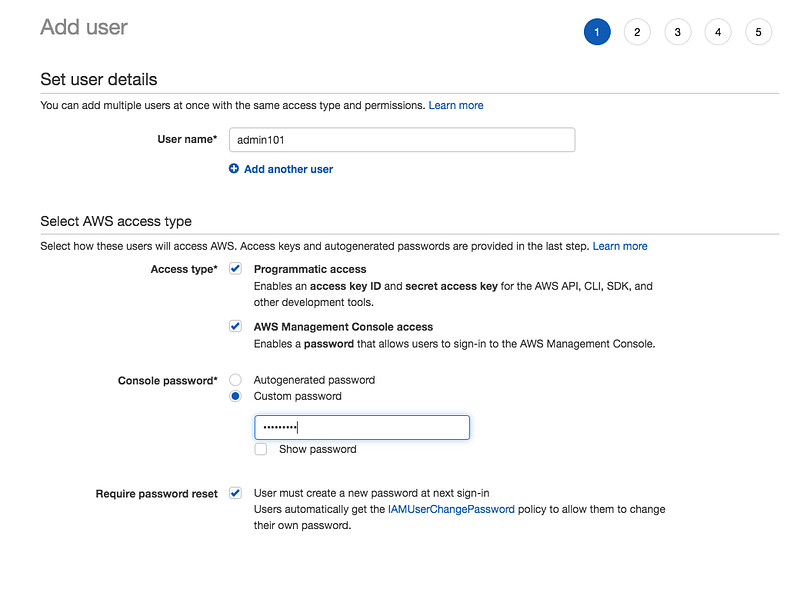
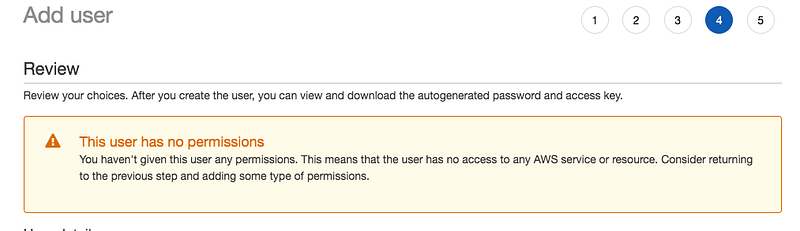
Now click on the Users and create users under these groups.
You can have options to allow programmatic access, aws management console access, etc. You can give a password or it can be auto-generated, etc.
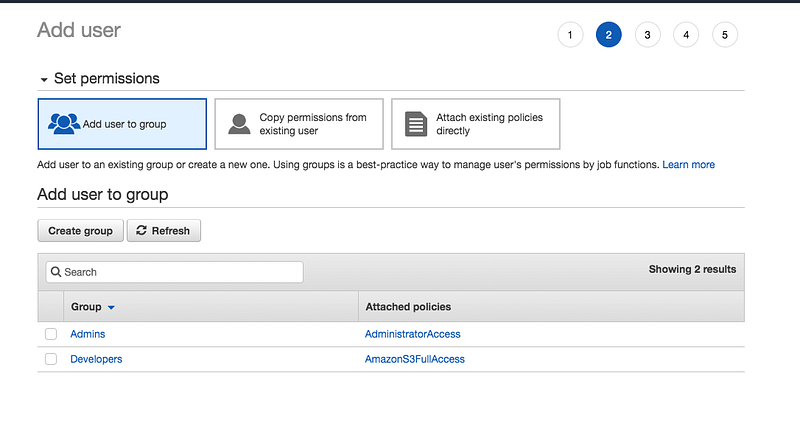
on the next screen, you can add this user to any of the groups available.
Once the user is created, you can see the below screen. You have created this user you can send the instruction to the user. Make sure you download the Access Key and Secret access key so that you can configure AWS CLI to manage AWS resources.
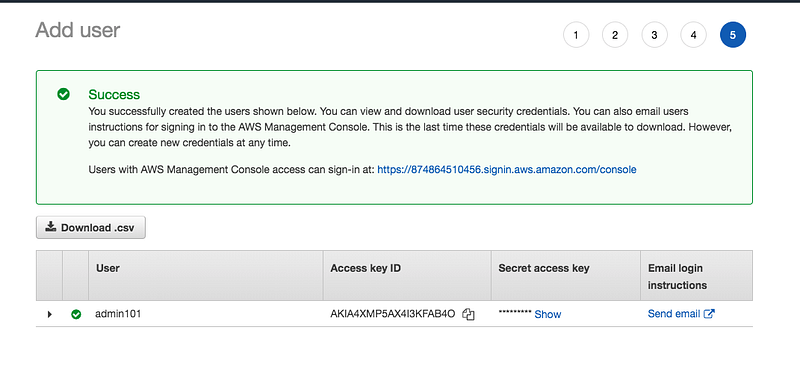
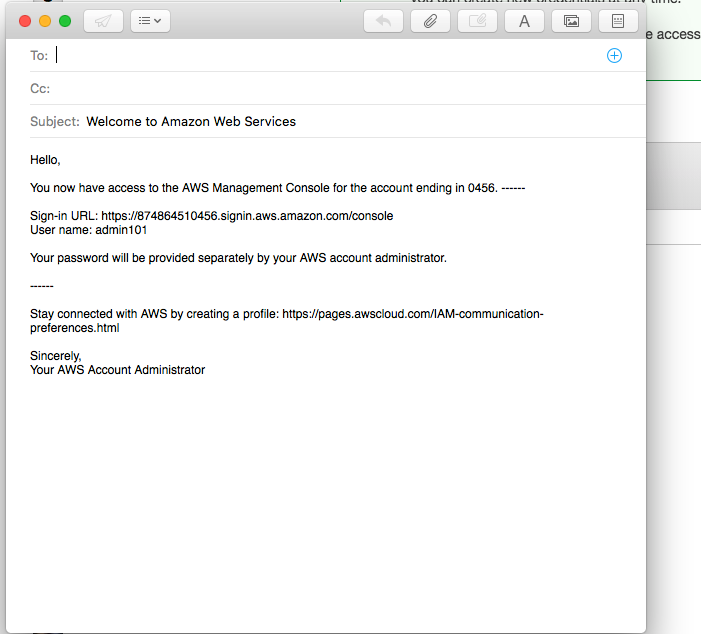
Here is the generated email when you click on the Send Email.
Logging in With new users
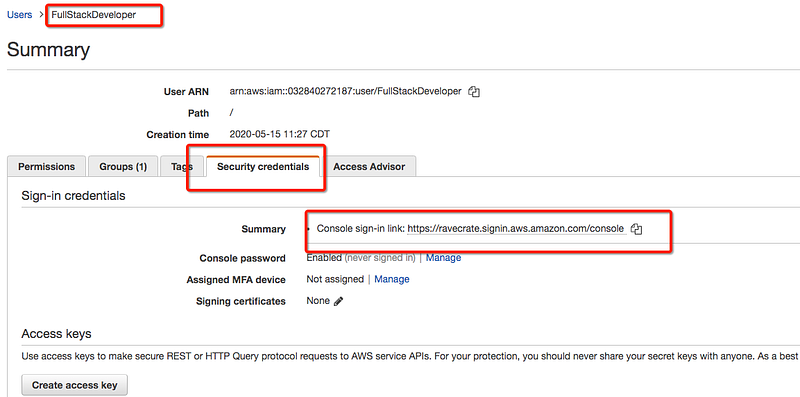
You have created groups and users. You can log in with the users by copying the AWS Account users sign-in URL.
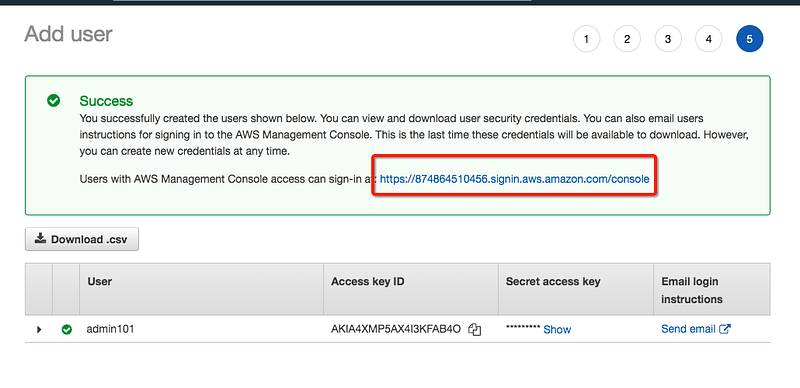
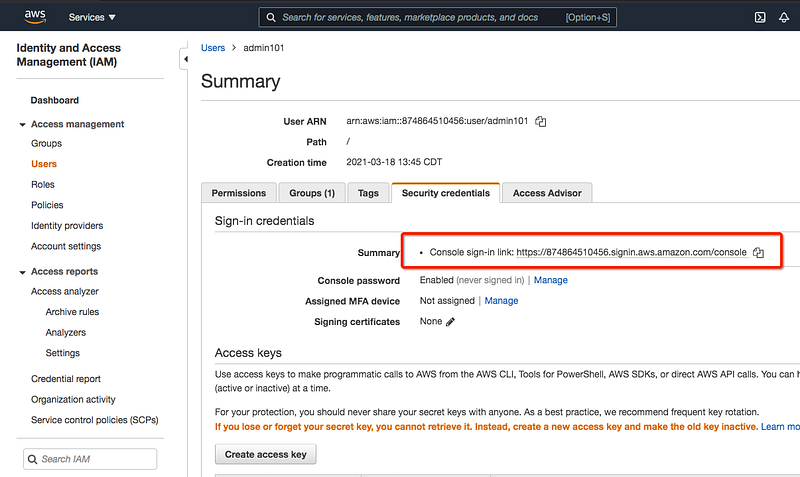
You can also find this URL by going into the Security credentials section of the user.
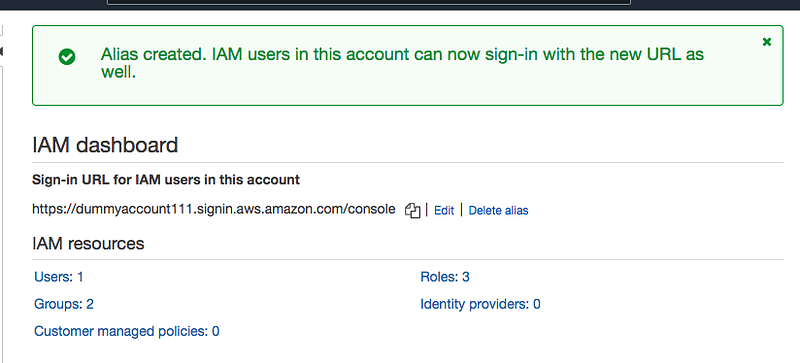
You can also customize this URL by going to the IAM dashboard.
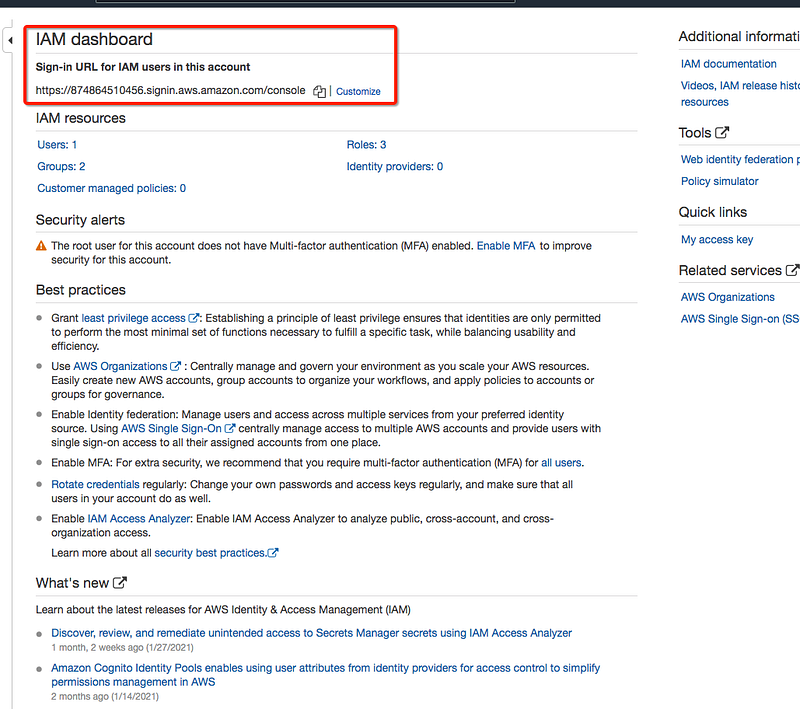
I just changed it to https://dummyaccount111.signin.aws.amazon.com/console
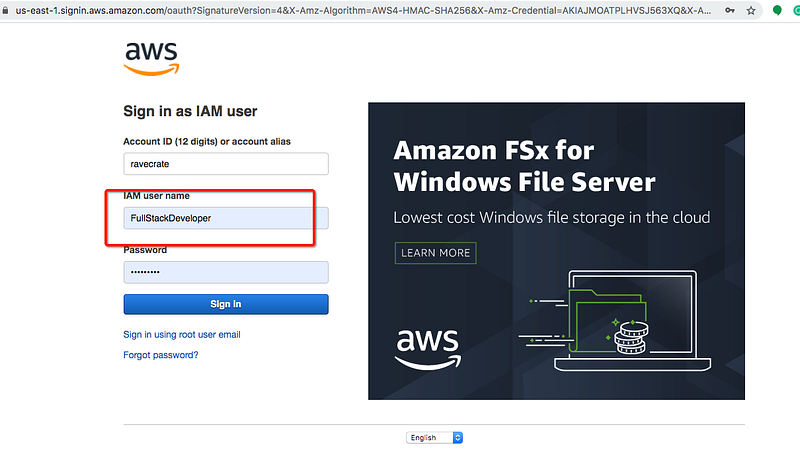
You can just copy the URL and sign out and log in with the user account you just created.

You can see the user name that you logged in in the header as below.
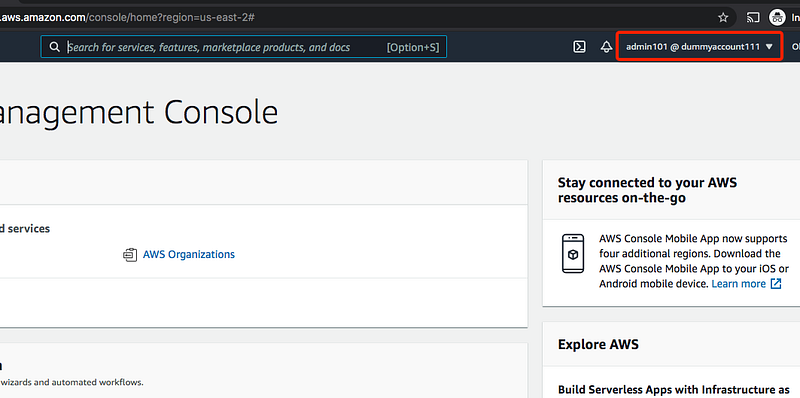
Since he has administrator access he has the ability to do all admin tasks.
Managing Resources With AWS Console
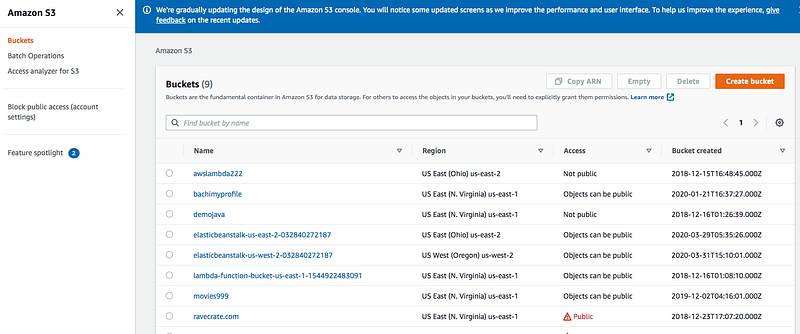
Let’s create a simple S3 bucket in the management console. Search for S3 and you can find the service and click on it and it takes you to the service dashboard page.
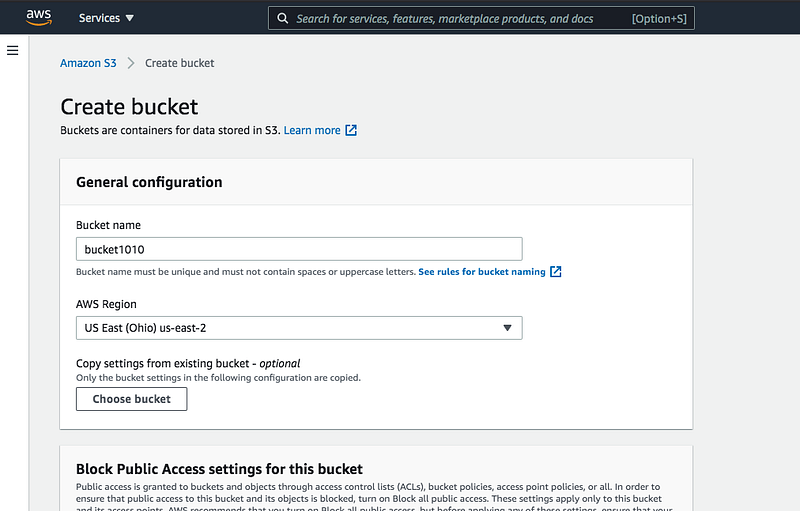
The bucket name should be unique globally while creating the bucket. This is a simple example of creating resources in the AWS Console. You can search an service and create a resource in the management console.
This is the easiest way to manage resources on AWS. You can log in with any user as above. All we need to do is that copy the URL for the user login from the root account like below. Copy the console sign-in link from the security credentials tab.
Let’s log out of your root account and log back in with that user.
Since the user has only read-only access to the IAM you can’t add a new user. If you try to add you will get the following error.
Let’s go to the S3 service and see all the buckets and create one. This is a very easy process you can go ahead and play with it.
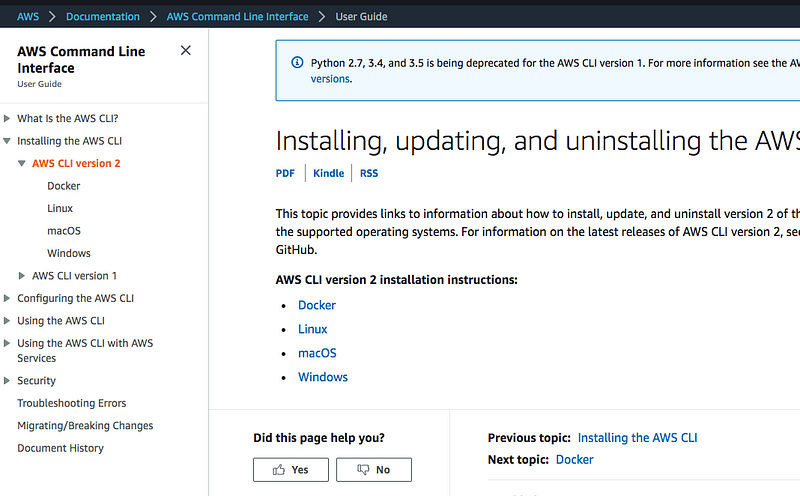
What is AWS CLI
The AWS Command Line Interface (CLI) is a unified tool to manage your AWS services. With just one tool to download and configure, you can control multiple AWS services from the command line and automate them through scripts.
We need to install AWS CLI on your laptop you can download and install from here.
Once installed check it whether it’s working or not.
// run some commands
aws help
aws ec2 describe-instancesWe need to configure our AWS CLI for the user (Admin101) we created above, for that, you should have access to the keys that you downloaded while creating the user and use the below command.
// configure CLI
aws configure
// check the user
aws iam get-user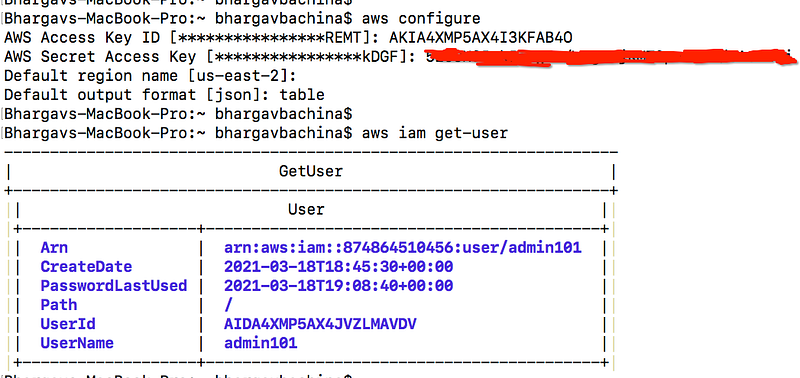
Now you can list the buckets with AWS CLI with the following command.
aws s3api list-buckets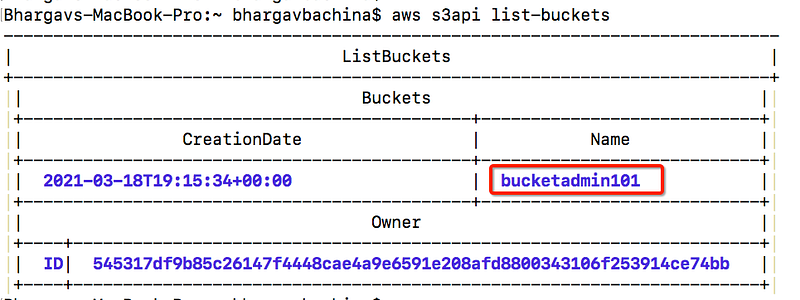
Managing Resources with AWS CLI
We have configured AWS CLI with the current user. It’s time to create the same resource that we created with the AWS console with the AWS CLI. We have created an S3 bucket with the Console, let's do the same with the AWS CLI.
Let’s create three buckets
aws s3 mb s3://bucketcreatedfromcli101aws s3 mb s3://bucketcreatedfromcli102aws s3 mb s3://bucketcreatedfromcli103
You can verify these buckets by login into AWS Console.

What is AWS Cloud Shell
AWS cloud shell is an interactive way of managing AWS resources with CLI in the browser itself. From the AWS Docs, AWS CloudShell is a browser-based shell that makes it easy to securely manage, explore, and interact with your AWS resources. CloudShell is pre-authenticated with your console credentials. Common Development and operations tools are pre-installed, so no local installation or configuration is required. With CloudShell, you can quickly run scripts with the AWS Command Line Interface (AWS CLI), experiment with AWS service APIs using the AWS SDKs, or use a range of other tools to be productive. You can use CloudShell right from your browser and at no additional cost.
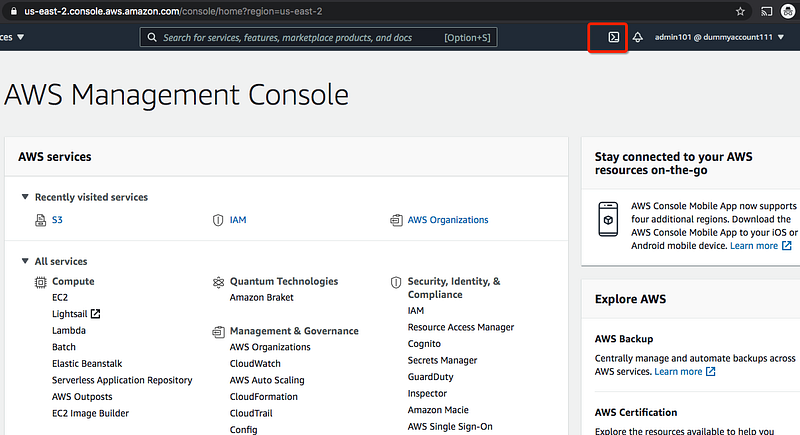
When you login in to your account you can find the Cloud Shell icon on the top right corner as below.
When you click on the icon and you can see another tab open as below. It takes some time to create the environment. Let’s run the following commands in the AWS Cloud Shell.
// getting the current user
aws iam get-user
// listing the buckets
aws s3 ls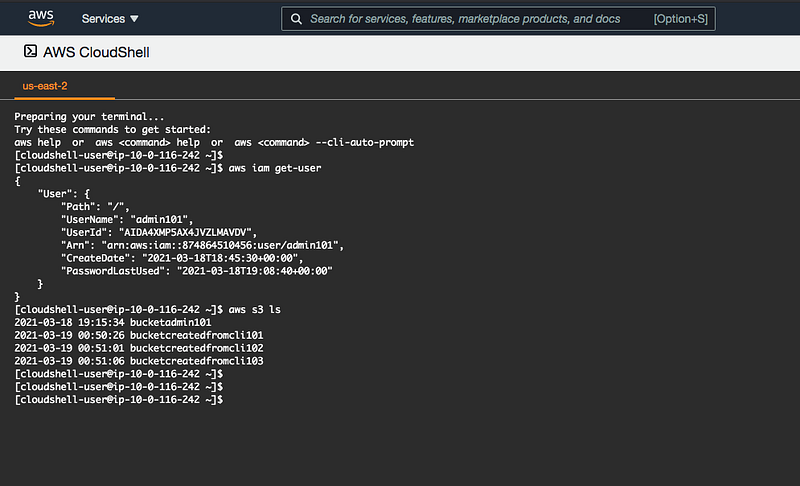
Managing Resources with Cloud Shell
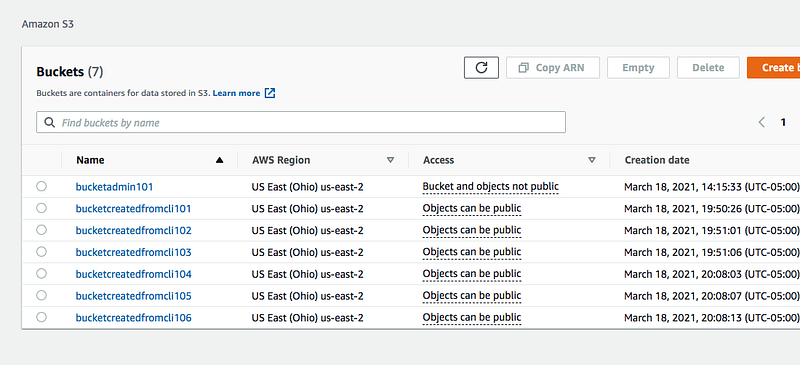
We have seen how to access AWS Cloud Shell. It’s time to create the same resource that we created with the AWS console with the AWS Cloud Shell. We have created three S3 buckets with the Console, lets do the same with the AWS Cloud Shell.
Let’s create three buckets again.
aws s3 mb s3://bucketcreatedfromcli104aws s3 mb s3://bucketcreatedfromcli105aws s3 mb s3://bucketcreatedfromcli106
You can verify these buckets by login into AWS Console.
What is AWS SDK
AWS has tools for developing and managing applications on AWS. AWS supports these programming languages at the time of writing C++, Go, Java, JavaScript, .NET, Node.js, PHP, Python, and Ruby. You can go through full documentation here.
Managing Resources with Azure SDK
Let’s create a node.js project which is a REST API to create buckets and list buckets. You can find full list of methods and API calls here. Here is an example project you can clone it and run it on your machine.
// clone the project
git clone https://github.com/bbachi/sample-nodejs-aws.git
// install and start
npm install
npm startMake sure you set up your security credentials at this location ~/.aws/credentials before running the project. If you configure with the commandaws configure it automatically put the credentials there.
There are only two dependencies for this project: express and aws-sdk.
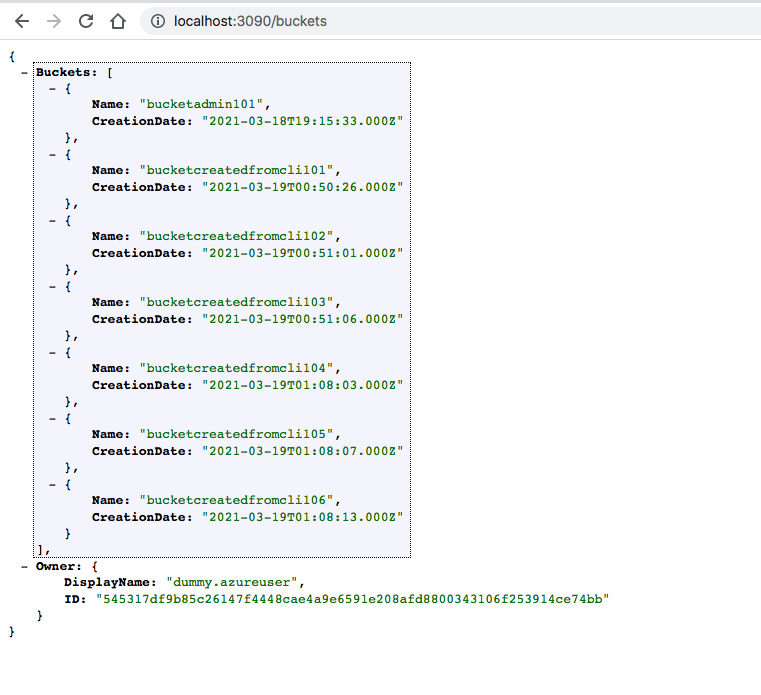
Here is the main file index.js which has three routes as below
// default route
http://localhost:3090/
// list bucktes
http://localhost:3090/buckets// create bucket
http://localhost:3090/bucket/my-bucletWhen you run this application and hit the GET URL to fetch the buckets you can see all these buckets that we created so far.
Creating a static website
AWS S3 is one of the options which provides a low-cost and highly reliable static website hosting solution. These static sites have only CCS, HTML, JS files, fonts, etc. We can see how we can build a static website with React and host that with the AWS S3.
Here is the detailed post on how to create a React Static Website on AWS.
Managing Resources With Terraform
Terraform is the infrastructure as a Code offering from HashiCorp. It is a tool for building, changing and managing infrastructure in a safe, repeatable way. Operators and Infrastructure teams can use Terraform to manage environments with a configuration language called the HashiCorp Configuration Language (HCL) for human-readable, automated deployments.
In this post, we can see how we can build a static website with a simple HTML and host that on AWS with Terraform.
Other Example Projects
There are so many other services available on AWS. Here is the list of the services that you can explore and get used to AWS. You can explore more example projects here.
Summary
- Cloud Computing is everywhere and is the most demanding and sought-after skill that companies are looking for.
- All most of the companies are either have plans to migrate to the cloud from on-prem or already migrated their workloads.
- Amazon Web Services (AWS) is the world’s most comprehensive and broadly adopted cloud platform, offering over 200 fully-featured services from data centers globally.
- Amazon is the leading cloud provider and pioneered Cloud Computing. AWS provides more than 100 services, and it’s very important to know which service you should select for your needs.
- AWS Organizations helps you centrally manage and govern your environment as you grow and scale your AWS resources. Using AWS Organizations, you can create accounts and allocate resources, group accounts to organize your workflows, apply policies for governance, and simplify billing by using a single payment method for all of your accounts.
- You can create users and groups in the management console or using CLI, etc. One of the best practices is not to use your root account. As soon as you created an account you should create another user for everyday tasks.
- You can also customize this URL with the alias name for the IAM users sign in
- The AWS Command Line Interface (CLI) is a unified tool to manage your AWS services. With just one tool to download and configure, you can control multiple AWS services from the command line and automate them through scripts.
- AWS cloud shell is an interactive way of managing AWS resources with CLI in the browser itself. From the AWS Docs, AWS CloudShell is a browser-based shell that makes it easy to securely manage, explore, and interact with your AWS resources. CloudShell is pre-authenticated with your console credentials.
- AWS has tools for developing and managing applications on AWS. AWS supports these programming languages at the time of writing C++, Go, Java, JavaScript, .NET, Node.js, PHP, Python, and Ruby. You can go through full documentation here.
Conclusion
This is a lot of information to take in but, this post serves as a good starting point for your AWS Cloud Journey. In future posts, we will see more services with examples.


