
AWS — Deploying React App With NGINX on EKS
A step by step guide with an example project
AWS provides more than 100 services and it’s very important to know which service you should select for your needs. Amazon Elastic Kubernetes Service (Amazon EKS) is a managed service that makes it easy for you to run Kubernetes on AWS without needing to stand up or maintain your own Kubernetes control plane. Kubernetes is an open-source system for automating the deployment, scaling, and management of containerized applications.
In this post, we are going to deploy the React application with an NGINX web server. First, we dockerize our app and push that image to Amazon ECR and run that app on Amazon EKS.
- Example Project
- Prerequisites
- Dockerize the Project
- Pushing Docker Image To ECR
- Create a Cluster and Worker Nodes
- Configure kubectl to use Cluster
- Deploy Kubernetes Objects On AWS EKS Cluster
- Summary
- Conclusion
Example Project
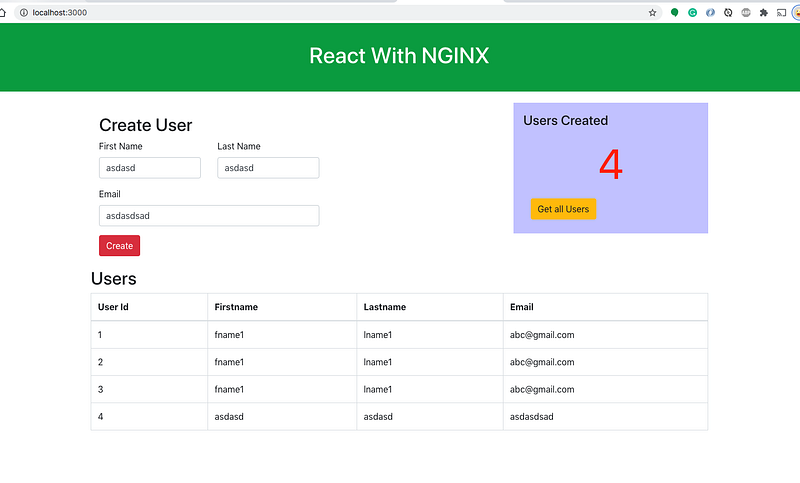
This is a simple project which demonstrates developing and running a React application with NGINX. We have a simple app in which we can add users, count, and display them at the side, and retrieve them whenever you want.
If you want to practice your own here is a Github link to this project. You can clone it and run it on your machine as well.
// clone the project
git clone https://github.com/bbachi/react-nginx-example.git
// install React dependencies and start
cd my-app
npm install
npm startPrerequisites
- If you are new to React please go through the below link on how to develop and build the React project with the NGINX web server.
How To Serve React Application With NGINX and Docker
The other prerequisites to this post are Docker essentials and Kubernests essentials. We are not going to discuss the basics such as what is a container or what is Kubernetes, rather, we will see how to build a Kubernetes cluster on AWS EKS. Below are the prerequisites you should know before going through this article
Docker Essentials
You need to understand Docker concepts such as creating images, container management, etc. Below are some of the links that you can understand about Docker if you are new.
- Docker Docs
- Docker — A Beginner’s guide to Dockerfile with a sample project
- Docker — Image creation and Management
- Docker — Container Management With Examples
- Understanding Docker Volumes with an example
Kubernetes Essentials
You need to understand Kubernetes’ essentials as well along with Docker essentials. Here are some of the docs to help you understand the concepts of Kubernetes.
AWS account
- AWS account setup: AWS offers a free tier for one year here is the link to set it up.
- Once you set it up you have a root account. It’s not a best practice to use your root account to do any tasks instead you should create an IAM group that has permissions for administrator access and add a user to it and log in with that user.
- Install AWS CLI
- Configure AWS CLI for the user you just created above. You should use this command
aws configureand it will ask for access key id and secret key.

- You have to install Docker for Desktop (whatever your OS is). Please follow this link to install Docker on your laptop. Once installed you can check the Docker info or version with the following commands.
docker info
docker --version- The Kubernetes command-line tool, kubectl, allows you to run commands against Kubernetes clusters. Install it from here.
Dockerize the Project
AWS EKS is a managed service that makes it easy for you to run Kubernetes on AWS. The first thing you need to do is to dockerize your project.
Here is the Dockerfile and it is using multi-stage builds to reduce the image size and surface attacks.
Here are the commands to build the image and run it on the Docker engine on your local machine. If you are new to Docker and check this detailed post on this topic.
// build the image
docker build -t react-nginx-ui .
// run the image
docker run -d --name react-nginx-webapp -p 80:80 react-nginx-ui// list the image you just built
docker images// list the container
docker psPushing Docker Image To ECR
Amazon Elastic Container Registry (ECR) is a fully-managed Docker container registry that makes it easy for developers to store, manage, and deploy Docker container images. Amazon ECR is integrated with Amazon Elastic Container Service (ECS), simplifying your development to production workflow.
Amazon ECS works with any Docker registry such as Docker Hub, etc. But, in this post, we see how we can use Amazon ECR to store our Docker images. Once you set up the Amazon account and create an IAM user with Administrator access the first thing you need to create a Docker repository.
You can create your first repository either by AWS console or AWS CLI
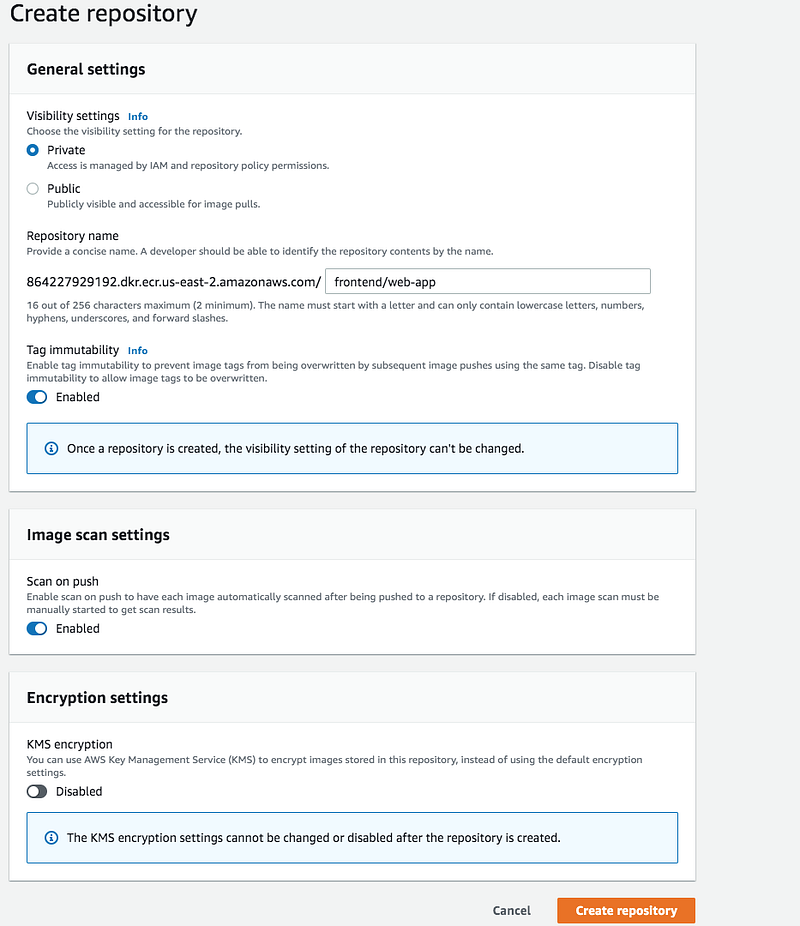
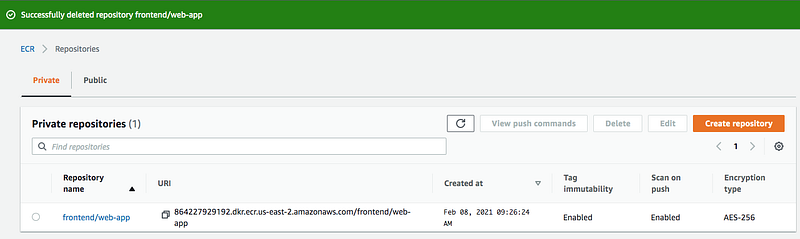
AWS console
Creating a repository with AWS console is straightforward and all you need to give a name.
AWS CLI
The first thing you need to do is authenticate to your default registry. Here is the command to authenticate to your default registry. You need to make sure you are putting the correct regions and account id in the command.
aws ecr get-login-password --region us-east-1 | docker login --username AWS --password-stdin aws_account_id.dkr.ecr.us-east-1.amazonaws.com
It’s time to create a repository with the following command
aws ecr create-repository \
     --repository-name frontend/web-app \
     --image-scanning-configuration scanOnPush=true \
     --image-tag-mutability IMMUTABLE \
     --region us-east-2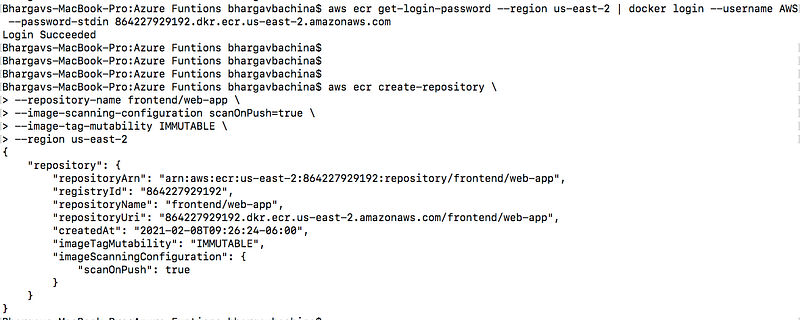
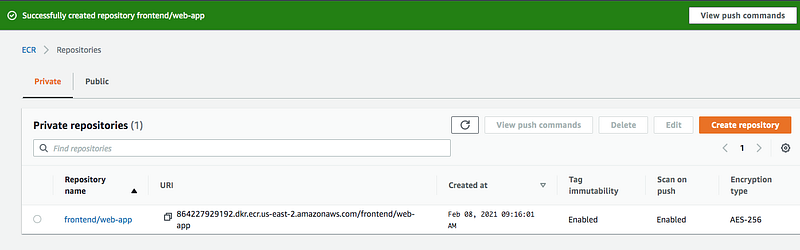
You will have the same result as well.
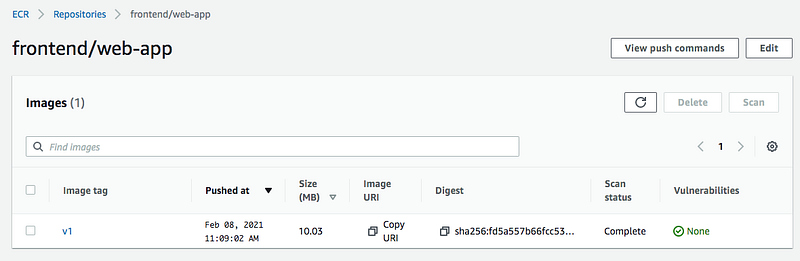
Tagging your local Docker image and Pushing
You have created a Docker image on your local machine earlier. It’s time to tag that image with this repository URI in the above image.
docker tag react-nginx-ui:latest 864227929192.dkr.ecr.us-east-2.amazonaws.com/frontend/web-app:v1Once you tag the image and it’s time to push the Docker image into your repository.
// list the images
docker images
// push the image
docker push 864227929192.dkr.ecr.us-east-2.amazonaws.com/frontend/web-app:v1
Create a Cluster and Worker Nodes
Getting started with AWS EKS is easy all you need to do the following steps
- We need to create an AWS EKS cluster with AWS console, SDK, or AWS CLI.
- Create a worker node group that registers with EKS Cluster
- When your cluster is ready, you can configure kubectl to communicate with your cluster.
- Deploy and manage your applications on the cluster
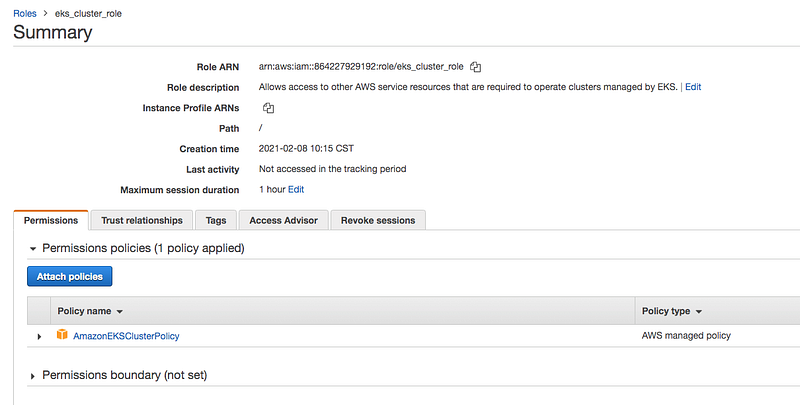
Cluster Creation
Let’s create a cluster by following this guide here. Make sure you created a role for the EKS to allow Amazon EKS and the Kubernetes control plane to manage AWS resources on your behalf. I created a role called eks_cluster_role. Here is a link to create a cluster role.
Let’s create a cluster by giving the below information.
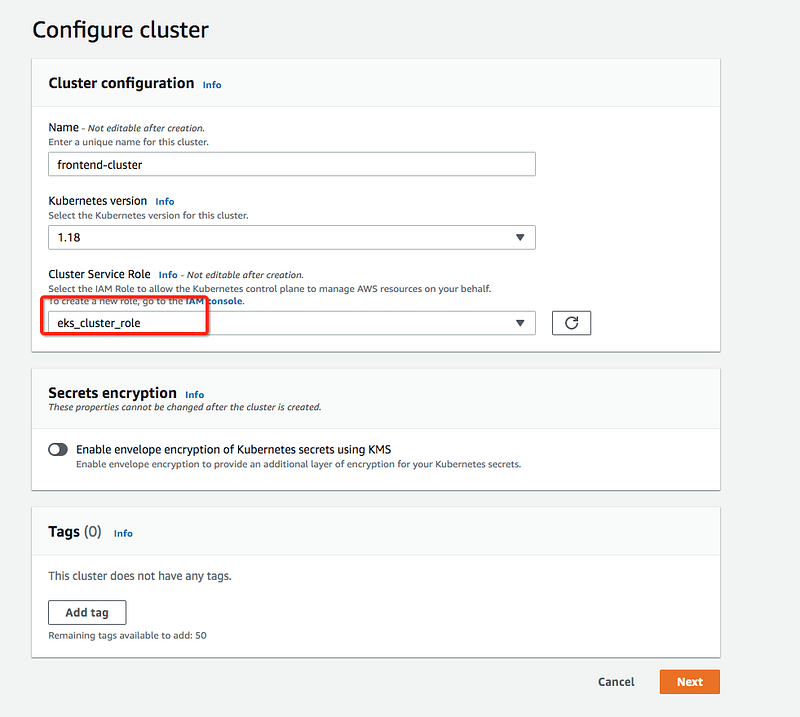
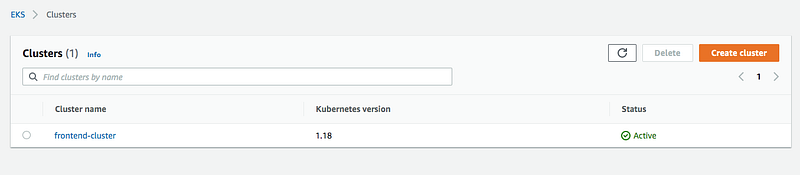
It takes some time for the cluster to get created and it should be in the active state once it is created.
Create Worker Nodes
It’s time to create nodes and before you do that we have to create this role called NodeInstanceRole. Follow this guide to create one.
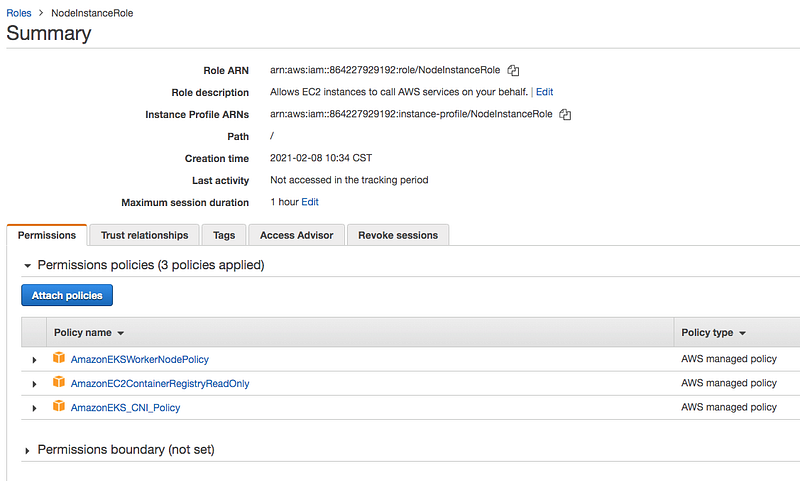
Follow this guide to create a node group after the role is created.

Configure kubectl to use Cluster
- We need to install kubectl on our machine, follow this guide to install depending on your OS.
- The next thing we need to do is to install an aws-iam-authenticator. Follow this guide. We need this to authenticate the cluster and it uses the same user as AWS CLI is authenticated with.
- Use the AWS CLI update-kubeconfig command to create or update your kubeconfig for your cluster. Here region-code is us-east-2 and cluster_name is frontend_clutser
aws eks --region region-code update-kubeconfig --name cluster_name
You can check with these commands.
// get the service
kubectl get nodes
// get the current context
kubectl config current-context
Deploy Kubernetes Objects On AWS EKS Cluster
Now we have configured kubectl to use AWS EKS from our own machine. Let’s create deployment and service objects and use the image from the AWS ECR. Here is the manifest file which contains these objects.
If you cloned the above example project and you are at the root folder just use this command to create objects kubectl create -f manifest.yml

You can use the following commands to verify all the objects are in the desired state.
// list the deployment
kubectl get deploy
// list the pods
kubectl get po// list the service
kubectl get svc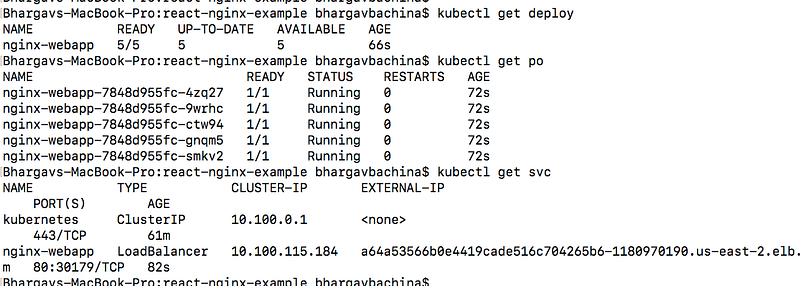
Summary
- Amazon Elastic Kubernetes Service (Amazon EKS) is a managed service that makes it easy for you to run Kubernetes on AWS without needing to stand up or maintain your own Kubernetes control plane.
- You need to create an AWS Account as a prerequisite.
- It’s not a best practice to use your root account to do any tasks instead you should create an IAM group that has permissions for administrator access and add a user to it and log in with that user.
- You should use this command
aws configurewith access key and secret key. - Amazon EKS is a managed service that makes it easy for you to run Kubernetes on AWS.
- Amazon Elastic Container Registry (ECR) is a fully-managed Docker container registry that makes it easy for developers to store, manage, and deploy Docker container images.
- Amazon ECR is integrated with Amazon Elastic Container Service (ECS), simplifying your development to production workflow.
- Amazon ECS works with any Docker registry such as Docker Hub, etc.
- You have to follow these steps to run apps on the Kubernetes cluster: we need to create an AWS EKS cluster with AWS console, SDK, or AWS CLI. Create a worker node group that registers with EKS Cluster, when your cluster is ready, you can configure kubectl to communicate with your cluster, Deploy and manage your applications on the cluster
Conclusion
We have deployed a simple React application with an NGINX web server on AWS EKS Cluster. In future posts, we will see how we can add a load balancer and how we can route requests to the Kubernetes Cluster.


