
How To Serve React Application With NGINX and Docker
Learn How to build with an example project

There are so many ways we can build React apps and ship for production. One way is to build React with NodeJS or Java and another way is to build the React app and serve that static content with NGINX web server. When we build with NGINX and docker we don’t have to deal with server runtime or server related code. All we need to build the app for prod and serve the generated static content with the NGINX server.
In this post, we will see the details and implementation of the second approach. We will go through step by step with an example.
- Introduction
- Prerequisites
- Example Project
- Just Enough NGINX For This Project
- Implementation
- Summary
- Conclusion
Introduction
In this project, we are going to use React as a JS library, NGINX as a web server, docker as a container runtime.
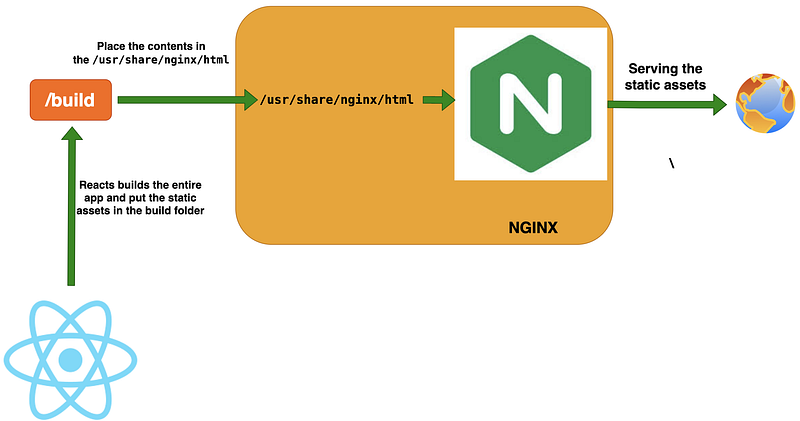
If we look at the above diagram, React builds the app and place the static assets in the /build folder. We place these assets in the NGINX default location /usr/share/nginx/htmlwhere it serves the web content from.
Prerequisites
There are some prerequisites to accomplish this task. We have to run NGINX in the docker and place the static assets in the NGINX and run the whole setup inside the docker. We need to install nodejs to install dependencies. Please install all the below tools to follow along with this tutorial or you want to run this on your machine.
Example Project
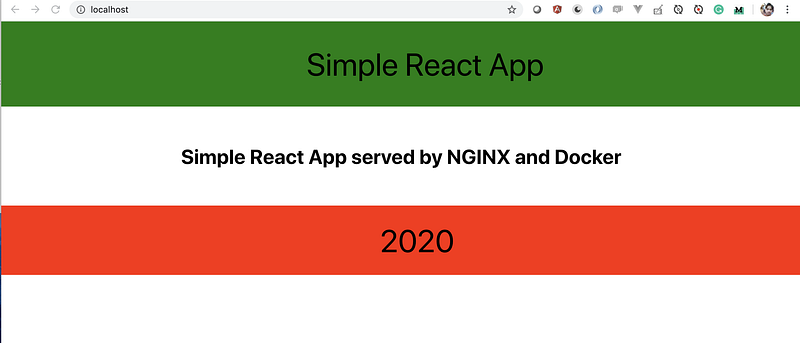
This is a simple project which demonstrates serving static React application with NGINX and Docker. We have a simple app with a header, footer and with a message.
Here is the example project where you can clone and run on your machine
// clone the project
git clone https://github.com/bbachi/react-nginx-docker
// install and start the dependencies
npm install
npm start// build the docker image
docker build -t react-ui .
// run the app
docker run -d --name reactui -p 80:80 react-uiThis is a simple React app that has the header, footer and some message on the dashboard. Here are the Header.js, Footer.js and, App.js files
Just Enough NGINX For This Project
We are not going through everything about NGINX here and we just go through just enough for this project. If you are already familiar with this stuff, you can skip over to the next section.
NGINX processes are divided into one master process and several worker processes. The master process takes care of evaluating configuration and maintaining worker processes and the worker processes take care of actual requests. We can define the number of worker processes in the configuration file which can be placed in the directory /usr/local/etc/nginx, /etc/nginx or /usr/local/nginx/conf.
The configuration file consists of directives that form the modules or contexts. There are two kinds of directives: simple directives and block directives. A simple directive has names and parameters separated by a space and ends with a semicolon like this listen 80; . A block directive is the same but has additional information and surrounded by braces like this { listen 80; root /usr/share/nginx/html; }.
Let’s understand the NGINX configuration file that we used in this project. Below is the nginx.conf file which is located under folder .nginx at root location of the project.
Everything is a context in the configuration file. We have a hierarchical context that starts with the main context. For example, worker_processes and events are defined in the main context and another context starts with http. We have another context inside http called server which listens on port 80 and serving static assets from the root location /usr/share/nginx/html.
We can have multiple declarations of the server inside the http context and we can have multiple declarations of location inside the server context.
Implementation
We use Docker as a container runtime for this project. We are using multi-stage builds to build the Docker image. Here is the Dockerfile for the project.
Stage 1
We are using node:10-alpine as a base image for the stage1 and copying package.json to install all the dependencies. We then copy the remaining project later, in that way we can skip the installing dependencies every time there is a change in the files. Docker uses a cache to build the image from existing layers if there is no change.
We build the project with the react-scripts and all the built static files are placed in the /build folder.
Stage 2
Stage 2 starts with the base image nginx:alpine and copy the nginx.conf file, remove the index file from the root location, and finally, copy all the files from stage 1 to the root location where it can serve the content from.
Build the Image and Run the Project
Let’s build the project with this command docker build -t react-ui. and you can run the project with this command docker run -d --name reactui -p 80:80 react-ui . You can run the app on http://localhost:80
Important Things to notice
The container port and nginx listen port should be the same which is 80 otherwise you would get ERR_EMPTY_RESPONSE when you run the project.
// container port
docker run -d --name react-ui -p 80:80 reactui
// nginx conf
http {
server {
listen 80;
}
}We should include this directive in the nginx.conf file otherwise all the styles are rendered as plain text in the browser.
include /etc/nginx/mime.types;Exec Into the Running Container
While the container is in running state we can exec into it and see the contents of the file system.
docker exec -it reactui /bin/shWe can actually see all the contents under /usr/share/nginx/html

Summary
- NGINX can be used as a web server or reverse proxy to serve the static content.
- All the NGINX configuration can be placed in this file
nginx.conf. - We need to build the react app and place all the static files in the root location of the NGINX to serve the web.
- Docker is used as the container runtime.
- We use multi-stage builds to reduce the final image size and remove unnecessary files from the production environment.
- Docker image can be built with
docker build -t react-ui . - Run the container with this command
docker run -d --name reactui -p 80:80 react-ui. - It’s very important to match ports while running the container and the listen port in nginx.conf file. Otherwise, you would get an ERR_EMPTY_RESPONSE error.
- You can exec into the container to explore the file system with this command
docker exec -it reactui /bin/sh.
Conclusion
NGINX is a high-performance web server that serves content and application delivery, improves security, facilitates availability and scalability for the web apps. If you want to avoid or there is no need for building UI apps with Java or node js server runtime, you can build the UI app and serve the static files with the NGINX at scale. In the next post, we can explore how to interact with the API.


