
Understanding Docker Volumes with an example
Before going deep into volumes, Let’s understand how containers persist data in the host filesystem.
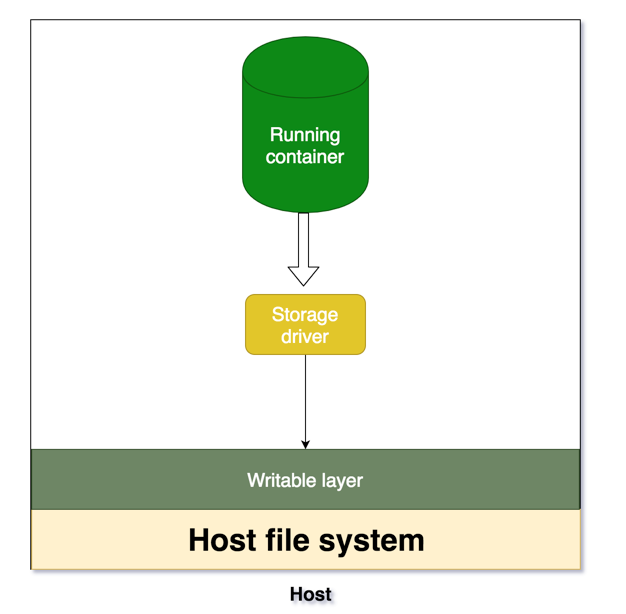
If we look at the above diagram, whenever running container wants to persist data, it actually put that data into the writable layer through storage driver. well, we have some problems with that!!!
What are the problems
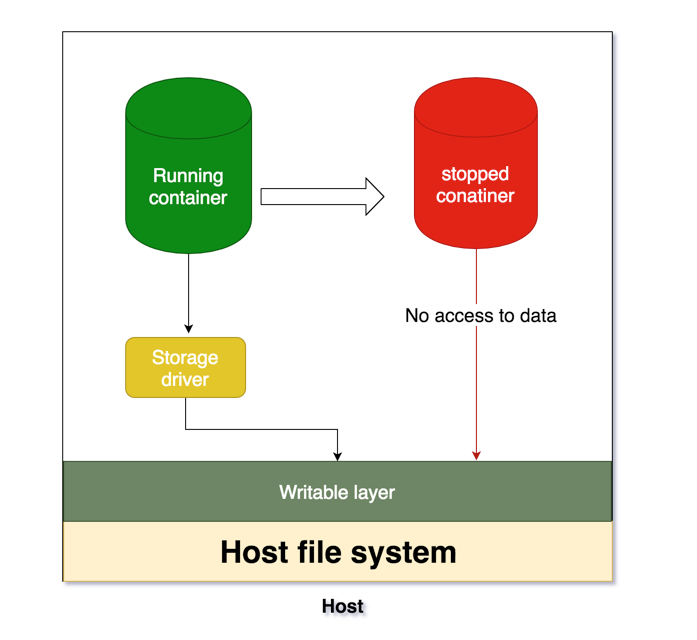
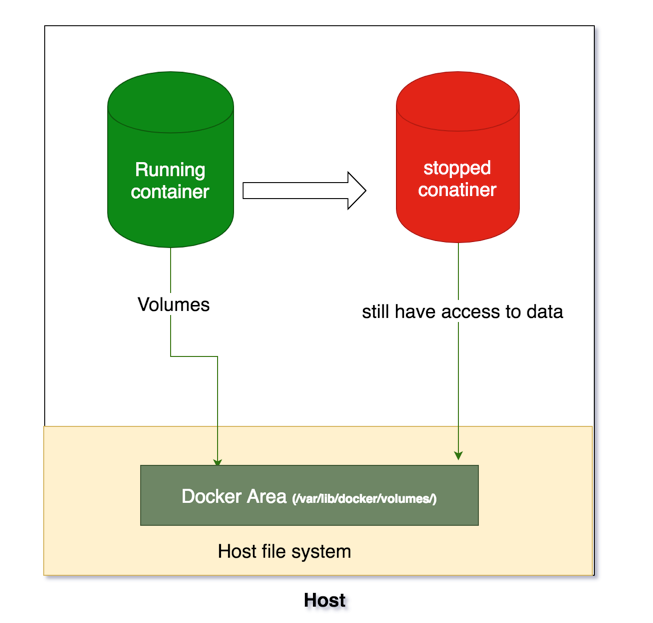
- Data is no longer persisted and difficult to access if container stops as shown in the following diagram
- As we can see writable layer is tightly coupled with host filesystem and difficult to move the data.
- We have an extra layer of abstraction with a storage driver which reduces the performance.
Let’s see in action
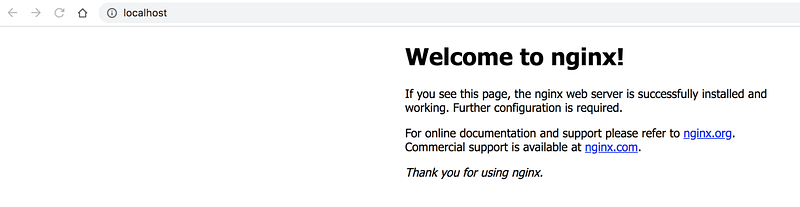
Let’s pull the latest nginx image from the docker hub and run the container and load the home page which listens on port 80.
// pull the nginx image
docker pull nginx
// run the container
docker run -it --name=webApp -d -p 80:80 nginx

Let’s use the docker exec command to edit the welcome page and load it.
// list the running containers
docker ps
// exec command
docker exec -it webApp bash// cd to welcome page and edit it
cd /usr/share/nginx/html
echo "I changed this file while running the conatiner" > index.html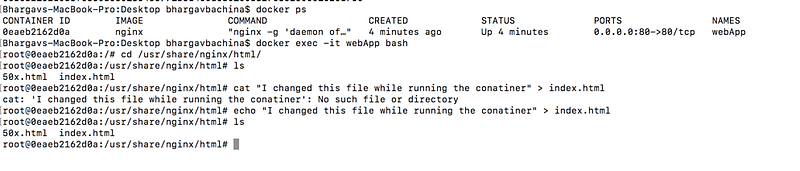

Let’s stop the container and start it again. we can still see the changes that we made. what if we stop this container and start another one and load the page. There is no way that we could access the file that we have changed in another container.

How Volumes can solve above issues
Volumes are saved in the host filesystem (/var/lib/docker/volumes/) which is owned and maintained by docker. Any other nondocker process can’t access it. But, As depicted in the below other docker processes/containers can still access the data even container is stopped since it is isolated from the container file system.
How to create a Volume
We can create a volume with the below command or while container/service creation and it is created in the directory of the docker host and When you mount the volume into a container, this directory is what is mounted into the container. we should notice the difference between creation and mounting.
docker volume create <volumeName>How to remove a Volume
docker volume pruneLet’s put Theory into practice
Let’s run these commands and see how it works!!. we can see the location of volumes in the docker area of the host file system with the inspect command.
// create a volume
docker volume create new_vol
// list volumes
docker volume ls// inspect volumes
docker volume inspect new_vol// removing volumes
docker volume rm new_vol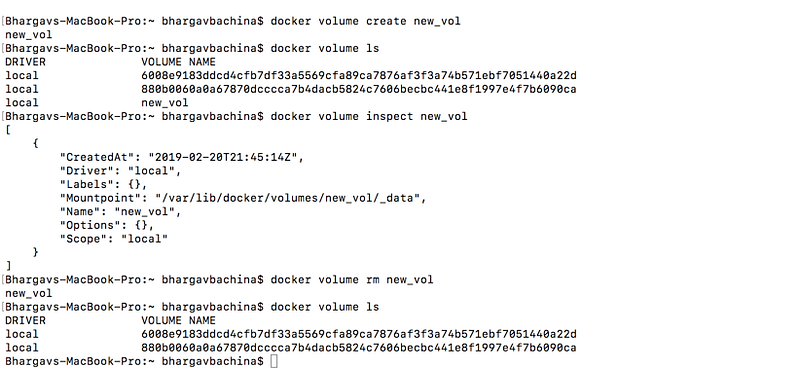
login into docker VM and check the filesystem and volumes location. We can see docker volumes location in the below image.
screen $HOME/Library/Containers/com.docker.docker/Data/vms/0/tty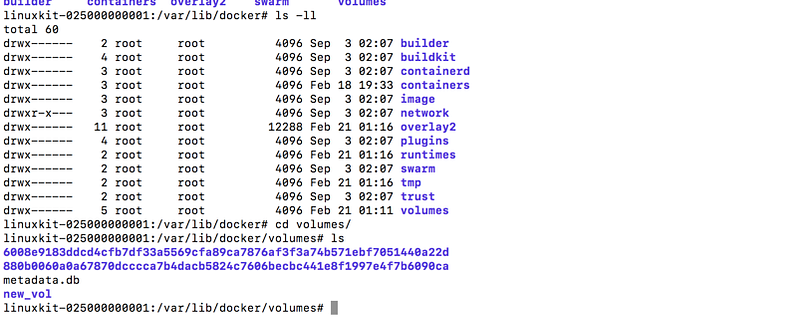
Let’s see the same example with volumes
Let’s run the nginx container with the below command. we are starting nginx container with the welcome page mounted to volume new_vol that we created above and exposing the port 80.
Once we run this command and ssh into docker volumes, we can see that volume prepopulated with default welcome page from nginx location /usr/share/nginx/html
docker run -d --name=webApp1 --mount source=new_vol,destination=/usr/share/nginx/html -p 80:80 nginx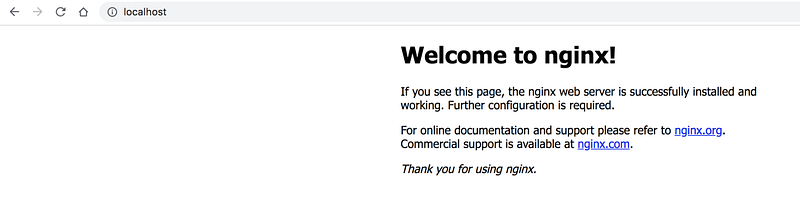
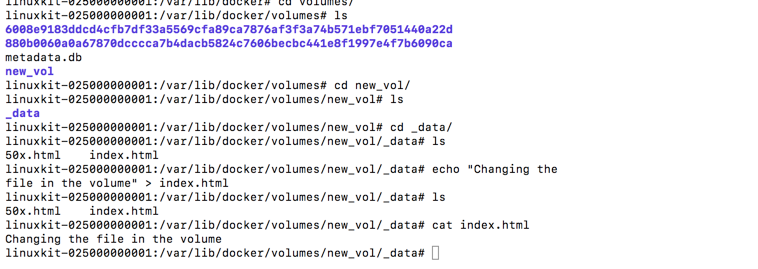
Let’s go and change the index.html from the new_vol location by ssh into the docker.

Let’s stop this container and start another one with the same command
docker stop webApp1
docker run -d --name=webApp2 --mount source=new_vol,destination=/usr/share/nginx/html -p 80:80 nginxwe can load the page again localhost:80 and still see the html file that we edited in the volume.
So, with the help of volumes, we can easily access the data even we stop the container and it’s very easy to access data and import the data to anywhere.
Don’t forget to remove volumes
if you stop the container and remove it, you should remove volume new_vol manually. stopping or removing the containers doesn’t delete the volumes.
Conclusion
Volumes can be more safely shared among multiple containers. We can prepopulate the volume with the run command and we can even backup, restore and remove volumes.
if you found this helpful. give it a clap :)


