
Hello-World w/ Atmel Studio 7 & UNO Serie (Episode#01)
We need to pave our road first…
Run Episode#00 first!
Our goal is to work with IO, ADC, TIMERS, PWM, EEPROM and much more on Arduino inside AS7… you never seen nothing like this serie on net!
After guaranteeing to record via USB in an arduino (via Ep # zero) we will enter our Hello World!
Let’s get Started!
Atmel Studio 7 & Arduino UNO
ATMEL STUDIO 7 Project
This is a HELLO WORLD ARDUINO UNO + ATMEL STUDIO 7! We’re gonna turn on led on pin 5 of the Arduino B port. Nothing special uh…;b
We need to know the simple first...
Let’s get started!
Step#01→ Go to Episode#00 and make Arduino works in Atmel Studio 7;)
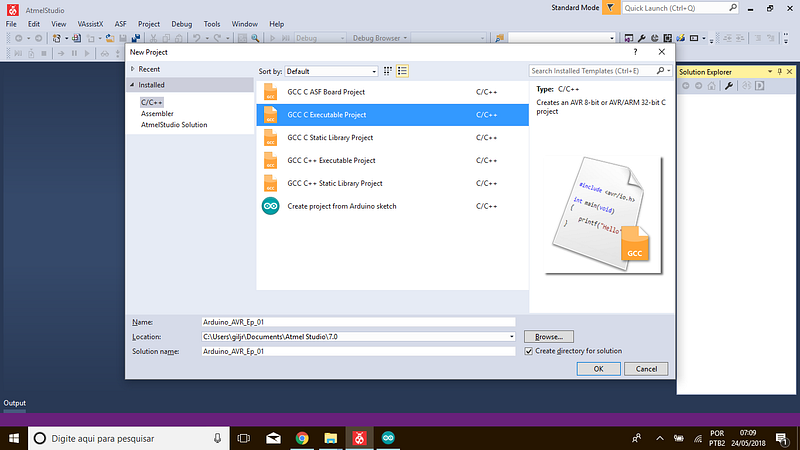
Step#02→Close and open a new project; name it Arduino_AVR_Ep_01;
Step#03→Choose GCC C Executable Project (C/C++);
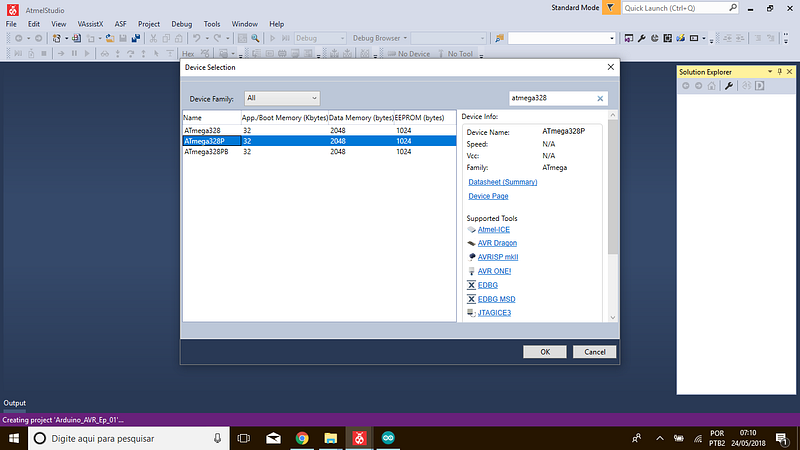
Step#04→Now Select ATmega328p as device;
Step#05→A barebone code will be created as below;
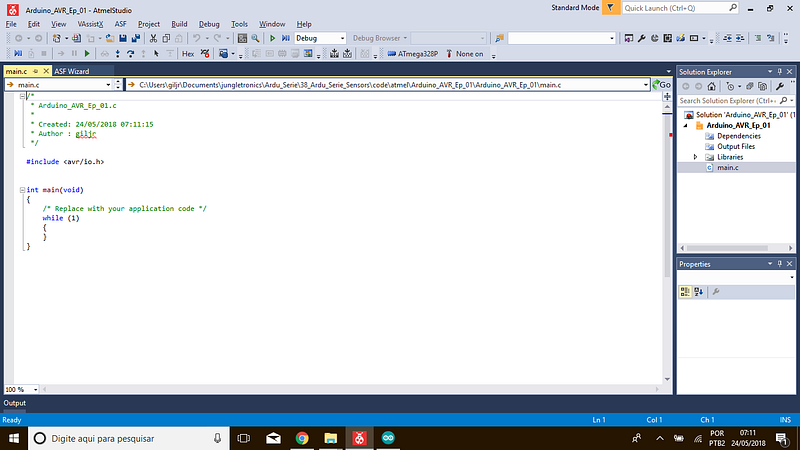
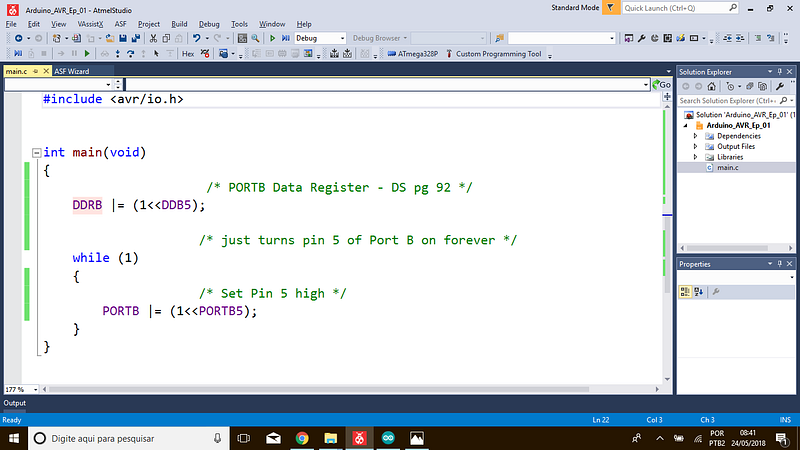
Step#06→Copy/paste this code;
#include <avr/io.h>int
main(void)
{
/* PORTB Data Register - DS pg 92 */
DDRB |= (1<<DDB5);
/* just turns pin 5 of Port B on forever */
while (1)
{
/* Set Pin 5 high */
PORTB |= (1<<PORTB5);
}
}
Step#07→Go to menu Build > Build Solution (or press F7) and compile the code; you’ll see…
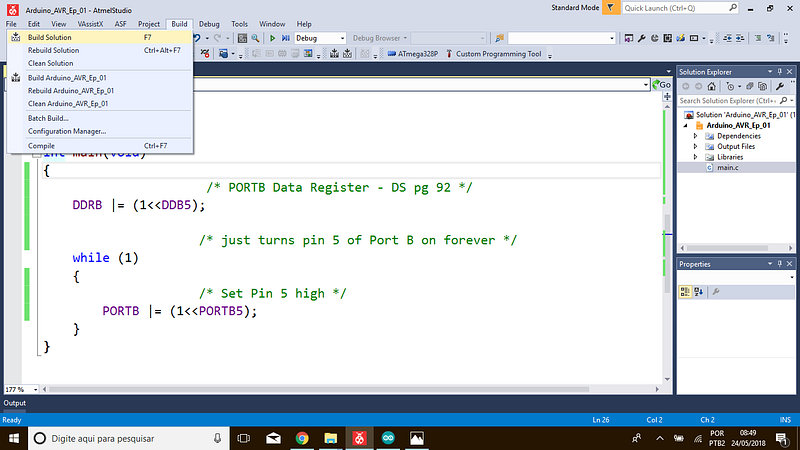
Build succeeded.
==== Build: 1 succeeded or up-to-date, 0 failed, 0 skipped ====Step#08→Finally Tools > Send to Arduino UNO and the code will be loaded into your Arduino UNO …
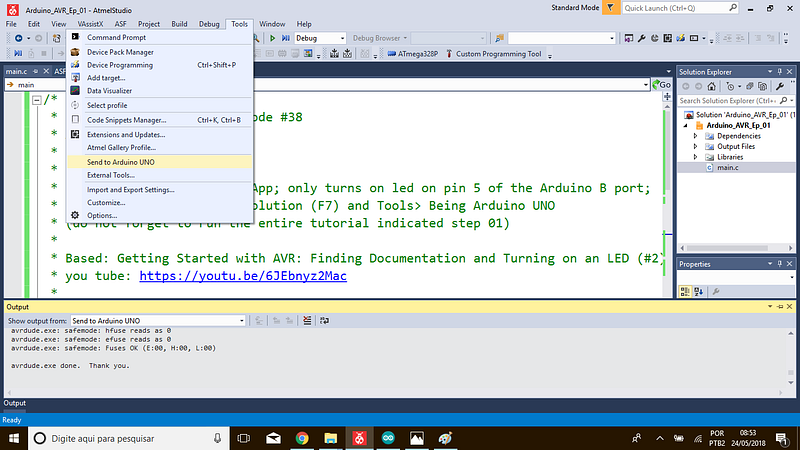
and there you have it!
In the next post we will Introduce AVR LibC functions . Our goal is to work with IO, ADC, TIMERS, PWM, EEPROM and much more on Arduino… you never seen nothing like this serie on net!
So stay tuned!
References & Credits
Follow along with the entire ‘Getting Started with AVR’ series: http://bit.ly/GettingStartedwithAVR
→Goto Episode#02
Complete Serie:
#00 HowTo-Load-Into-Arduino-AS7
#08
#09
#10