
Pin-Change-Interrupt w/ Atmel Studio 7 & UNO (Episode#04)
Now that we have a switch working in our code, with this post you will be able to have the AVR chip monitoring for a pin change interrupt. Let’s step forward!

The idea is when the button is pressed it wakes the system up!
So, Lets get started!
With our previous code (see Episode 3: https://github.com/giljr/avr/tree/master/atmel) we get the button on Arduino Pin 7 and a LED on Arduino Pin 8. Good!
Step#01→ Copy Paste previous code to another Atmel Studio 7 Project;
Step#02→ Include
This is the new library needed.
Step#03→ Open Arduino schema and find out what pin and port the LED is attached;
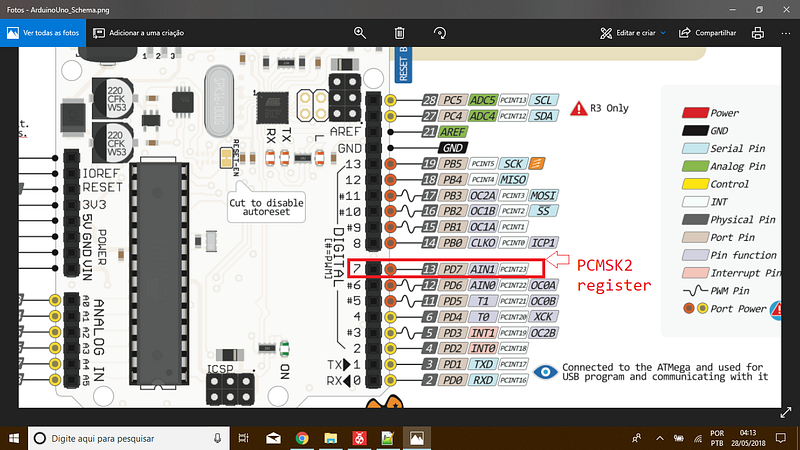
Step#04→ Go to datasheet and look for pcint23. You’ll find out that this is the code:
PCMSK2 |= (1<<PCINT23);
PCICR |= (1<< PCIE2);
Here we are setting Arduino Pin 7 to enable interrupt.
Then we enable the pin change interrupt on the control pin (PCICR);
Step#05→ Transfer the toggle routine from while method to ISR, and there you have it!
Now we have the main free and the routine transfered for the interruption routine.
Great, we have prepared everything so that we can use the sleep method in the next post. See you soon!
BTW here is the code till here:
https://gist.github.com/giljr/2b348ce16c170a970794a8f7b8f387e2
References & Credits
Follow along with the entire ‘Getting Started with AVR’ series: http://bit.ly/GettingStartedwithAVR
→Goto Episode#05
Complete Serie:
#00 HowTo-Load-Into-Arduino-AS7
#04_Pin-Change-Interrup
#08
#09
#10