
Sending emails in Power BI — ZERO CODING

Assume you need to send some emails to a list of people shown in a Power BI report. Instead of doing this manually, you can use the Power Automate for Power BI visual to automate this flow with Zero Coding. Yes, you read that right, ZERO CODING. All you need to do is to create a workflow using Power Automate and you will be able to send all those emails on a single button-click.
So let’s get right to it!
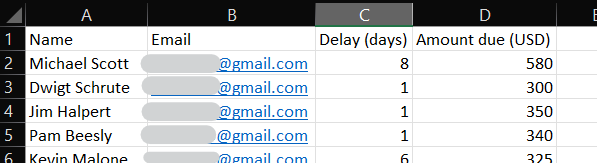
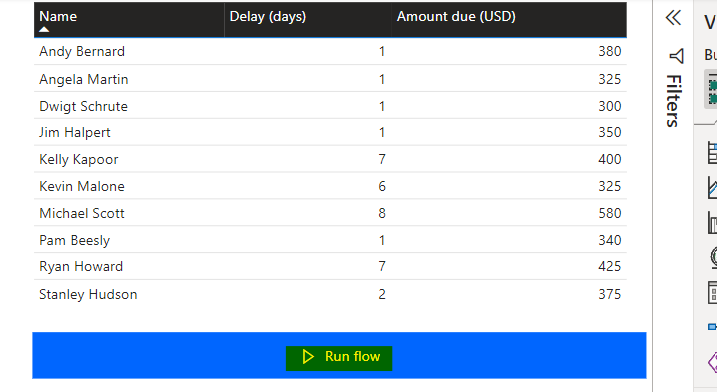
I created a dummy dataset consisting of rental delay information for the purpose of this tutorial with the fields; Name, Email, Delay (days) and Amount due (USD). I used my email address in the email field of all records, just to test out if it was working correctly.
Note: If you are an absolute beginner who is just getting stated with Power BI, I have included a link at the end of this article which shows how to create a simple Power BI report using an excel dataset.
Let’s get started!
STEP 1: ADD POWER AUTOMATE VISUAL TO REPORT
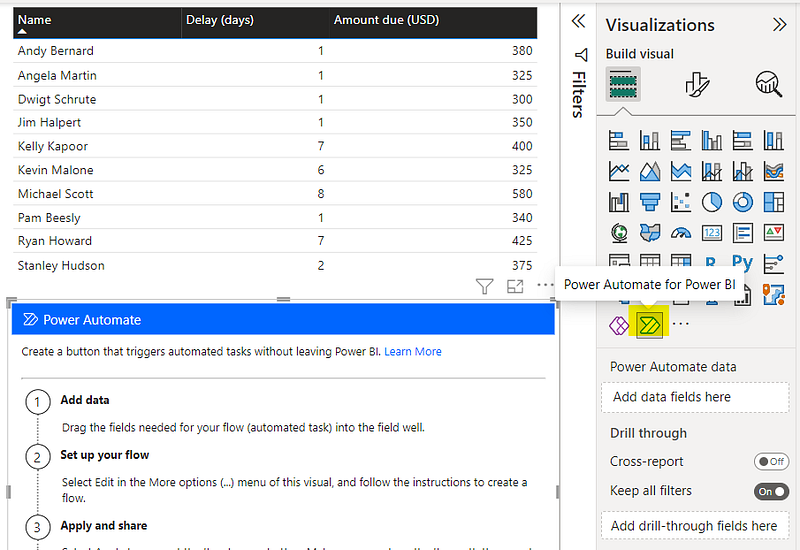
- Add the “Power Automate for Power BI” visual from the Visualizations panel
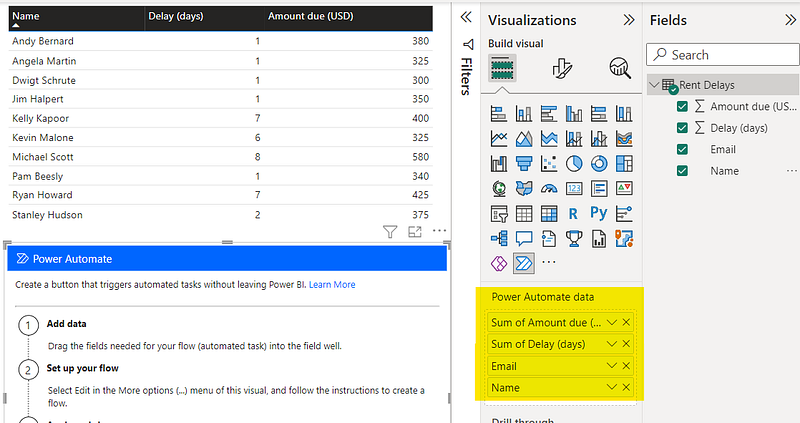
2. Click on the Power Automate visual and add the fields you need when sending the email to the Power Automate data section in the Visualizations panel
3. Click on the “More Options” button (three dots “…”) in the Power Automate visual and select “Edit” to start defining the workflow

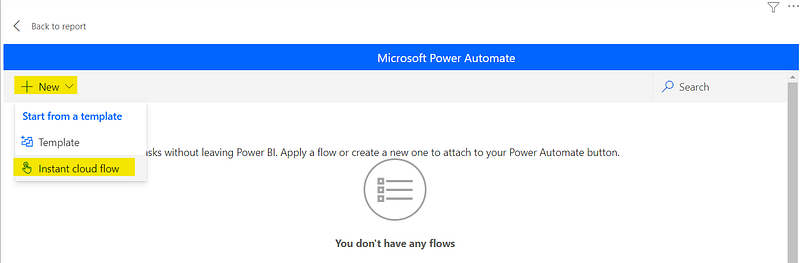
4. In the newly opened Microsoft Power Automate window, select “New” and select the “Instant cloud flow” option
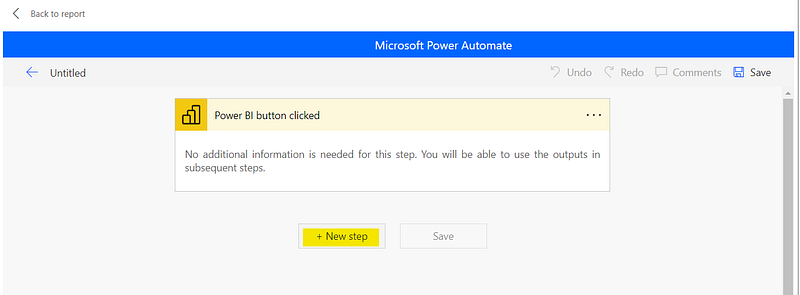
5. Now click on “New Step” to start defining the workflow
STEP 2: DEFINE WORKFLOW TO SEND EMAIL
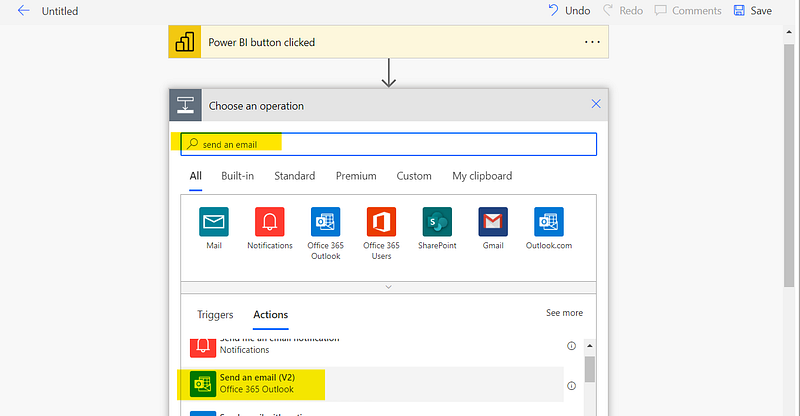
Now let’s create the workflow to send an email to everyone in the rental delays table.
6. Search for “Send an email” in the search bar and select the “Send an email (V2)” option from the Actions tab as shown below
STEP 3: SPECIFY EMAIL RECIPEINT, SUBJECT AND BODY
You can add dynamic content from the Power BI dataset by clicking on the “Add dynamic content” option and selecting the relevant field.
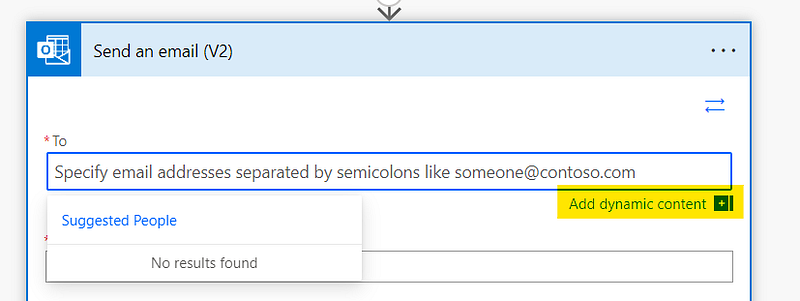
You can see the fields in your Power BI data set with the prefix “Power BI data”.

This is the sample email that I created.

This ensures that an email is sent to all the emails in the Email field of our dataset with the corresponding name, delayed days and Amount due information as above.
STEP 4: NAME AND SAVE THE WORKFLOW
Give your workflow a name and save and apply the changes.


STEP 4: RUN WORKFLOW
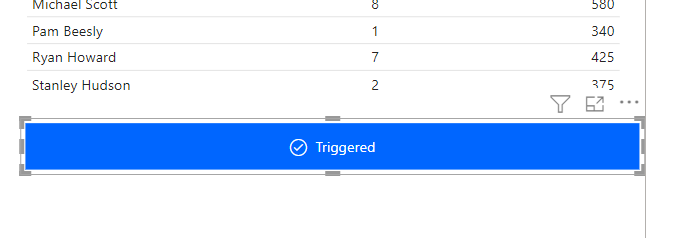
When you go back to the report you will see a button called “Run Workflow”.
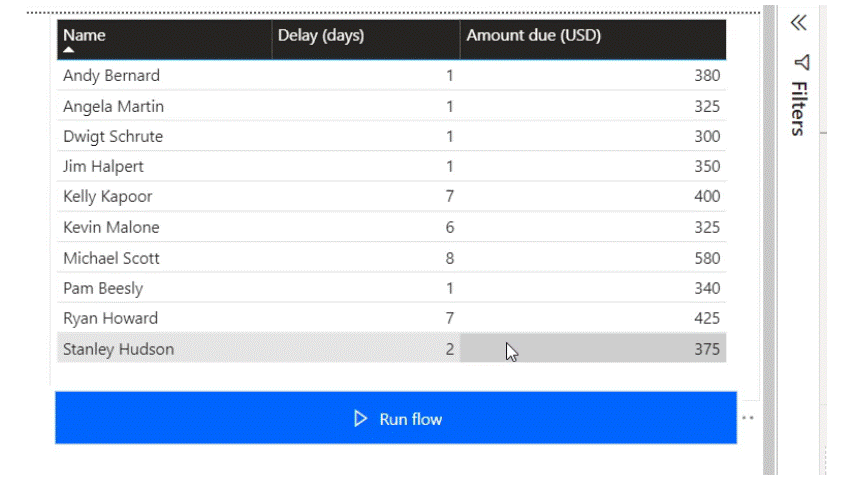
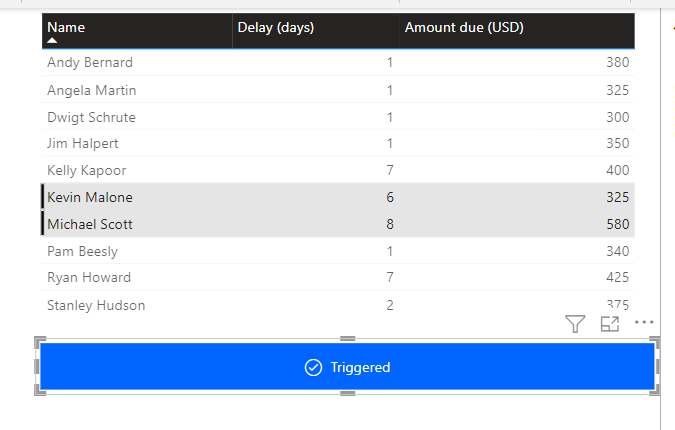
Click on this button while holding down the “ctrl” key in the keyboard. This will trigger the workflow that we created and send emails to everyone in the Power BI dataset.
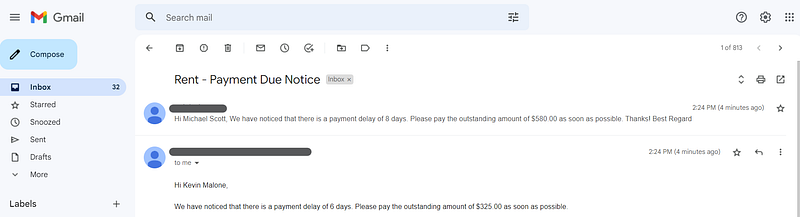
If you used your email address for this exercise like me, you will now able to see the emails in your inbox.

As you can see, the email contains data taken from the Power BI dataset as we specified in the workflow.
If you need to send this email only to a few people in the list, you can select those records and then run the workflow. This will send the email to only the individuals selected.
This brings us to the end of our tutorial.
Stay tuned for a second part where I will show you how to add conditions and perform different based on a condition in a workflow!
Thanks for reading and hope this was helpful!
More articles on Power BI (full list here),
- Power BI: Filtering using Slicers
- Creating a pop up window in Power BI
- How to Show/Hide fields dynamically in Power BI
- How to create a Power BI report in 15 mins : For absolute beginners
If you are interested in Machine Learning, check out this list.
Subscribe to DDIntel Here.
Visit our website here: https://www.datadriveninvestor.com
Join our network here: https://datadriveninvestor.com/collaborate


