
Mastering Midjourney: Cinematic Prompts & Over-The-Shoulder Shots
Cinematography with Midjourney: How To Create Over-The-Shoulder (OTS) Shots
The over-the-shoulder (OTS) shot is one of the most effective and widely used visual storytelling techniques and a standard tool in any filmmaker’s arsenal.
With Midjourney’s latest V5 model, it’s now much easier to use this type of shot in your cinematic images. Here’s how.
What are OTS shots used for?
They are mainly (but not exclusively) used to depict conversations between two people: The camera is behind one of them and captures the scene from their point of view, with part of their shoulder and head in the out-of-focus foreground and their counterpart in the middle of the frame. The technique is often used sequentially, switching between the OTS perspectives of the two subjects, creating a dynamic interplay that effectively conveys dialogue and reactions.
How to create OTS shots with Midjourney
In the days of Midjourney V4, you had a lot more obstacles to overcome to achieve an OTS shot, since the old model didn’t have that strong V5 tendency toward photorealism. So let’s get to it.
At the start, we set the scene and characters.
cinematic shot, two women in a hotel lobby scene --ar 16:9 --seed 4000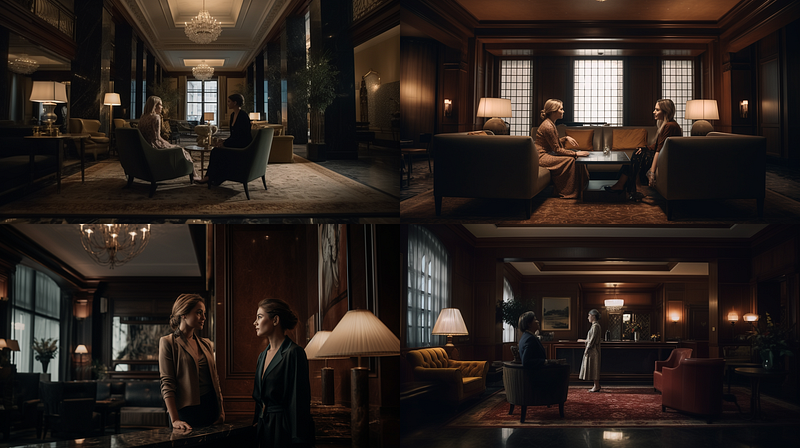
(if you are new to Midjourney and wonder about the “ — ar 16:9” and “ — seed 4000” thing, catch up here and here)
With our scene & characters in place, let’s jump into our desired shot size.
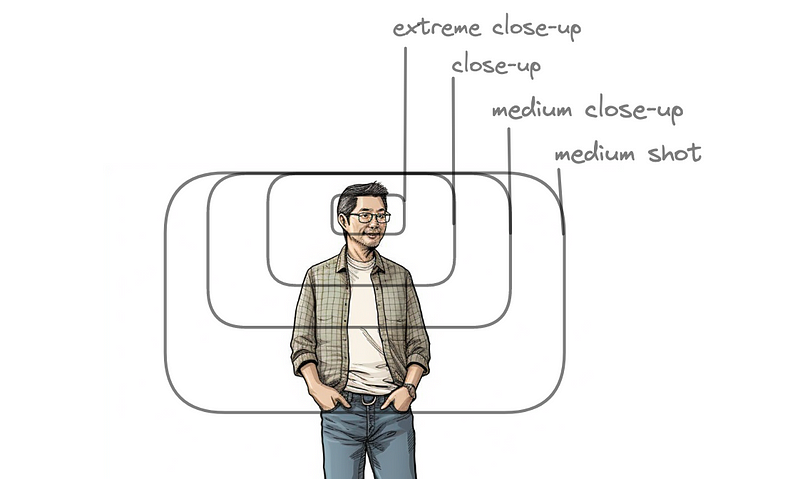
For OTS shots we need to get to “close-up”.
If we add this to our prompt, we can immediately see the problem we will be dealing with:
cinematic close-up shot, two women in a hotel lobby scene --ar 16:9 --seed 4000 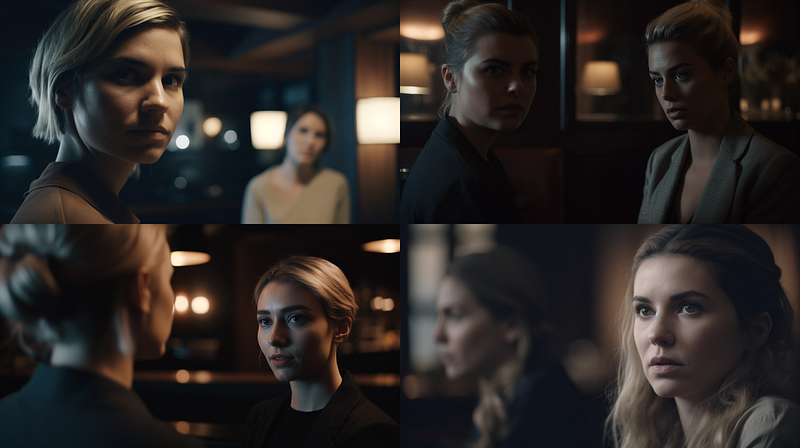
Images 1, 2, and 4 do not match the conversation scene we are aiming for. Image 3, on the other hand, is almost ready.
This kind of problem is very common when creating AI images with Midjourney: the algorithms work holistically in the sense that they take into account the connotations of words and not just the narrow meaning of a word alone.
In this case, the semantic field of “people in a hotel lobby” rendered the two women in a conversation when we were not in close-up because statistically, that’s what most people look like in lobbies: they talk to each other.
In the close-up, things got different: “Talking to each other” is only one option for the model (image 3), while others could be “standing side by side”, “watching something” etc. We know from our explorations in V4, that we can use the phrase “having a conversation” to accomplish two things at once:
- keep the character in the right spot for our OTS shot
- as well as facilitate the OTS shot when we go into close-up.
For the sake of completeness, we start over again:
cinematic shot, two women having a conversation, hotel lobby scene
--ar 16:9 --seed 4000 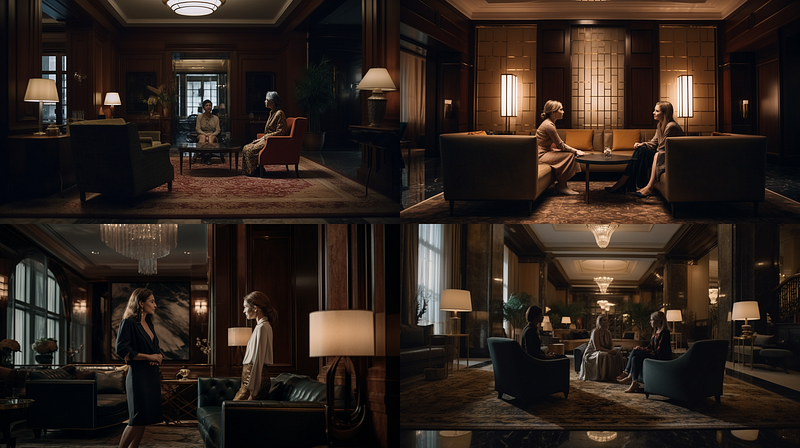
Now we jump into close-up.
cinematic close-up shot, two women having a conversation, hotel lobby scene
--ar 16:9 --seed 4000 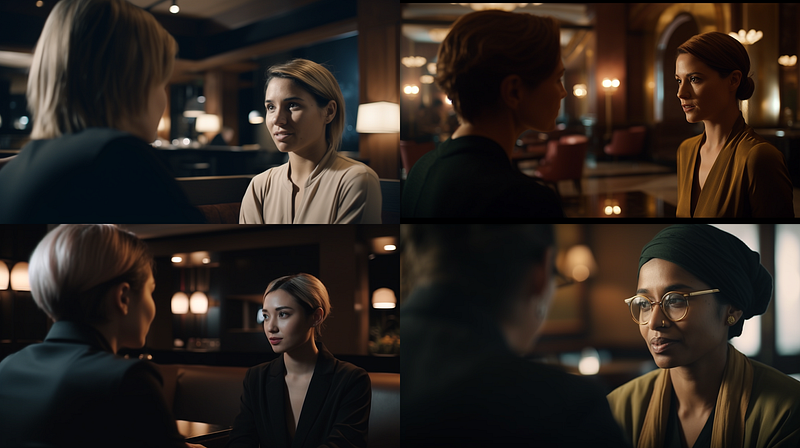
Et voilá, all four images in the initial grid are already going in the right direction.
One important thing to add: I placed the shot types at the end of a prompt while using Midjourney V4, however, in V5 I try to always include them in the prefix. In V5, putting shot types at the end of the prompt will cause a lot of unnecessary problems.
Look at these examples, where I put “close-up” at the end:
cinematic shot, two women having a conversation, hotel lobby scene,
close-up shot --ar 16:9 --seed 4000 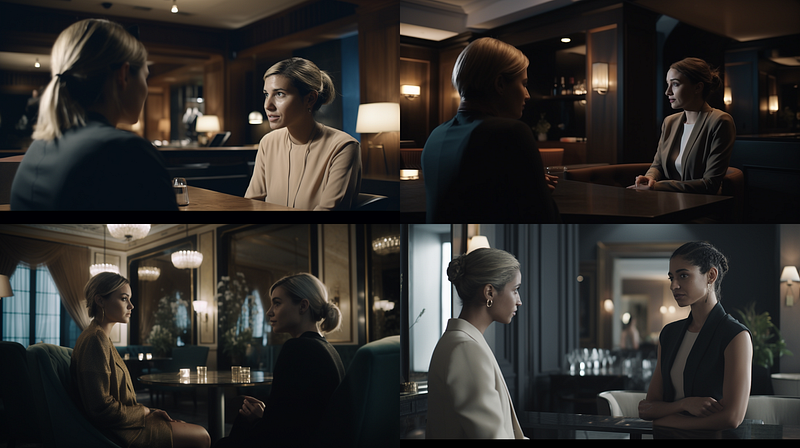
No close-ups.
This could very well be an effect of Midjourne’s refined understanding of natural language. Something that is often misunderstood, as if Midjourney would only understand natural language now. It still understands comma-separated prompts, and they might even be more useful in some cases, but you have to know when to use which.
Also, V5’s tendency toward photorealism is very helpful, but it doesn’t replace the use of cinematic terminology.
For example, if you don’t use a cinematic prefix at all:
close-up shot, two women having a conversation, hotel lobby scene
--ar 16:9 --seed 4000
… then the original grid differs even more and we are not even close to our destination.
So, back to the OTS shot.
We were here:
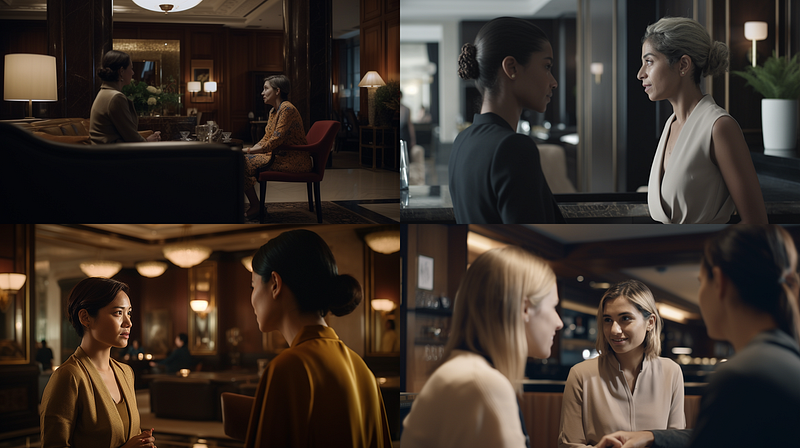
cinematic close-up shot, two women having a conversation, hotel lobby scene
--ar 16:9 --seed 4000All four images in the initial grid were already on the right way.
What is missing, though?
If you look at image 4, you might agree that this is closer to our OTS aesthetic than the other three.
Why?
- Because it is closer to a “close-up” shot than the rest of the images and
- it makes specific use of depth of field.
Let’s examine them one by one. First, we add “shallow depth of field” to stress the effect we’re looking for.
cinematic close-up shot, two women having a conversation, hotel lobby scene,
shallow depth of field --ar 16:9 --seed 4000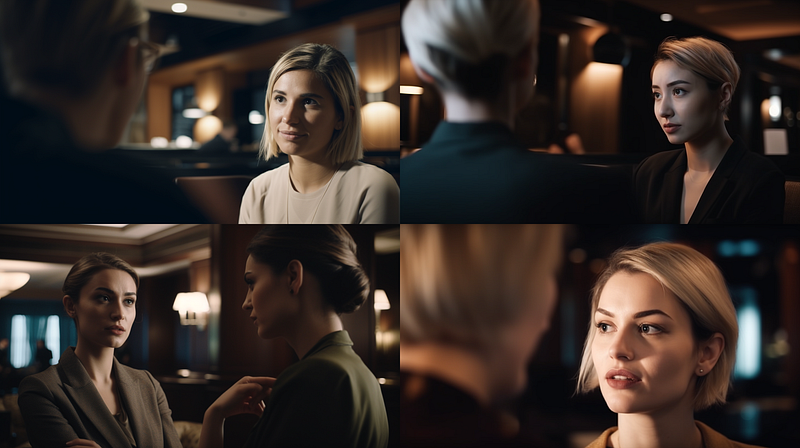
Next, we are exaggerating the close-up shot to stress it’s importance as well. Interestingly, V5 always seems to be one shot size begind (“close up” tends to become a medium shot, and “extreme close up” tends to result in a close up)
cinematic extreme close-up shot, two women having a conversation,
hotel lobby scene --ar 16:9 --seed 4000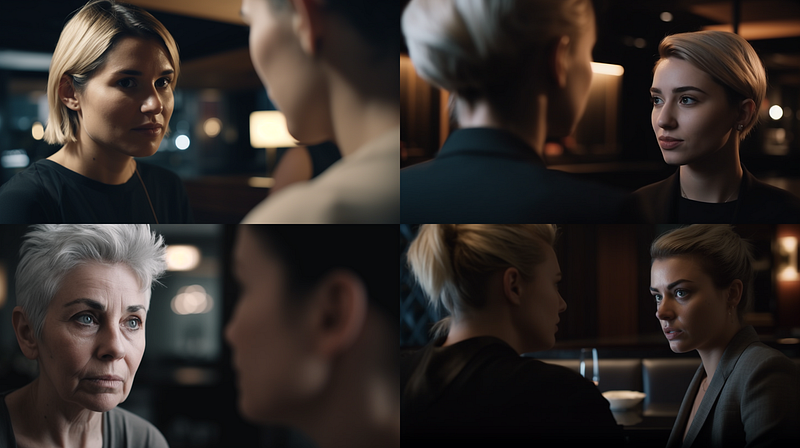
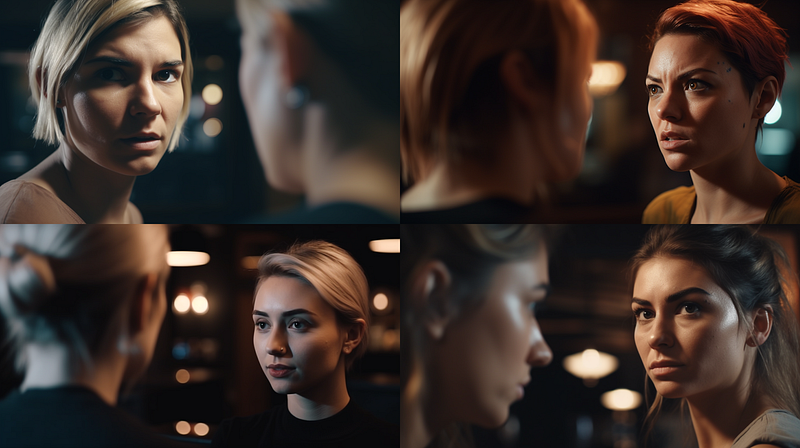
Finally, we can combine these two “enforcements” to get the OTS aesthetic in all images of the initial grid.
cinematic extreme close-up shot, two women having a conversation,
hotel lobby scene, depth of field --ar 16:9 --seed 4000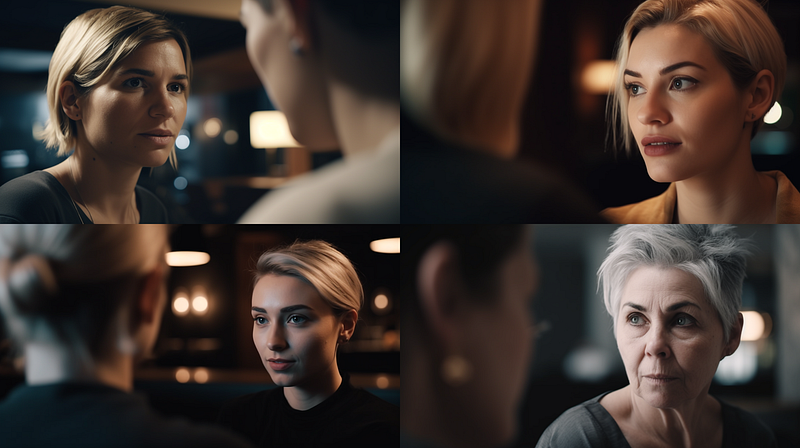
From here you can start exploring, e.g. further fine-tune shot descriptions:
cinematic extreme close-up shot, two women having a conversation,
hotel lobby scene, shallow depth of field --ar 16:9 --seed 4000 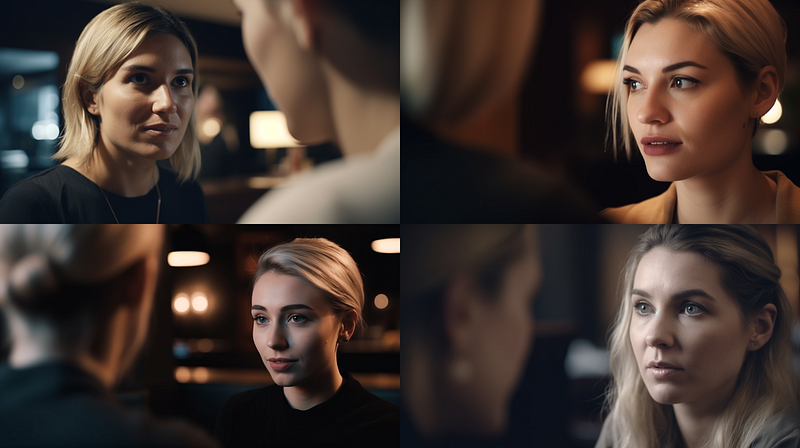
Or change the emotions:
What else?
What about situations that are not conversations? Can we also make something like this work more reliably :
cinematic over-the-shoulder shot, a man stealing a bagel in a bakery,
depth of field --ar 16:9 --seed 4000 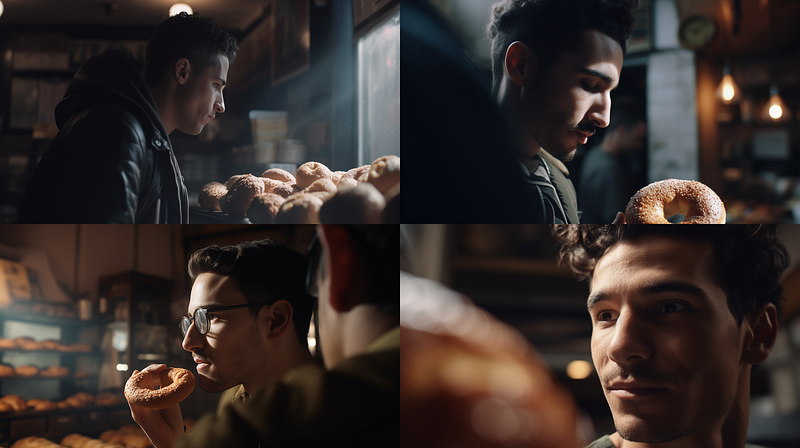
(Image 4, a shot over a bagel’s shoulder? 😂 )
We’ll dive into this one in one of the next episodes of Mastering Midjourney V5. If you missed the last ones? No worries, you can catch up here, here and here.
I hope you enjoyed this post. Keep exploring! 🚀
➡️ For more information about AI & Creativity, follow me on Twitter or Medium (use my referral link to get full access to all my articles and those of thousands of other writers).
➡️ If you like my content, why not leave a “clap” at the end of this article, so more people can see it?


