Configure a Transit Gateway To Route Traffic From A Site To Site VPN to a NAT
ACM.472 Get the routing right or packets will mysteriously disappear
~~~~~~~~~~~~~~~~~~~~~~~~~~~~~~~~~~~~~~~~~~~~~~~~~~~~~~~~~
⚙️ Check out my series on Automating Cybersecurity Metrics. The Code.
🔒 Related Stories: Network Security | AWS Security | Cloud Architecture
💻 Free Content on Jobs in Cybersecurity | ✉️ Sign up for the Email List
~~~~~~~~~~~~~~~~~~~~~~~~~~~~~~~~~~~~~~~~~~~~~~~~~~~~~~~~~ In the last post I showed how to properly set up a public and private subnet to route traffic to a NAT. If you haven’t already set this up, read this post first and deploy those resources.
If you don’t set up your public and private subnet, routing, NAT, and Internet Gateway correctly, none of this will work. I explain what transitive routing is in that post and why traffic through a VPN can’t reach the Internet and why it can when you add a Transit Gateway.
Mind the cost of this solution if you’re on a budget.
Find all the posts in this sub-series at the bottom of this introductory post:
Alright, let’s do it.
Add a Transit Gateway
Navigate to the VPC dashboard.
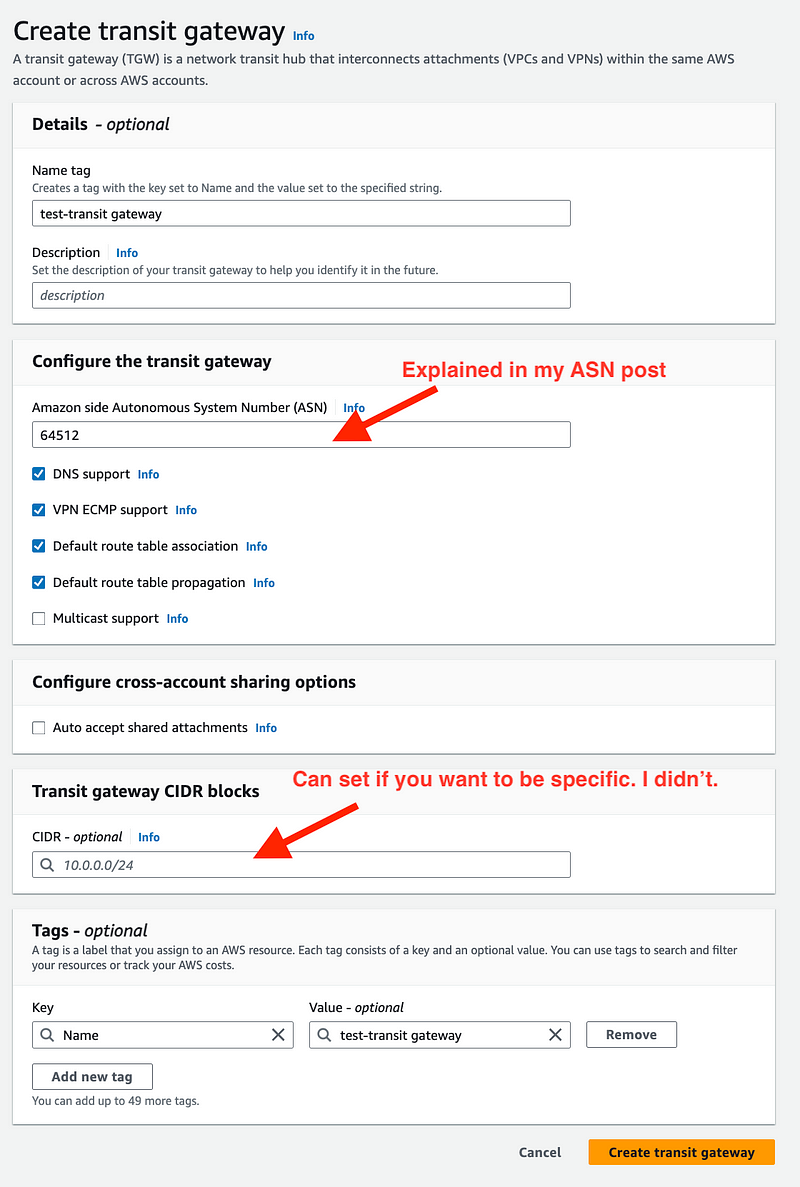
Click on Transit gateways. Click Create transit gateway.

- Add a name.
- Add a private ASN. See this post for more about ASNs.
I left everything else as default.
Click Create transit gateway.
Create a Flow Log for your Transit Gateway
Choose Actions > Create flow log
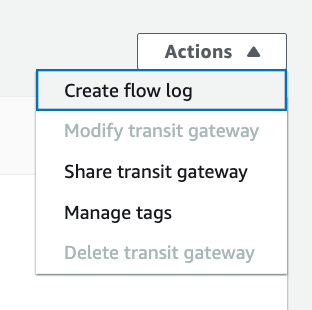
I chose CloudWatch and used the group and role created in the VPC post.
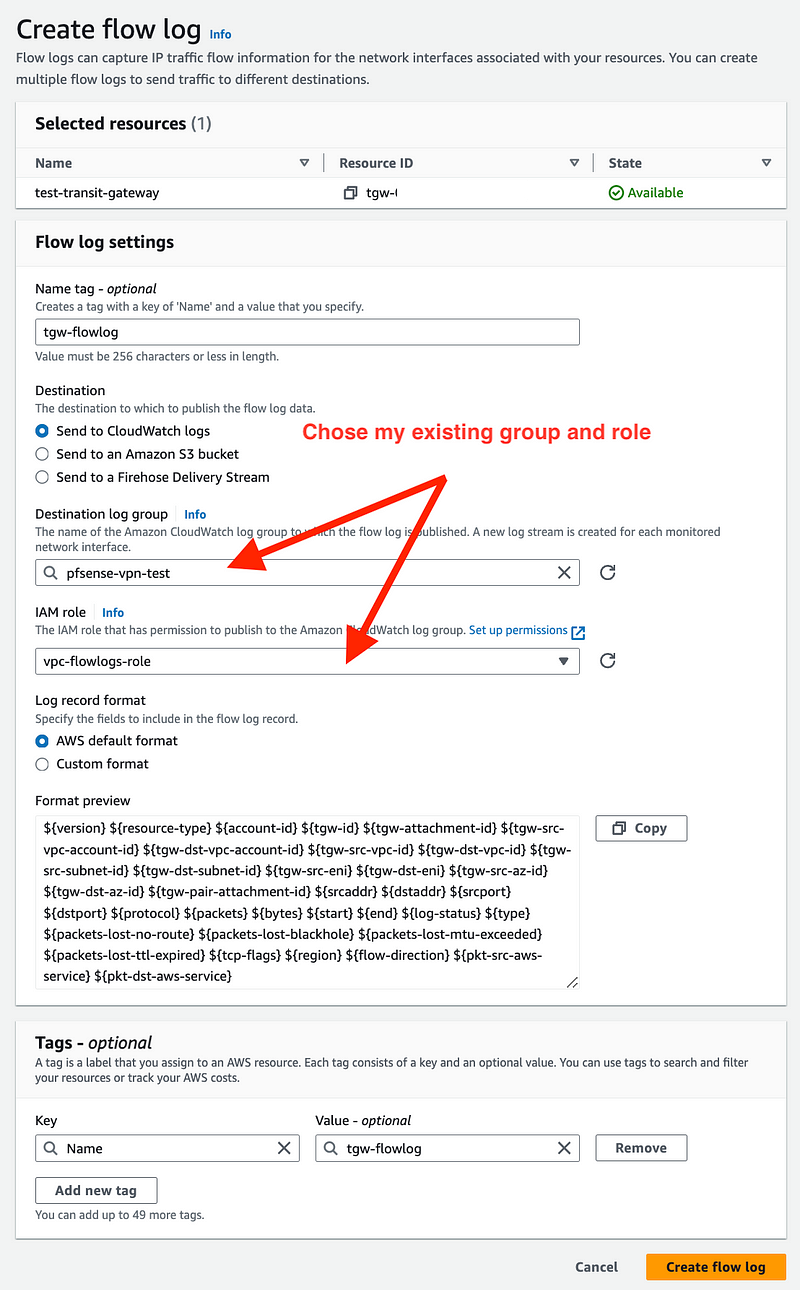
Create Transit Gateway VPN Attachment
Click on Transit gateway attachments in the left menu.
Click Create transit gateway attachment.

Enter the details.
- Choose your Transit Gateway ID.
- Choose VPN
- Choose your existing Customer Gateway (from VPN post above.)
- I’m using static routes. (If you want to use BGP see ASN post above.)
- Fill in or leave the tunnel options blank. Note that I tried to reuse my tunnel options for the VPN created in a prior post but AWS still created a separate Site to Site VPN and I had to re-establish my tunnel. I did not have to change anything on the pfSense side.
- Click Create transit gateway attachment.
You will get a message that your attachment was successfully created but it will not immediately show up in the list. Wait a minute and refresh the screen to see it.
Configure Your Site-to-Site VPN
After you create your VPN attachment you will see a new Site-to-Site VPN in AWS.
Click on Site-to-Site VPN Connections.
I changed the name of the new Site-to-Site VPN to THIS IS NEW below so you can see what I mean. I didn’t create that. It was created when I created the Transit Gateway VPN Attachment. However, it’s not properly configured.

The configuration of the VPN for a Transit Gateway works the same way it does for a Site-to-Site VPN for a Virtual Private Gateway on the pfSense side. Follow the instructions I provided in my prior post which include downloading the configuration to get the pre-shared keys.

Just a note you might want to use certificates here instead of pre-shared keys, but I’m keeping it simple. Also, if I wanted to use a private CA on AWS that’s very expensive.
Follow the steps in this post to select specific encryption algorithms and prevent downgrade attacks.
Create a Transit Gateway VPC Attachment
Click Transit gateway attachments in the left menu.
Click Create transit gateway attachment.

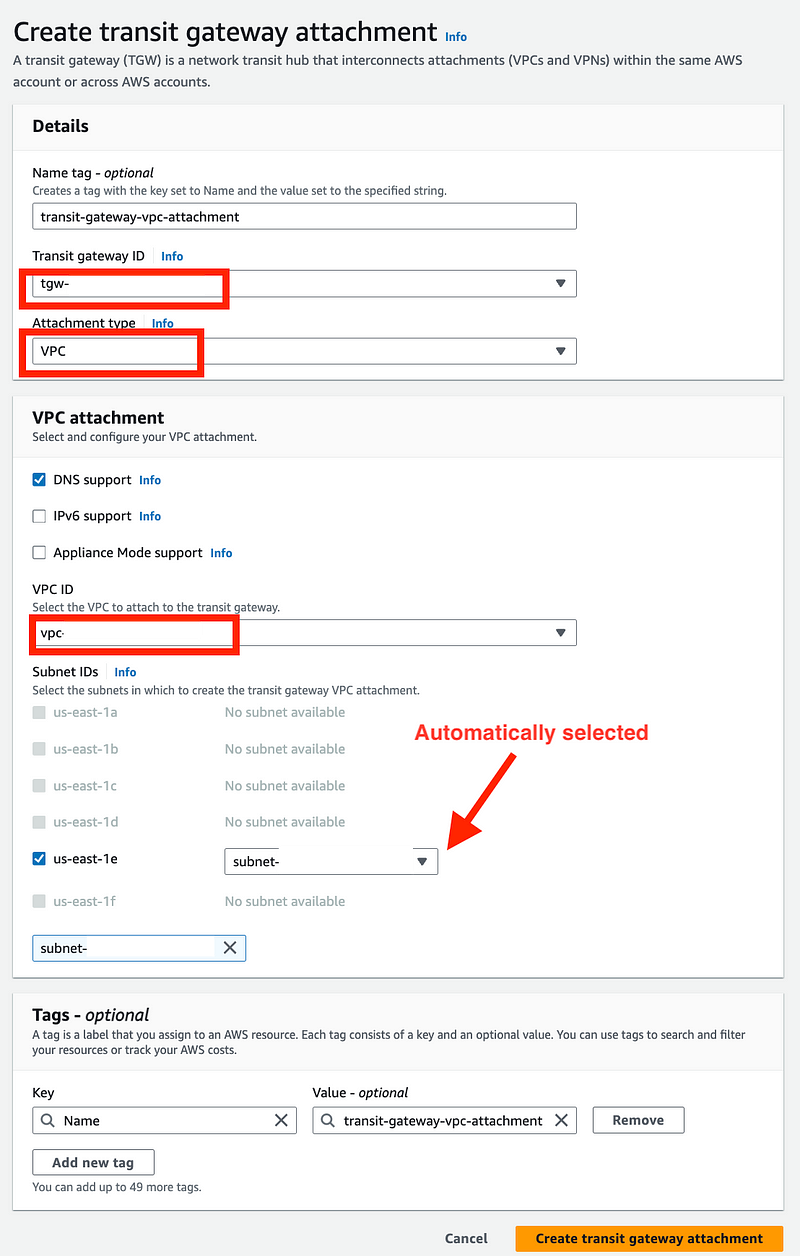
- Enter a name
- Choose VPC for Attachment type.
- Choose your VPC ID.
- The subnet is automatically populated. Just make sure it is the private subnet and your desired availability zone.
- Click Create transit gateway attachment.
Note that I’m not using IPv6 but select that if you are.
Add a Route to Your Private Network to the Transit Gateway
We need to tell the Transit Gateway where to route traffic destined for your private network. I explained how to configure and choose a private CIDR in my previous post where I configured a VPN on pfSense.
In this post I’m going to presume you choose 192.168.200.0/28.
Click on your Transit Gateway in the list of Transit Gateways.
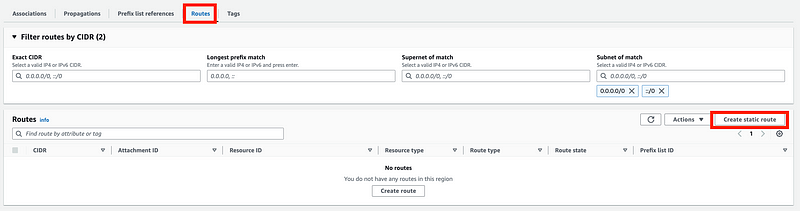
Click on the link under Association route table ID

Click on Routes. Click on Create static route.
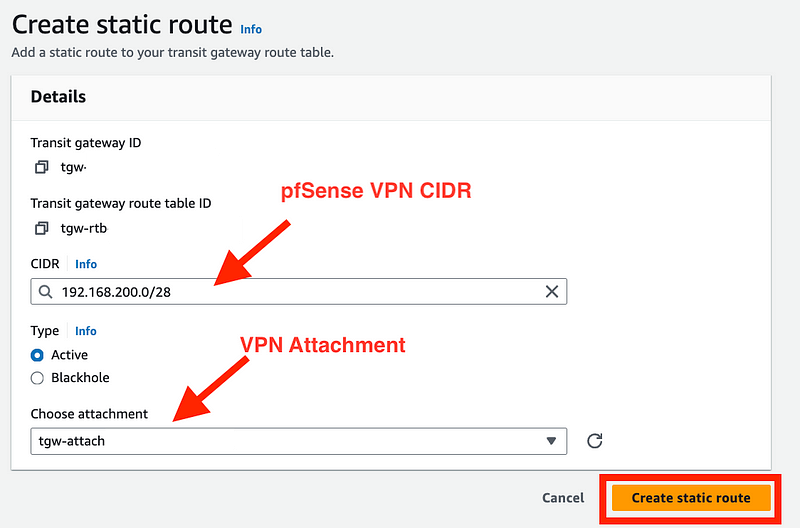
Enter your pfSense VPN CIDR.
Choose your VPN Attachment.
Click Create static route.
Now any time something to the Transit Gateway destined for that IP range, it will be routed (sent) to the VPN attachment and head out over the VPN connection to pfSense. (Presuming you’ve configured everything else correctly.)
Note that if you do this prior to establishing your VPN connection, the route will show that the traffic is going to a Black hole.

Once properly established it will show as active.

The routes to the VPC are automatically added when you add a VPC attachment. Any traffic sent to the Transit Gateway destined for those VPC CIDRs will be sent to the VPC attachment which is basically a network interface associated with that VPC.

Add a Route to The Internet to the Transit Gateway
OK, what if traffic comes into the Transit Gateway destined for the Internet. We only have a route for the private pfSense CIDR and a route for the VPC CIDRs. It will end up in never never land — the non-existent route to nowhere. We need to fix that.
Add a route to the Internet but where should we send it?
Recall that our VPC attachment is basically a network interface in our private subnet of our VPC.
Recall what happens when resources in our private VPC try to access the Internet from the last post.
- The traffic is sent to the Internet route in the private subnet route table which routes (directs) the traffic to the NAT in our public subnet.
- From there, any Internet-destined traffic in the public subnet gets sent to the Internet route which directs traffic to the Internet Gateway.
So if we route the traffic destined for an Internet IP address to the VPC Transit Gateway Attachment, it will get directed to the network interface in the private VPC which can send traffic to the Internet via the NAT.
Add a route to the Internet (0.0.0.0/0) with a target of the VPC attachment in the Transit Gateway route table the same way we just did for the private pfSense CIDR.
Create a static route in your Transit Gateway Route Table.

Choose 0.0.0.0/0 and the VPC attachment. Click Create static route.
Update the Public and Private Subnet Route Tables to Send pfSense Traffic to the Transit Gateway
There’s one last thing we need to do to make this all work. This is related to my no-route to host post when you’re sending data across networks.
In that post above I had to add routes to get the traffic back and forth between a UDM Pro and a pfSense router.
Similar in concept, when the NAT gets back a response that needs to get back to the pfSense network it needs a route for that IP range.
What happens if we don’t add a private route for the pfSense CIDR. There’s a route to the private VPC CIDRS that doesn’t match. There’s a route to the Internet Gateway for everything and I explained why that’s not going to work in the prior post.
We need to add a route to indicate that any traffic destined for the pfSense CIDR needs to go to the Transit Gateway. The Transit Gateway route table will direct traffic to those private IPs to the Transit Gateway VPN Attachment using the route we created above. That attachment will send the traffic over the VPN to pfSense.
Add a route to both the public and private route tables (the same way we did in the last post) to direct traffic to your private pfSense range back to the Transit Gateway.

Phew!
Well, that’s about it for now on the pfSense to Site-To-Site VPN to Transit Gateway to NAT to Internet Gateway solution.
As always, if you have questions, you can schedule a consulting call with me through IANS Research if you’re a customer of IANS or with me directly if you’re not.
Follow for updates.
Teri Radichel | © 2nd Sight Lab 2024
About Teri Radichel:
~~~~~~~~~~~~~~~~~~~~
⭐️ Author: Cybersecurity Books
⭐️ Presentations: Presentations by Teri Radichel
⭐️ Recognition: SANS Award, AWS Security Hero, IANS Faculty
⭐️ Certifications: SANS ~ GSE 240
⭐️ Education: BA Business, Master of Software Engineering, Master of Infosec
⭐️ Company: Penetration Tests, Assessments, Phone Consulting ~ 2nd Sight Lab
Need Help With Cybersecurity, Cloud, or Application Security?
~~~~~~~~~~~~~~~~~~~~~~~~~~~~~~~~~~~~~~~~~~~~~~~~~~~~~~~~~~~~~
🔒 Request a penetration test or security assessment
🔒 Schedule a consulting call
🔒 Cybersecurity Speaker for PresentationFollow for more stories like this:
~~~~~~~~~~~~~~~~~~~~~~~~~~~~~~~~~~~~~~~~~~~~~~~~~~~~~~~~~~~~~
❤️ Sign Up my Medium Email List
❤️ Twitter: @teriradichel
❤️ LinkedIn: https://www.linkedin.com/in/teriradichel
❤️ Mastodon: @teriradichel@infosec.exchange
❤️ Facebook: 2nd Sight Lab
❤️ YouTube: @2ndsightlab