Subnets And Routes For a Public NAT
ACM.471 Setting up proper routing to leverage a NAT to reach the Internet on AWS; Avoid traffic dropped due to transitive routing
~~~~~~~~~~~~~~~~~~~~~~~~~~~~~~~~~~~~~~~~~~~~~~~~~~~~~~~~~
⚙️ Check out my series on Automating Cybersecurity Metrics. The Code.
🔒 Related Stories: Network Security | AWS Security | Cloud Architecture
💻 Free Content on Jobs in Cybersecurity | ✉️ Sign up for the Email List
~~~~~~~~~~~~~~~~~~~~~~~~~~~~~~~~~~~~~~~~~~~~~~~~~~~~~~~~~ In the last post I showed that you can’t send traffic from a VPN with a VGW straight to a NAT on AWS. At least not the way I did it.
I’ve been looking at options for sending traffic from my local network through a VPN and out via an AWS NAT. All the related posts are at the bottom of this post.
When I started setting up a Transit Gateway one thing I realized is that I needed to adjust my public subnet configuration and routes because traffic wasn’t getting from my local network to the Internet through the NAT.
There are a few things you need to be aware of when using a Transit Gateway in order for your traffic to route properly. If you don’t set it up right, at the time of this writing, you basically have no error messages or logs to tell you what the problem is as I explained here and added additional context in the last post.
There are no routing logs to tell you where things are being routed and dropped due to “No route to host” type error messages. There are no logs to show routes used. There are also no traffic logs for an Internet Gateway or Virtual Private Gateway. Traffic just goes into a black hole if there’s no Elastic Network Interface in a VPC along the way to receive traffic and produce VPC Flow logs.
Transitive Routing
You need to set up the routes properly to avoid traffic patterns that are not allowed on AWS, mostly for good reason. You don’t want unexpected data leaks. I like to say, if there is a path, data will flow there like water.
When I was working at Capital One, due to the fact that transit routing was not allowed, I was told to set up a proxy to route traffic between various VPCs. One day I was looking at the traffic and saw our QA person trying to access production. I asked him, “Hey, what are you doing? I’m seeing traffic from your EC2 instance in production.” He said, “I’m not doing that!”
Well the problem was, due to the specific nature of the VPC routes, he was trying to reach a host in the QA environment but his traffic got routed to a production resource. He certainly wasn’t trying to do that but that is what happened. The most specific route wins and interesting things happen when you set up your routes incorrectly.
For example, if you have a NAT in one subnet and a route to an Internet Gateway in another subnet and you send traffic into the VPC but not specifically to the NAT because you’re trying to reach an Internet host, it will end up getting routed to the Internet Gateway. And it will be dropped.
Why? AWS Does not allow transitive routing or two hops to anything. There has to be an AWS Network Interface in your VPC and something to receive that data and transfer it along.
Transitive routing looks like this:
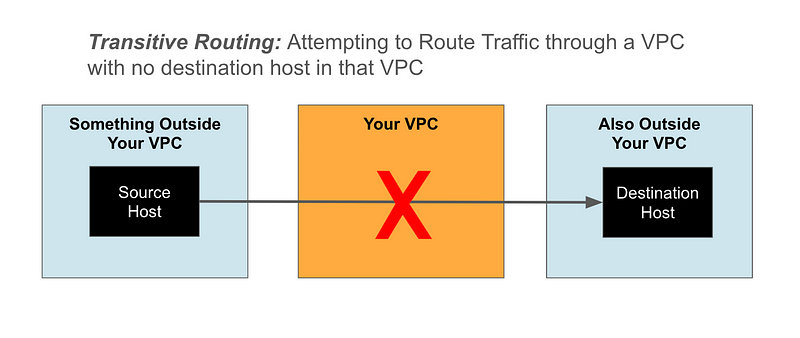
You’re trying to pass through a VPC without anything in between to receive and pass along the data. That scenario is not allowed. Here are scenarios that are not allowed in regards to passing data through a VPC without an endpoint in the VPC itself as the destination:
- From the Internet through a VPC’s routes, to some other VPC.
- From a VPC, through a second VPC’s routes, to a third VPC.
- From a VPC, through another VPC’s routes, to the Internet.
What we need to avoid is the first one. What I initially misconfigured was that I was trying to hit the NAT but my packets were heading straight from my private network to the Internet Gateway. That’s not allowed. In order to avoid that we need to make sure our data is destined for a NAT, prior to the Internet Gateway. I’ll show you how to make sure that happens.
Resources You Need From Prior Posts
If you don’t have the following set up from prior posts deploy these things first.
Set up the VPC and VPC Flow Logs:
If you are using your VPC created in an earlier post and have been following along:
- You can leave the following if you have them set up and configured or set them up in the next post when we create the Transit Gateway if you haven’t already created them: Customer Gateway, pfSense VPN configuration.
- Delete the AWS Site to Site VPN, Virtual Private Gateway, and EC2 instance, private subnet, and private route table and anything else.
If you have a NAT Gateway in the private subnet, detach or delete it.
Create an Internet Gateway and Attach it to your VPC
Head over to the VPC Dashboard.
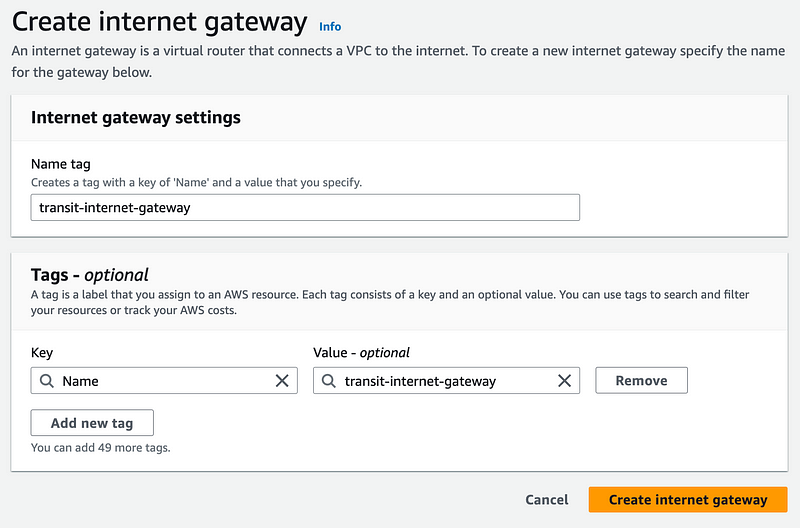
Click on Internet gateways on the left, then Create internet gateway.

Name your Internet Gateway and click Create internet gateway.
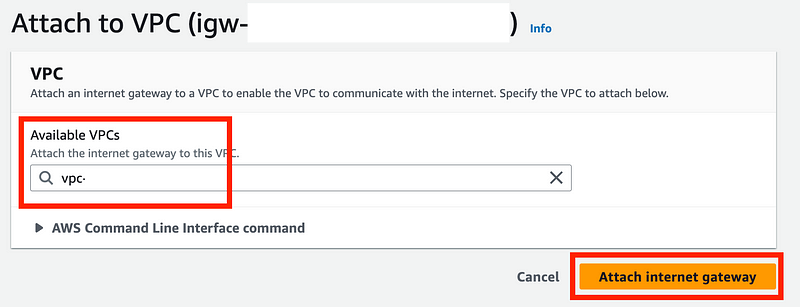
Choose Actions > Attach to VPC
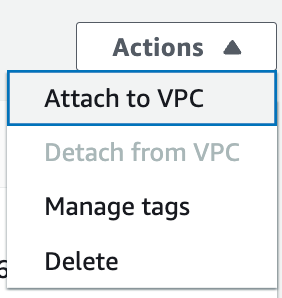
Select your VPC and click Attach internet gateway
More about Internet Gateways here:
Also just a note that if you are using IPv6, you can set up an Egress-only Internet Gateway.
I’m not sure why they didn’t just call this an IPv6 Internet Gateway.
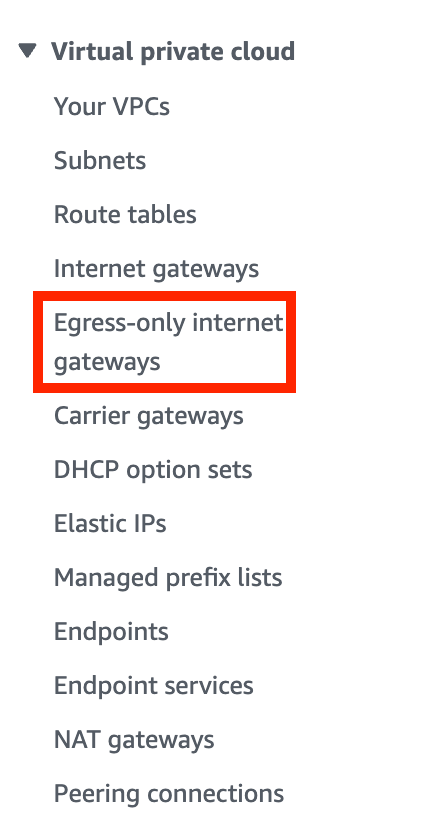
That also requires a VPC and a name:
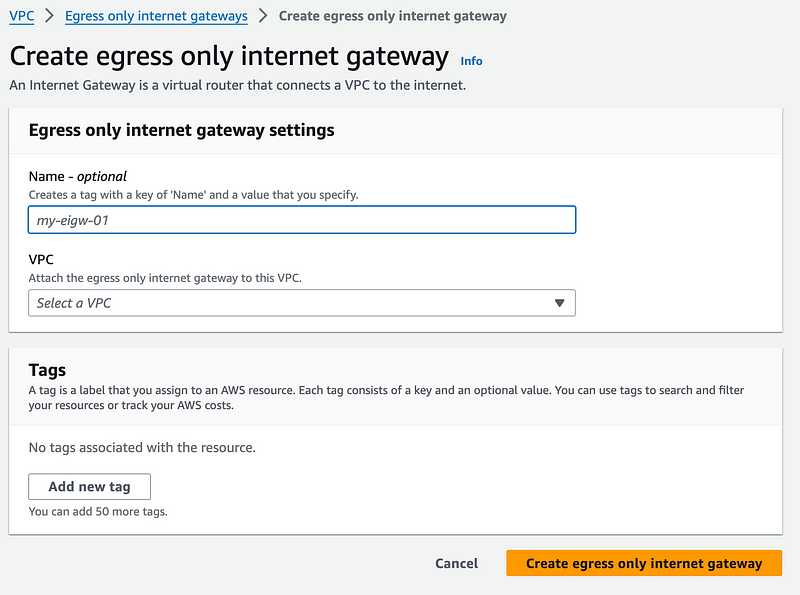
I’m not using IPv6 for this particular purpose so I am going to skip that.
Create public route table
On the VPC Dashboard click Route tables in the left menu.
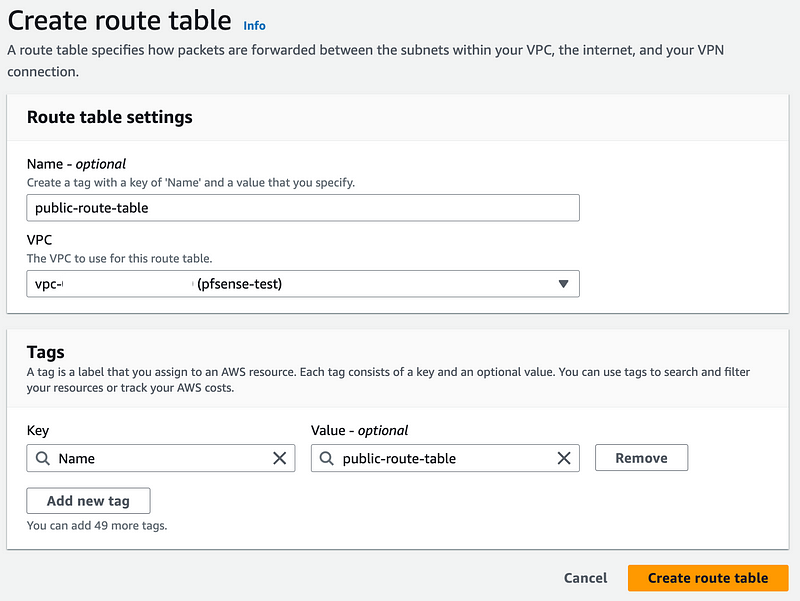
Click Create route table.

Enter a name and select a VPC. Click Create route table.
Add a route to your route table for the Internet Gateway
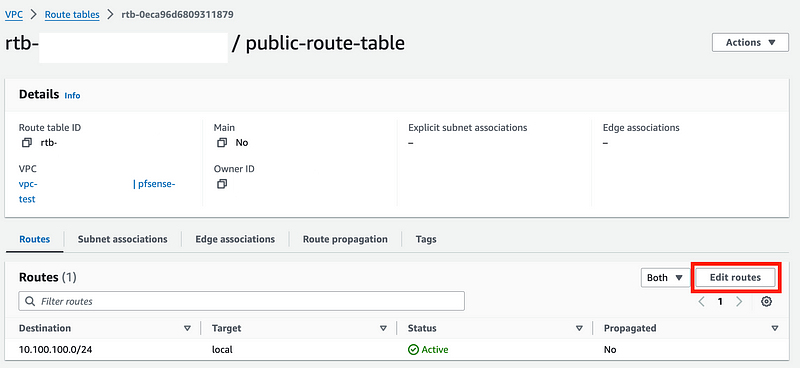
In the details for your route table, click Edit routes.
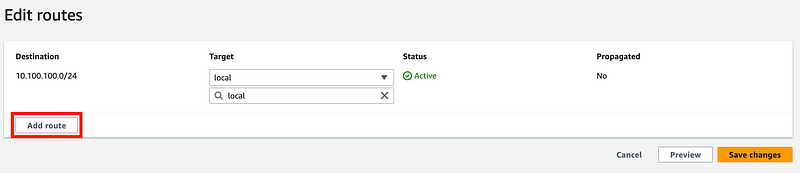
Click Add route:
Enter a destination of 0.0.0.0/0 (the entire Internet.)
Enter a target of Internet Gateway and select your Internet Gateway from the list.
Click Save changes.
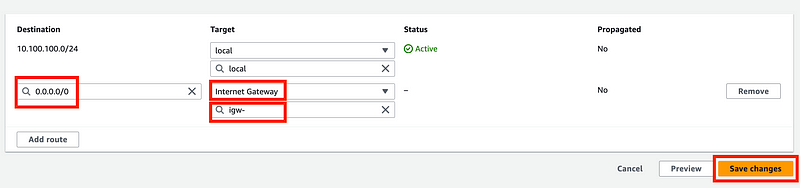
Your routes should look like this:

Anything with an IP in the VPC range will stay within the VPC. Any other requested IP address by a resource in this VPC will get sent to the Internet Gateway.
Create a private subnet
If you do not already have a private subnet from a prior post, create it now.
Recall that I used the entire VPC CIDR for the private subnet.
Click Subnets in the left menu. Click Create subnet.

Choose your VPC:
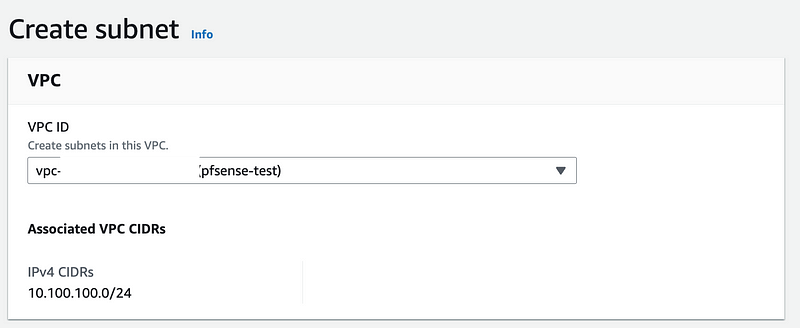
Recall that I used the entire CIDR block for the VPC in my prior post:
Note that our route table is going to be different and we are not using a Virtual Private Gateway as I did in that post. The Site to Site VPN will be created when we create the Transit Gateway in the next post.
Remember to choose the same AZ for all subnets and resources to minimize costs.
I’ll get back to the route table in a minute after we create the NAT. First we need a public subnet.
Create public subnet
If you try to choose the VPC CIDR like we did for the private subnet when you create the public subnet, you’re going to have a conflict because the private subnet is already using that CIDR block.
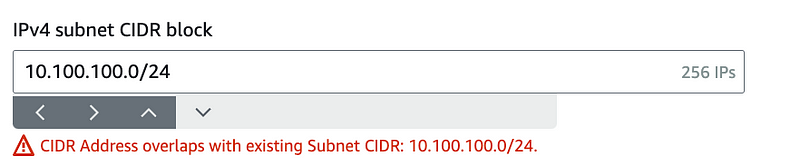
Luckily, unlike when I started on AWS, we can add a new CIDR block to the VPC instead of tearing everything down and starting over or changing the CIDR block of the private subnet.
Navigate to your VPCs and click on the VPC we’re using.
If you click on CIDRs you’ll see the one CIDR we added there.

By the way, if you’re not familiar with CIDR calculations I’ve described that in other posts.
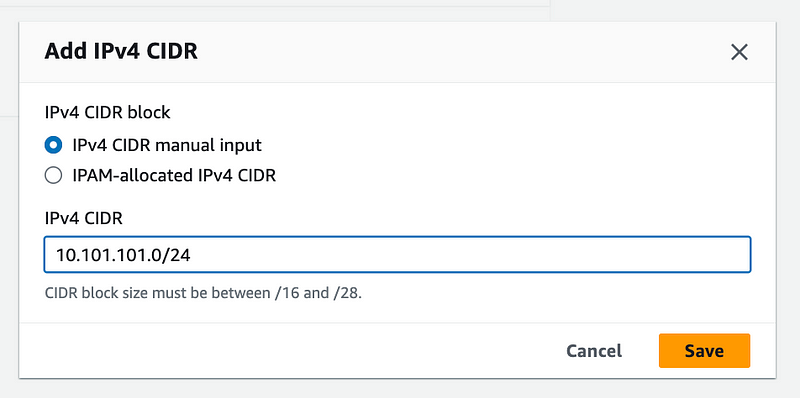
Click on Actions > Edit CIDRs.
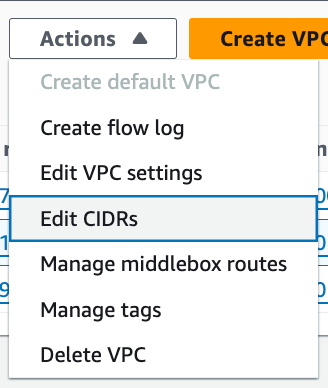
Add a new CIDR for your VPC and click Add. Click Close.
Click Subnets in the left menu. Click Create subnet.
Choose your VPC:
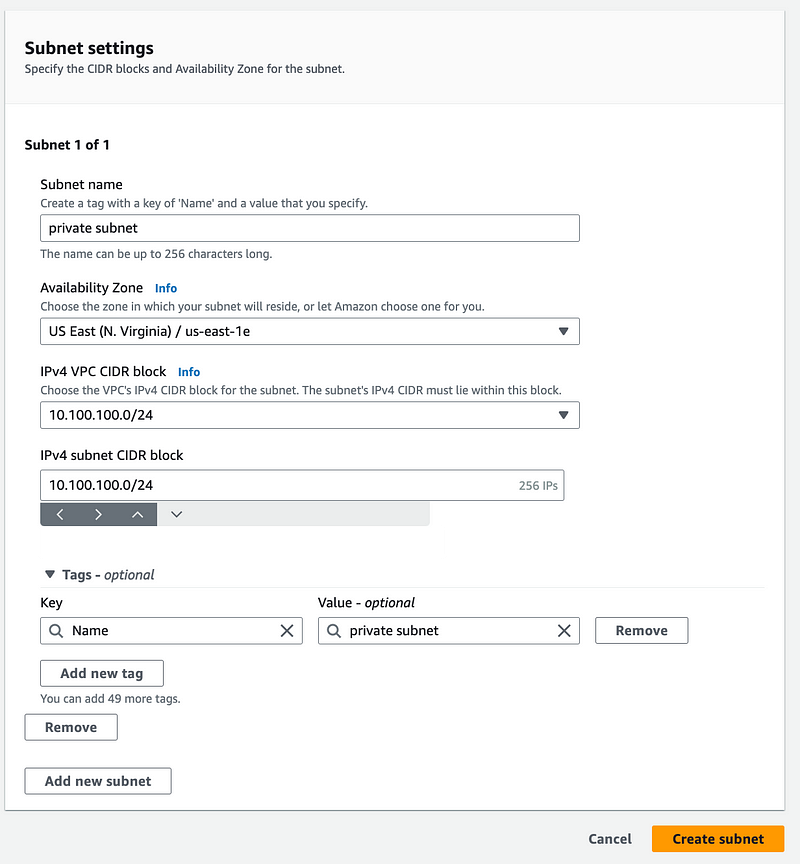
Create the subnet just like you did for the private subnet.
Name it public subnet.
Choose the same Availability Zone and your new CIDR block.
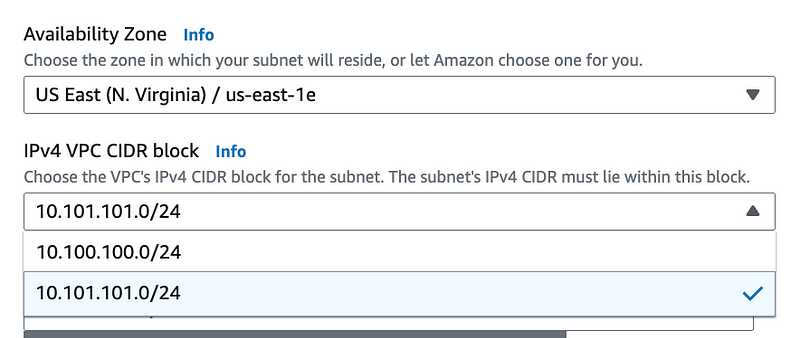
Now you can use that whole CIDR block for your subnet.

Click Create subnet.
Now click on your subnet.
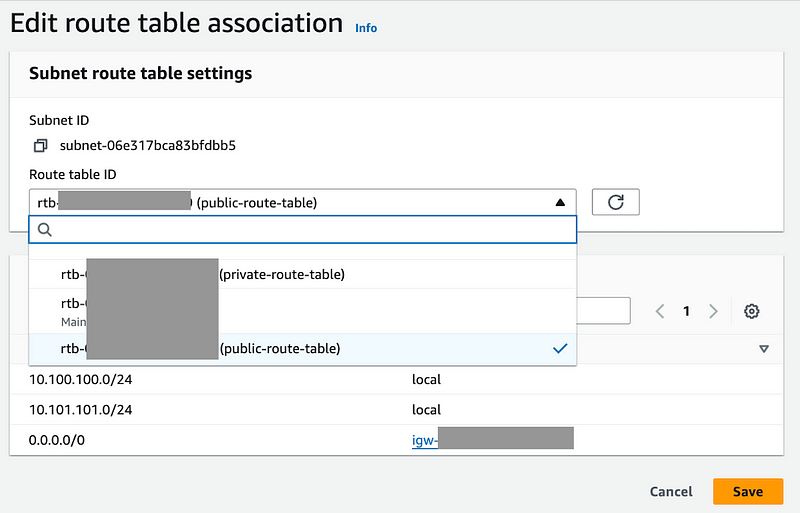
Choose Actions > Edit route table association
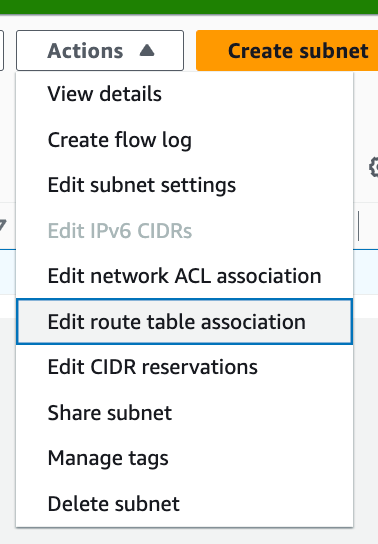
Select your public route table. Click Save.
How we avoid transitive routing
Now here’s the trick. We’re going to add the NAT gateway to the public subnet. Anything destined for an address external to the VPC CIDRs in the public subnet will be forwarded to the Internet gateway based on the above route table. So any traffic we direct to our NAT will be forwarded by the NAT to the requested address which will end up routing to the Internet Gateway if it is outside our VPC CIDR.
Next, we’ll add a route to the entire Internet in the private subnet to target the NAT gateway. There will be no route to the Internet Gateway. Any resources in the private subnet that try to reach an IP address outside the VPC CIDRs will get sent to the NAT Gateway route. The NAT Gateway will translate the address and send it to the IGW.
When we add a Transit Gateway in the next post, it will have a network interface in our private VPC. That means it will send traffic destined for any address not otherwise defined in the route table to the NAT. The NAT will send the data to the Internet Gateway.
Why can’t we send traffic from the VPN to the NAT? Remember the VPN is a tunnel. It doesn’t create a network interface in our VPC. It simply transmits data to the specified endpoint, which happens to be either an address in AWS or an address on the Internet. For an address on the Internet, we still need to somehow send that from a network interface in our VPC otherwise we are trying to use transitive routing with that packet and it’s not going to work.
Create a NAT Gateway in the Public Subnet
On the VPC Dashboard left menu click NAT Gateways.
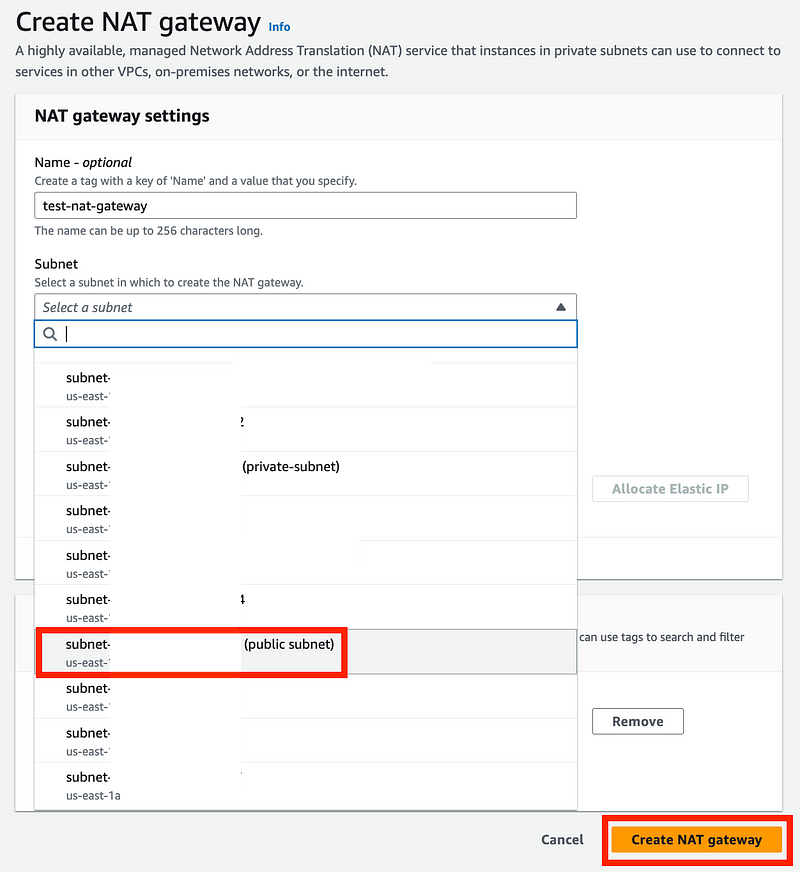
Click Create NAT gateway.

Give your NAT a name. Choose your public subnet.
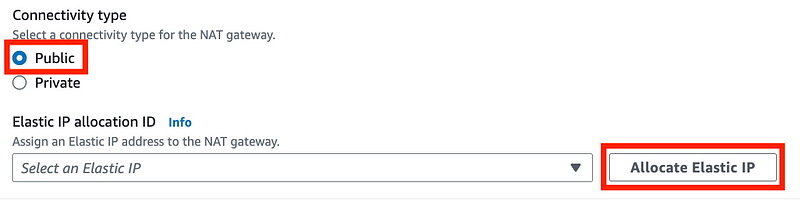
Click Create NAT Gateway.
Because we are trying to route traffic to the Internet, choose Public.
Allocate an Elastic IP. (I explain what this is in other networking posts.)
Add a Private Route Table with a NAT Route for the Private Subnet
Click Route tables on the left. Click Create route table.

Enter a name and select a VPC. Click Create route table.
Add a new route just like we did above for the public route table but instead of selecting the Internet Gateway for the Internet route choose your NAT.

Test your routes
To test your routes, you could create an EC2 instance in the private VPC and SSH into it and try to reach the Internet from that EC2 instance since you can’t access it from the Internet.
You can reach your EC2 instance in the private subnet from the VPN.
The EC2 instance in the private subnet can send traffic to the NAT and out to the Internet.
What you cannot do is send traffic from your laptop to the Internet via the VPN as explained above. To do that we need a Transit Gateway which I’ll add in the next post.
Follow for updates.
Teri Radichel | © 2nd Sight Lab 2024
About Teri Radichel:
~~~~~~~~~~~~~~~~~~~~
⭐️ Author: Cybersecurity Books
⭐️ Presentations: Presentations by Teri Radichel
⭐️ Recognition: SANS Award, AWS Security Hero, IANS Faculty
⭐️ Certifications: SANS ~ GSE 240
⭐️ Education: BA Business, Master of Software Engineering, Master of Infosec
⭐️ Company: Penetration Tests, Assessments, Phone Consulting ~ 2nd Sight Lab
Need Help With Cybersecurity, Cloud, or Application Security?
~~~~~~~~~~~~~~~~~~~~~~~~~~~~~~~~~~~~~~~~~~~~~~~~~~~~~~~~~~~~~
🔒 Request a penetration test or security assessment
🔒 Schedule a consulting call
🔒 Cybersecurity Speaker for PresentationFollow for more stories like this:
~~~~~~~~~~~~~~~~~~~~~~~~~~~~~~~~~~~~~~~~~~~~~~~~~~~~~~~~~~~~~
❤️ Sign Up my Medium Email List
❤️ Twitter: @teriradichel
❤️ LinkedIn: https://www.linkedin.com/in/teriradichel
❤️ Mastodon: @teriradichel@infosec.exchange
❤️ Facebook: 2nd Sight Lab
❤️ YouTube: @2ndsightlab