
Azure — Deploying React App With NGINX on AKS
A step by step guide with an example project
AKS is Microsoft Azure’s managed Kubernetes solution that lets you run and manage containerized applications in the cloud. Since this is a managed Kubernetes service, Microsoft takes care of a lot of things for us such as security, maintenance, scalability, and monitoring. This makes us quickly deploy our applications into the Kubernetes cluster without worrying about the underlying details of building it.
In this post, we are going to deploy a React application with an NGINX web server. First, we dockerize our app and push that image to the Azure container registry and run that app on Azure AKS. We will see how we can build the Kubernetes cluster on Azure AKS, Accessing clusters from outside, configuring kubectl to work with AKS cluster, and many more.
- Example Project
- Prerequisites
- Install Azure CLI and Configure
- Dockerize the Project
- Pushing Docker Image To Container Registry
- Creating AKS Cluster
- Configure Kuebctl With AKS Cluster
- Deploy Kubernetes Objects On Azure AKS Cluster
- Access the WebApp from the browser
- Summary
- Conclusion
Example Project
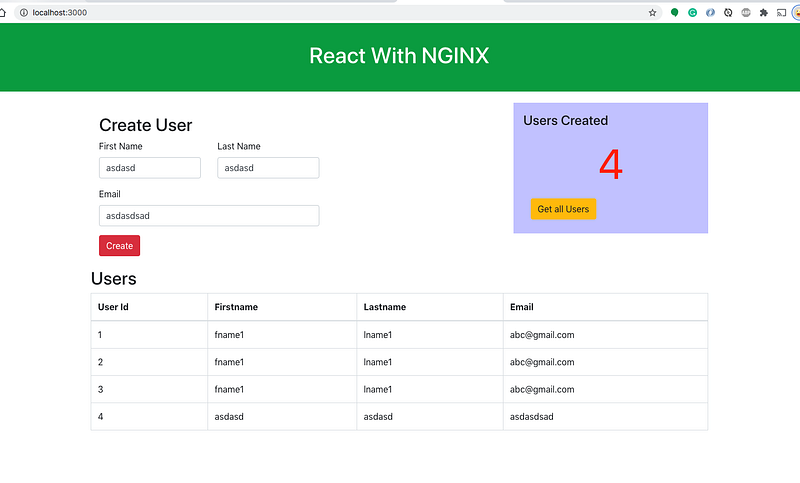
This is a simple project which demonstrates developing and running a React application with NGINX. We have a simple app in which we can add users, count, and display them at the side, and retrieve them whenever you want.
If you want to practice your own here is a Github link to this project. You can clone it and run it on your machine as well.
// clone the project
git clone https://github.com/bbachi/react-nginx-example.git
// install React dependencies and start
cd my-app
npm install
npm startPrerequisites
- If you are new to React please go through the below link on how to develop and build the React project with NGINX web server.
How To Serve React Application With NGINX and Docker
The other prerequisites to this post are Docker essentials and Kubernests essentials. We are not going to discuss the basics such as what is a container or what is Kubernetes, rather, we will see how to build a Kubernetes cluster on Azure AKS. Below are the prerequisites you should know before going through this article
Docker Essentials
You need to understand Docker concepts such as creating images, container management, etc. Below are some of the links that you can understand about Docker if you are new.
- Docker Docs
- Docker — A Beginner’s guide to Dockerfile with a sample project
- Docker — Image creation and Management
- Docker — Container Management With Examples
- Understanding Docker Volumes with an example
Kubernetes Essentials
You need to understand Kubernetes’ essentials as well along with Docker essentials. Here are some of the docs to help you understand the concepts of Kubernetes.
Microsoft Azure Account
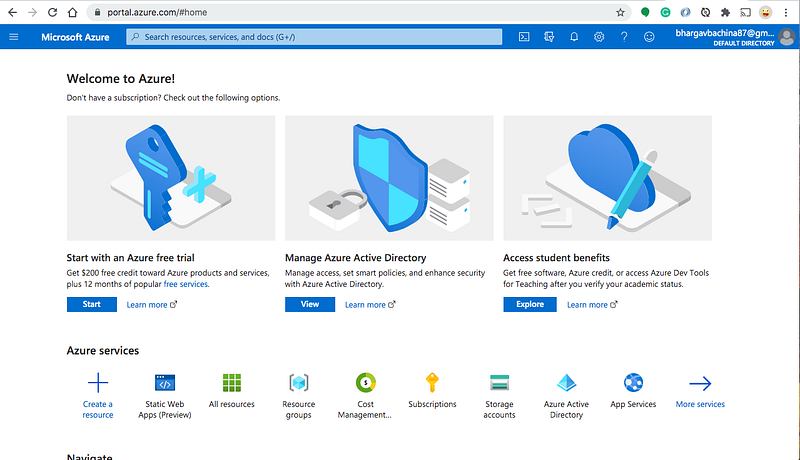
You should have a Microsoft Azure Account. You can get a free account for one year. You should see the below screen after you login.
You need to create a subscription for your account. The most common is Pay As You Go subscription.
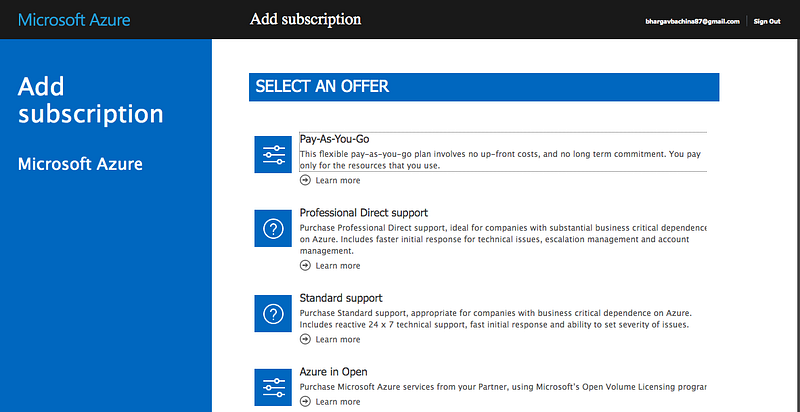
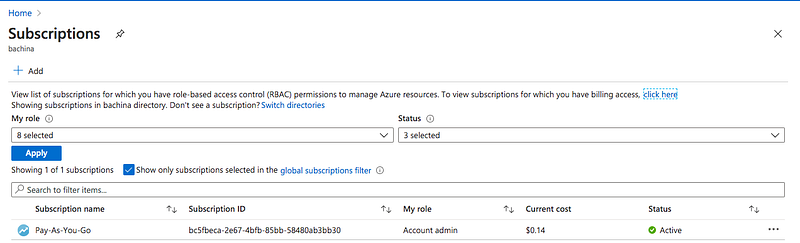
You need a subscription to be associated with your tenant so that all the cost is billed to this subscription.
Install Azure CLI and Configure
Once you have the Azure Account you can install Azure CLI. You can go to the below documentation and install Azure CLI based on your operation system. You can configure Azure CLI with your subscription.
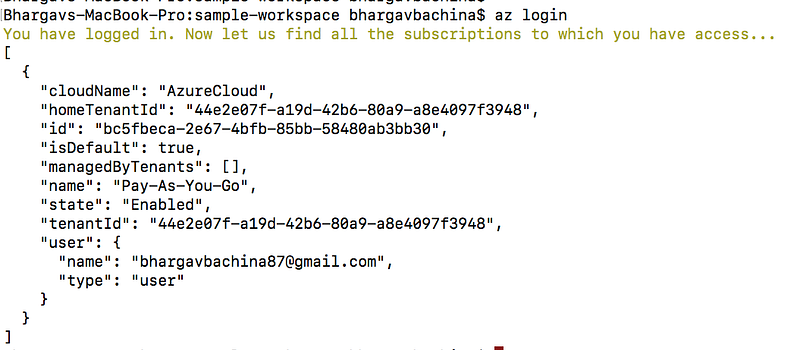
Let’s list the subscription with the following command
az account listDockerize the Project
Azure AKS is a managed service that makes it easy for you to run Kubernetes on Azure. The first thing you need to do is to dockerize your project.
Here is the Dockerfile and it is using multi-stage builds to reduce the image size and surface attacks.
Here are the commands to build the image and run it on the Docker engine on your local machine. If you are new to Docker and check this detailed post on this topic.
// build the image
docker build -t react-nginx-ui .
// run the image
docker run -d --name react-nginx-webapp -p 80:80 react-nginx-ui// list the image you just built
docker images// list the container
docker psPushing Docker Image To Container Registry
Azure container registry builds, store, secure, scan, replicate, and manage container images and artifacts with a fully managed, geo-replicated instance of OCI distribution. Connect across environments, including Azure Kubernetes Service and Azure Red Hat OpenShift, and across Azure services like App Service, Machine Learning, and Batch.
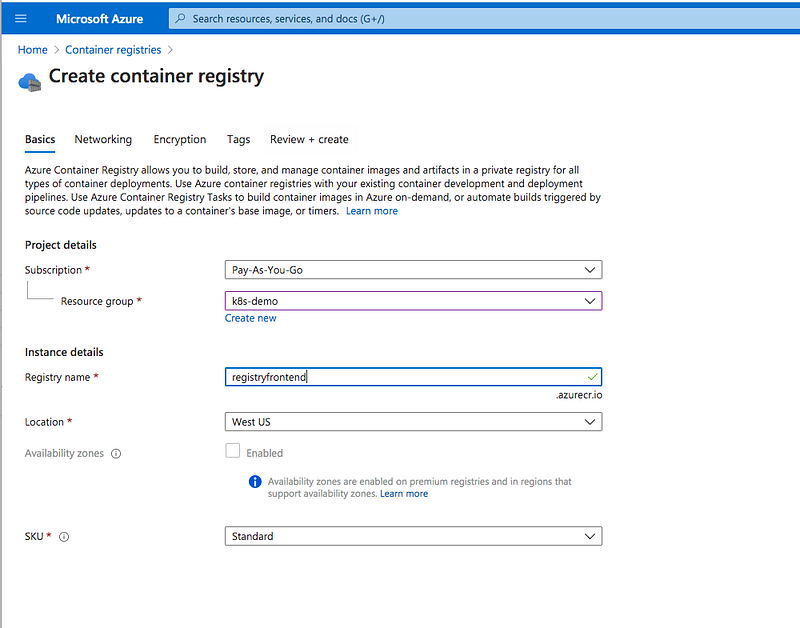
Azure AKS works with any Docker registry such as Docker Hub, etc. But, in this post, we see how we can use the Azure container registry to store our Docker images. Once you set up the Azure portal account and creates a resource group as above you can create a container registry as below.
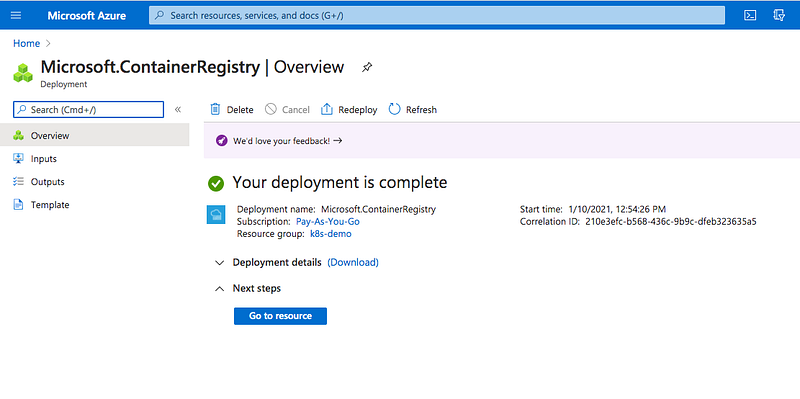
Once you review and create you can see the following screen.
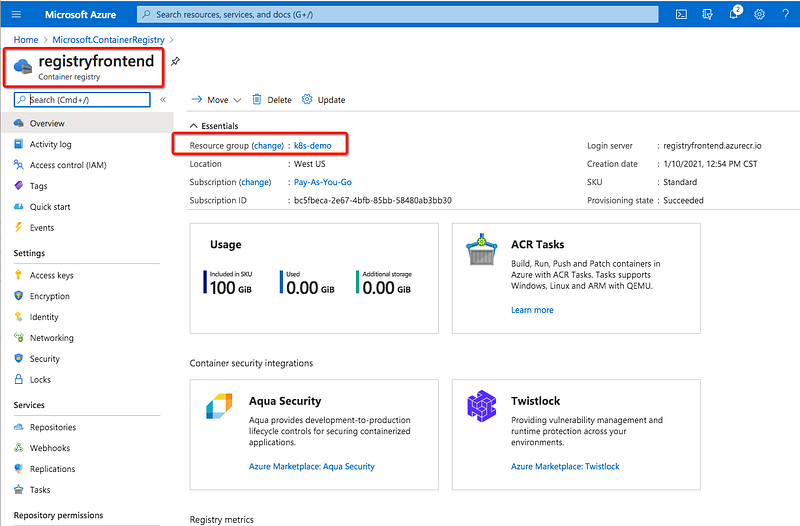
You can see the main container registry page below.
You can do the same things with the Azure CLI with the following commands. Make sure you log in to your Azure Account with CLI with this command az login before running the below commands.
// create a resource group
az group create --name k8s-demo --location westus
// create a container registry
az acr create --resource-group k8s-demo \
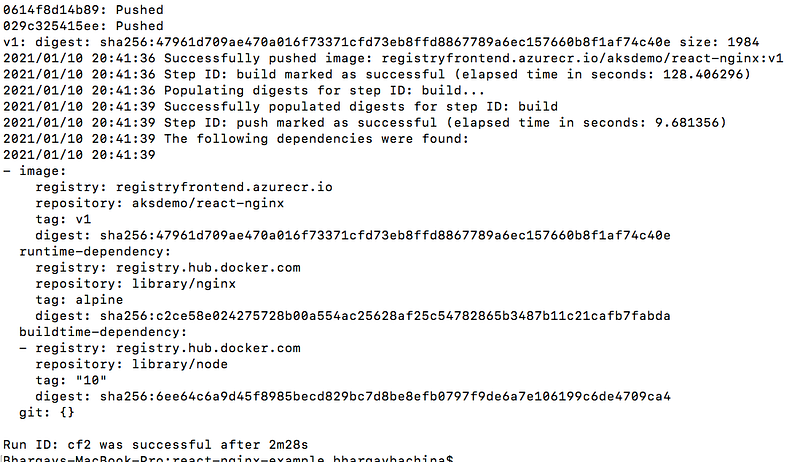
--name registryfrontend --sku BasicIt’s time to build and push the Docker image with the following command. Clone the above example project and go to the root folder where Dockerfile resides and run this command.
az acr build --image aksdemo/react-nginx:v1 \
  --registry registryfrontend \
  --file Dockerfile .
You will see the output below.
You can see all the details in the portal as well.

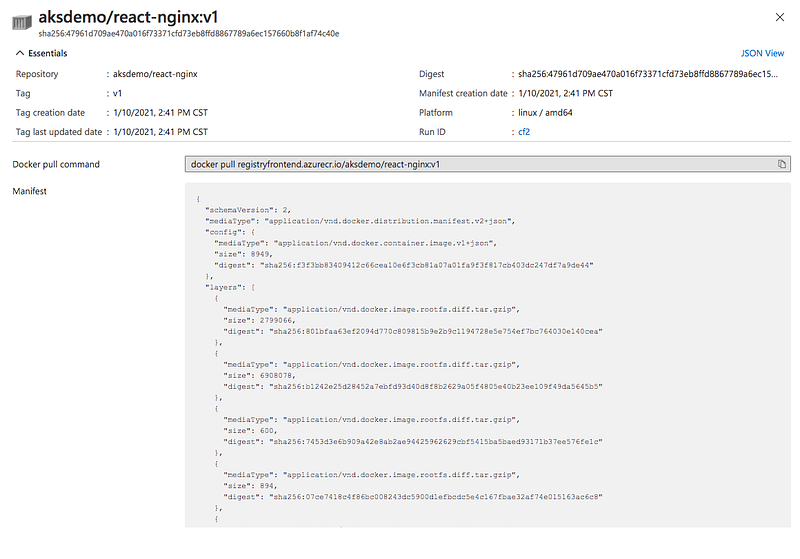
If you want to pull this repository you need to use this command.
docker pull registryfrontend.azurecr.io/aksdemo/react-nginx:v1Creating AKS Cluster
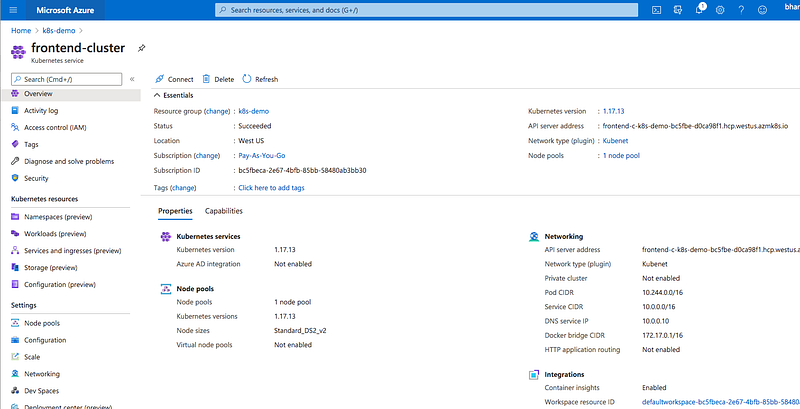
First, you need a resource group for all your resources. Let’s create a resource with the following command.
az group create --name k8s-demo --location westusLet’s create a cluster with the following command. Notice that we are using the same resource group that we created above. You can see the JSON formatted result after a few minutes.
az aks create --resource-group k8s-demo --name frontend-cluster --node-count 3 --enable-addons monitoring --generate-ssh-keysYou can see the following cluster in the console.
Configure Kuebctl With AKS Cluster
Kubectl is the command-line utility for the Kubernetes. You need to install kubectl before you configure it. Run the first command only if you don’t have kubectl on your local machine.
// install CLI
az aks install-cli
// connect to your cluster
az aks get-credentials --resource-group k8s-demo --name frontend-cluster// get all the contexts
kubectl config get-contexts// verify the current context
kubectl config current-context// get the node
kubectl get nodes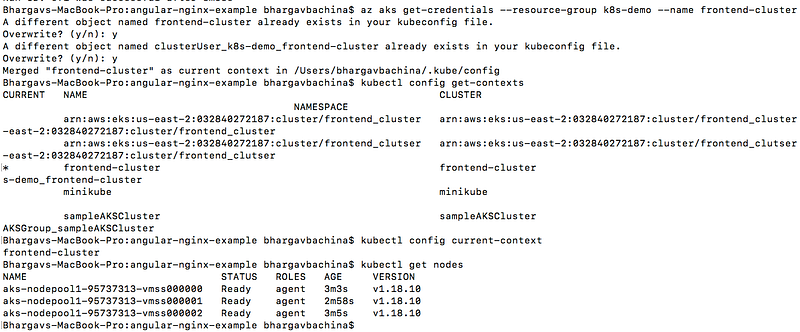
Deploy Kubernetes Objects on Azure AKS Cluster
Now we have configured kubectl to use Azure AKS from our own machine. You need to integrate the container registry with the AKS. Let’s attach the container registry with the cluster with the following command. You can explore the docs here regarding this.
az aks update -n frontend-cluster -g k8s-demo --attach-acr regfrontendLet’s create deployment and service objects and use the image from the Azure container registry. Here is the manifest file which contains these objects.
If you cloned the above example project and you are at the root folder just use this command to create objects kubectl create -f manifest.yml

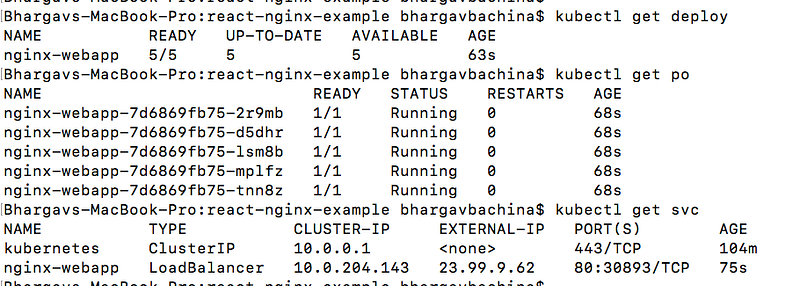
You can use the following commands to verify all the objects are in the desired state.
// list the deployment
kubectl get deploy
// list the pods
kubectl get po// list the service
kubectl get svcWe can see 5 pods running since we have defined 5 replicas for the deployment.
Access the WebApp from the browser
We have created a service with the LoadBalancer type. You can get the external IP from the service and access the entire from the browser.

You can access the webapp with the following URL
http://23.99.9.62:80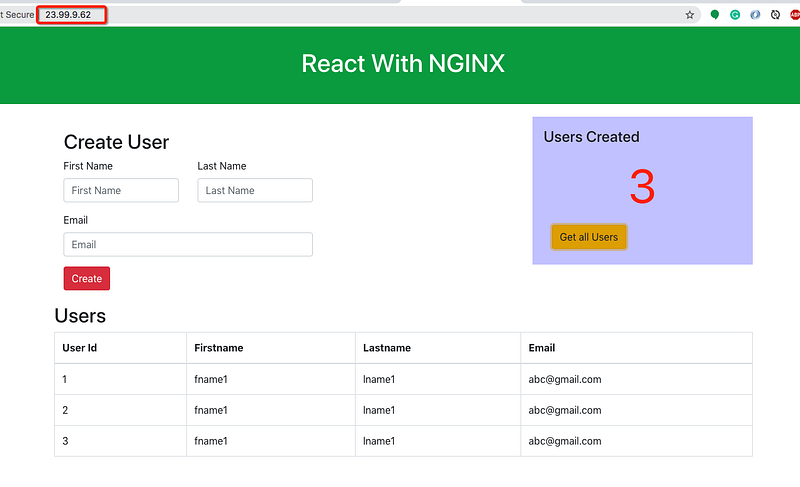
Daelete the Cluster
You can just delete the cluster or the resource group. I created a resource group just for this so I am deleting the resource group with the following command. Make sure you delete if you don’t want to incur charges.
az group delete --name k8s-demoSummary
- AKS is Microsoft Azure’s managed Kubernetes solution that lets you run and manage containerized applications in the cloud.
- Before starting this, you need to have docker and Kubernetes essentials. If you don’t have these essentials please go through these with the links provided.
- You need to create a Microsoft Azure Account here.
- You need a subscription to be associated with your tenant so that all the cost is billed to this subscription.
- You can create the AKS cluster through a portal, Azure CLI, REST API as well.
- You can install Azure CLI and configure it to use with your AKS Cluster.
- Configure kubectl to use the AKS cluster.
- You need to integrate the container registry with the AKS and you need to attach the container registry with the cluster in many ways. You can explore the docs here regarding this.
- Create a deployment and service with Loadbalancer so that you can access it from outside.
- You can access the dashboard with either Kubeconfig or Token.
- Make sure you delete if you don’t want to incur charges.
Conclusion
We have deployed a simple React application with NGINX web server on Azure AKS Cluster and access it from the browser. In future posts, we can see more advanced use cases.


