
Scheduling DAGs in Airflow
My personal notes from the book “Data Pipelines with Apache Airflow” by Bas Harenslak and Julian de Ruiter — Chapter 3, Part 1

Introduction
This series of posts recaps my learnings from the book by Bas Harenslak and Julian de Ruiter. If you like the content, you can purchase the book on Manning.
📚 Related Posts:
Chapter 2: - 1. Introduction to Airflow - 2. Running Airflow Locally (in a Python Environment) - 3. Running Airflow with Docker - 4. Understanding Airflow User Interface
Chapter 3:
-1. Scheduling DAGs in Airflow
👩💻 Practice!
I highly encourage you to follow along with the book examples and to get some practice. To replicate the examples:
First-time setup
- Go to the GitHub repository: data-pipelines-with-airflow
- Clone it (either with SSH or HTTPS). I personally use SSH:
$ cd ~
$ mkdir Projects
$ cd Projects
$ git clone [email protected]:BasPH/data-pipelines-with-apache-airflow.git
3. Open Docker Desktop. If you need to download you can find it on the official page here.
4. Check out the README.md file of the corresponding chapter to see running instructions. However, in most cases, you will do the following:
$ cd data-pipelines-with-apache-airflow
$ cd <chapter_number> # put the number of the current chapter
$ docker-compose up --build
This will take care of spinning up the required resources and start an Airflow instance for you.
5. Once everything is running, you should be able to run the examples in Airflow http://localhost:8080/.
6. To stop running the examples, run the following command:
$ docker-compose down -vDe🐛ing
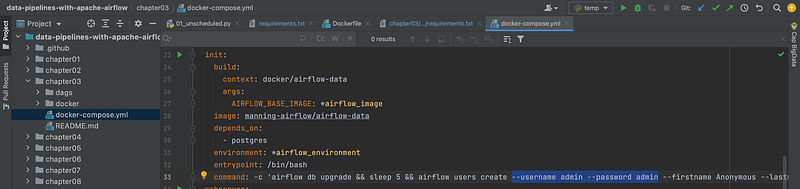
🙋♀️ If you open Airflow on your browser and you don’t see any dags, most likely you ran docker-compose up --build in the wrong directory. If you check the docker-compose.yaml file, you see that it’s mounting the dags from the folder ./dags into /opt.airflow/dags . This means that you should run the docker-compose up --build command in the parent directory of the dags folder.
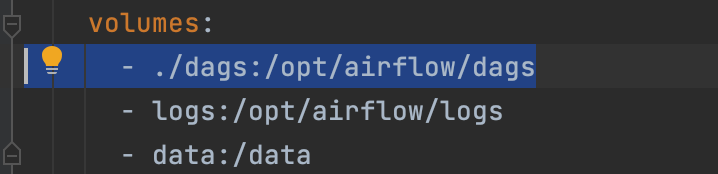
🙋♀️ Which are the login username and password? The standard practice (for development environments), is to use admin for both the Airflow username and login password. In any case, you can check/change them here:
🙋♀️ if something doesn’t work, a good idea is to remove all existing containers and start “fresh”: docker rm -f $(docker ps -aq)
⚠️ For running Chapter 03, I had to modify the requirements.txt to a newer version of Flask and consequently a newer version of Click. This is because support for the escape module was dropped in a newer version of Jinja which was a dependency of Flask V1.X.X. My new file looks something like this:
click==8.0
faker==4.14.0
Flask==2.1.0
pandas==1.1.3
⚠️ When building the containers, I also got this error message:
Error response from daemon: Ports are not available: exposing port TCP 0.0.0.0:5000 -> 0.0.0.0:0: listen tcp 0.0.0.0:5000: bind: address already in useI hence checked which process was running on port 5000:

It seems that Control Center on Monterey is listening on ports 5000 and 7000. To free up the ports, you can turn it off by going to System Preferences > Sharing .
Running the examples after the first-time setup
- Oper Docker Desktop
- Open the project
data-pipelines-with-apache-airflowfrom an IDE (I personally use Pycharm) - Go to the chapter of interest:
cd <chapter_number> - Follow the instructions on the README.md file. For example:
docker-compose up -build. Wait for a few seconds and you should be able to access the examples at http://localhost:8080/ with password=admin and user=admin. - After you are done, stop the container with:
docker-compose down -v.
Why Scheduling a DAG
Scheduling is important for a couple of reasons:
- Automating your job (you don’t want to do a repetitive task such as triggering a DAG since a computer could do it for you).
- Process data incrementally at regular intervals.
- Loading and reprocessing past data (backfilling).
- Having reliable tasks.
Simple Example: Processing user events
The book starts with an example of a service that tracks which pages users have accessed on a given website. Users are identified by their IP address. We want to know:
- How many different pages do users access?
- How much time do users spend on each visit?
We want to compute these two statistics every day and be able to compare different periods.
In this toy example, data will be stored locally. If you were to replicate this flow in production, you would use cloud storage (e.g. Amazon S3 or Google’s Cloud Storage) as the raw data might quickly become large. Cloud storage provides high durability at a relatively low cost.
To simulate this scenario, the authors have created a local API to fake the retrieval of user events. The API will be automatically set up for you if you used the docker-compose file of Chapter 3.
The API returns a JSON-encoded list of user events. You can try it running:
curl http://localhost:5000/events
Let’s start modelling our pipeline
It’s good practice in Airflow to always break up your work into “minimal units”. In this case, we could create a task that fetches the user events and another one that computes the statistics.
Fetching the data is a relatively simple command, hence we will use a BashOperator . Computing the statistics is a bit more complex (we are going to create a Pandas Dataframe and use groupby and aggregation), hence we will use a PythonOperator .
The DAG definition could be something like this:
Notice that:
- the
schedule_intervalis currently set toNone. This means that we will need to trigger the DAG manually. - the
PythonOperatoruses a Python callable (i.e. a function) that — following the standards — has the same name (except for a_which typically indicates internal variables) - the
_calculate_statsfunction requires two arguments (“input_path” and “output_path”) which are provided by theop_kwargs(i.e. Operator Keywords Arguments)
1. Test the DAG Locally
Even if the book doesn’t mention it, I think it’s always good practice to first test your DAG locally. In this way, you can separate code errors (syntax, logic etc) from Airflow-related errors.
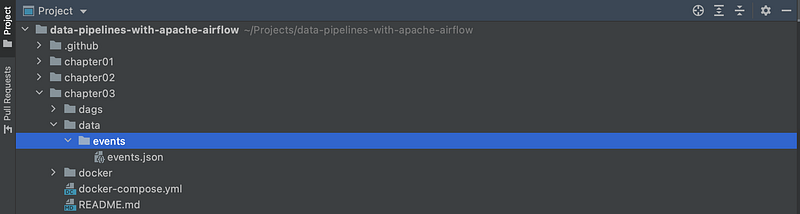
$ cd chapter03
$ mkdir -p ./data/events
$ curl -o ./data/events/events.json https://localhost:5000/events
This would save the events in JSON format under the folder chapter03/data/events :
⚠️ Notice that I have changed the paths with respect to the ones defined in the DAG.
You can test the remaining part with this:
from pathlib import Path
import pandas as pd


def _calculate_stats(input_path, output_path):
    """Calculates event statistics."""

    Path(output_path).parent.mkdir(exist_ok=True)

    events = pd.read_json(input_path)
    stats = events.groupby(["date", "user"]).size().reset_index()

    stats.to_csv(output_path, index=False)


_calculate_stats(input_path="/Users/najmabader/Projects/data-pipelines-with-apache-airflow/chapter03/data/events/events.json",
                 output_path="/Users/najmabader/Projects/data-pipelines-with-apache-airflow/chapter03/data/events/stats.csv")
2. Trigger the DAG manually
Once you verified that the code runs locally without any error, I think it’s good practice to first manually trigger a run and check that everything is fine. To do this, toggle the DAG on using the switch button (top-left corner of the page) and then hit the Play button (top-right corner of the page). You should see something like this:
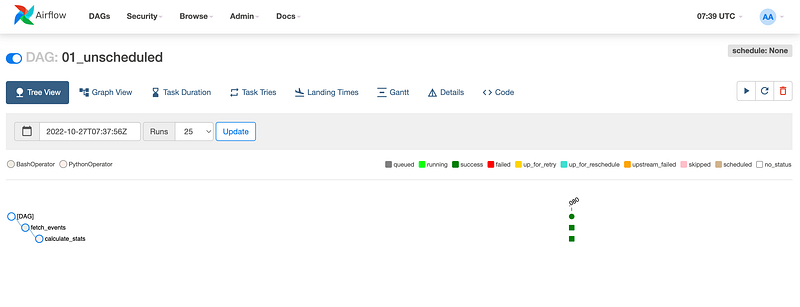
If every task is marked as Success, move to step 3.
3. Schedule the DAG
In order to schedule a DAG you need to define:
- A
schedule_intervalparameter. - A
start_dateparameter. - Optionally, an
end_dateparameter. If this is not defined, Airflow will keep executing the dag forever.
For example:
dag = DAG(
    dag_id="01_unscheduled",
    start_date=dt.datetime(2019, 1, 1),  # start date of the DAG
    schedule_interval=@daily,  # run every day at midnight
    end_date=dt.datetime(2022, 1, 1)
)
The schedule_interval and the start_date are essential parameters and, based on them, Airflow will schedule the first run.
⚠️ Airflow will schedule the first execution of the DAG to run at the first scheduled interval after the start date (start + interval)
For example, if you set start_date = dt.datetime(2019,1,1) and schedule_interval="@daily" (where @daily is an Airflow macro which runs the DAG every day at midnight), the first execution will happen on start_date + schedule_interval , which means “2019–01–02 00:00:00”.
The second execution is on “2019–01–03 00:00:00”, the third is on “2019–01–04 00:00:00” and so on. In other words, “2019–01–01 00:00:00” is skipped as the first execution is defined as start_date + schedule_interval .
I hope this helps ❤️ See you in the next post!
References
Data Pipelines with Apache Airflow by Bas P. Harenslak and Julian Rutger de Ruiter


