
Can Rejected Scrap Wood Make a Good Table?
My second project designing and making a small wood table…
I had just started learning how to make sawdust, when I saw this article online, one of the free projects that Fine Woodworking (FWW) publishes:
I thought it looked fine. But I had a particular cherry board I had fallen in love with, and I wanted to make it into the top of a table with minimal changes to the board. So, I decided to design my own table, inspired of course by FWW’s design.
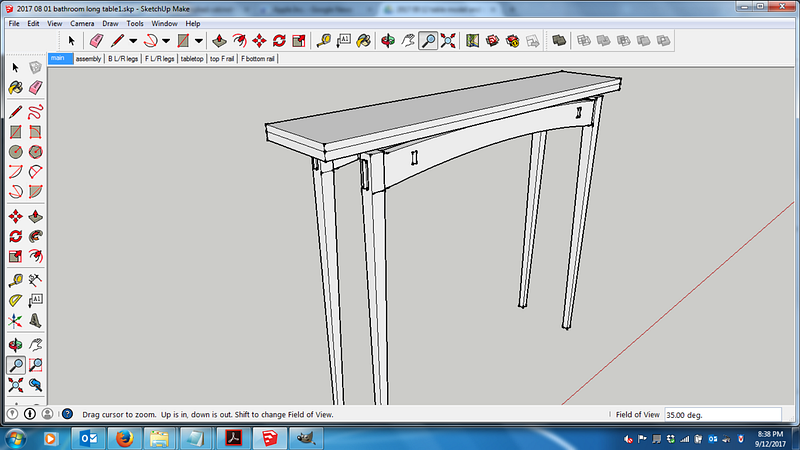
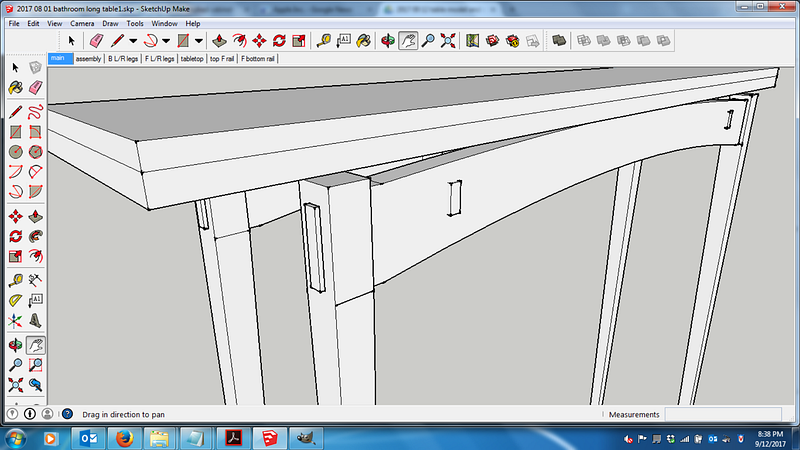
Here are a couple screenshots of my design after seeing that article by Michael Pekovich:
This is the story of one small cut-off cherry board and the table I made from it.
The raw materials…
Here, below, is a photo showing the raw boards I started with for this design. The one at the bottom of the photo is the board I wanted as the tabletop.
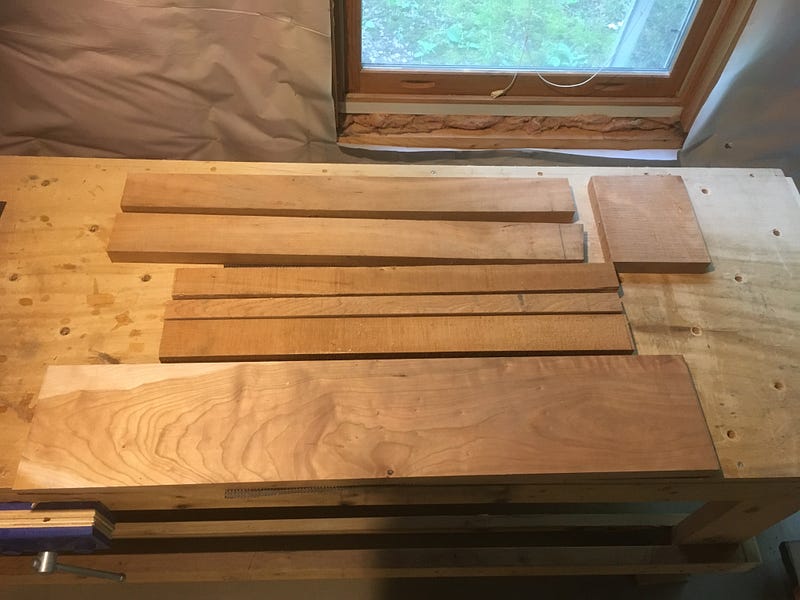
I was already in love with this raw cherry board, the shimmer of the grain, the fact that it was a discarded cutoff, showing some of the light sapwood which most woodworkers shun.
The sapwood is the outer layer of the tree, the still-living part in which the sap still runs and water passes from the roots to the leaves. The heartwood is the darker, dead, central core and support of the tree.
Each year, new sapwood only a few cells thick forms just under the bark. Meanwhile, the innermost layer of sapwood in turn becomes a new layer of heartwood. The sapwood dies as it turns into heartwood, and chemical changes add both weight and color to the new heartwood.
People like cherry for the dark red tones, and it makes sense that the sapwood in cherry lumber is accordingly less valued.
I liked the bit of color contrast in this orphaned cherry board of mine. Furthermore, not shown in the above photo, but just barely visible in the top photo of the table, is the bark still attached to the underside of this board (lower right corner). My goal was to rescue this reject of a board, and turn it into the show-piece, the top of my table.
And I wanted to preserve it as-is, including the bark, as much as I thought possible.
Mistakes all over the place (if you’re not making mistakes, you’re not living)…
Here are photos of some of my mistakes in making this table. The next photo below are the legs, and the mortises (the rectangular holes) are not quite as rectangular as they were supposed to be…
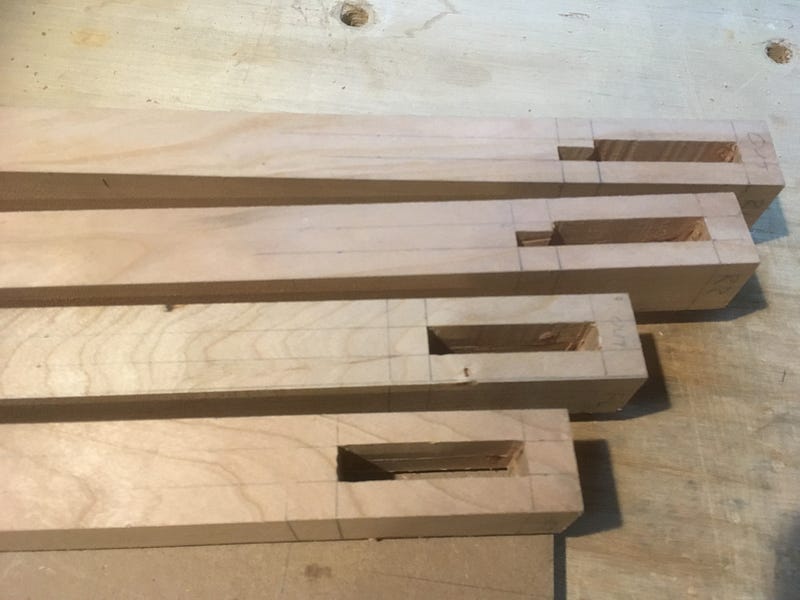
The next photo below shows the dry-fit assembly of the apron, the boards which will support the tabletop, and which also attach to the legs, to the supposedly rectangular mortises via the rectangular tenons (the small bits at the ends of the longest pieces you see here):
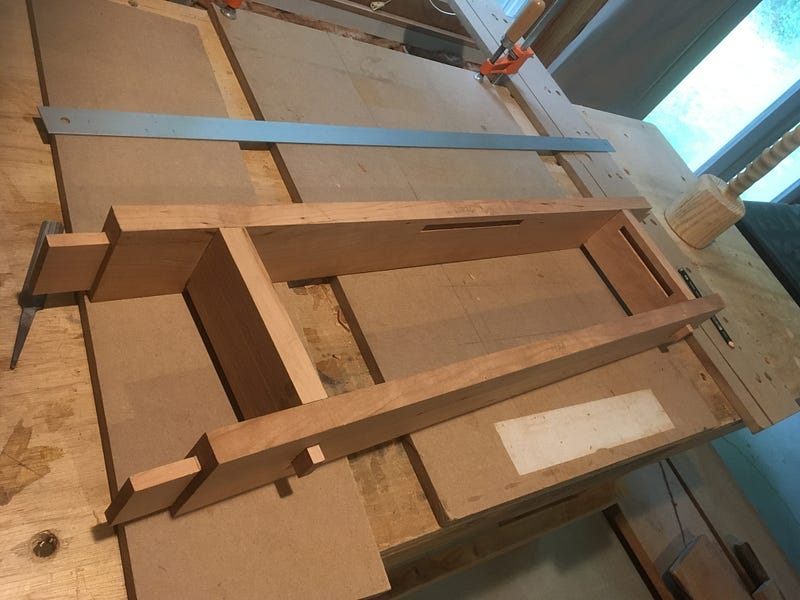
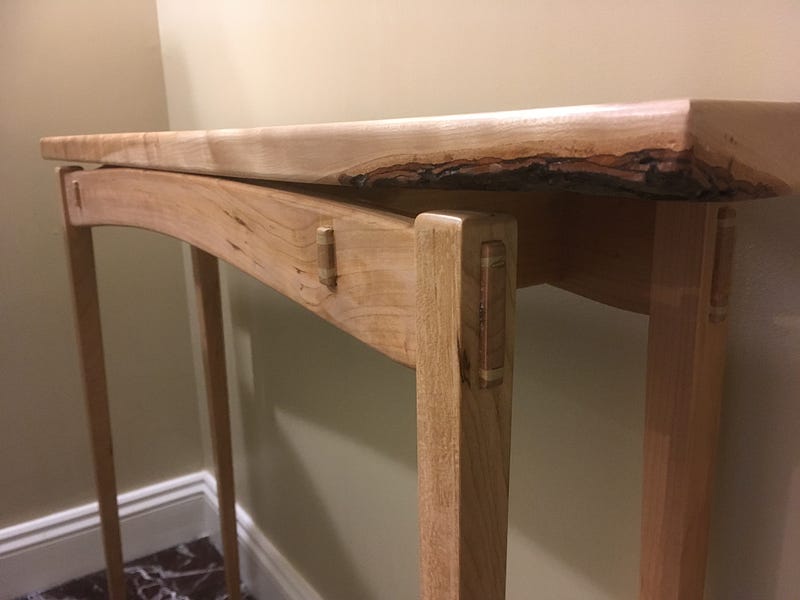
Now, of course, I first made these pieces all simple squared and evenly aligned. But the purpose was to create a cute little optical illusion, of a top barely supported at all, a “floating” top. So I had to cut some profiles into these apron pieces.
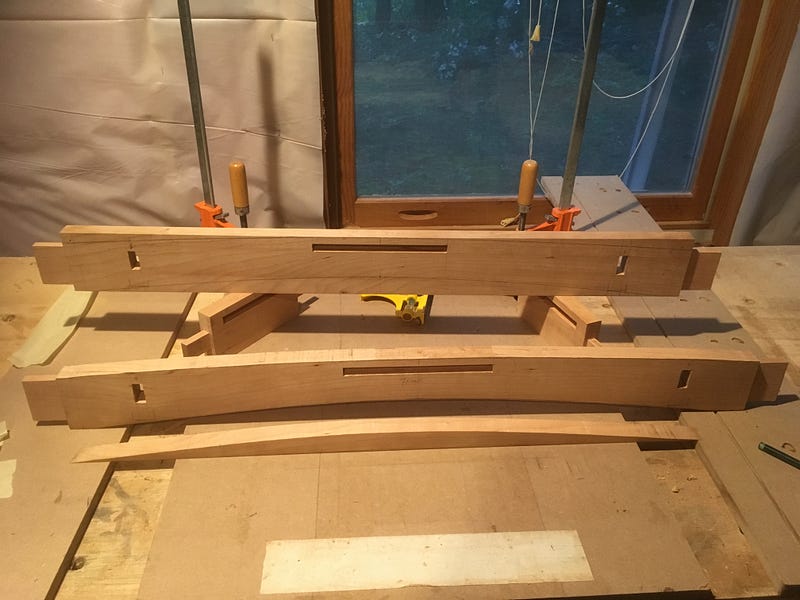
In the photo below you see in the back one of the long pieces marked up ready to be band-sawed into its final curved profile, and in front is the matching piece already cut giving me two long curves on the top and bottom edges of the apron:
I mentioned elsewhere that I have an idiosyncracy in that I like to finish the boards as much as possible before gluing them together. My issue is with sanding inside corners. I hate it. So I would rather apply the finish, and put masking tape on areas to be glued or otherwise protected.
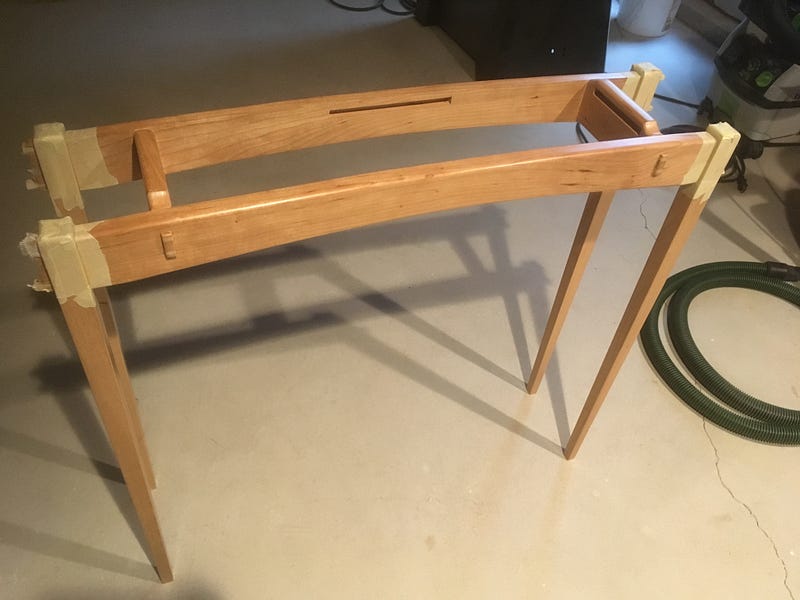
Here is a photo of the leg-apron assembly:
The curves I cut into those aprons are gentle, whispers of curves, and they form the bones of the table, the structure, the support. In my small way, I honored the Viking shipwrights who shaped the graceful curves of their living, breathing dragon boats here:
Or master swordsmiths who forged the breath-honed curve of steel katanas celebrated here:
The most I can do is to pay a poor homage to those old masters who poured their heart and soul into their crafts and made living things from wood and steel.
Thankfully, my table will not be going to war with anyone.
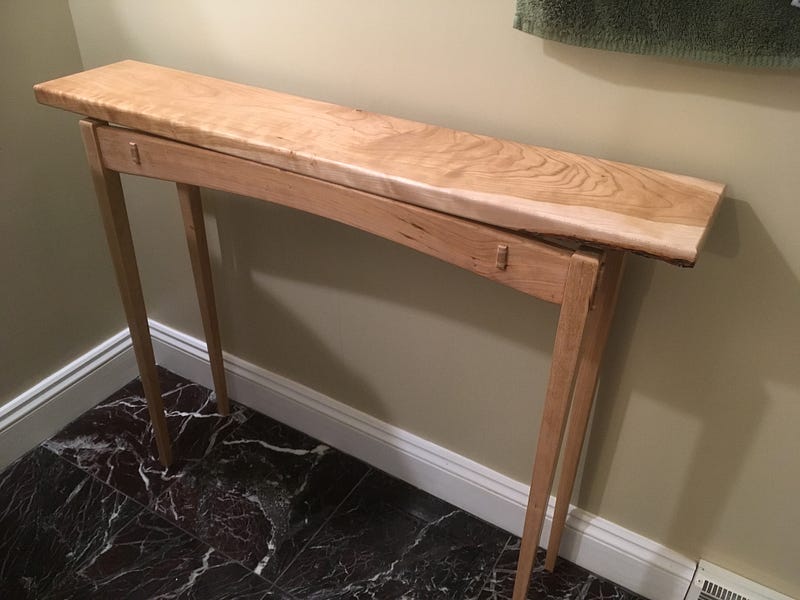
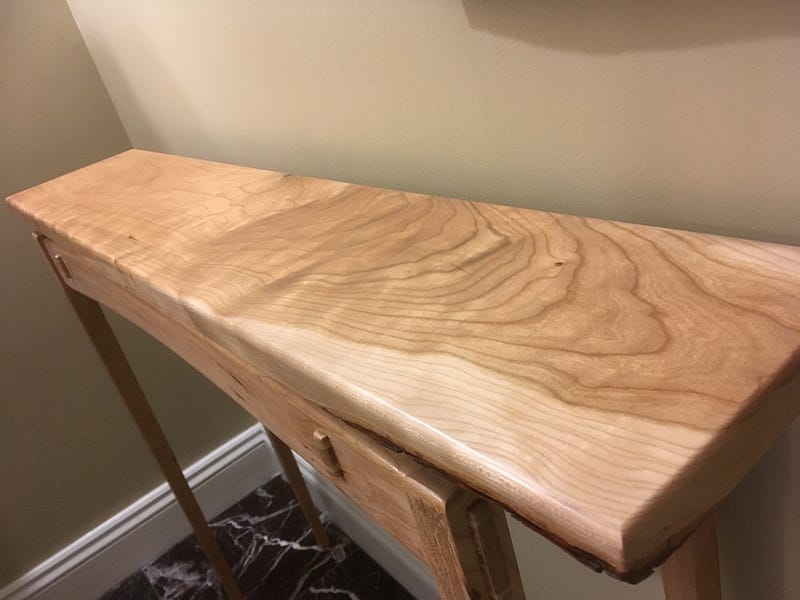
With the top assembled, here’s the final table:
The live-edge created by the bark on the right side of the table gives it a tapered look, which I now think I should have tried to mirror on the blunt left side. I don’t mind the asymmetry, but I think a long taper on the underside of the left end would have been more elegant, mirroring the tapered legs.
Other stories about rescuing scrap wood:
Thanks again for reading, and please share.
Follow this publication: https://medium.com/woodworkers-of-the-world-unite
Twitter at https://twitter.com/DuuudeScience
Facebook at https://www.facebook.com/sciences.duude.1/
Email at [email protected]


