
Midjourney: a simple method for changing the panning direction and Upscale panned images
It is not true that you can only pan in one direction.
This is one of the stories in the “Midjourney Mini Tutorials” series. The mini-tutorials are designed to help new Midjourney users perform specific tasks by providing simple, easy-to-follow instructions.
[Pan] is an outpainting feature with numerous applications and surprises.
I created the Symmetrical Method based on [Pan] before inpainting was released. I also recently developed the Split Screen Method, which is also based on [Pan]. Guess what? I’m still thinking about new methods based on [Pan]! It has a lot of potential.
If you need a refresher on [Pan], read these stories: Midjourney’s new Pan feature and Pan’s eight use cases.
In this story, I’ll show you a simple method to change the direction of your panning. This allows you to add pixels in various ways, both vertically and horizontally.
Then, the panned image can be upscaled using Upscale (2x) or Upscale (4x).
According to the official Midjourney User Guide:
The Pan option allows you to expand the canvas of an image in a chosen direction without changing the content of the original image.
After panning an image once, you can only pan that image again in the same direction (horizontal/vertical).
Once users begin to pan in a direction, the [Pan] buttons for panning in the opposite direction will disappear. Other buttons, such as Vary (Strong), Vary (Subtle), and Vary (Region), will be missing as well.
Although clicking [Make Square] followed by upscaling is a quick way to restore the buttons, we may not want to alter the image’s aspect ratio.
Is there a way to regain access to all buttons without [Make Square]?
Let’s create a case to walk through the issue.
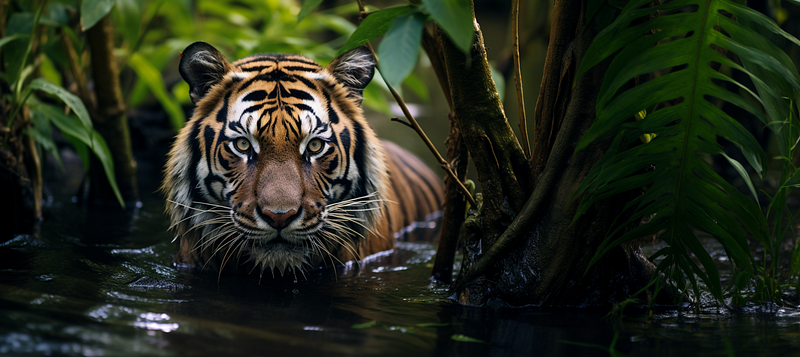
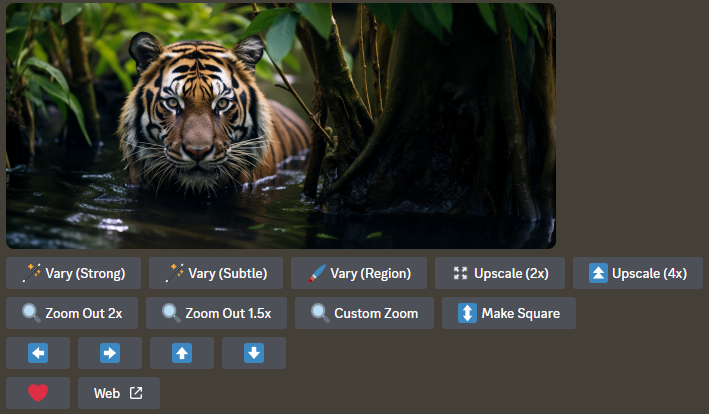
The following prompt was used to create the photo of a tiger:
/imagine prompt: a documentary photo of a tiger in a jungle -- ar 3:2
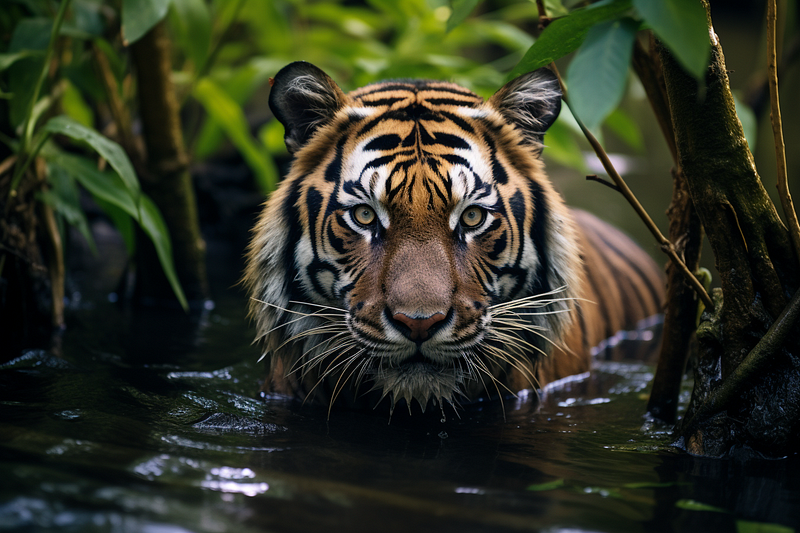
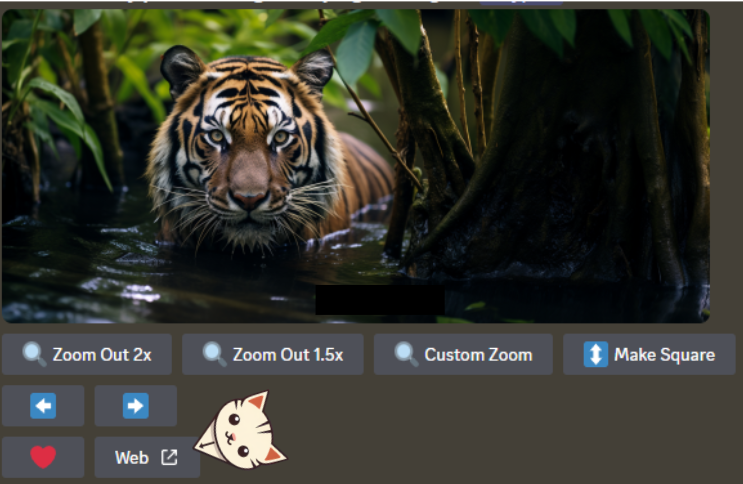
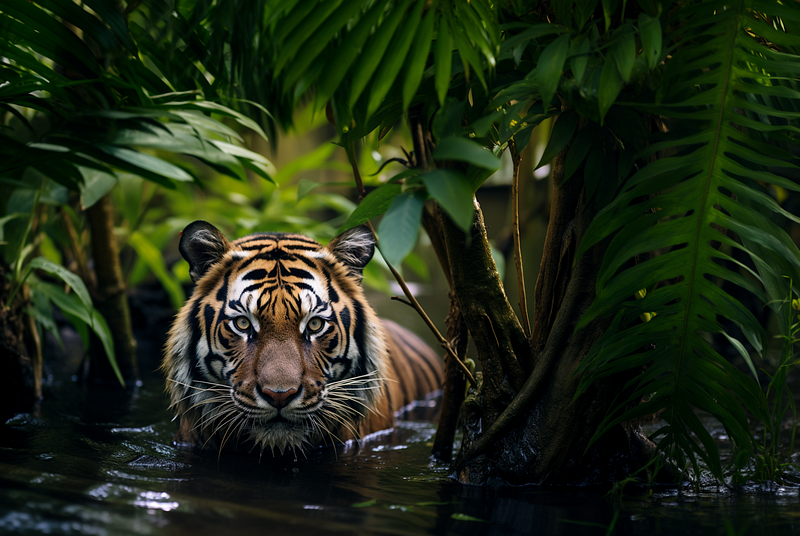
/imagine prompt: a documentary photo of a tiger in a jungle --ar 3:2The photo was panned right to add more canvas to the right.
(To avoid subject duplication, the phrase “a tiger in” could be removed from the prompt of the [Pan] dialogue box, but the duplication error didn’t occur when preparing this story.)
a documentary photo of a tiger in a jungleOn the right, more vegetation has been added. To add more leaves to the top of the tiger’s head, we need to [Pan Up], but the horizontal [Pan] buttons are missing.
With /remix mode activated, we can “reset” the image and change the panning direction using [Custom Zoom]. To do so, one must first determine the image’s aspect ratio.
But where can we find the aspect ratio value after panning?
Steps for resetting the image to regain access to all buttons
- Click on the Web button to go to your gallery.
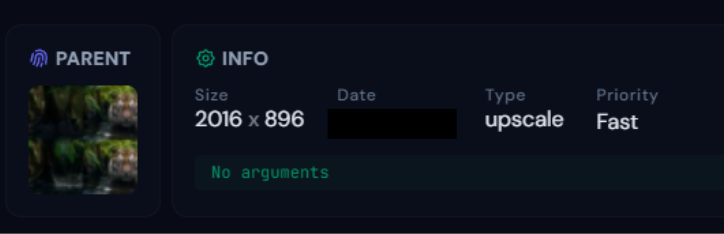
- Scroll down to the “Info” section and look for the image’s Size. Copy the value.
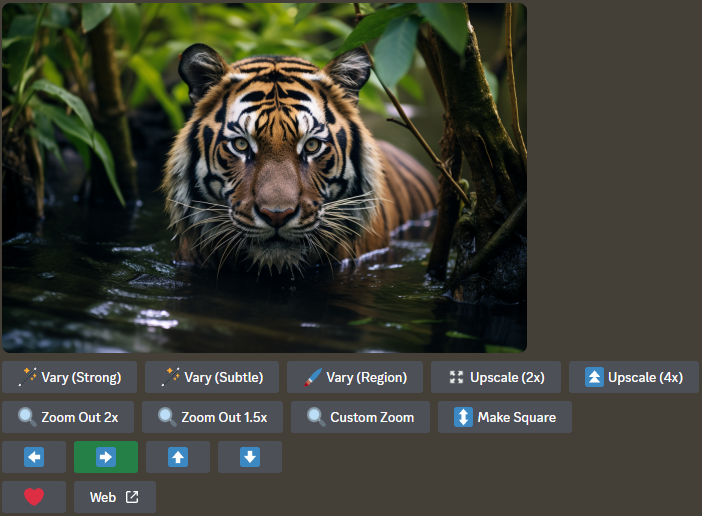
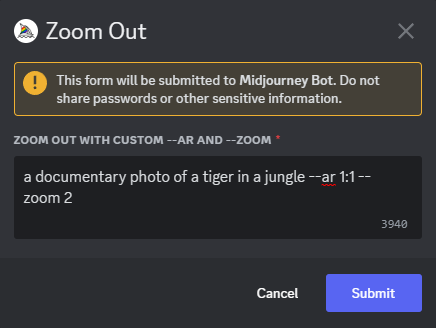
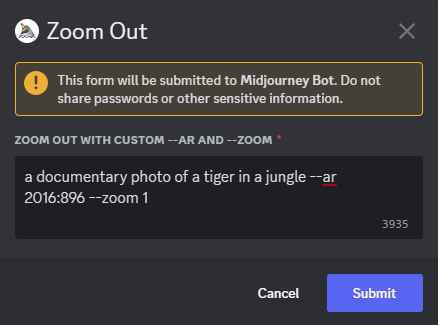
- Click [Custom Zoom]. Replace the aspect ratio value in the dialogue box with the image dimension width and height. Set the zoom value to 1. The prompt in the dialogue box should look like this:
a documentary photo of a tiger in a jungle --ar 2016:896 --zoom 1 - Click “Submit,” then pick one image to upscale.
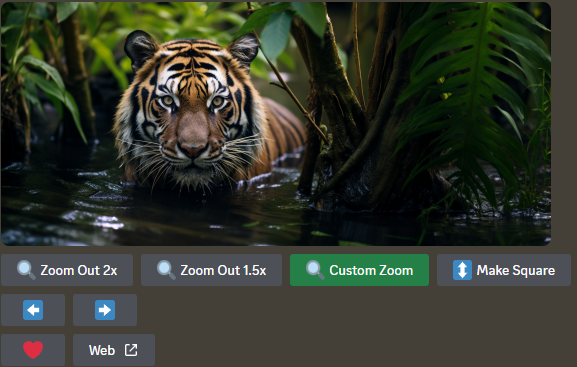
- Your image has been successfully reset if you see all the inpainting, outpainting, and Upscale buttons reappear.
- You can continue to [Pan] in any direction you want. If you want to change the panning direction at any time, simply reset the image.
- (Optional) Once you’re happy with the [Pan] result, finish with Upscale (2x) or Upscale (4x).
Tips and Explanation
- You can copy and paste the image size information from the Web Gallery directly into the [Custom Zoom] dialogue box. Then change the “x” to “:” — for example, the image size is 1648x1104. Change only one character to make it 1648:1104.
- There is no need to write down the value on paper or in Notepad. It is ideal for people who are lazy but still efficient, like me.
- You can also use [Custom Zoom] to reset old photos and unlock new features such as Upscale (2x) and Upscale (4x).
- Because we cannot reset the photo after Upscale (2x) or Upscale (4x), the upscaling process will be the final step in the panning session.
- You can use this method to create a large panned image and then upscale it to increase its resolution (2x or 4x).
- According to the User Guide, aspect ratios may change slightly during image generation or upscaling. It’s expected to have minor changes to the image’s borders after each image reset using [Custom Zoom].
After resetting the image, you are no longer limited to horizontal panning.
You can also change the details by inpainting.
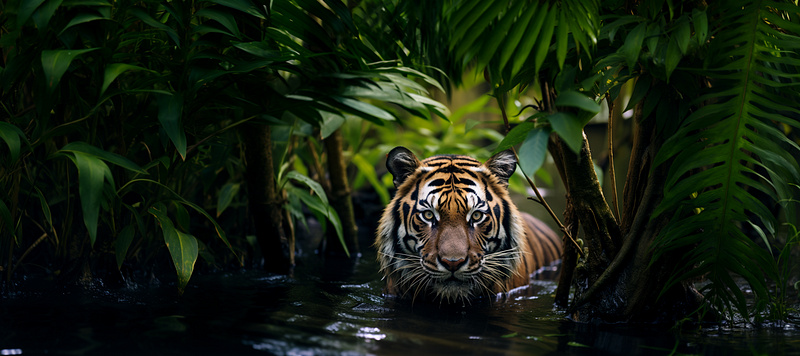
Here, I panned up (vertical panning) to add leaves above the tiger.
Finally, after resetting the image (again), I added more vegetation by panning left (horizontal panning).
However, too many panning sessions make the tiger appear smaller in the photograph. Remember, more is not always better.
Related stories
Conclusion
- Pan in one direction and switch to the opposite direction is possible. You are not limited to only panning in one direction.
- Between the panning sessions, you can “reset” the image with [Custom Zoom] to regain access to all Outpainting, Inpainting, and Upscale buttons. To do so, first determine the aspect ratio of the image.
- The image dimensions can be obtained from the web gallery. Use the information to edit the prompt in the [Custom Zoom] dialogue box and reset the Zoom value to 1.
- You can use this method to create a large panned image and then upscale it to increase its resolution (2x or 4x).
I hope you like this story!
Please give me a clap or leave a positive comment to let Medium’s algorithm know that this story is helpful and has contributed to its platform’s success.
Your support inspires me to create higher-quality content in the future!
Never miss a story. Follow me on Medium for updates, stories, and tips about Midjourney.
Sign up here for a free email alert when I post a new story.


