
The Best in CP value Scanning 135 Negative: Lomo DigitaLIZA Max v2
Lomo has launched the second generation of the Digitaliza Film Scanner… I bought it immediately after seeing the video on the internet… I have been using it for a week or so and have scanned about 1x cartridge of negatives, mainly 135 prints… The result is much better than expected… I would recommend it to anyone who likes negatives…
Why use a digital camera/mobile phone for Scanning Film?
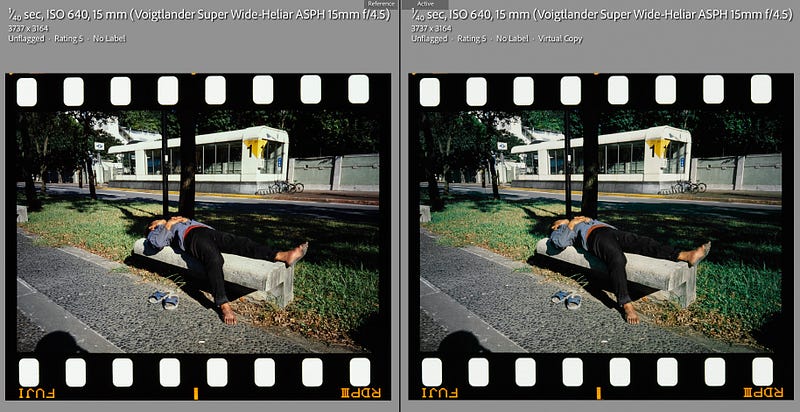
In the past two months, I have started scanning my family’s positive films from 2007–2012, including 120/135 positive films… I have been using Epson V700 + SilverFast SE9+ to scan 120 negative films, and the results are pretty satisfactory… However, if I continue to use the Epson V700 for scanning 135 prints, the results are not too good… The reason is that the accuracy required for scanning 135 photos is much higher than that of 120 images… Later, I bought a magnetic film holder online to flatten the 135 prints a bit and then used the A7R3+ on my own. The A7R3+ OM50/2 was then used to take the film, but the results were satisfactory, but I always felt that the film still needed to be longer…
The author has also written a short article on the experience of scanning negatives with the Epson V700…
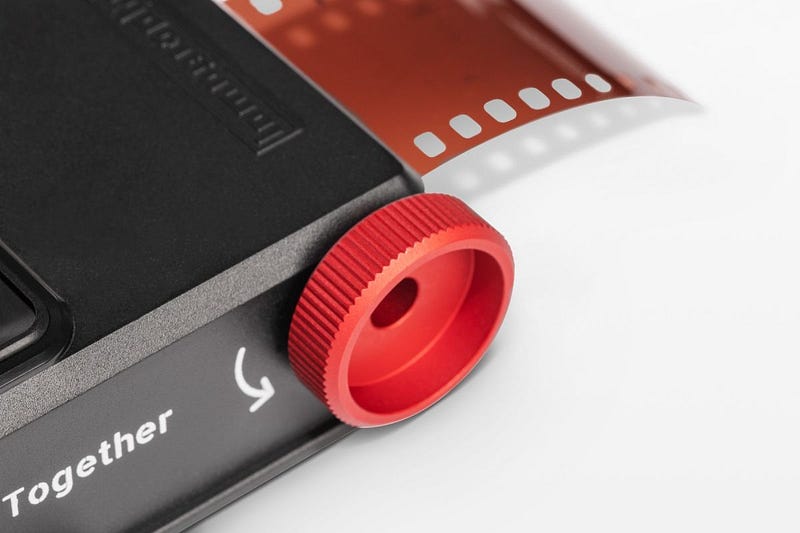
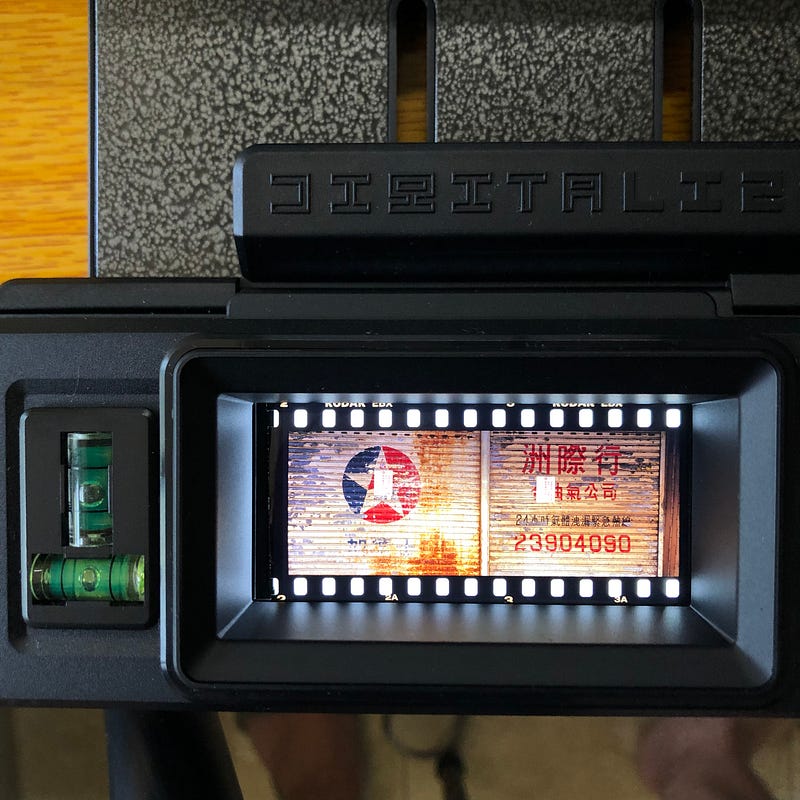
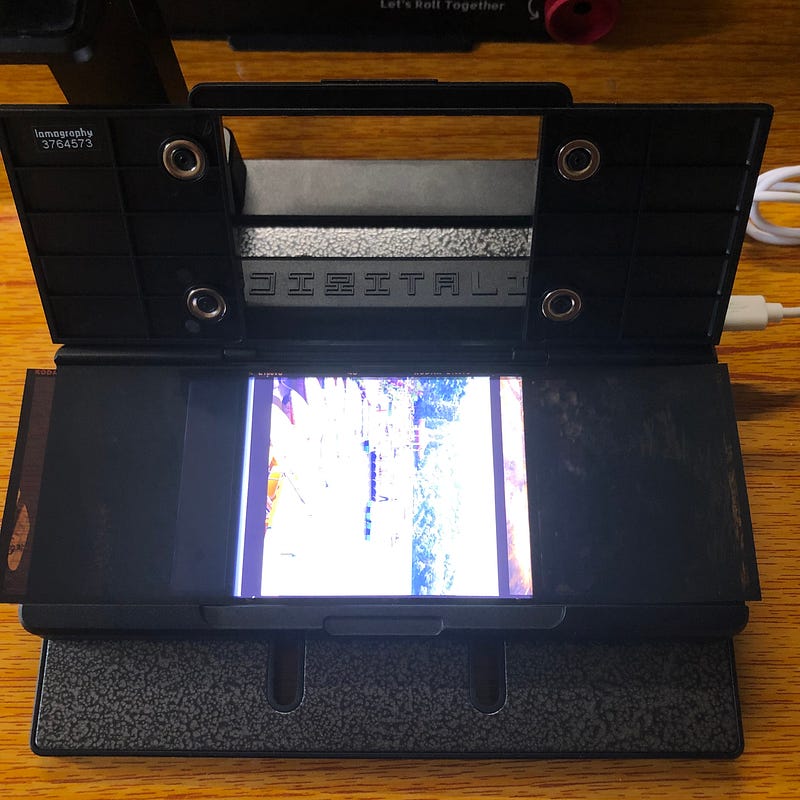
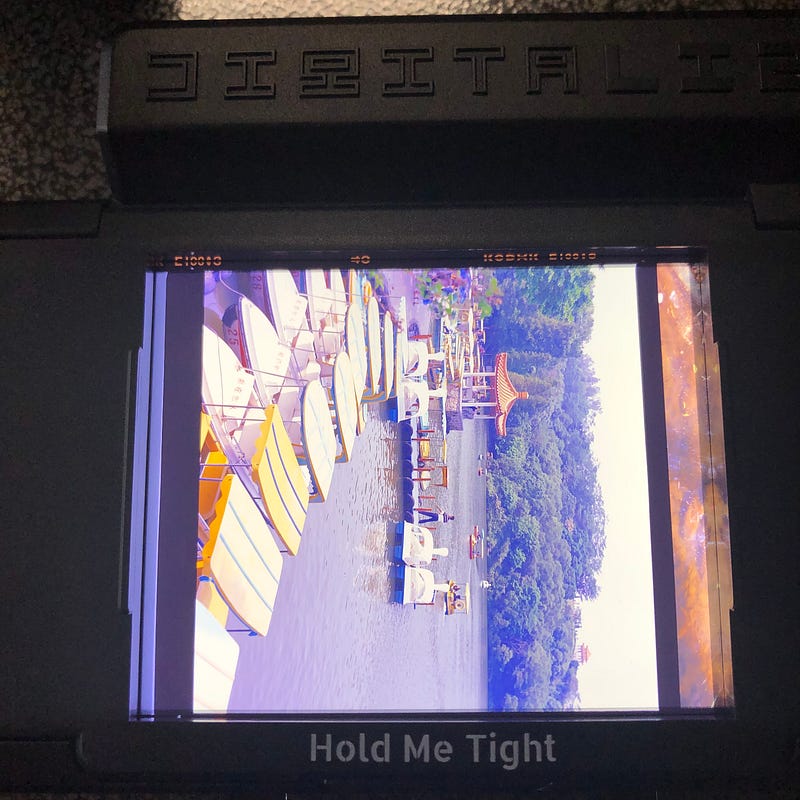
Until I came across the Lomo Digitaliza Max, which has a 135 magnetic clip to keep the negative flat and at the same time scan the negative holes in the negative, which is very attractive for scanning xPan photos with negative holes… The previous generation of Lomo Digitalize required a separate 135 negative hole clip. Still, the second generation of Lomo Digitaliza Max v2 can now scan the negative holes directly, significantly improving CP value. Of course, it’s hard to compare the CP value of Lomo accessories, but the Lomo Digitaliza Max v2 is one of the few products I would recommend to my friends.
The other thing is that using a flatbed or professional negative scanner is not cheap, and it takes up a lot of space, so for many people, a negative scanner is just a document scanner. The tolerance is very good, and the results are actually better than affordable platform scanners such as the Canon 1000F… You don’t have to worry too much about unevenly compressed negatives when using Lomo Digitalize+…
Mobile phones and lenses for Scanning negatives
The author uses a digital camera A7R3 + OM50/2 to shoot mainly… 50mm macro lens, the focal length is very suitable for shooting 120 films, if the APSC x1.5 mode is turned on, it is also ideal for shooting 135 films, but the effective number of images will be greatly reduced… Therefore, it is best to shoot in RAW mode when shooting. Most negatives require significant changes to white balance, light and dark, contrast, etc., so RAW is the best way to make changes…
I have also tried to use the Ricoh GR3x to retrieve negatives, and with its lightweight body and the advantage of a portable macro shooter, it was worth a try, and the results were as good as expected…
On the other hand, I’m not sure about the phone mount, ha!

The shooting process is approximately as follows:
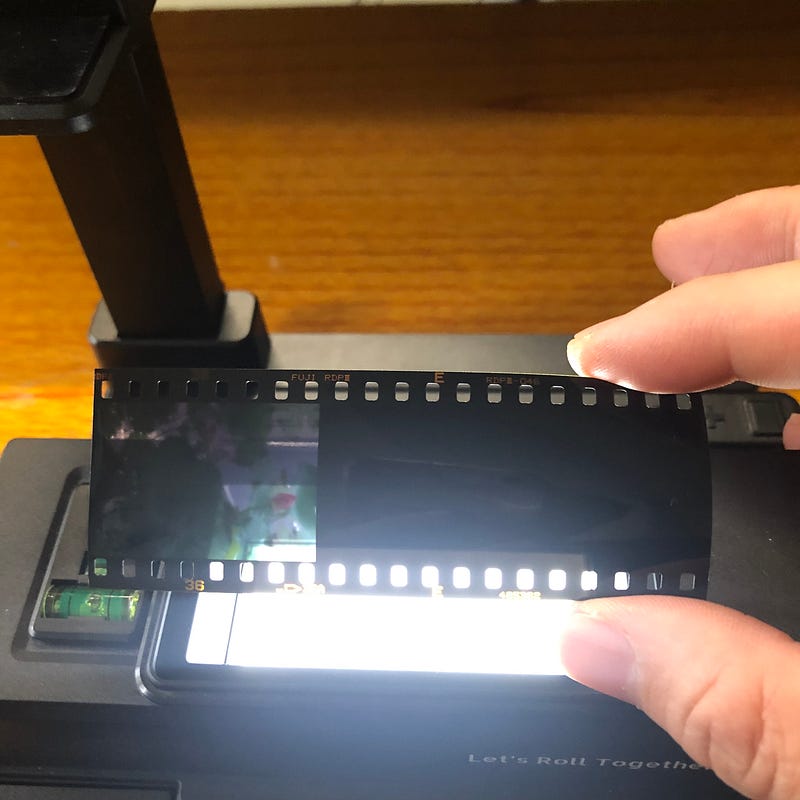
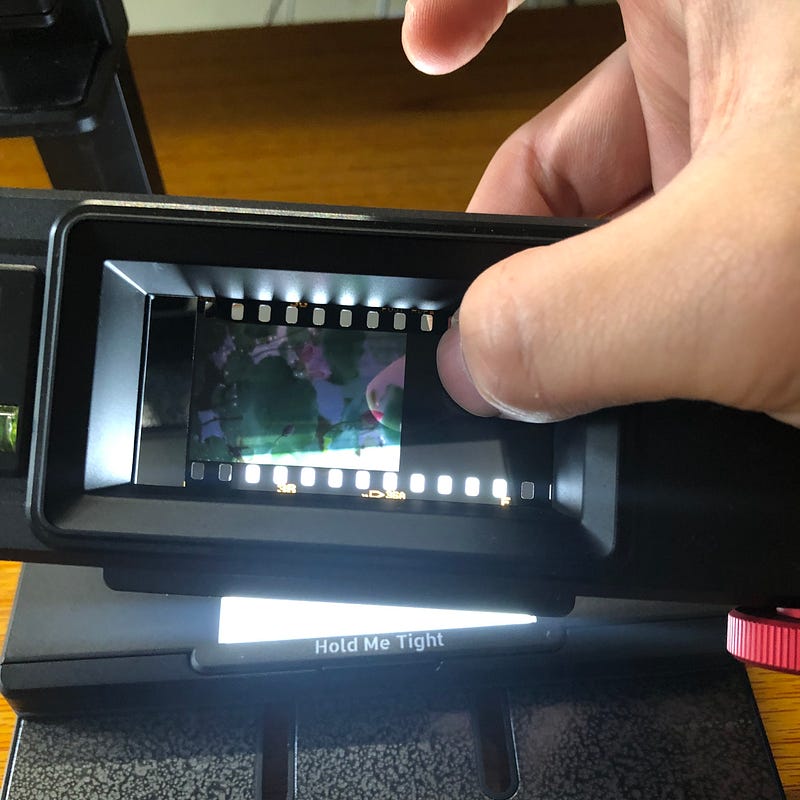
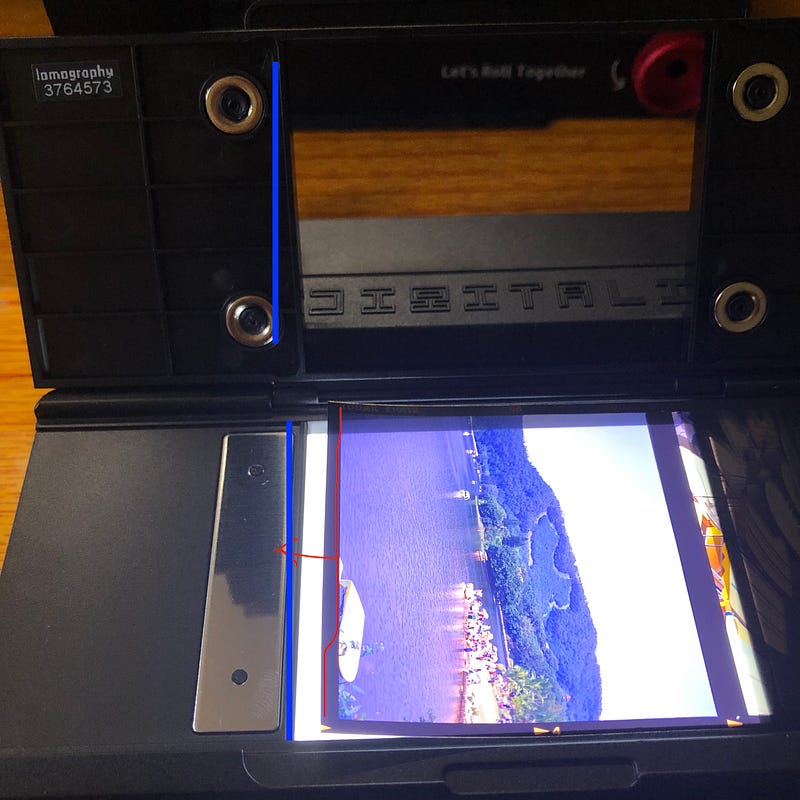
- Assemble the Lomo Digitalize and load the negative…
- A simple dusting of negatives and lamp holders with an air blower
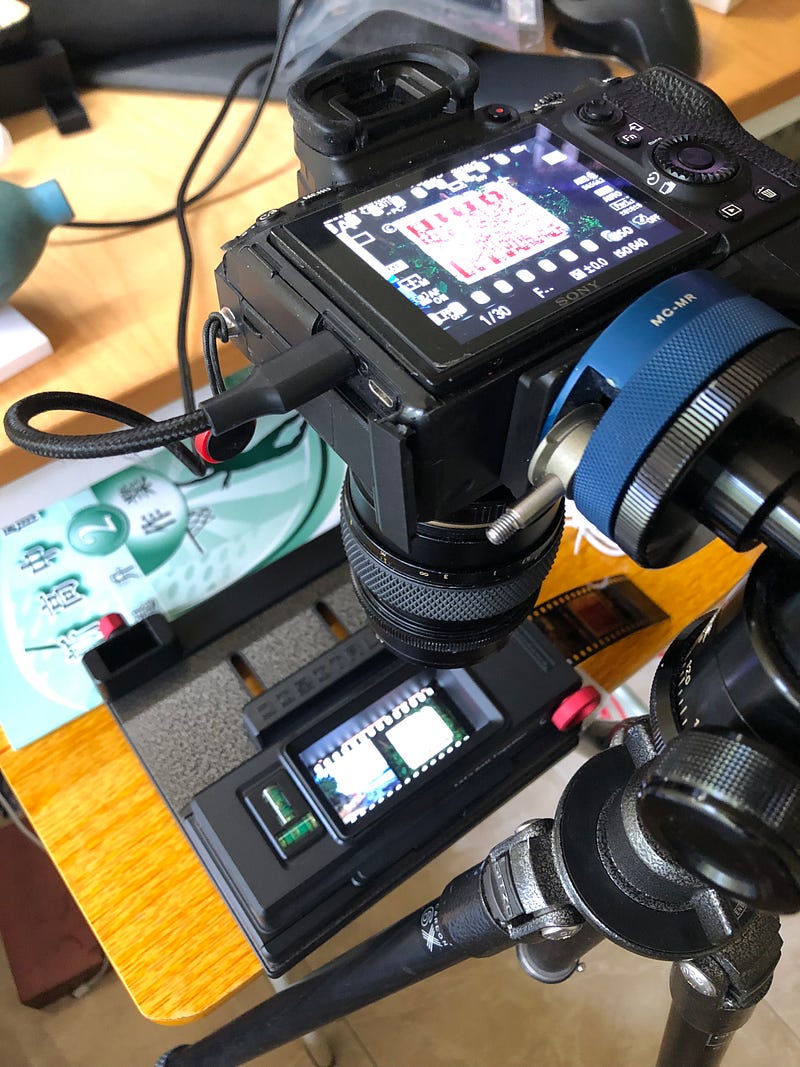
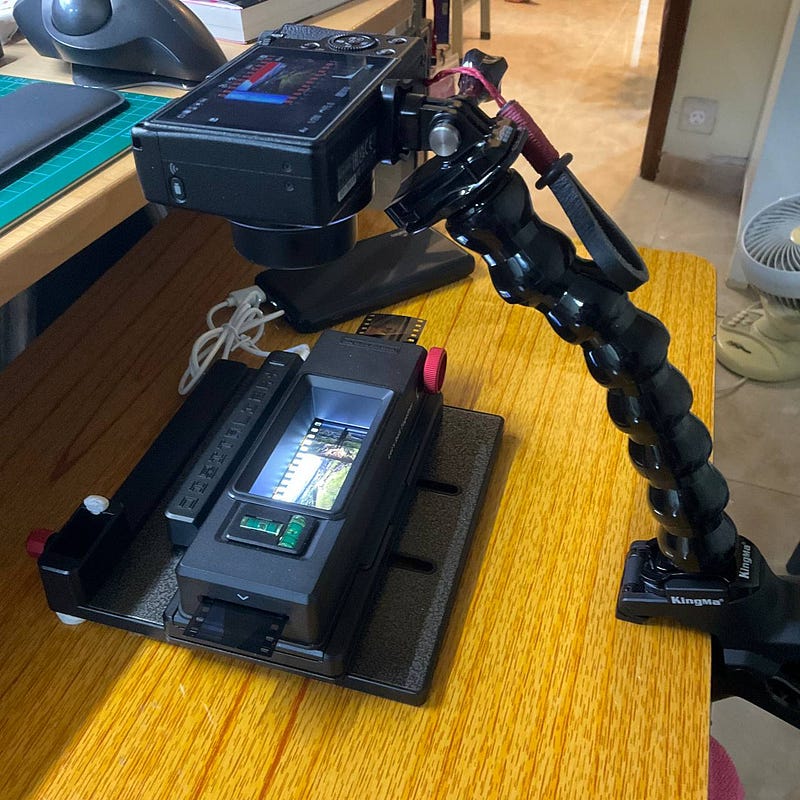
- Set the base and camera in a horizontal position…
- Set the camera lens at the right distance and open the connected computer software to help you take pictures (adjust the level, watch the shooting process and results in real-time)
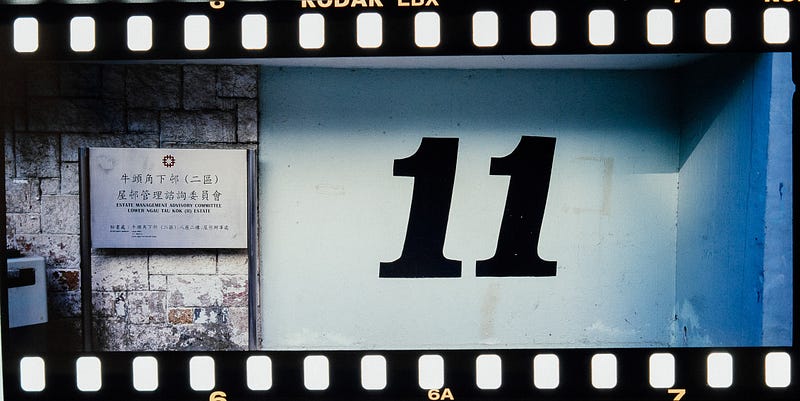
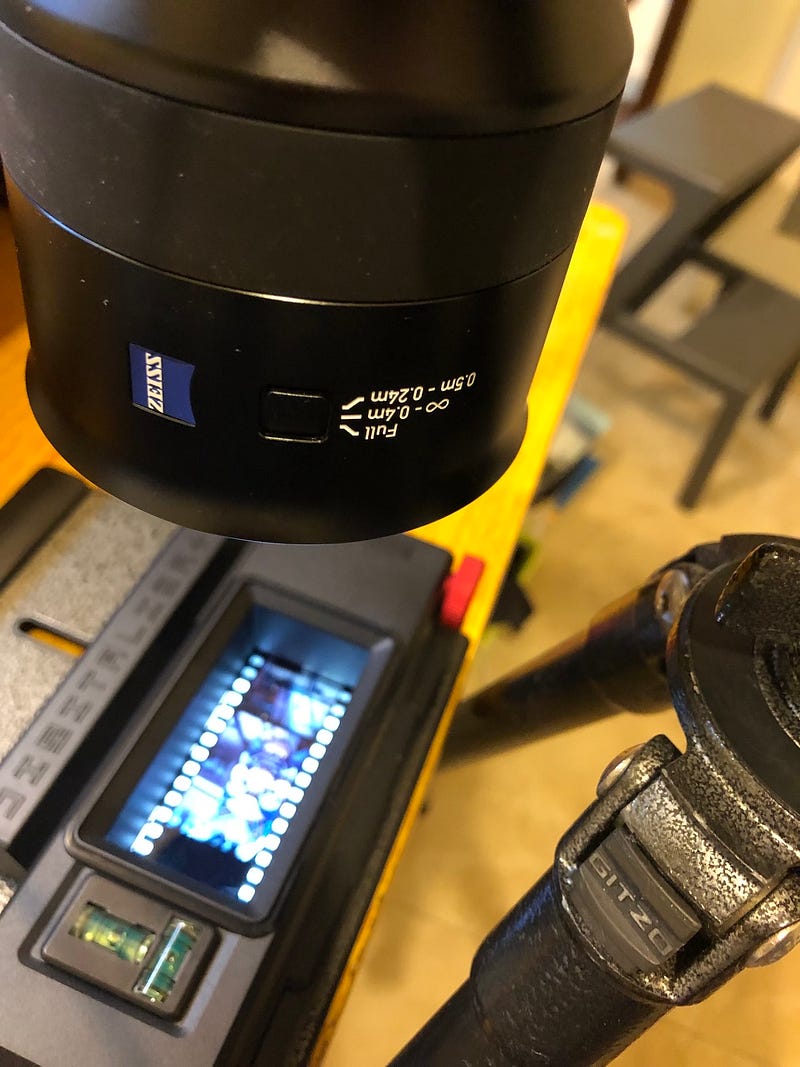
- If the lens is in the same focal plane as the base, an aperture of F5.6 is sufficient to keep the image sharp, but an aperture of F8 or smaller will probably pick up more dust and take more time to remove it. A picture of a wall or a horizontal object to focus on and hold for the entire focus distance. This way, you can turn the gear to ensure it’s level and then continue to shoot at the same setting or even use the same setting for the whole roll of negatives…
Connected to computer filming to assist in the Scanning process
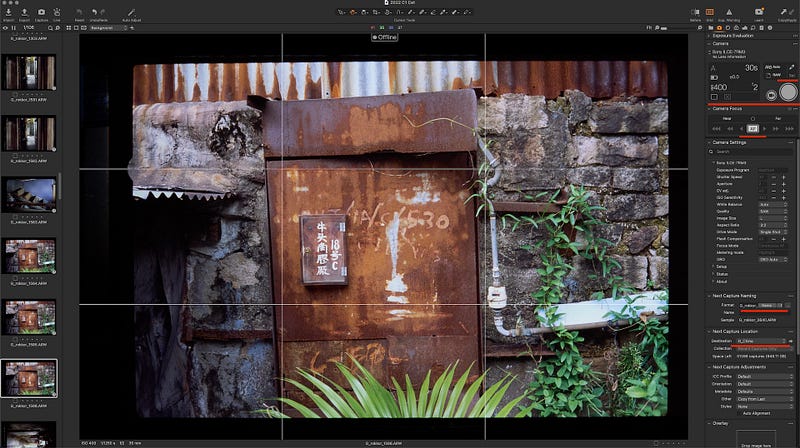
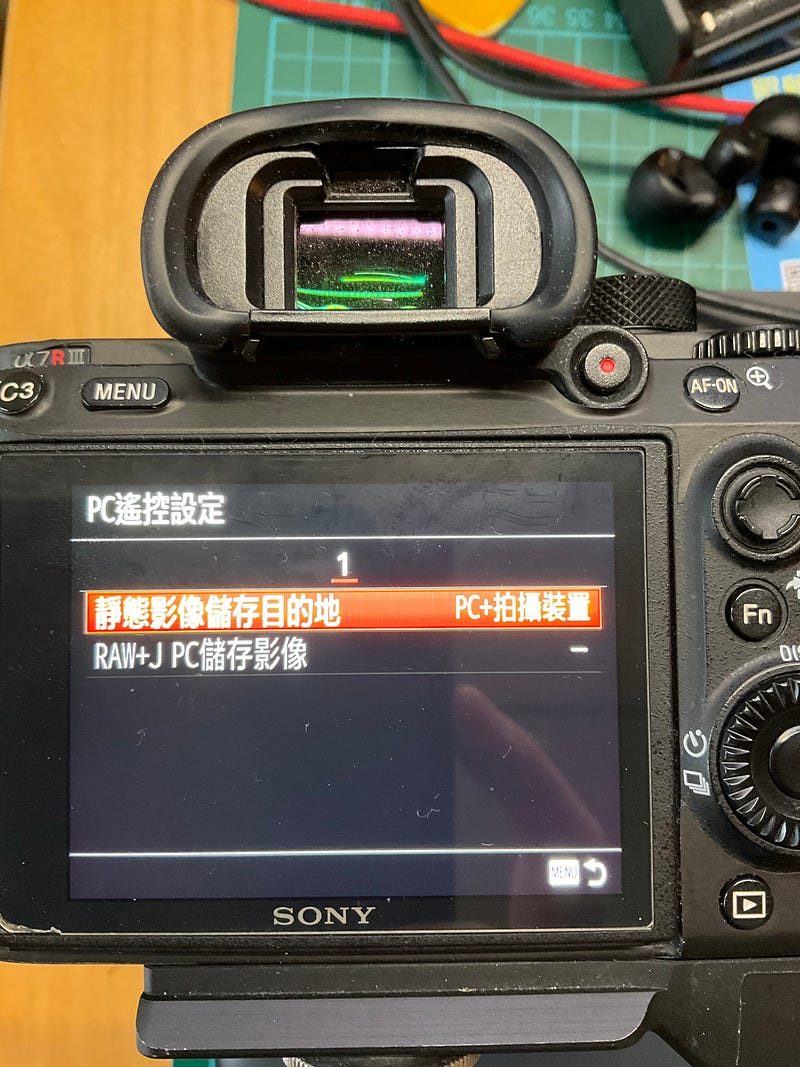
If you’re using a mirrorless camera, you can watch the process and results in real-time with different connections… If you’re using Sony/Canon/Fujifilm/nikon, each of them has their own free real-time software to support shooting, making it easy to control the camera and compose images more accurately in real-time…
The better the pre-production, the less time/effort will be required to make significant changes in the post-production… If the pre-production is done well, it may be possible to do everything in the post-production with a simple cut of the photo…
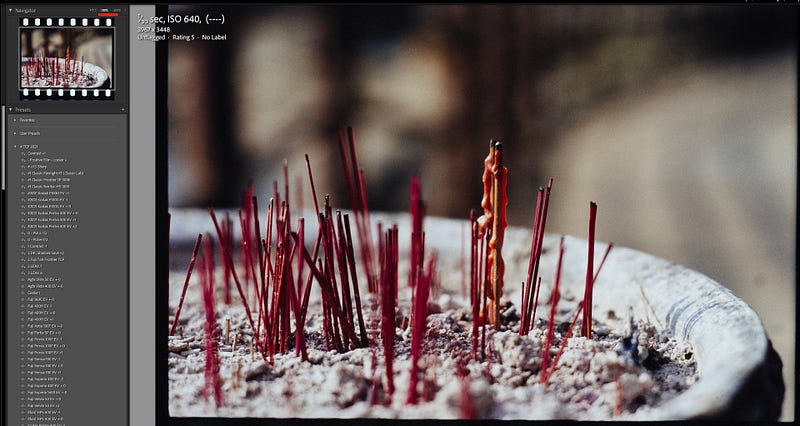
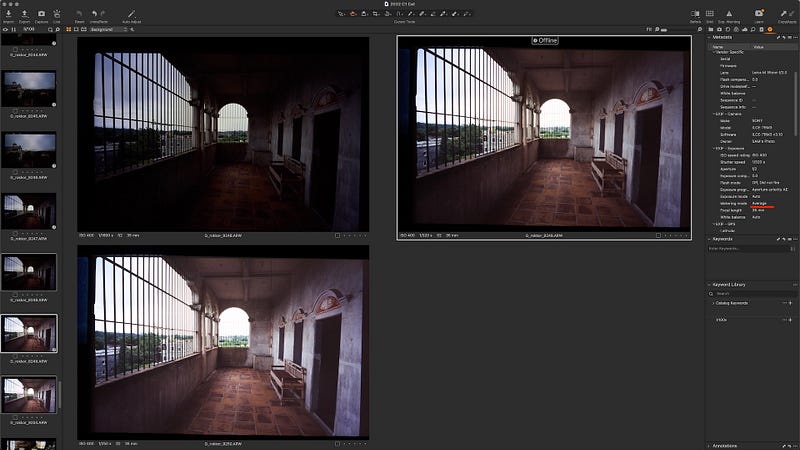
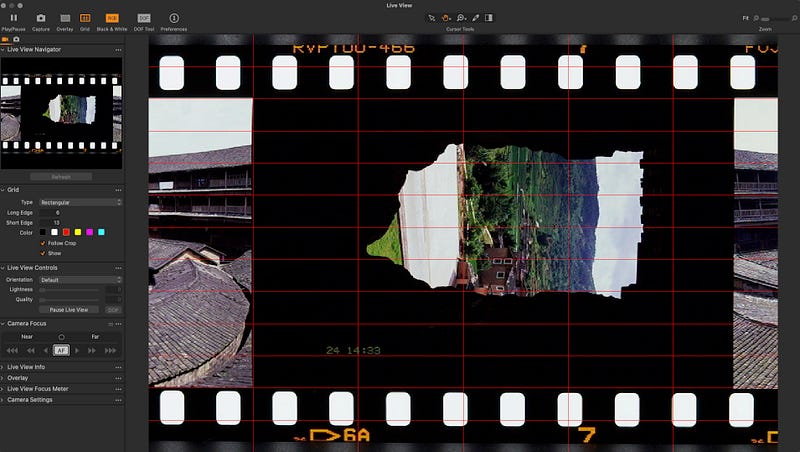
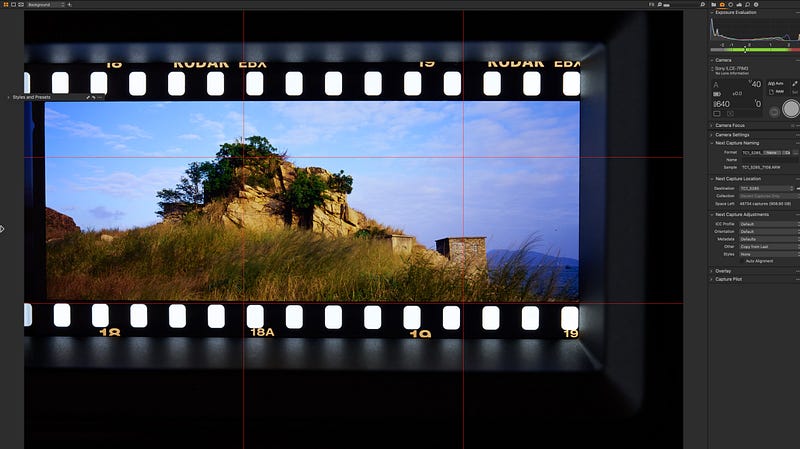
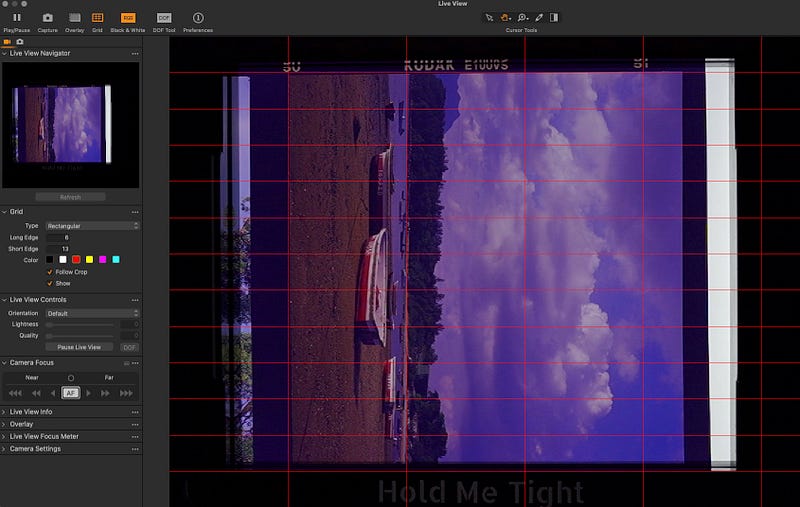
As I have a Capture One V22 at home, the speed and stability of the connection is much better than Sony’s own software, so I mostly use Capture One Live Capture to assist me in taking photos… I add frame lines for different photo ratios to help bring the photos to a level for later editing…

If possible, you may wish to use a different metering mode for photos with complex light sources
There is no such thing as a straight out negative scan Post-production DNG files are processed:
Cuttings photos
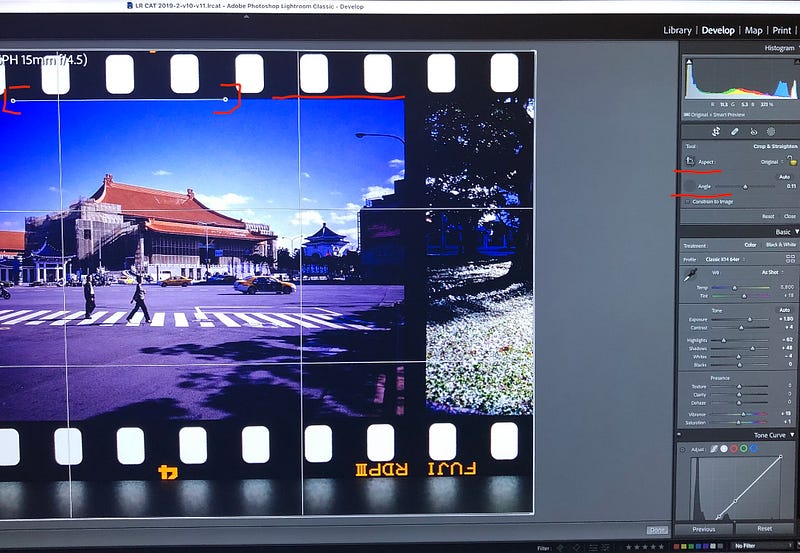
2. Tap/correct the white balance
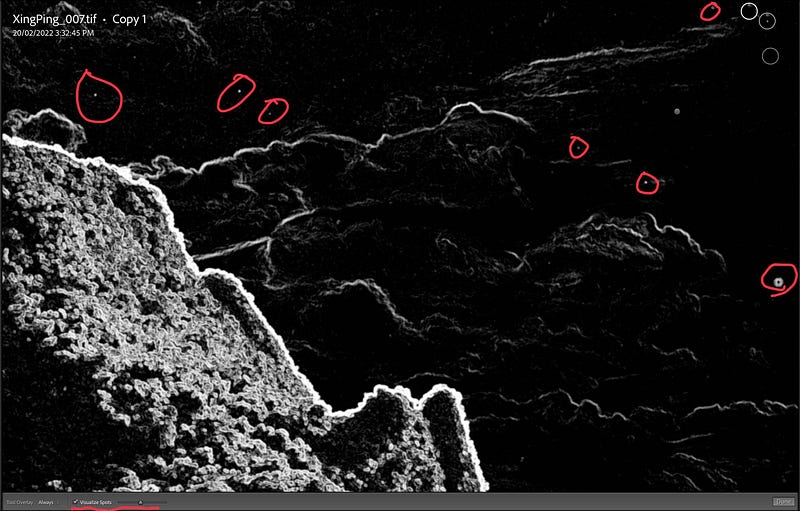
3. Remove dust from the negative
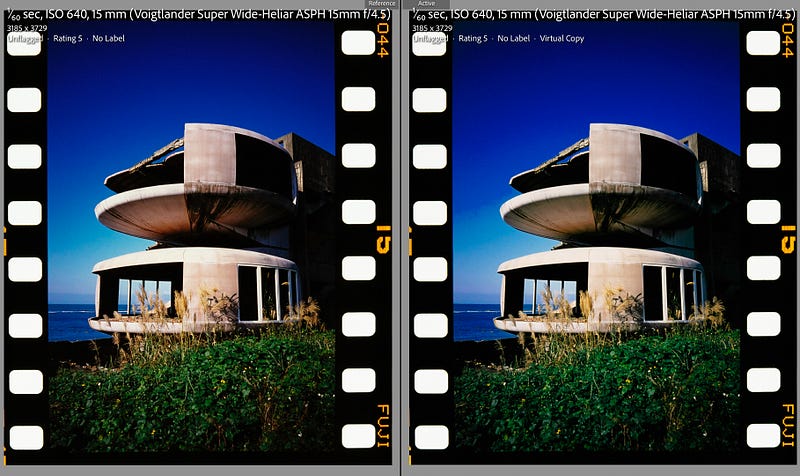
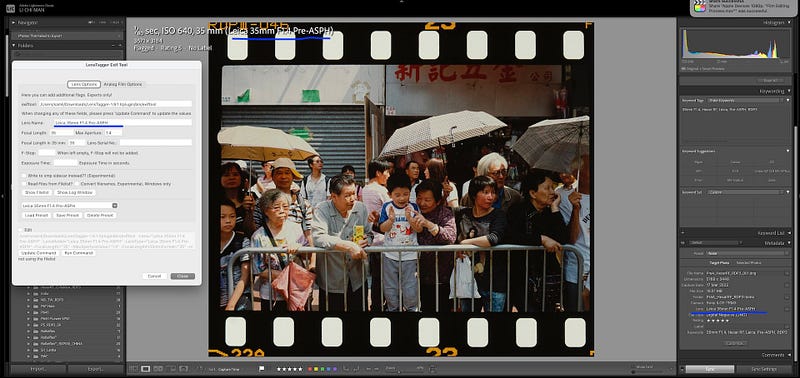
4. Applying the corresponding negative style file + selecting the colour temperature orientation of the negative + simple fine-tuning of details
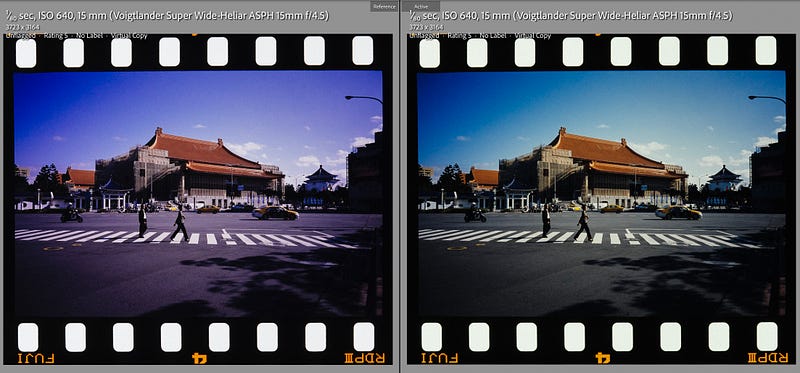
This is because the image is colour managed by the camera/phone processor, i.e. the image is actually Apple colours, Sony colours, which may be slightly different from the colours on the original negative. …using a negative style file saves you the time of making adjustments yourself, as each negative has a different colour and colour temperature orientation…E100vs will be warmer, and redder when shooting underexposed, and RDP3 will be a little more bluish when shooting underexposed…in fact, when using a negative scanner If you are using a digital camera, you will not have a negative description file to use beforehand. Still, you can add a negative style file to correct it later… You can also correct it by referring to the original film. There is nothing wrong with corrections; the most important thing is that they fit your post-processing process…
The author used to put on the wind file, see if the situation required Push/Pull images, put on the Frontier/Nortisu description file, and then adjust the light and darkness, contrast and other details…and then use the post-noise reduction software as needed…
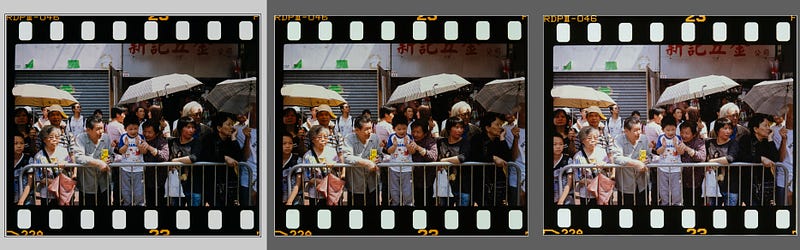
Often, when you go to different negative printers, the colour of the final scanned image differs because they use different scanners…the mainstream commercial Frontier SP3000, the image will be a little greener and cooler. The Nortisu HS1800 will be a little redder and warmer…by applying these settings. You can make the scanned negative image more closely resemble the style of the negative as seen by the average photographer…unlike the negative, sometimes the colour temperature setting is just a little different XD…
5. adding appropriate exif, lens data, geographical data, etc. to photos

6. transfer out photos
Lightroom modifies the images you see here… I believe that many people who take photos with VM15/4.5 or a camera with a portable negative will not add an extra colour temperature filter to the lens to modify the colour temperature of the shot… so the colour temperature of many of the positive shots will be This is not very pleasing to the eye…
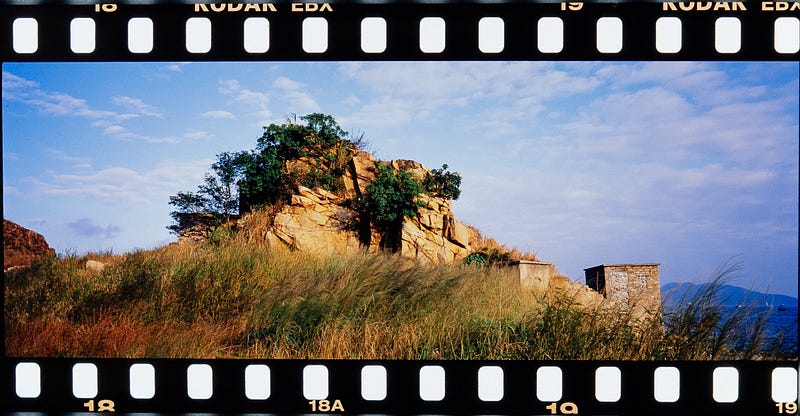
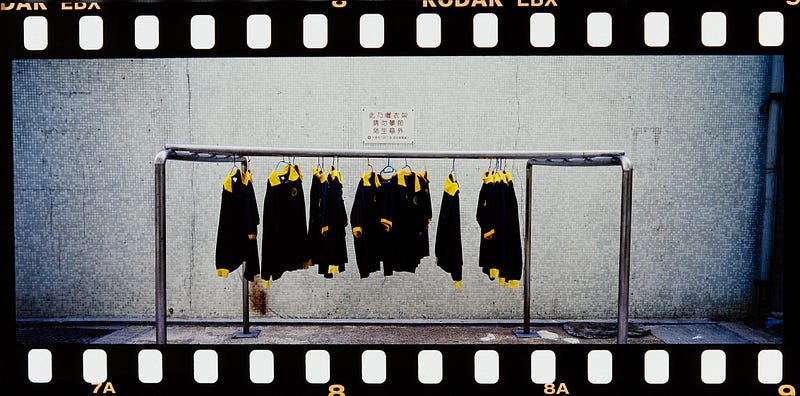
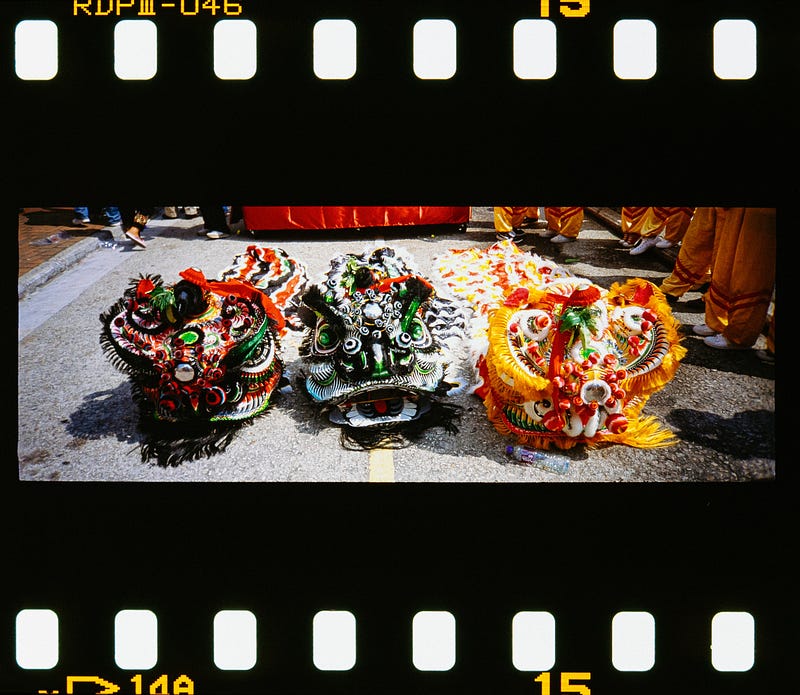
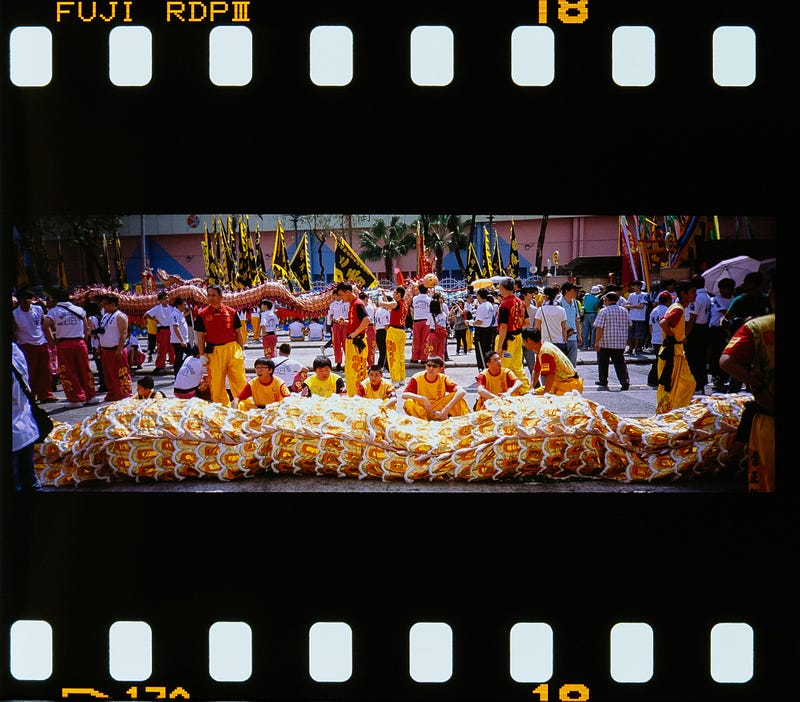
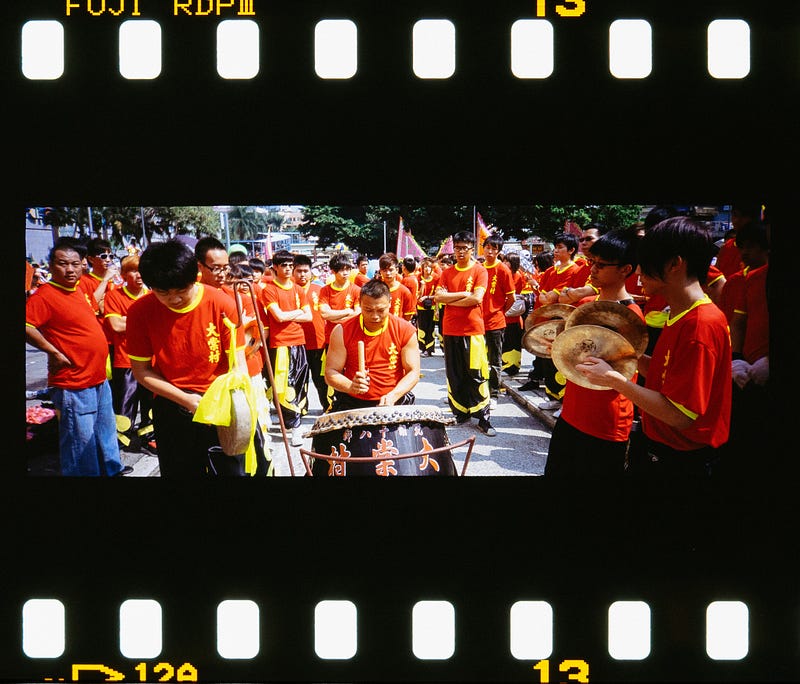
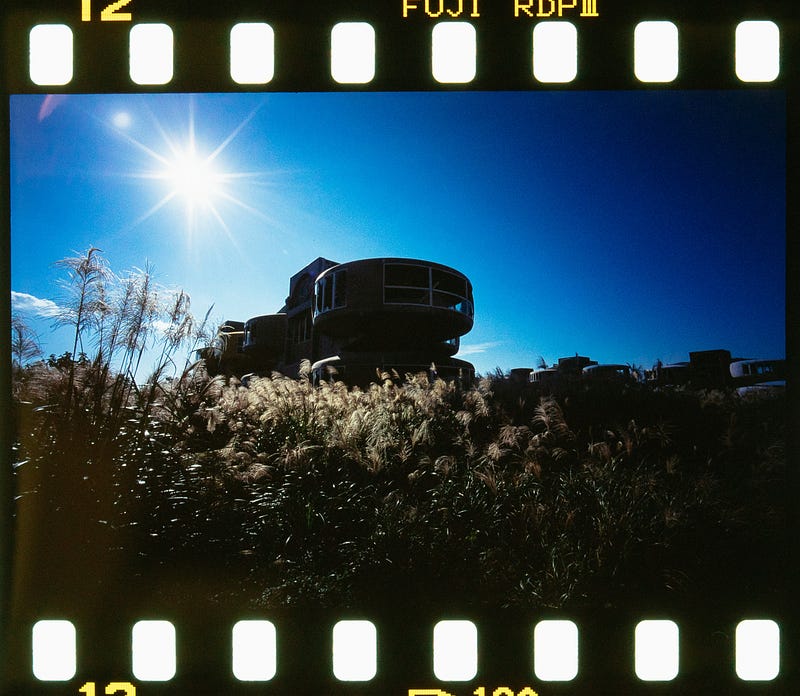
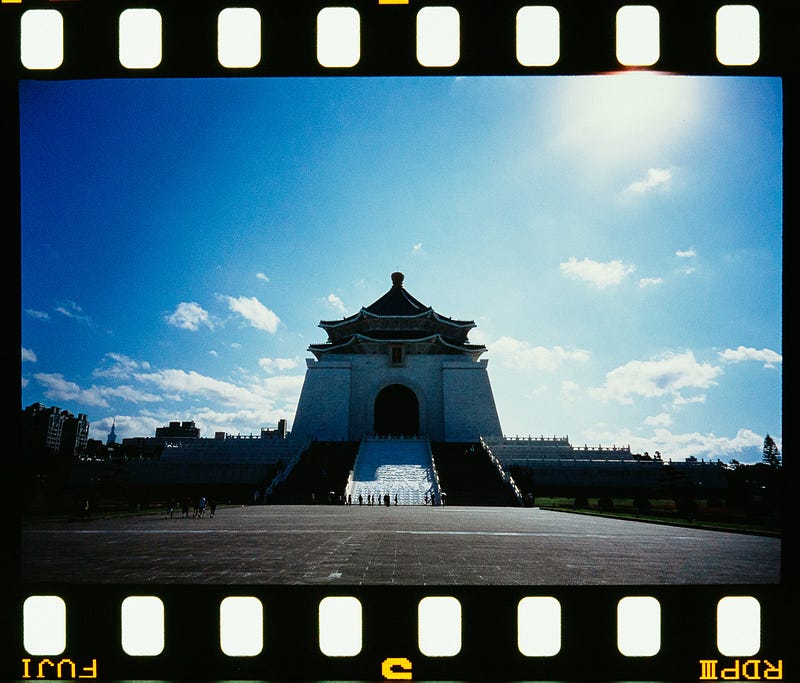
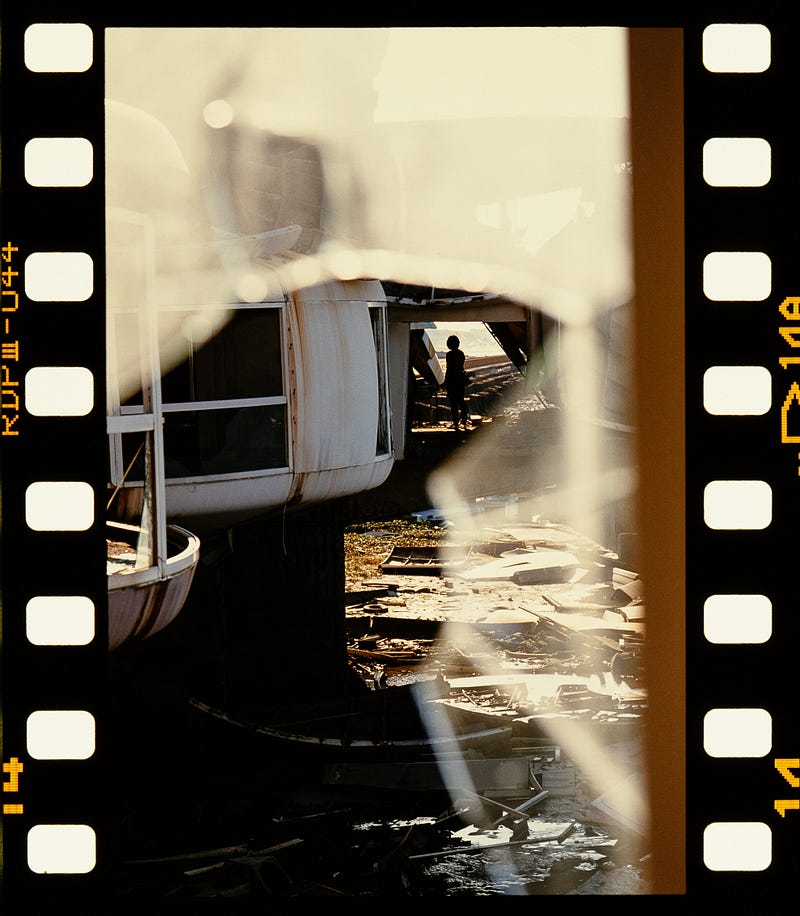
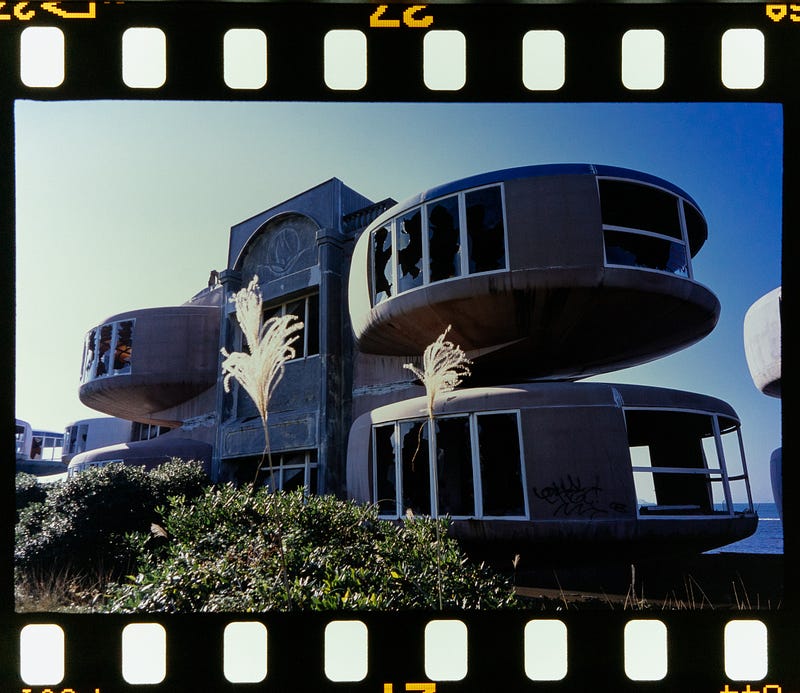
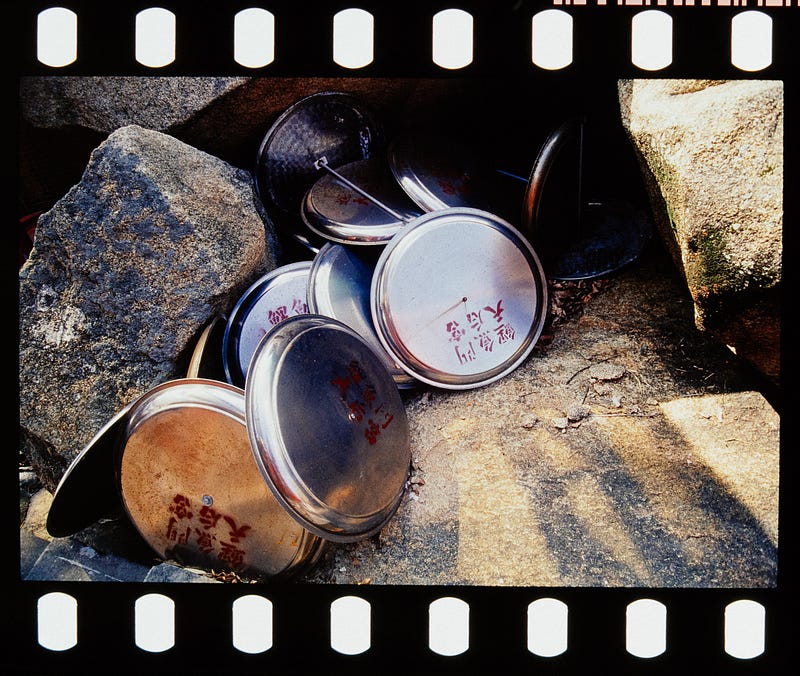
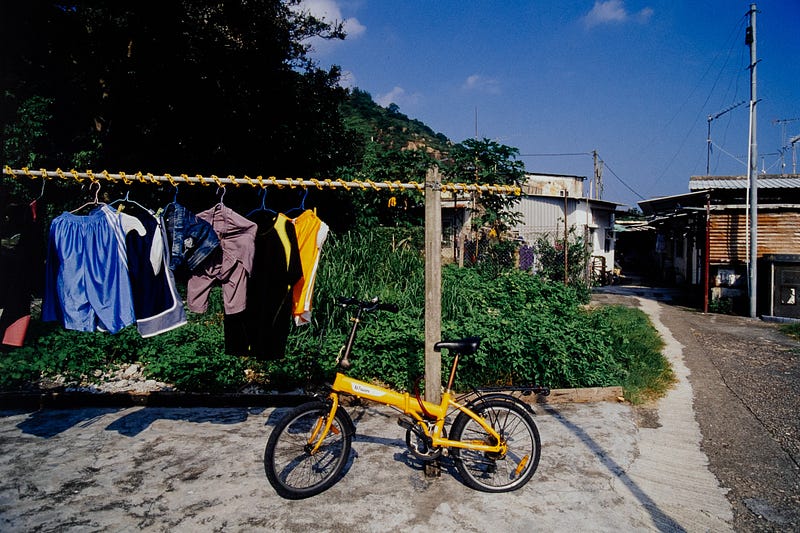
Using Lomo DigitaLIZA+ to shoot the DNG RAW, I have become a colourist in a printing shop, and I have been able to adjust the colour temperature, light and darkness, highlights/darkness, reddish and greenish images… The image processed today is closer to the image effect I have in mind today than looking at the original film… At the same time, The images processed today no longer have the same emotions as those of that day… Maybe I didn’t overthink it when I took the photos, but subconsciously thought the images and composition were beautiful, so I took them and left them to be processed again today with different results… At the same time, the photos you see have been laid out, put together, or consciously categorised. In this age of mobile phones, where everyone can be a photographer, editing and laying out images may be a subject that photography enthusiasts need to learn…
The author took about 20–30 minutes to retake a roll of 135 negatives with 36 prints and about 15–20 minutes to finish an additional roll of 135… The retaking time and quality are perfect, and the post-production of 36 photos takes about another 30 minutes, which means about 50–60 minutes to retake + post-process the photos…
Using Lomo DigitaLIZA won’t give you instantly beautiful photos… but it will save you the time and effort of flattening 135 negatives… Scanning/reversing negatives is, as always, a matter of time, time, time and, to a lesser extent, money… Even if you use the same tools, the difference in quality will be in the details… The better the pre-processing, the better the post-processing, the easier and faster it will be…
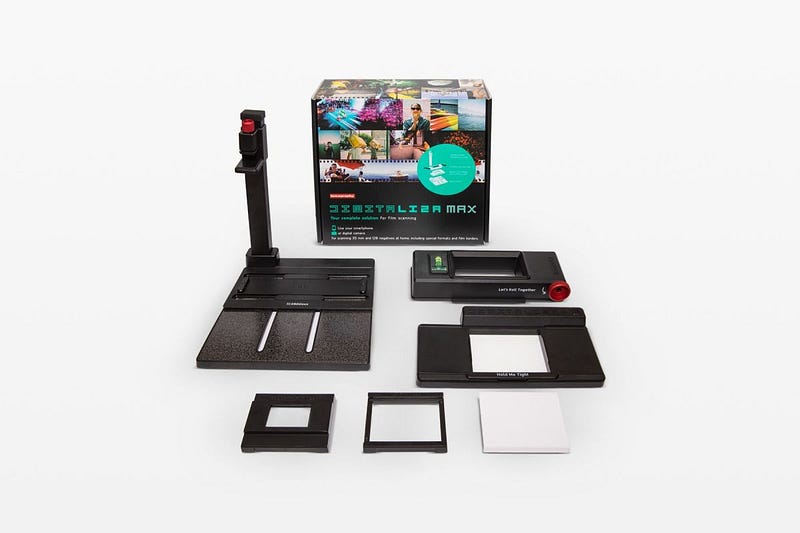
Lomo DigitaLIZA
Advantages:
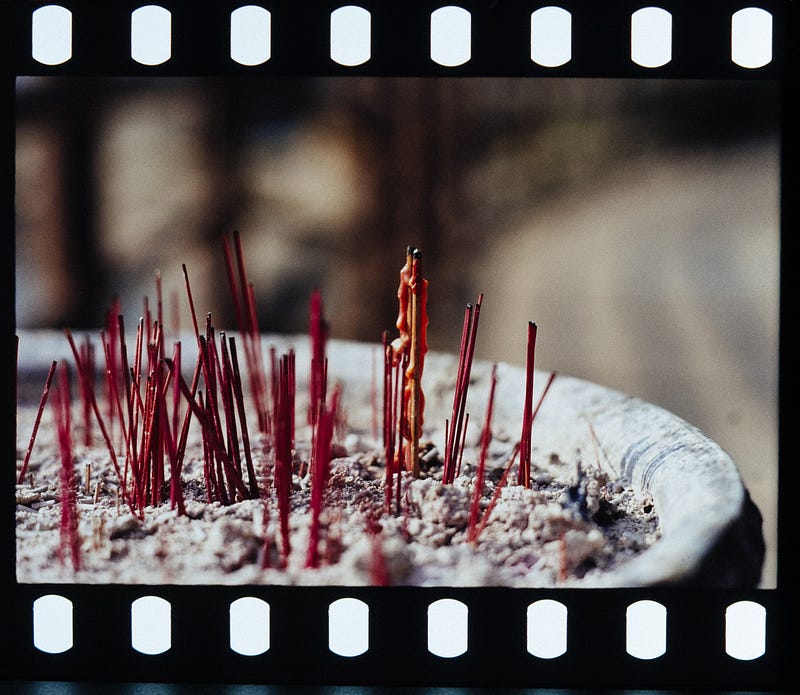
。The 135 films can be held flat by a magnetic element. The 135 films can be held flat by a magnetic element for excellent results when flipping the film…
。Can shoot 35mm, 120, 110, panoramic (xPan), negatives with negative holes…
。Negative film holder with light box, can be operated with 2A battery or via Micro-USB power supply
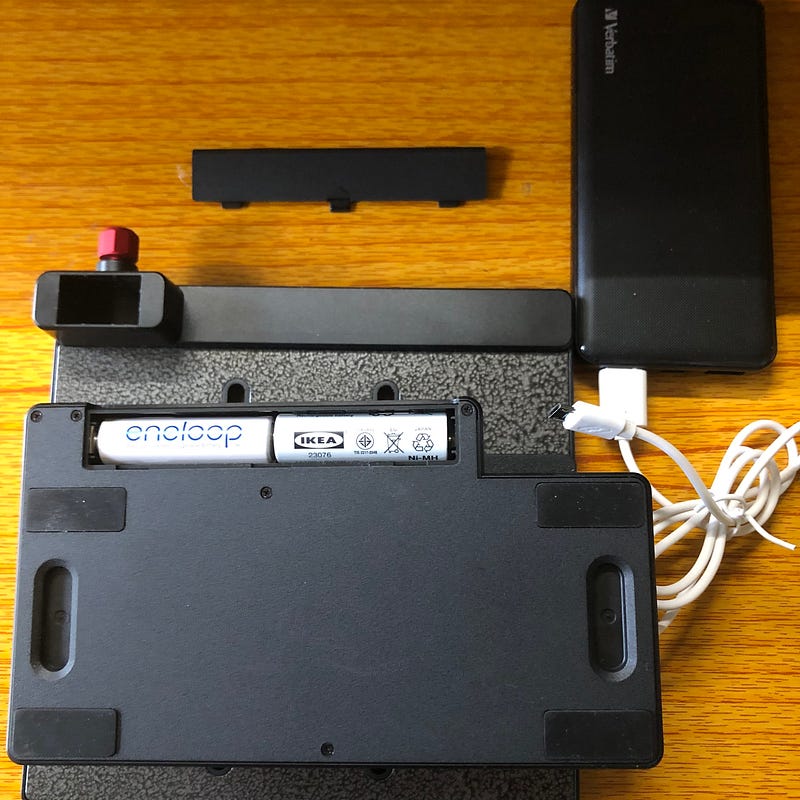
。The Max kit includes a smartphone stand, a sliding platform stand for easy handling…
。With detachable leveller
。It is light but extremely well-equipped…
。You can take photos with your mobile phone or digital camera and adjust the size, colour, contrast, etc. on your mobile phone or computer with great flexibility…
Disadvantages:
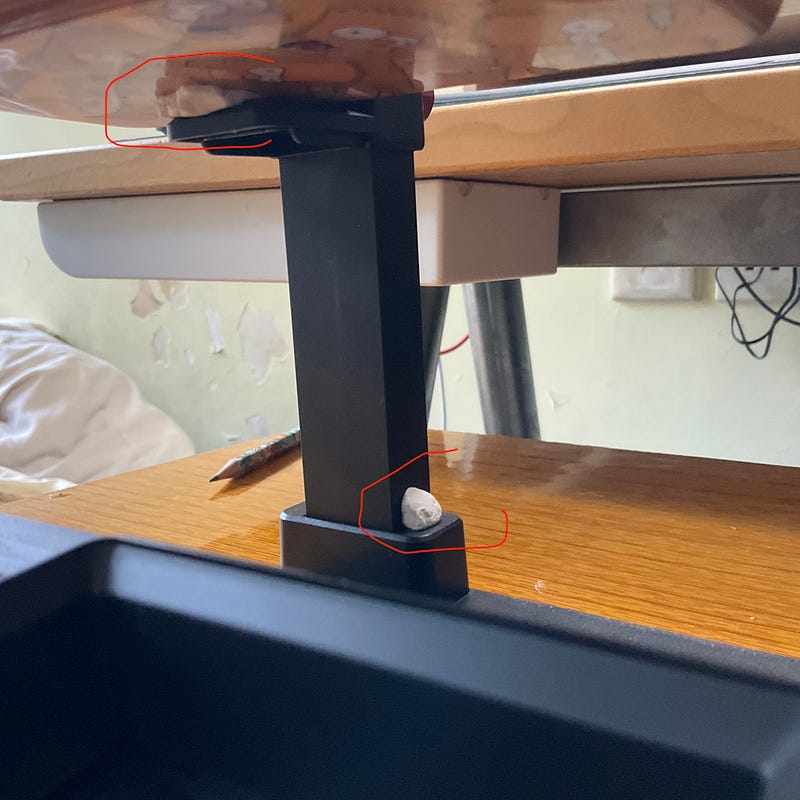
It has a levelling device. Although it has a levelling device, there is no simple accessory to adjust the level of the film platform…
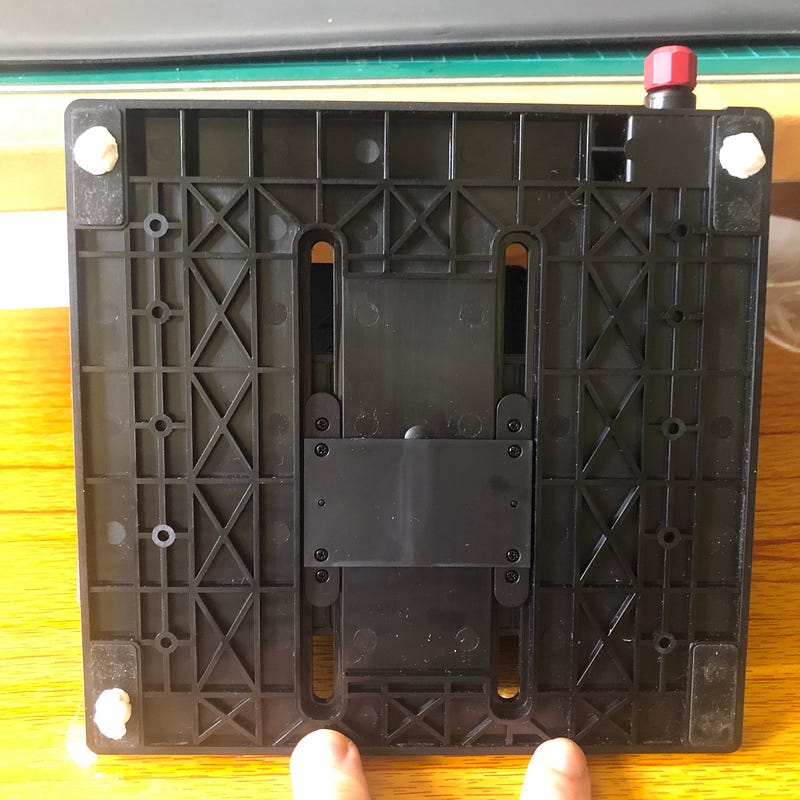
。The smartphone mount has a leveling problem, and there is no easy way to adjust the level…which greatly affects the quality of the photos taken

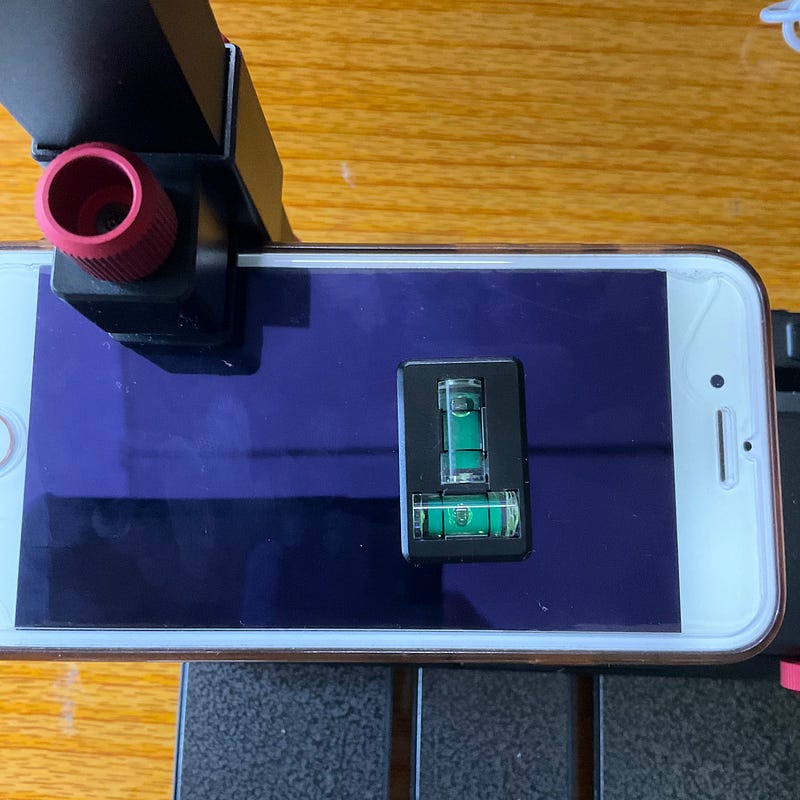
。If possible, it would be better to send an extra level for use on a mobile phone, the cost is extremely limited…
。The brightness of the light box is a bit on the dark side, and when I shoot with the A7R3, I have to use ISO 640 to get an exposure between 1/30–1/60s… The only way to ensure that there is no aftershock after pressing the shutter is to use a tripod, which affects the quality of the photos…

。When the film is too short, it is necessary to move the film manually and it is not possible to use the gear to rotate the film (but this is not the fault of the designer)
The gear wheel cannot replace the 120 folders, so you have to reload the negative manually, and it may take longer to turn 3 frames of 120 6x6 negatives than it does to turn 6 frames of 135 negatives. So for me, I use Lomo Digitalize mainly to turn 135 photos, and a roll of 120 negatives may only be used to turn a few 120 photos. But the author is also pleased with the results of the 120 negatives with Digitalize… I select some of the 120s for Digitalize, but not all, because it takes time to adjust each negative after shooting. It’s time-consuming…
Conclusion:
When flipping 135 prints, using Lomo Digitalize greatly enhances the flatness of the negative. Just adjust the bottom of the negative and the level of the camera/phone, and you’ll have an excellent flipping result… if you’re sharing with family or forwarding to friends, you might get good results with a phone mount. …but if you want to improve it further, you may need to pay attention to a lot of details…there is no best process for flipping, only the best balance of time, equipment and quality needs…the most essential thing is to establish a stable and effective way of flipping photos…
Overall, Lomo Digitalize is the only product I would recommend to my friends in recent years. If you need to remake 135 positive films, Lomo Digitalize is well worth getting…

Thank you for reading this, I think it’s tough to write long articles in this day and age. However, I still think it is better to write and watch photos or present them in an article, as the photos on Youtube are heavily compressed, so you can’t see the quality or the difference… Of course, this generation is used to fast food, so it is not good to read thousands of words. Thank you very much for reading this. If you like it, you can clap your hands and let me know you like it. After all, I always want more interaction or feedback…
The Lomo Digitalize for this article was purchased at my own expense from the official website. The order was placed on Sunday and received on Tuesday…
If you want to support the author, you can buy a cup of Coffee and support me to continue writing.


You can see all my articles at :
Other related articles by the author:
If you Like my reviews, please support me by buying me a coffee.
Rokkorx’s Blog | Facebook https://www.flickr.com/photos/rokkorx/ https://www.instagram.com/samlee.hk/


