
How to Setup User Authentication for Dash Apps using Python and Flask
Create User Accounts and Protect Access to Dashboards

Secure Your Data
Not long ago, it was declared that Data is the new oil in the digital economy[1]. Since that declaration, understanding cyber security and how to protect data has become of utmost importance for businesses around the globe. As someone who works with sensitive education data every day, I understand first hand the seriousness of keeping records protected.
Working in analytics, one of my go-to dashboard tools is Dash by Plotly. Dash is a framework for Python written on top of Flask, Plotly.js, and React.js. It abstracts away the complexities of each of those technologies into easy to apply components. Anyone who has a little Python and HTML experience will feel like Dash empowers them to create powerful and interactive web-based dashboards without breaking a sweat.
Downloaded 4M times per month, Dash & Plotly are how the world productionizes Python analytics. — plotly.com
In this article I am going to walk through two methods for securing Dash apps with user-based authentication:
- How to use Dash-Auth (the simple example).
- How to use Flask-Login (the advanced example).
The complete code for example 2 is available at the bottom of the article.
Dash Framework Refresher
I’ll give you a very short refresher on the Dash core concepts while describing the example app and starter code. However, if you are new to Dash or need an in-depth refresher of the basics, start with my Introduction to Dash tutorial or checkout my website pythondashboards.com.
Before creating the app, start by installing dependencies.
pip install dash
pip install dash-auth
Because the focus of this article is securing the dashboard, I’ll start with a simple Dash app example consisting of a droplist and graph. From there, I’ll add the authentication.

If you want an example of an advanced Dash application, check out the dashboard I use to dominate the stock market!
Dash Apps
Dash apps are composed of a Layout and Callbacks:
Layout
The layout is made up of a tree of components that describe what the application looks like and how users experience the content. Dash comes with several component libraries out of the box.
Callbacks
Callbacks make the Dash apps interactive. Callbacks are Python functions that are automatically called whenever an input property changes.
Dash App Starter Code
Here is the Dash app starter code for the authentication walk-throughs. The advanced example will use the same dropdown and graph functionality, but add significantly more complexity.
#dependencies
import dash
import dash_core_components as dcc
import dash_html_components as html
import plotly
#instantiate Dash
app = dash.Dash(__name__)#Set the layout
app.layout = html.Div([
html.H1('A Simple Dash App')
, dcc.Dropdown(
id='dropdown'
, options=[{'label': i, 'value': i}
for i in ['Day 1', 'Day 2']]
, value='Day 1')
, dcc.Graph(id='graph')
]) #end div#set the callback for the dropdown interactivity
@app.callback(
dash.dependencies.Output('graph', 'figure')
, [dash.dependencies.Input('dropdown', 'value')])
def update_graph(dropdown_value):
if dropdown_value == 'Day 1':
return {'layout': {'title': 'Graph of Day 1'}
, 'data': [{'x': [1, 2, 3, 4]
, 'y': [4, 1, 2, 1]}]}
else:
return {'layout': {'title': 'Graph of Day 2'}
,'data': [{'x': [1, 2, 3, 4]
, 'y': [2, 3, 2, 4]}]}if __name__ == '__main__':
app.run_server(debug=True)Notice the app layout consists of three components (html.H1, dcc.Dropdown, dcc.Graph) and a callback to make the it a little interactive. A user can select between two items in the droplist, and the graph will update accordingly.
When the app is run in the terminal, it can be accessed locally through the browser using this URL: http://127.0.0.1:8050/. If it was hosted somewhere, anyone could access it and view the graph. Since I only want certain people to access the dashboard, I’ll use Dash-Auth to set up basic HTTP authentication.
Basic Authentication using Dash-Auth
Using the Dash-Auth library is easy, but it has some limitations. For example, using basic authentication, I must hardcode usernames and passwords in a dictionary and send the user/password pair to the users I want accessing the app. Users are not able to create their own account or change the password, and users cannot log out. In the advanced example using Flask-Login, I’ll let the user create their own username and password!
WARNING: Treat the username/password pairs like API keys and keep them out of the source code repository! Remember to add the file to your .gitignore.
File Structure
The app uses two files. I keep the username/password pairs stored in a python file as text, separate from the application code. In the advanced example, I’ll use an SQLite database to store the user data.

File users.py
The file users.py contains the username/password dictionary. If I need to let three people access the Dash app, I need to create three username/password pairs like this:
#user dictionary
USERNAME_PASSWORD_PAIRS = {
     'user1': 'test1'
    , 'user2': 'test2'
    , 'user3': 'test3'
}
File app.py
The file app.py contains the code for the Dash app. For the dependencies, import the dash_auth library and the user dictionary from the users.py file.
#import dash-auth and users dictionary
import dash_auth
from users import USERNAME_PASSWORD_PAIRS
Next, add this little bit of boilerplate code after instantiating the app in the app.py file:
auth = dash_auth.BasicAuth(app, USERNAME_PASSWORD_PAIRS)It should look like this:
#import dependencies
import dash_auth
from users import USERNAME_PASSWORD_PAIRS
#instantiate Dash
app = dash.Dash(__name__)
auth = dash_auth.BasicAuth(
app,
USERNAME_PASSWORD_PAIRS
)### layout and callbacks ### ...
That’s it! Basic authentication is now set up. When opening the Dash app, the user will be prompted for a username and password.

Enter one of the user/password combinations from the users.py file to gain access to the dashboard.
Behind the scenes, the HTTP authentication framework is challenging the client request, forcing it to provide authentication information. The process beings with the server responding to the client with an Unauthorized response status (401). A client that wants to authenticate with the server must include an Authorization request header with credentials.
Note, the exchange must happen over an HTTPS (TLS) connection to be secure. This process is defined by RFC 7235.

Advanced Authentication using Flask-Login
The Dash-Auth library provides an easy way for users to access the dashboard, but provides little in the ways of session management. For a more robust authentication solution, I recommend the Flask-Login library. It stores the active users’ ID in the session, allowing them to log in and out while protecting users’ sessions from being stolen by cookie thieves. According to the documentation:
It handles the common tasks of logging in, logging out, and remembering your users’ sessions over extended periods of time.
While Powerful, Flask-Login does have a few limitations. It has no inherent way to register users or recover accounts. I will explain how to create those functions. Additionally, the library only handles logging in or out and no other permissions.

Dependencies
This advanced example uses several powerful Python libraries. Explaining them all in-depth is beyond the scope of this tutorial, but I do my best to explain each component at a high level.
Use pip to install these necessary libraries: sqlalchemy, flask-sqlalchemy, flask-login, werkzeug, and configparser.
#import dependencies#manage database and users
import sqlite3
from sqlalchemy import Table, create_engine
from sqlalchemy.sql import select
from flask_sqlalchemy import SQLAlchemy
from flask_login import login_user, logout_user, current_user, LoginManager, UserMixin#manage password hashing
from werkzeug.security import generate_password_hash, check_password_hash#use to config server
import warnings
import configparser
import os#dash dependencies
import dash_core_components as dcc
import dash_html_components as html
import dash
from dash.dependencies import Input, Output, StateFile Structure
The file structure is similar to the first example in that it only contains two files. The file app.py contains the code for the Dash application and will be composed of several different layouts to accommodate creating the user account, logging in, and displaying the graphed data.

File data.sqlite
I recommend creating the database with a Users table before creating the Dash app.
The data.sqlite file is the database and stores the username, password, and email address in the Users table. To protect user passwords, the password will be hashed using the werkzeug library. Werkzeug is an advanced web server gateway interface (WSGI) utilities library.
Setting up the Database and Users Table
If the database does not already exist, it will be created automatically when connecting.
conn = sqlite3.connect('data.sqlite')As seen in the authentication workflow image above, I want users to create their own accounts. The database connection and insert statement used to write the user account to the database will be managed by the SQLAlchemy library. Additionally, since Dash is built on top of Flask, I’ll use Flask-SQLAlchemy to configure the server to interact with the database.
SQLAlchemy is a powerful and flexible enterprise-level SQL toolkit and Object Relational Mapper for Python. Flask-SQLAlchemy is an extension for Flask that adds support for SQLAlchemy to the Flask application. Since Dash is built on Flask, everything works together perfectly.
Create the Users Table
To store user accounts in the database, I’ll need a table with columns for username, password, and email. SQLAlchemy can handle creating the table. Use the following template to create the Users table.
Note, this can be done using raw SQL instead of SQLAlchemy.
conn = sqlite3.connect('data.sqlite')#connect to the database
engine = create_engine('sqlite:///data.sqlite')
db = SQLAlchemy()#class for the table Users
class Users(db.Model):
id = db.Column(db.Integer, primary_key=True)
username = db.Column(db.String(15), unique=True, nullable = False)
email = db.Column(db.String(50), unique=True)
password = db.Column(db.String(80))Users_tbl = Table('users', Users.metadata)#fuction to create table using Users class
def create_users_table():
Users.metadata.create_all(engine)#create the table
create_users_table()Notice the table is created by running the create_users_table function.
I find it is easiest to check the table data using the pandas library because dataframes present the data beautifully in columns and rows.
import pandas as pd
c = conn.cursor()
df = pd.read_sql('select * from users', conn)
df
Now that the database and table is set up, it is time to create the Dash App!
Configure the Dash App Server
Configuring the app is a little more complex than the simple Dash app since I’m using Flask and SQLAlchemy. Use this bit of boiler-plate code to configure the Flask server for the Dash app and have it interact with the database through SQLAlchemy. Most of this code should already look familiar if you used SQLAlchemy to build the Users table.
warnings.filterwarnings("ignore")#connect to SQLite database
conn = sqlite3.connect('data.sqlite')
engine = create_engine('sqlite:///data.sqlite')
db = SQLAlchemy()config = configparser.ConfigParser()#create users class for interacting with users table
class Users(db.Model):
id = db.Column(db.Integer, primary_key=True)
username = db.Column(db.String(15), unique=True, nullable = False)
email = db.Column(db.String(50), unique=True)
password = db.Column(db.String(80))Users_tbl = Table('users', Users.metadata)#instantiate dash app
app = dash.Dash(__name__)
server = app.server
app.config.suppress_callback_exceptions = True#config the server to interact with the database
#Secret Key is used for user sessions
server.config.update(
SECRET_KEY=os.urandom(12),
SQLALCHEMY_DATABASE_URI='sqlite:///data.sqlite',
SQLALCHEMY_TRACK_MODIFICATIONS=False
)db.init_app(server)Notice os.urandom is used to generate the SECRET_KEY. This will be explained in the next section since it relates to Flask-Login functionality.
For more in-depth information about configuring the application, I recommend reviewing the Flask-SQLAlchemy configuration documentation.
Configure Flask-Login in the Dash App
Flask-Login is a powerful library, and I only scratch the surface in this tutorial. Read the documentation for a list of all the advanced functionality packaged with Flask-Login.
Use the LoginManager class to allow the Dash app to work with Flask-Login. Flask-Login uses sessions for authentication by default. This means the configuration must include a secret key. That is why SECERET_KEY is set in the previous section.
login_manager = LoginManager()The login manager lets the Dash app do things like load a user from an ID and validate the user in the login process.
#This provides default implementations for the methods that Flask-#Login expects user objects to have
login_manager.init_app(app)
class Users(UserMixin, Users):
    pass
A callback to the login_manager is needed to complete the login processes. This callback will go with the rest of the Dash Callbacks.
# callback to reload the user object
@login_manager.user_loader
def load_user(user_id):
    return Users.query.get(int(user_id))
Congratulations! Flask-Login is configured. Now time to build the rest of the Dash app.
Create the Dash App Layouts
Each step in the authentication workflow corresponds to a layout within the app.py file. Between the authentication and Dash app contents, there are six total layouts used:

Create Layout
This layout is used to let the user create their user account. It uses relies on the Input Dash Core Component to take in user input. When the user clicks the Create User button, a callback triggers and writes the user’s input to the database.
create = html.Div([ html.H1('Create User Account')
        , dcc.Location(id='create_user', refresh=True)
        , dcc.Input(id="username"
            , type="text"
            , placeholder="user name"
            , maxLength =15)
        , dcc.Input(id="password"
            , type="password"
            , placeholder="password")
        , dcc.Input(id="email"
            , type="email"
            , placeholder="email"
            , maxLength = 50)
        , html.Button('Create User', id='submit-val', n_clicks=0)
        , html.Div(id='container-button-basic')
    ])#end div
Create Callback
Using a callback, the input is written to the database. The input is stored using the dash dependency State. The State allows the values to be input without firing the callback until the Create User button is pushed.
Notice a few things in the callback:
- I use SQLAlchemy to insert the values instead of raw SQL.
ins = Users_tbl.insert().values(username=un, password=hashed_password, email=em,)- The user’s password is hashed using the generate_password_hash function from the Werkzeug library.
@app.callback(
   [Output('container-button-basic', "children")]
    , [Input('submit-val', 'n_clicks')]
    , [State('username', 'value'), State('password', 'value'), State('email', 'value')])
def insert_users(n_clicks, un, pw, em):
    hashed_password = generate_password_hash(pw, method='sha256')
    if un is not None and pw is not None and em is not None:
        ins = Users_tbl.insert().values(username=un,  password=hashed_password, email=em,)
        conn = engine.connect()
        conn.execute(ins)
        conn.close()
        return [login]
    else:
        return [html.Div([html.H2('Already have a user account?'), dcc.Link('Click here to Log In', href='/login')])]
Additionally, notice the Login layout is returned when the user account is created making it easy for the user to log in.
Login Layout
The Login layout is used to let the user log in after creating their user account. It uses Input fields and a Button just like the Create layout.
login =  html.Div([dcc.Location(id='url_login', refresh=True)
            , html.H2('''Please log in to continue:''', id='h1')
            , dcc.Input(placeholder='Enter your username',
                    type='text',
                    id='uname-box')
            , dcc.Input(placeholder='Enter your password',
                    type='password',
                    id='pwd-box')
            , html.Button(children='Login',
                    n_clicks=0,
                    type='submit',
                    id='login-button')
            , html.Div(children='', id='output-state')
        ]) #end div
Login Callbacks
There are two callbacks tied to logging in. The first one passes the user to the success page. The second callback tells the user their username or password is incorrect in the event their information is wrong or not found in the database.
The callbacks use the function check_password_hash from the Werkzeug library.
@app.callback(
    Output('url_login', 'pathname')
    , [Input('login-button', 'n_clicks')]
    , [State('uname-box', 'value'), State('pwd-box', 'value')])
def successful(n_clicks, input1, input2):
    user = Users.query.filter_by(username=input1).first()
    if user:
        if check_password_hash(user.password, input2):
            login_user(user)
            return '/success'
        else:
            pass
    else:
        pass
@app.callback(
Output('output-state', 'children')
, [Input('login-button', 'n_clicks')]
, [State('uname-box', 'value'), State('pwd-box', 'value')])
def update_output(n_clicks, input1, input2):
if n_clicks > 0:
user = Users.query.filter_by(username=input1).first()
if user:
if check_password_hash(user.password, input2):
return ''
else:
return 'Incorrect username or password'
else:
return 'Incorrect username or password'
else:
return ''Notice the callbacks use SQLAlchemy to query the Users table by the username. The following code describes how SQLAlchemy pulls back the user data so the password can be verified.
Users.query.filter_by(username=input1).first()Success Layout
The Success layout displays the available datasets the user can access after authenticating. The only dataset available in the app is the one I made for the graph in the first example.
success = html.Div([dcc.Location(id='url_login_success', refresh=True)
            , html.Div([html.H2('Login successful.')
                    , html.Br()
                    , html.P('Select a Dataset')
                    , dcc.Link('Data', href = '/data')
                ]) #end div
            , html.Div([html.Br()
                    , html.Button(id='back-button', children='Go back', n_clicks=0)
                ]) #end div
        ]) #end div
Failed Layout
The Failed layout displays when the user fails to log in. Notice the Login layout is embedded in the Failed layout, allowing the user to re-enter their credentials.
failed = html.Div([ dcc.Location(id='url_login_df', refresh=True)
            , html.Div([html.H2('Log in Failed. Please try again.')
                    , html.Br()
                    , html.Div([login])
                    , html.Br()
                    , html.Button(id='back-button', children='Go back', n_clicks=0)
                ]) #end div
        ]) #end div
Logout Layout
The Logout layout displays when the user has been logged out. Like the Failed layout, the Login layout is embedded so the user can easily log in again.
logout = html.Div([dcc.Location(id='logout', refresh=True)
        , html.Br()
        , html.Div(html.H2('You have been logged out - Please login'))
        , html.Br()
        , html.Div([login])
        , html.Button(id='back-button', children='Go back', n_clicks=0)
    ])#end div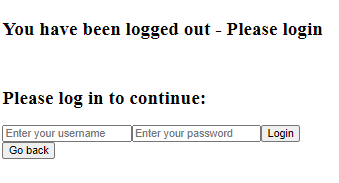
Data Layout
This layout displays the graph that was set up in the first example.
data = html.Div([dcc.Dropdown(
                    id='dropdown',
                    options=[{'label': i, 'value': i} for i in ['Day 1', 'Day 2']],
                    value='Day 1')
                , html.Br()
                , html.Div([dcc.Graph(id='graph')])
            ]) #end div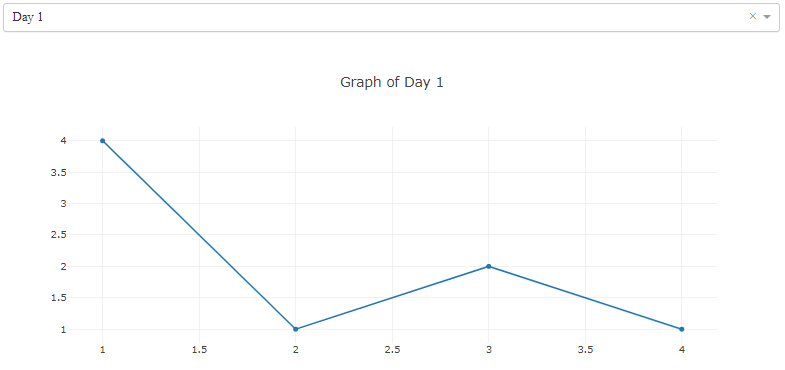
Data Callback
The data callback outputs the graph depending on which option is selected in the dropdown menu.
#set the callback for the dropdown interactivity
@app.callback(
    [Output('graph', 'figure')]
    , [Input('dropdown', 'value')])
def update_graph(dropdown_value):
    if dropdown_value == 'Day 1':
        return [{'layout': {'title': 'Graph of Day 1'}
                , 'data': [{'x': [1, 2, 3, 4]
                    , 'y': [4, 1, 2, 1]}]}]
    else:
        return [{'layout': {'title': 'Graph of Day 2'}
                ,'data': [{'x': [1, 2, 3, 4]
                    , 'y': [2, 3, 2, 4]}]}]
Back Button Callbacks
Each of the pages has a back button that returns the user to the log in screen. These callbacks update the appropriate layout and return the user to the log in screen.
@app.callback(
    Output('url_login_success', 'pathname')
    , [Input('back-button', 'n_clicks')])
def logout_dashboard(n_clicks):
    if n_clicks > 0:
        return '/'
@app.callback(
Output('url_login_df', 'pathname')
, [Input('back-button', 'n_clicks')])
def logout_dashboard(n_clicks):
if n_clicks > 0:
return '/'# Create callbacks
@app.callback(
Output('url_logout', 'pathname')
, [Input('back-button', 'n_clicks')])
def logout_dashboard(n_clicks):
if n_clicks > 0:
return '/'Displaying the Layouts
Now that the layouts have been created, I’ll design the app.layout to use a html.Div which can display the appropriate layout for the corresponding step as the child of the html.Div. A callback is used to control which layout is returned as the child of the html.Div component with the ID page-content.
app.layout= html.Div([
            html.Div(id='page-content', className='content')
            ,  dcc.Location(id='url', refresh=False)
        ])
#callback to determine layout to return
@app.callback(
Output('page-content', 'children')
, [Input('url', 'pathname')])
def display_page(pathname):
if pathname == '/':
return create
elif pathname == '/login':
return login
elif pathname == '/success':
if current_user.is_authenticated:
return success
else:
return failed
elif pathname =='/data':
if current_user.is_authenticated:
return data
elif pathname == '/logout':
if current_user.is_authenticated:
logout_user()
return logout
else:
return logout
else:
return '404'The code is now complete! When putting it together, start with the configuration code, then add the layouts, and then the callbacks. Below is the complete code for the advanced example.
Final Thoughts and the Complete Dash App
Protecting user data is more important than ever, and you are now able to use Dash-Auth and Flask-Login to set up security and user authentication for your Dash applications. Both tools have their pros and cons. Dash-Auth is perfect for simple HTTP basic authentication while Flask-Login provides advanced features for controlling authentication and user sessions.
Complete Code
With all the individual parts coded, it is time to show the complete Dash app! I decided to order the configuration, layouts, and callbacks into 1 file. However, it is perfectly fine to split the layouts into their own files to keep things more organized. If you enjoyed this tutorial and want to learn more Dash, check out my other Dash tutorials!
3 Advanced Examples for Dash Beginners Live Updates and Streaming Data into a Dashboard Responsive Mobile Dashboards with Bootstrap CSS Components Creating a Data Table using Data from Reddit Exporting Data from a Dashboard
import dash_core_components as dcc
import dash_html_components as html
import dash
from dash.dependencies import Input, Output, State
from sqlalchemy import Table, create_engine
from sqlalchemy.sql import select
from flask_sqlalchemy import SQLAlchemyfrom werkzeug.security import generate_password_hash, check_password_hashimport sqlite3
import warningsimport os
from flask_login import login_user, logout_user, current_user, LoginManager, UserMixin
import configparserwarnings.filterwarnings("ignore")
conn = sqlite3.connect('data.sqlite')
engine = create_engine('sqlite:///data.sqlite')
db = SQLAlchemy()
config = configparser.ConfigParser()class Users(db.Model):
id = db.Column(db.Integer, primary_key=True)
username = db.Column(db.String(15), unique=True, nullable = False)
email = db.Column(db.String(50), unique=True)
password = db.Column(db.String(80))Users_tbl = Table('users', Users.metadata)app = dash.Dash(__name__)
server = app.server
app.config.suppress_callback_exceptions = True# config
server.config.update(
SECRET_KEY=os.urandom(12),
SQLALCHEMY_DATABASE_URI='sqlite:///data.sqlite',
SQLALCHEMY_TRACK_MODIFICATIONS=False
)db.init_app(server)# Setup the LoginManager for the server
login_manager = LoginManager()
login_manager.init_app(server)
login_manager.login_view = '/login'#User as base
# Create User class with UserMixin
class Users(UserMixin, Users):
passcreate = html.Div([ html.H1('Create User Account')
, dcc.Location(id='create_user', refresh=True)
, dcc.Input(id="username"
, type="text"
, placeholder="user name"
, maxLength =15)
, dcc.Input(id="password"
, type="password"
, placeholder="password")
, dcc.Input(id="email"
, type="email"
, placeholder="email"
, maxLength = 50)
, html.Button('Create User', id='submit-val', n_clicks=0)
, html.Div(id='container-button-basic')
])#end divlogin = html.Div([dcc.Location(id='url_login', refresh=True)
, html.H2('''Please log in to continue:''', id='h1')
, dcc.Input(placeholder='Enter your username',
type='text',
id='uname-box')
, dcc.Input(placeholder='Enter your password',
type='password',
id='pwd-box')
, html.Button(children='Login',
n_clicks=0,
type='submit',
id='login-button')
, html.Div(children='', id='output-state')
]) #end divsuccess = html.Div([dcc.Location(id='url_login_success', refresh=True)
, html.Div([html.H2('Login successful.')
, html.Br()
, html.P('Select a Dataset')
, dcc.Link('Data', href = '/data')
]) #end div
, html.Div([html.Br()
, html.Button(id='back-button', children='Go back', n_clicks=0)
]) #end div
]) #end divdata = html.Div([dcc.Dropdown(
id='dropdown',
options=[{'label': i, 'value': i} for i in ['Day 1', 'Day 2']],
value='Day 1')
, html.Br()
, html.Div([dcc.Graph(id='graph')])
]) #end divfailed = html.Div([ dcc.Location(id='url_login_df', refresh=True)
, html.Div([html.H2('Log in Failed. Please try again.')
, html.Br()
, html.Div([login])
, html.Br()
, html.Button(id='back-button', children='Go back', n_clicks=0)
]) #end div
]) #end divlogout = html.Div([dcc.Location(id='logout', refresh=True)
, html.Br()
, html.Div(html.H2('You have been logged out - Please login'))
, html.Br()
, html.Div([login])
, html.Button(id='back-button', children='Go back', n_clicks=0)
])#end divapp.layout= html.Div([
html.Div(id='page-content', className='content')
, dcc.Location(id='url', refresh=False)
])# callback to reload the user object
@login_manager.user_loader
def load_user(user_id):
return Users.query.get(int(user_id))@app.callback(
Output('page-content', 'children')
, [Input('url', 'pathname')])
def display_page(pathname):
if pathname == '/':
return create
elif pathname == '/login':
return login
elif pathname == '/success':
if current_user.is_authenticated:
return success
else:
return failed
elif pathname =='/data':
if current_user.is_authenticated:
return data
elif pathname == '/logout':
if current_user.is_authenticated:
logout_user()
return logout
else:
return logout
else:
return '404'#set the callback for the dropdown interactivity
@app.callback(
[Output('graph', 'figure')]
, [Input('dropdown', 'value')])
def update_graph(dropdown_value):
if dropdown_value == 'Day 1':
return [{'layout': {'title': 'Graph of Day 1'}
, 'data': [{'x': [1, 2, 3, 4]
, 'y': [4, 1, 2, 1]}]}]
else:
return [{'layout': {'title': 'Graph of Day 2'}
,'data': [{'x': [1, 2, 3, 4]
, 'y': [2, 3, 2, 4]}]}]@app.callback(
[Output('container-button-basic', "children")]
, [Input('submit-val', 'n_clicks')]
, [State('username', 'value'), State('password', 'value'), State('email', 'value')])
def insert_users(n_clicks, un, pw, em):
hashed_password = generate_password_hash(pw, method='sha256')
if un is not None and pw is not None and em is not None:
ins = Users_tbl.insert().values(username=un, password=hashed_password, email=em,)
conn = engine.connect()
conn.execute(ins)
conn.close()
return [login]
else:
return [html.Div([html.H2('Already have a user account?'), dcc.Link('Click here to Log In', href='/login')])]@app.callback(
Output('url_login', 'pathname')
, [Input('login-button', 'n_clicks')]
, [State('uname-box', 'value'), State('pwd-box', 'value')])
def successful(n_clicks, input1, input2):
user = Users.query.filter_by(username=input1).first()
if user:
if check_password_hash(user.password, input2):
login_user(user)
return '/success'
else:
pass
else:
pass@app.callback(
Output('output-state', 'children')
, [Input('login-button', 'n_clicks')]
, [State('uname-box', 'value'), State('pwd-box', 'value')])
def update_output(n_clicks, input1, input2):
if n_clicks > 0:
user = Users.query.filter_by(username=input1).first()
if user:
if check_password_hash(user.password, input2):
return ''
else:
return 'Incorrect username or password'
else:
return 'Incorrect username or password'
else:
return ''@app.callback(
Output('url_login_success', 'pathname')
, [Input('back-button', 'n_clicks')])
def logout_dashboard(n_clicks):
if n_clicks > 0:
return '/'@app.callback(
Output('url_login_df', 'pathname')
, [Input('back-button', 'n_clicks')])
def logout_dashboard(n_clicks):
if n_clicks > 0:
return '/'# Create callbacks
@app.callback(
Output('url_logout', 'pathname')
, [Input('back-button', 'n_clicks')])
def logout_dashboard(n_clicks):
if n_clicks > 0:
return '/'if __name__ == '__main__':
app.run_server(debug=True)Thank You!
- If you enjoyed my work, follow me on Medium for more!
- Get FULL ACCESS and help support my content by subscribing!
- Let’s connect on LinkedIn
- Analyze Data using Python? Check out my website!


