
How To Run React With Java Backend on GCP Cloud Run
A step by step guide with an example project With Docker Runtime
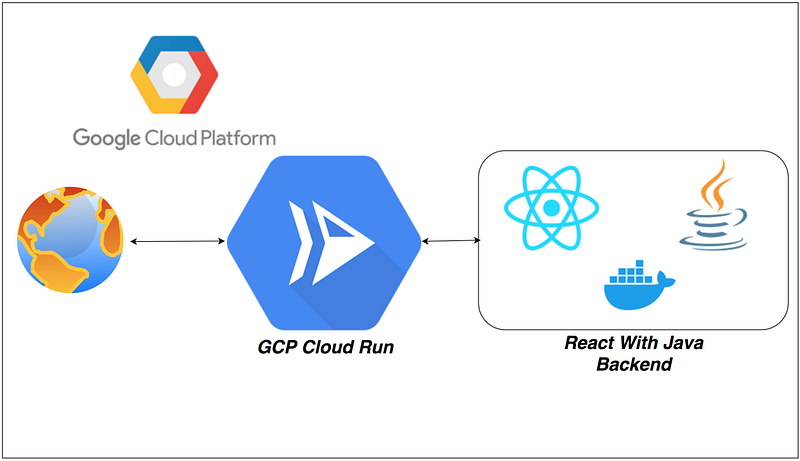
If you want to develop and deploy highly scalable containerized applications on a fully managed serverless platform, GCP Cloud Run is the right choice. You can run the whole WebApp with Docker runtime without any worry about the configuration from your side. GCP Cloud Run is a GCP service that you can write code your way by deploying any code or container that listens for requests or events. Build applications in your favorite language, with your favorite dependencies and tools, and deploy them in seconds.
You can select the Java runtime or you can dockerize the WebApp and deploy that in the Docker runtime. The Docker images can be pulled from the Container registry, etc. In this post, we will see how to run WebApp with Docker runtime.
- Prerequisites
- Install gcloud CLI and Configure
- Example Project
- Dockerize the Project
- Running the API on Docker
- Pushing Docker Image To Container Registry
- Creating a Cloud Run Service
- Testing The WebApp
- Application Logs
- Deleting the Service
- Summary
- Conclusion
Prerequisites
- If you are new to React please go through the below link on how to develop and build the React project with Java backend.
The other prerequisites to this post are Docker essentials. We are not going to discuss the basics such as what is a container or Docker. Below are the prerequisites you should know before going through this article
Docker Essentials
You need to understand Docker concepts such as creating images, container management, etc. Below are some of the links that you can understand about Docker if you are new.
- Docker Docs
- Docker — A Beginner’s guide to Dockerfile with a sample project
- Docker — Image creation and Management
- Docker — Container Management With Examples
- Understanding Docker Volumes with an example
GCP Prerequisites
- Create a New project
- You need to create a Billing Account
- Link Billing Account With this project
- Enable All the APIs that we need to run the dataflow on GCP
- Download the Google SDK
Service Account
Need to create a service account so that when you run the application from your local machine it can invoke the GCP dataflow pipeline with owner permissions.
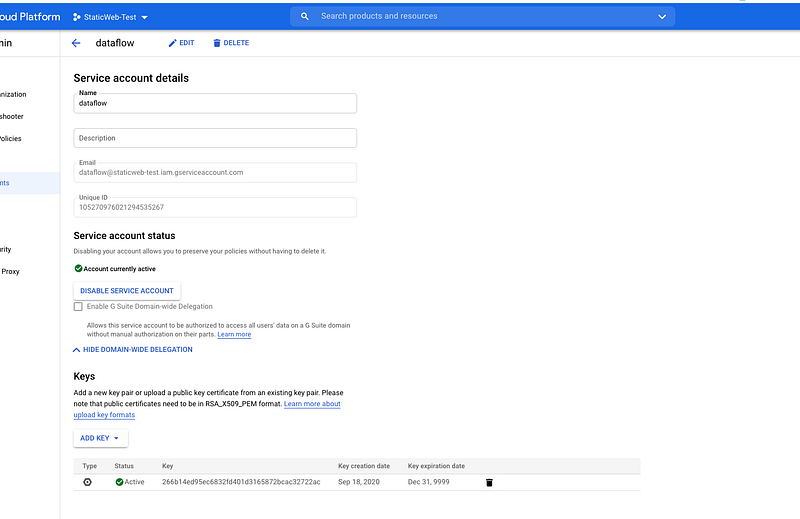
You have to generate the key and download and set the environment variable called GOOGLE_APPLICATION_CREDENTIALS.
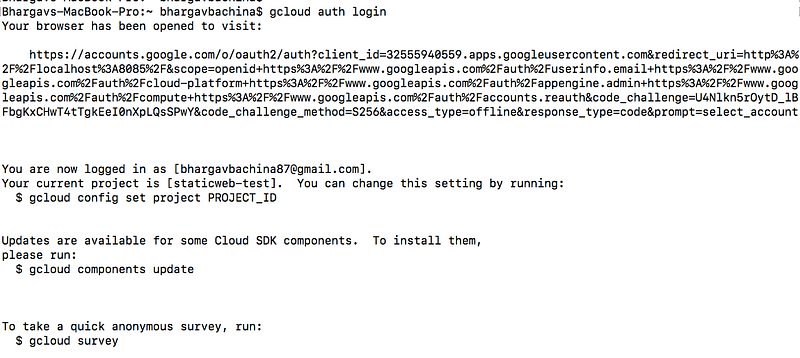
export GOOGLE_APPLICATION_CREDENTIALS="/Users/bhargavbachina/gcp-credentials/gcp-dataflow-service-account.json"Finally, you can run the following command to log in to your GCP account.
gcloud auth loginInstall gcloud CLI and Configure
Once you have the GCP Account you can install the gcloud command-line tool. You can go to the below documentation and install gcloud CLI based on your operation system. You can configure gcloud CLI with your project.
The gcloud CLI is a part of the Google Cloud SDK. You must download and install the SDK on your system and initialize it before you can use the gcloud command-line tool
// initializing
gcloud init
// auth login
gcloud auth loginOnce you run the above command, it opens up a browser for you to login into your GCP and you get the response as below.
You can list the projects with the following command.
gcloud projects listYou can set the current project with the following command.
gcloud config set project staticweb-test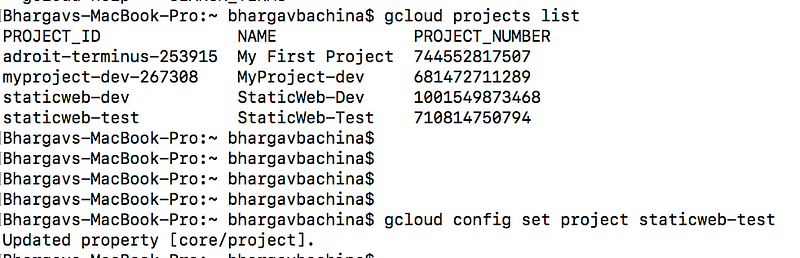
Example Project
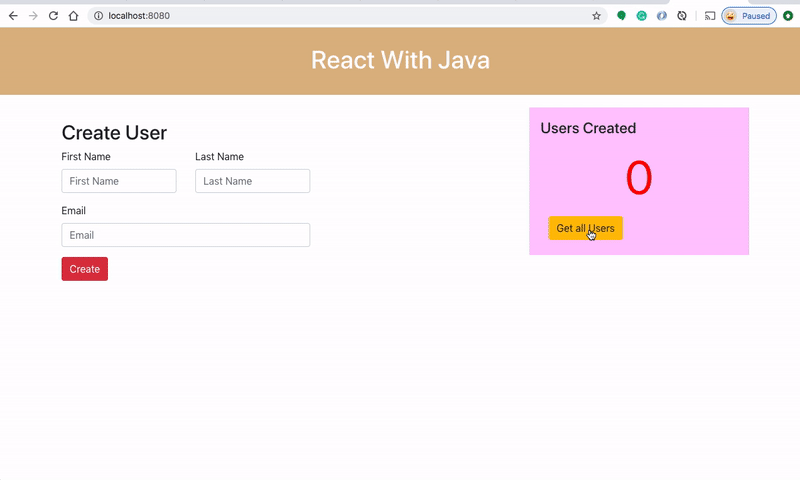
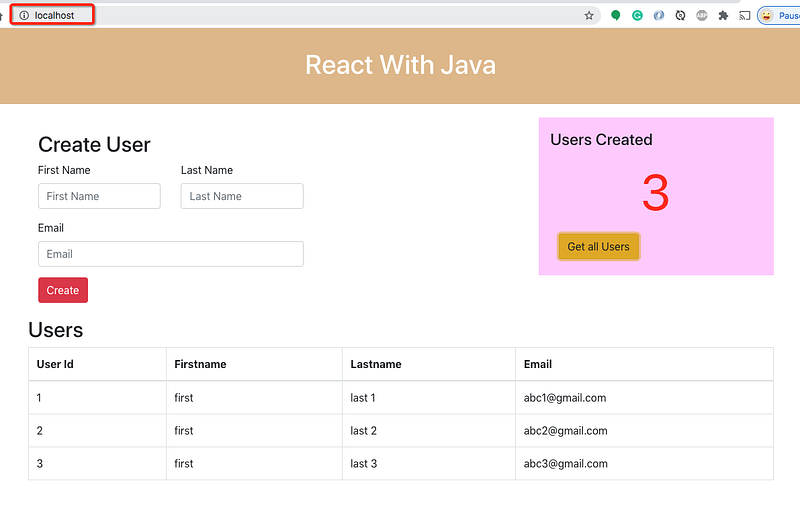
This is a simple project which demonstrates developing and running React applications with Java. We have a simple app in which we can add users, count, and display them at the side, and retrieve them whenever you want.
If you want to practice your own here is a Github link to this project. You can clone it and run it on your machine as well.
// clone the project
git clone https://github.com/bbachi/react-java-ecs.git
// change directory
cd react-java-ecs// install
mvn clean install// Run the app
java -jar target/users-0.0.2-SNAPSHOT.jarDockerize the Project
AWS App Runner is an AWS service that provides a fast, simple, and cost-effective way to deploy straight from source code or a container image directly to a scalable and secure web application in the AWS Cloud.
Make sure your Java API runs on port 80.
we need to create a Dockerfile that creates a Docker image. Here is the file which starts with FROM command and with the base image openjdk:8-jre-alpine. Copy the generated war file and finally CMD command that runs when the image is instantiated.
Here are the commands to build the image and run it on the Docker engine on your local machine.
// package the app
mvn clean package
// change the directory
cd docker// build the image
docker build -t react-java-image .//list the images
docker imagesRunning the WebApp on Docker
Now, we have the docker image and let’s run the container and once it is up and running you can access the web app at http://localhost:80. Make sure your app runs on port 80.
// running on Image
docker run -d -it -p  80:80 --name react-java-ui react-java-image
// list the container
docker ps// logs
docker logs react-java-ui// exec into running container
docker exec -it react-java-ui /bin/sh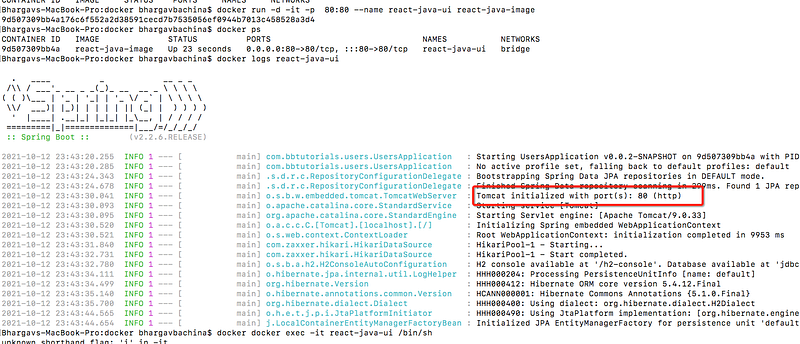
Pushing Docker Image To Container Registry
Container Registry is a single place for your team to manage Docker images, perform vulnerability analysis, and decide who can access what with fine-grained access control. Existing CI/CD integrations let you set up fully automated Docker pipelines to get fast feedback. You can check the whole documentation here.
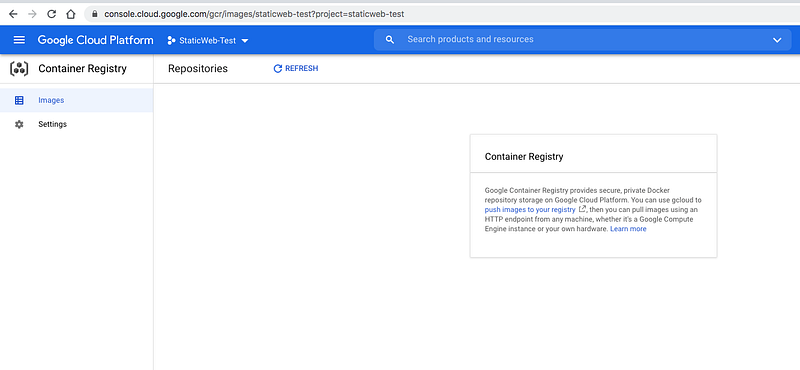
GCP Cloud Run works with any Docker registry such as Docker Hub, etc. But, in this post, we see how we can use a GCP container registry to store our Docker images. Make sure you enable the relevant API on GCP. If you log in and go to the Container Registry you can see the empty registry.
The first thing we need to do is to enable the API with the following command.
gcloud services enable containerregistry.googleapis.comYou need to configure docker with the following command. You can see the full documentation here.
gcloud auth configure-docker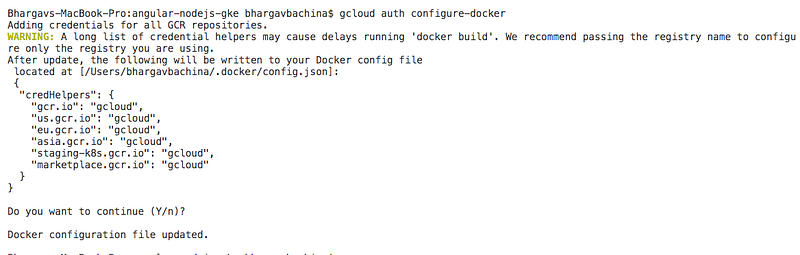
As we have seen in the Example Project section, let’s build the Docker image with the following command.
docker build -t cloud-run-webapp .
Let’s tag the local docker image with the registry name by using the command:
docker tag [SOURCE_IMAGE] [HOSTNAME]/[PROJECT-ID]/[IMAGE]:[TAG]// run this command
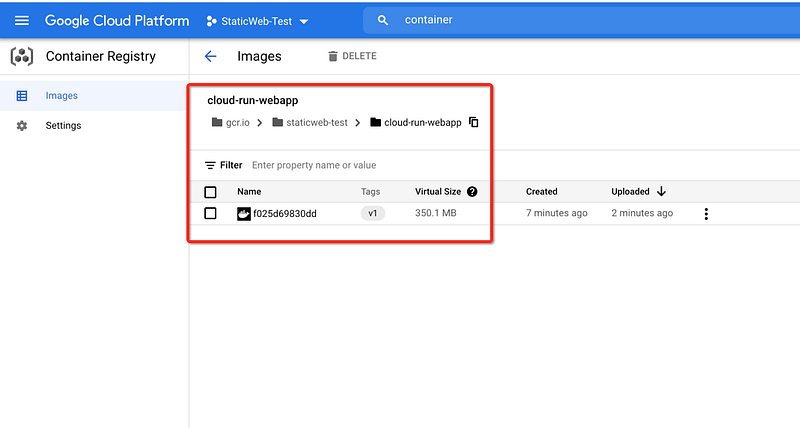
docker tag cloud-run-webapp gcr.io/staticweb-test/cloud-run-webapp:v1Finally, push the image into the GCP container registry
docker push gcr.io/staticweb-test/cloud-run-webapp:v1
You can see the repository in the console as well.
Creating a Cloud Run Service
We have pushed the Docker image into the container registry and it’s time to create a Cloud Run Service. You can create the Service by going to the appropriate service in the console.
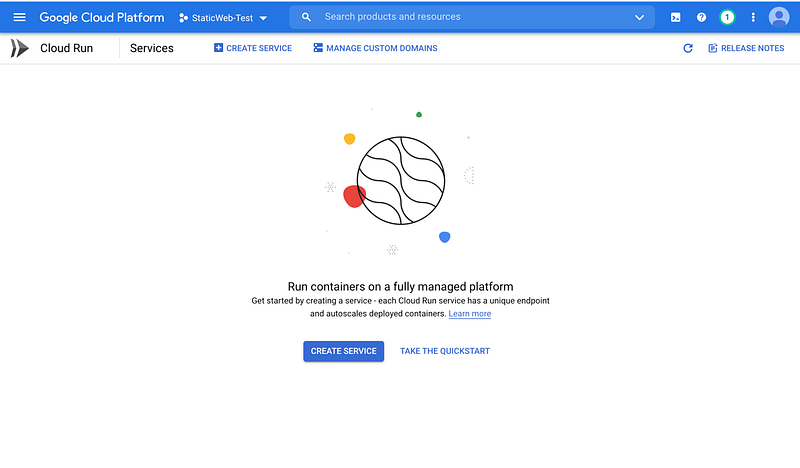
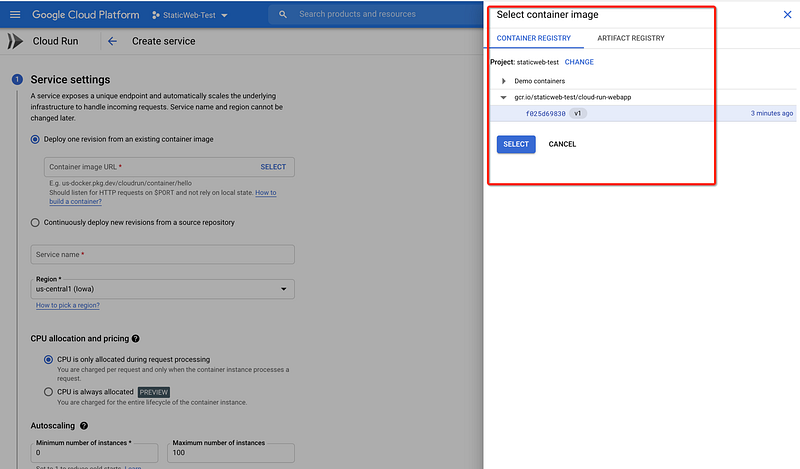
You can see the above window when you search Cloud Run and go to the page. You can click on the button Create Service. On the next page, you should choose the container image that we just pushed to the container registry.
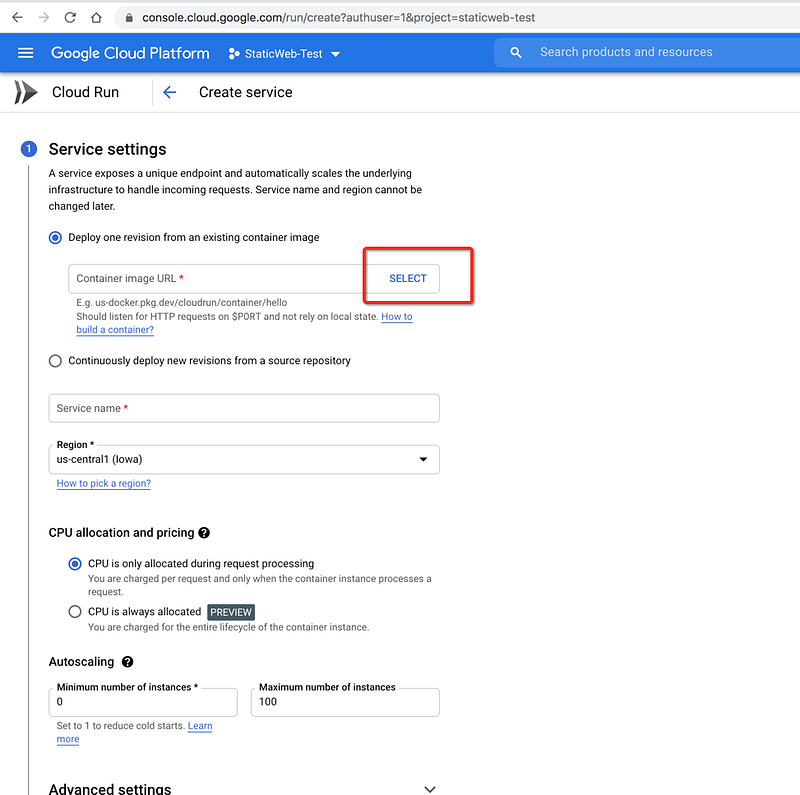
Choose the repository that we just pushed to the registry.
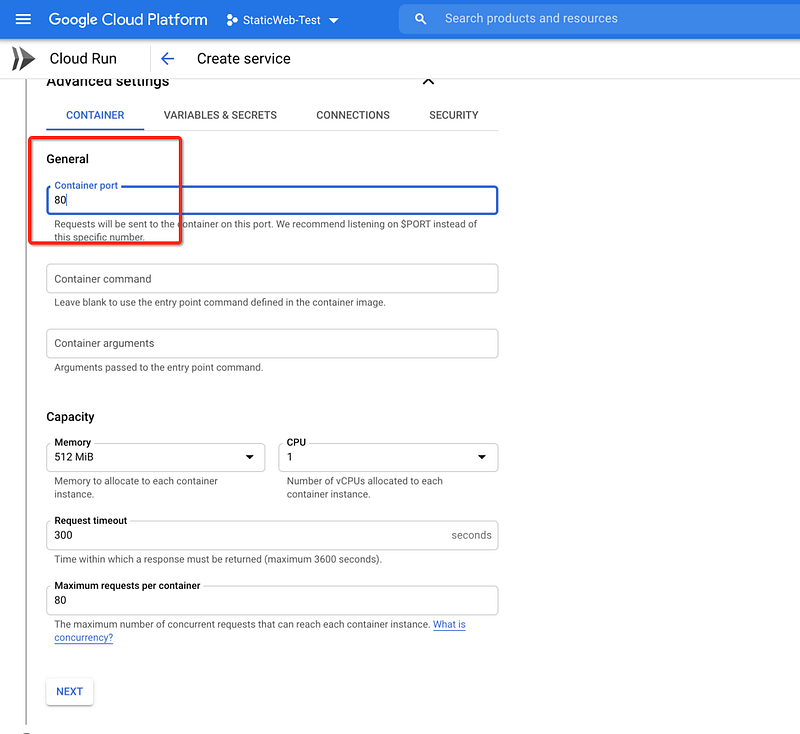
We know you are running the service on port 8080. You can put that in the advanced settings section as below. You can choose to run your Docker container on any port and make sure that port and the port we put here should match.
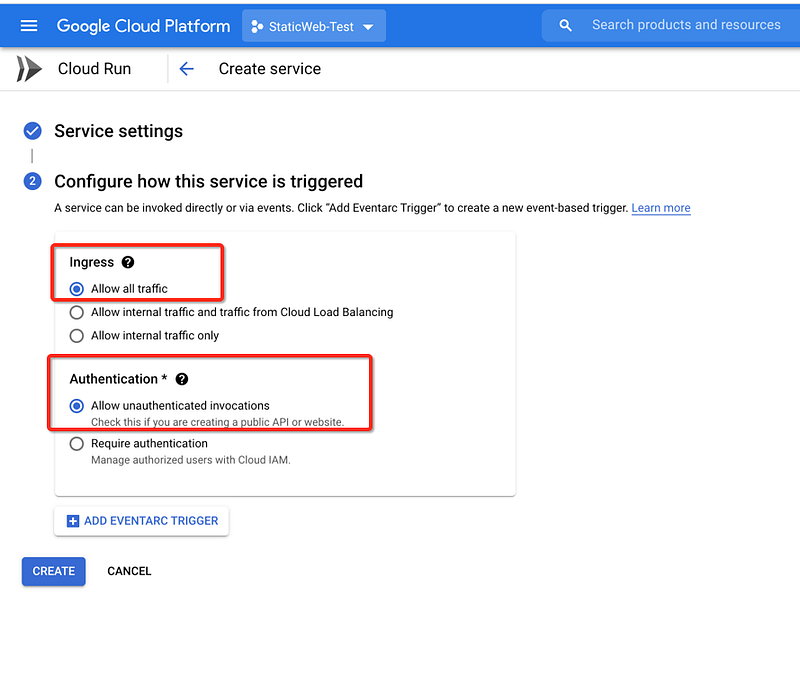
On the next screen, you should check the radio button Allow all traffic under the Ingress section and this allows all the incoming traffic to reach your container.
check the radio button Allow unauthenticated invocations under the Authentication section and this makes your API public.
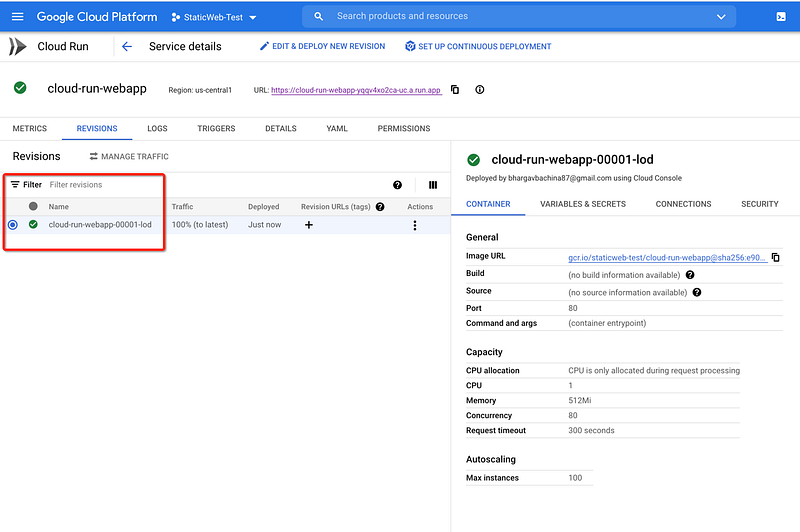
Finally, you can click on the Create button and you can see the service running after some time as below.
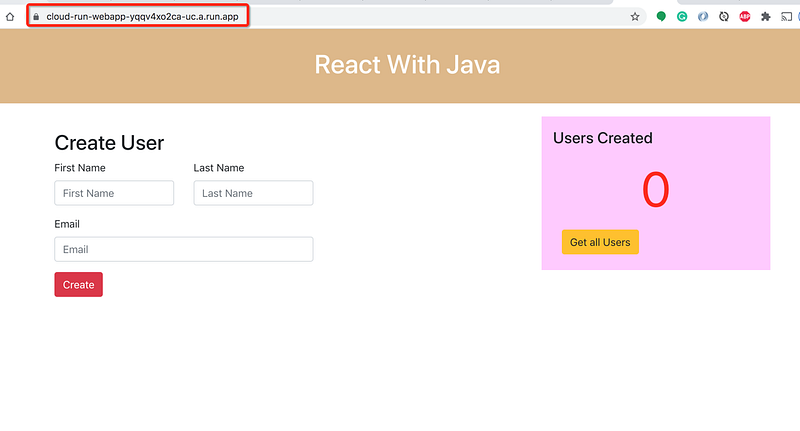
Testing The WebApp
You can take the default domain URL from the below location and hit it in the browser with the actual path.
https://cloud-run-webapp-yqqv4xo2ca-uc.a.run.app/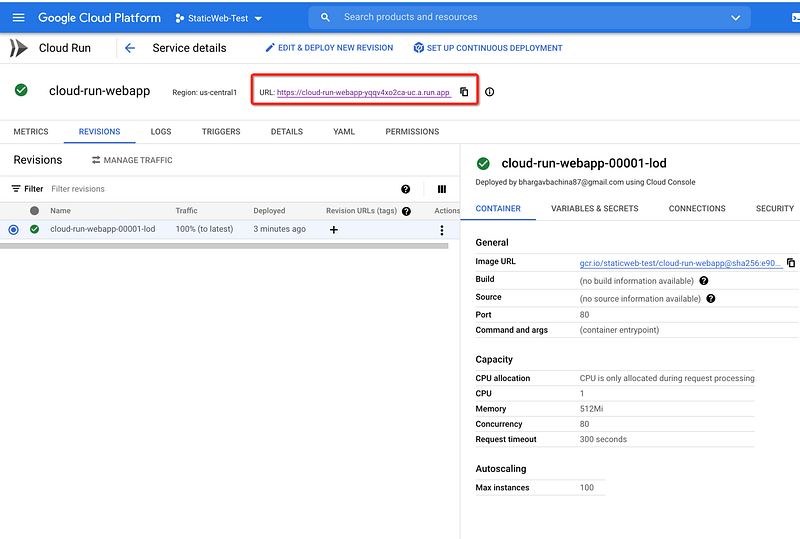
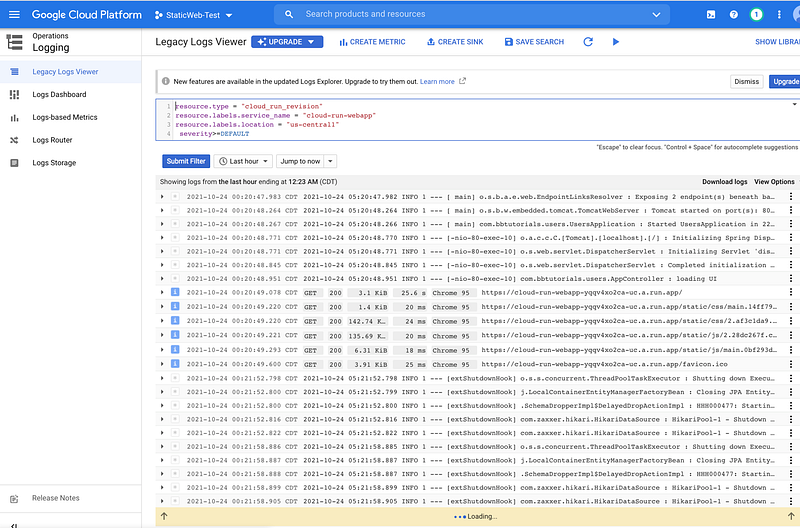
Application Logs
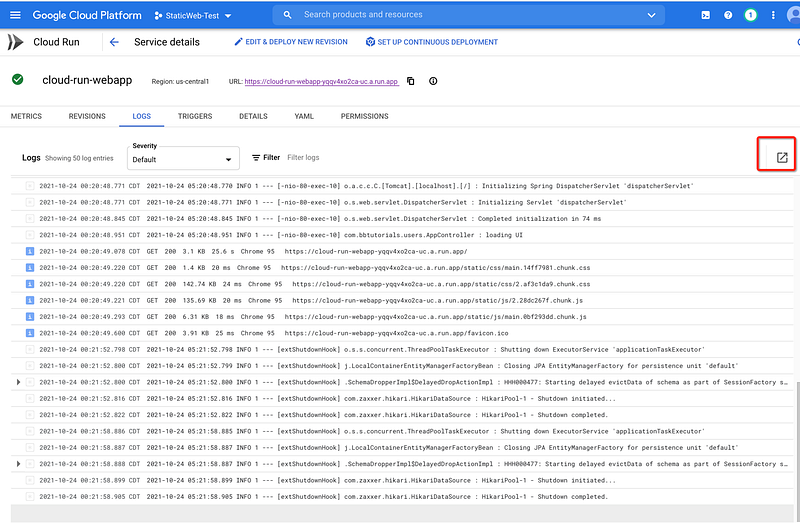
The application logs can be seen under the logs section as below.
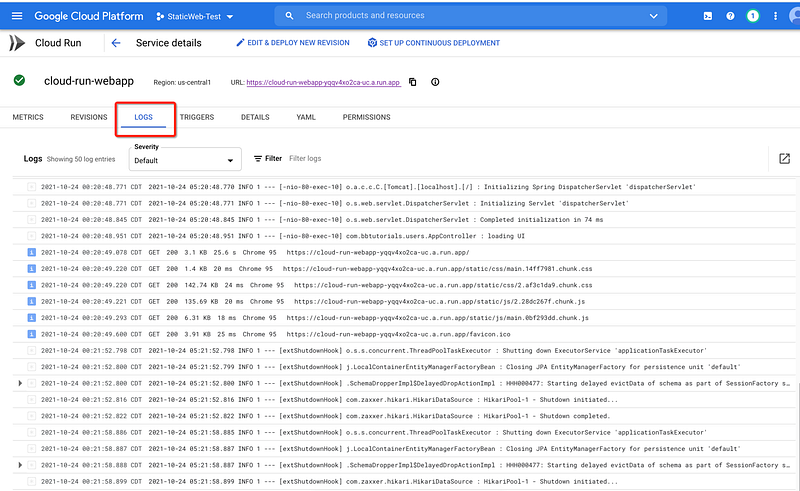
You can click on the link to see the logs in detail. You can even see these logs in Monitoring as well.
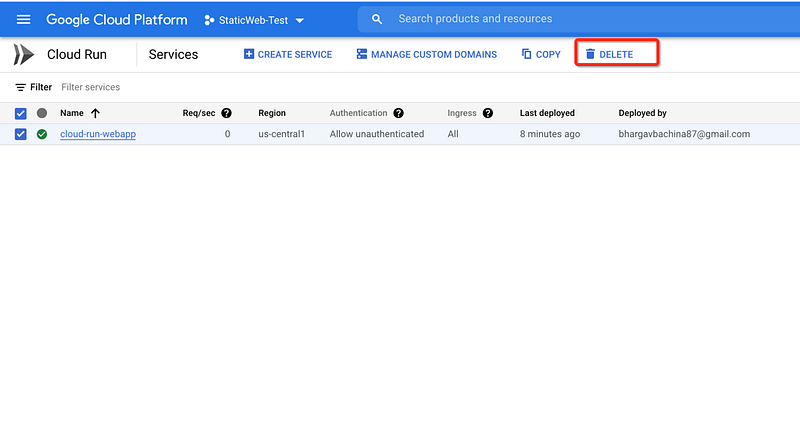
Deleting the Service
We have deployed the service and see it running. You can delete the service if you don’t want to incur any charges. You can click on the delete button as below.

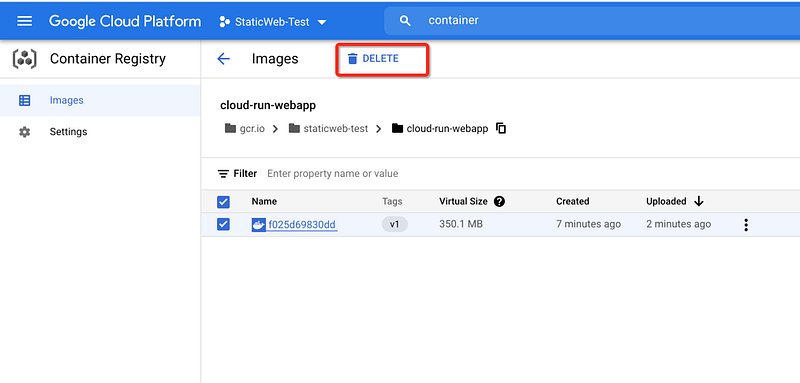
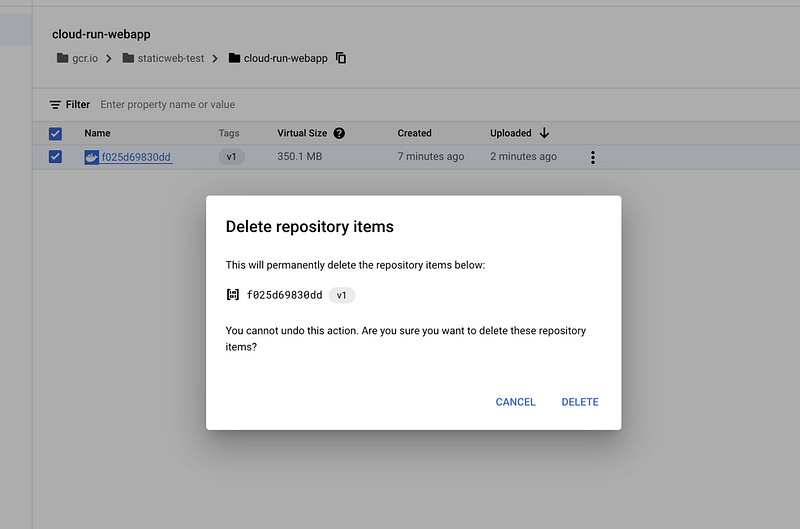
You can delete the image as well from the container registry as below.
Summary
- If you want to develop and deploy highly scalable containerized applications on a fully managed serverless platform, GCP Cloud Run is the right choice.
- You can run the whole WebApp with Docker runtime without any worry about the configuration from your side.
- GCP Cloud Run is a GCP service that you can write code your way by deploying any code or container that listens for requests or events. Build applications in your favorite language, with your favorite dependencies and tools, and deploy them in seconds.
- You can select the Java runtime or you can dockerize the WebApp and deploy that in the Docker runtime. The Docker images can be pulled from the Container registry, etc.
- Container Registry is a single place for your team to manage Docker images, perform vulnerability analysis, and decide who can access what with fine-grained access control.
- Make sure your container port and the port in the advanced settings section match.
Conclusion
We have seen how to run the React with Java Backend with Docker Runtime on GCP Cloud Run. In future posts, we can see how to do automatic deployments, configure environment variables, link custom domains, etc, and other configuration stuff.


