AI Image Generator Prompt Design:
How to get your AI art generator to stop cropping off people’s heads
An AI Prompt Engineer shows you how to get full body shots

For tons of advice from myself and others, visit the Jasper Facebook group!
If you’ve been using AI image generators, you’ll know that the bane of our existence is the badly cropped pic. For some reason, AI loves to taunt us by giving us near-perfect images that are lobbed off by an ill-positioned frame.
Nothing ruins a pic like a headless torso.
Likewise, it’s a photography rule to never crop at a joint. It looks uncanny. And lots of content calls for a full-length body shot. So what can we do?
The Full Body Problem
For someone who enjoys solving linguistic and visual puzzles (prompts are effectively both), getting a full-length portrait was an exciting challenge. Here’s an insight into how a prompt engineer goes about creating one:

Start with the basics
First I tried to think of corollary images that I could evoke in text, to make the representation matching easier for the AI. It helps to know how the AI thinks.
So I asked myself: “Hmm, where do I regularly see full-body shots? Where is it always part of the visual language, the lexicon?”
Answer? Computer games! T-poses, and character customisation screens! It’s a cliche of the genre. So I tried to mimic that. The results were good:

In addition to “Character creation”, try:
- “Body customization”
- “Reference pose”
And if you don’t mind a CGI-looking model:
- “Unreal Engine 5, MetaHuman Creator body”
But we want the option of more realistic, photo-quality humans as well.
Cracking the Full Body Code
So time to add in some more photographic cues. I’ve spoken before about the importance of photographic and cinematic language to describe what we want the AI to generate, even if it’s not strictly representational or mimetic.
So I searched my old film school textbooks for inspiration and key terms:

The Full Shot
This worked a treat. I added it to the “character creation” prompt and got better results. “Wide field of view” works too. However, sometimes the characters drifted off to the side of the frame when I did this:

While I liked the aesthetic of the slightly off-center character, getting the figures right smack dab in the middle of the image would be more useful.
Make like a Yoga teacher, and find your center
“Centered” helped align those figures better. Remember, part of what your text prompt does is help the AI to rearrange the concept of the image in m-dimensional space. So be sure to always tell it where things should go.
You’re never fully dressed
To further help the AI, I started describing something at the top and the bottom of my figure. What do we usually see on the top and bottom?
Hair and shoes! Right. So pretend your figure is a paper doll and dress it up.

Try describing an item of clothing or distinctive feature. Sneakers. A cap. A Mallen streak in their hair like sexy Robb Stark (“The North Remembers!”).
Anything to mark out those essential boundaries of top and bottom.
Your description determines the outline of the subject. So make sure the AI doesn’t crop things out just because you left the description blank. I think that’s often why AI shunts part of the subject offscreen and crops an image.
Describe your figure in relation to the space
For instance, I find “standing on a white rug” helps bring in some perspective and dimension. My friend and colleague Danny Thompson — who Beta tested these full-length prompts for me — suggests adding a full body action, which I think is a wonderful idea. It also cues the AI to reference other similar images.
What is your character doing? Here’s a cheat sheet of some full-body verbs:

Finishing touches:
Finally, it’s been wisely suggested to me that a solid background makes it much easier to lasso the figure when creating a collage or special overlays.
Most of my examples had blank backgrounds — as I didn’t set the scene — but you may want to add “blank background” or “plain backdrop” to your prompt.
This step is useful if you plan to convert the full body figure into a 3D model that you can repose in other images, using software like Character Creator.
Building your perfect AI prompt for uncropped, full-body portraits

To recap, here are the moving parts you need to add to your prompt:
- “Full shot”
- “Full-length portrait”
- “Wide field of view”
- “Centered”
- {definiting attributes at top and bottom of figure to bind it}
- {relationship to space}
- {a full-body verb}
and if you’re planning to use the image for a 3D model or special overlays:
- “Blank or plain background”
- “Character creation” “character customization”
- “T-pose” (you could even have fun with adding “Vitruvian man pose”)
There you have it! Now just add in some extra secret sauce for hyperrealism or photorealism, and voila! I recommend starting small and finetuning, adding qualifiers as you go (full shot, full length, character creation + [subject]).
Here are some ideas for adding more tone to your AI-generated artworks:
What to avoid if you want full body shots:
Don’t describe selfies! Or extreme closeups! There’s solid research to say that AI actually thinks cropped images are more attractive, according to Stanford.

Many of the words we use to try to get a good picture are counterproductively telling the AI to crop. “Gorgeous” and “highly detailed” are terms that are more associated with close-ups and selfies than with full-body portraits.
So use them sparingly! Admittedly the resolution on faces will take a hit, but part of this is due to the smaller area the face occupies, so the level of detail is diminished (and the noising is more visible). I’d expect a fix from Jasper Art later this month if recent improvements we’ve seen happen are any indication.

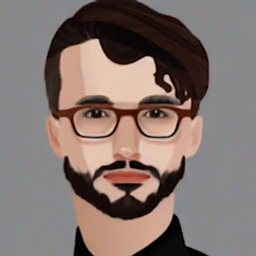
Any imperfections that we’d normally dismiss in such a small pixel area appear disproportionate on his tiny face, because it’s not scalable (yet).
Until then, try an image sharpener like Baseten or Luminar AI, or the new neural filters in Photoshop, to fix any rendering artefacts. I’ll show you how in an upcoming guide. Just don’t go overboard and lose texture. No image in this post has been enhanced; they’re genuine output generated by Jasper Art.
The Pink Elephant Paradox: The Ironic Process Theory in AI
You might be tempted to add “not cropped”. I’m not convinced that negative prompts work. It’s like telling someone “Don’t think of a pink elephant”. It works on occasion, but negative prompts seem to trigger the thing you want the AI to avoid, especially if your syntax isn’t 100%. Ironic, don’t you think?

That’s because nobody is labelling the source images with what they’re not. Make sense right? So instead, describe in detail what you do want to see.
Conclusion:
I hope you found this guide helpful! Have fun creating your AI-generated full-body portraits! If you have any tips or tricks of your own to add, please share them in the comments below. Be sure to follow me for more info!
For heaps of tips, tricks, and techniques, visit the Jasper Facebook group!
Who is The Jasper Whisperer? How can he help me make AI artwork?
I’m fully certified by Jasper AI and a group expert. I partner with Jasper AI. Jasper Art is now only $20/mo for unlimited image generations!
You can start to generate AI art right away — no waitlist!
I offer Pro training on how you can use AI to create commercial content.
If you’re interested in discovering more, please feel free to contact me.
Ready to join Medium?
Unlock the entire Medium catalogue with my referral link, and you’ll also be supporting my writing here at no extra cost to you. I’d appreciate it.


