
How To Develop and Build MERN Stack
A step by step guide with an example project
There are so many ways we can build React apps and ship them for production. One way is to build the React app with NodeJS and MongoDB as a database. There are four things that make this stack popular and you can write everything in Javascript. The four things are MongoDB, React, Express, and NodeJS. This stack can be used for a lot of use cases in web development.
The entire frontend is written in React and we are using MongoDB as a document database. The express and NodeJS are used for the middle layer. In this post, we will see the details and implementation of the MERN Stack. We will go through step by step with an example project.
- Introduction
- Prerequisites
- Example Project
- Project Structure
- Set up a MongoDB Atlas
- Building API
- Configure MongoDB In API
- Externalize the Environment Variables
- Building UI
- Make API Calls From UI
- Development Environment Setup
- Running on Docker Compose
- Dockerize MERN Stack
- Linting
- Unit Testing API
- Unit Testing UI
- Integration Tests
- Build for production
- Demo
- Summary
- Conclusion
Introduction
As we said earlier, MERN Stack uses four technologies such as MongoDB, Express, React, and NodeJS. React is a javascript library for building web apps and it doesn’t load itself in the browser. We need some kind of mechanism that loads the index.html (single page) of React application with all the dependencies(CSS and js files) in the browser. In this case, we are using node as the webserver which loads React assets and accepts any API calls from the React UI app.

If you look at the above diagram all the web requests without the /api will go to React routing and the React Router kicks in and loads components based on the path. All the paths that contain /api will be handled by the Node server itself.
Prerequisites
There are some prerequisites for this post. You need to have a NodeJS installed on your machine and some other tools that are required to complete this project.
- NodeJS
- Express Framework
- Mongoose
- MongoDB
- VSCode
- Postman
- nodemon
- dotenv
- Create React App
- Typescript
- react-bootstrap
NodeJS: As an asynchronous event-driven JavaScript runtime, Node.js is designed to build scalable network applications.
Express Framework: Express is a minimal and flexible Node.js web application framework that provides a robust set of features for web and mobile applications.
Mongoose: elegant MongoDB object modeling for node.js
MongoDB: MongoDB is a general-purpose, document-based, distributed database built for modern application developers and for the cloud era.
VSCode: The editor we are using for the project. It’s open-source and you can download it here.
Postman: Manual testing your APIs
nodemon: To speed up the development
If you are a complete beginner and don’t know how to build from scratch, I would recommend going through the below articles. We used these projects from this article as a basis for this post.
How to write production-ready Node.js Rest API — Javascript version
Example Project
Here is an example of a simple tasks application that creates, retrieves, edits, and deletes tasks. We actually run the API on the NodeJS server and you can use MongoDB to save all these tasks.

As you add users we are making an API call to the nodejs server to store them and get the same data from the server when we retrieve them. You can see network calls in the following video.

Here is a Github link to this project. You can clone it and run it on your machine.
// clone the project
git clone https://github.com/bbachi/mern-stack-example
// React Code
cd ui
npm install
npm start// API code
cd api
npm install
npm run devProject Structure
Let’s understand the project structure for this project. We will have two package.json: one for the React and another for nodejs API. It’s always best practice to have completely different node_modules for each one. In this way, you won’t get merging issues or any other problems regarding web and server node modules collision. It’s easier to convert your MERN Stack into any other stack later such as replacing the API code with microservices and serving your UI through NGINX web server.
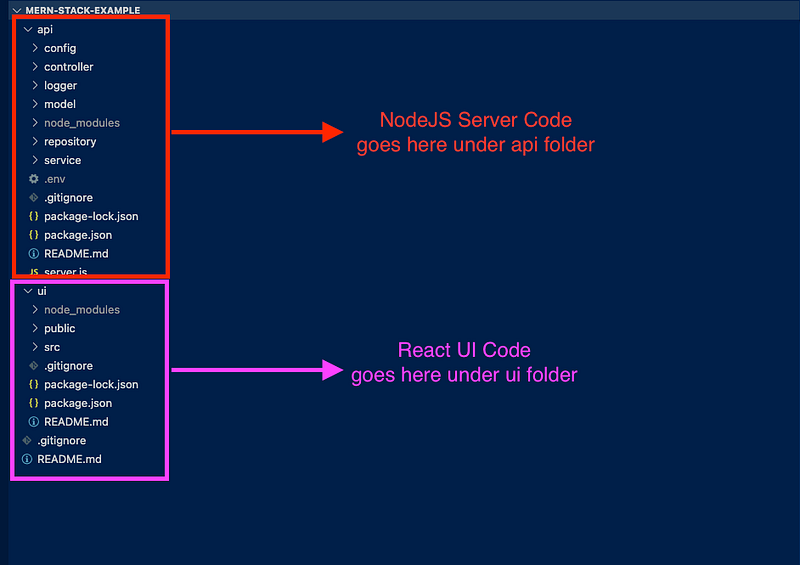
If you look at the above project structure, all the React app resides under the ui folder and nodejs API resides under the api folder.
Set up a MongoDB Atlas
The core of MongoDB Cloud is MongoDB Atlas, a fully managed cloud database for modern applications. Atlas is the best way to run MongoDB, the leading modern database.
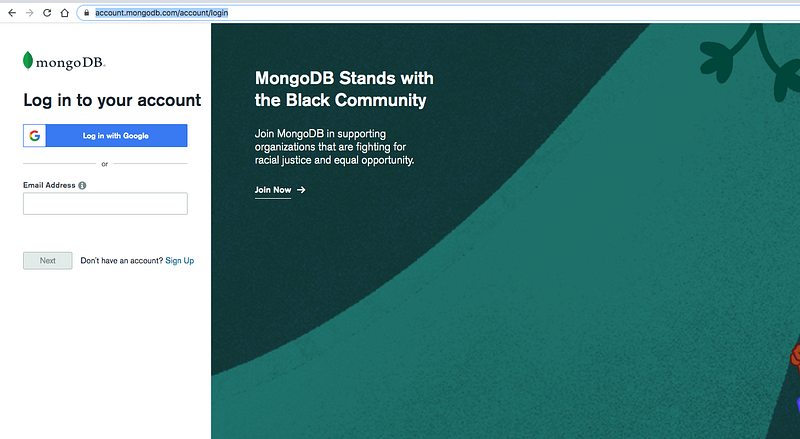
Let’s create your MongoDB Account here. You can either log in with any of your Gmail accounts or you can provide any other email address to create the account.
Once you log in with your account you will see the dashboard below where you can create clusters.
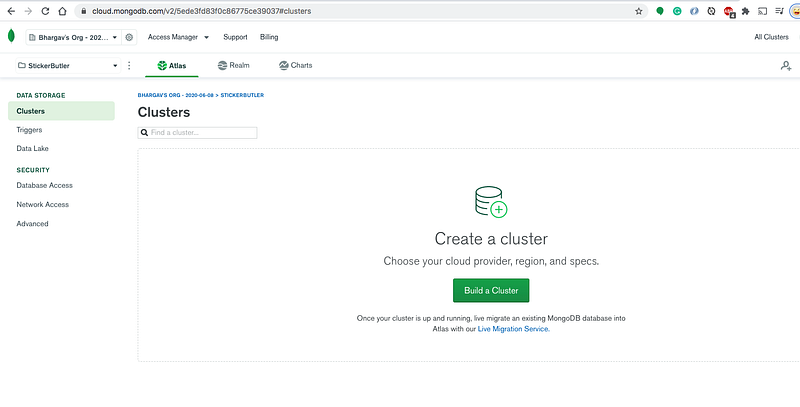
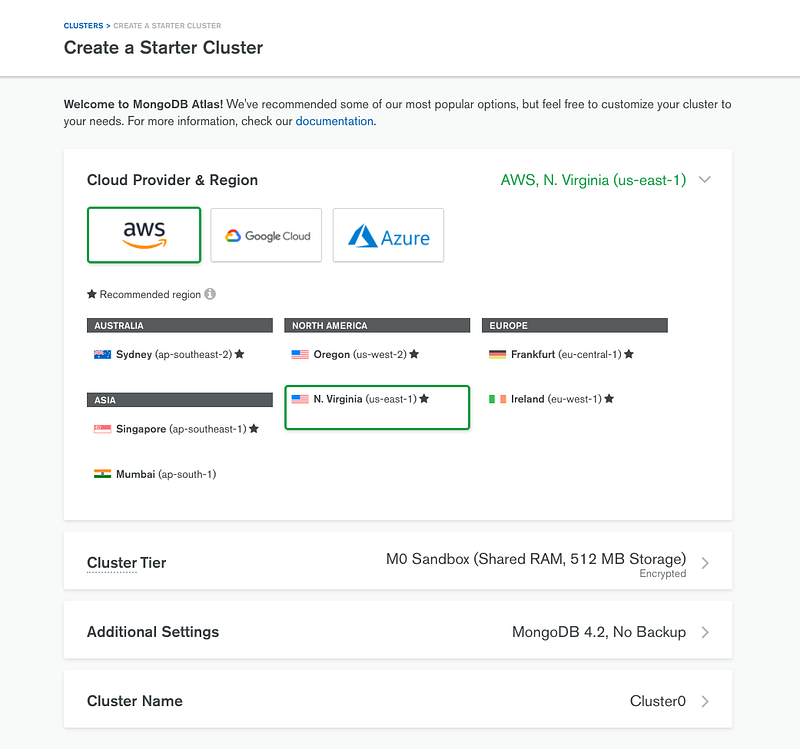
Let’s create a cluster called todo-cluster by clicking on the build a cluster and selecting all the details below.
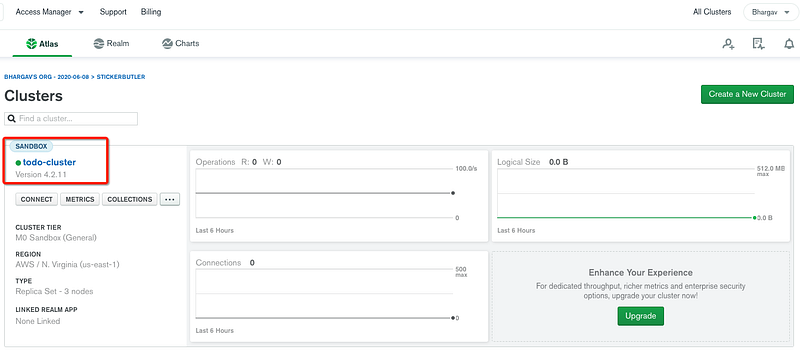
Here is the cluster we created below.
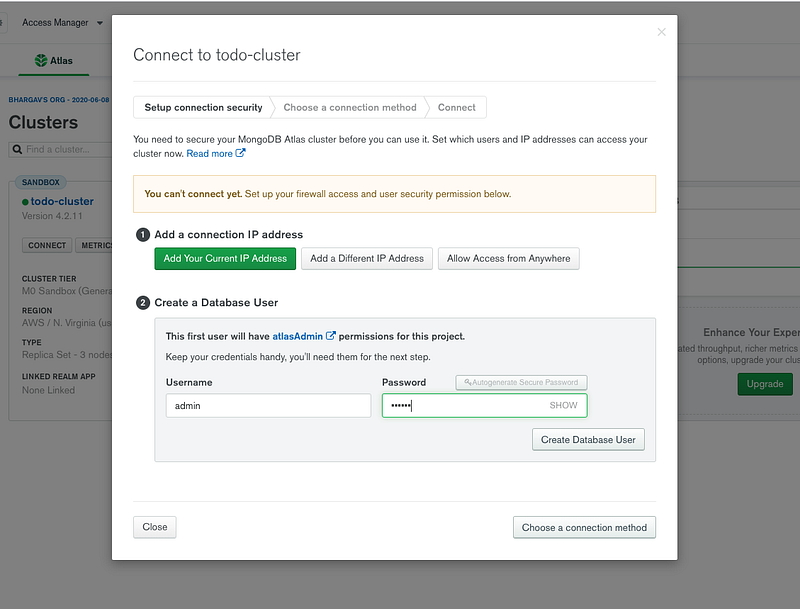
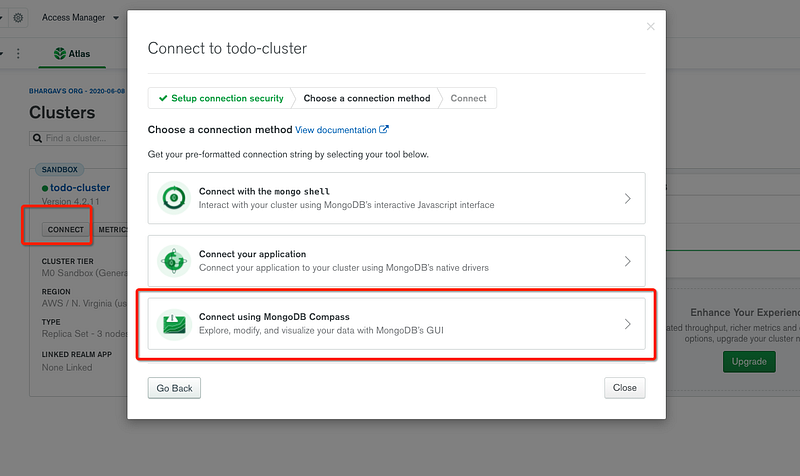
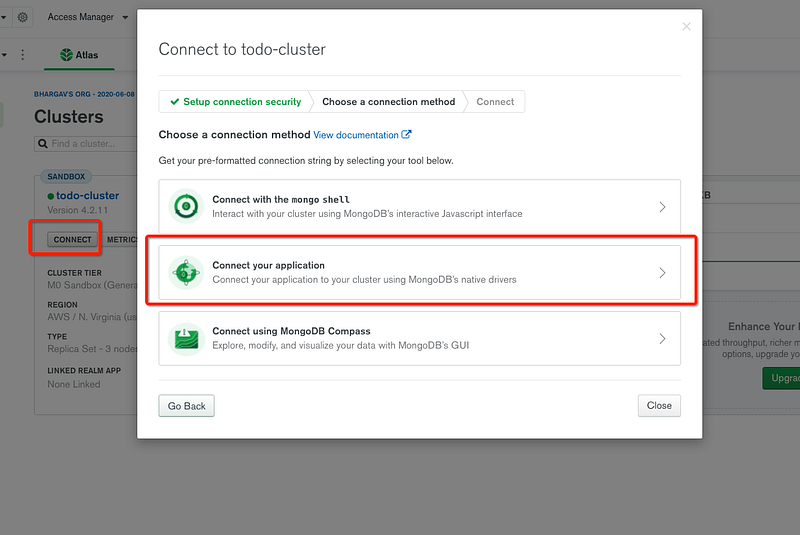
You can click on the connect button to see the details about connecting to the cluster. You need to create a user and Allow Access from anywhere for now.
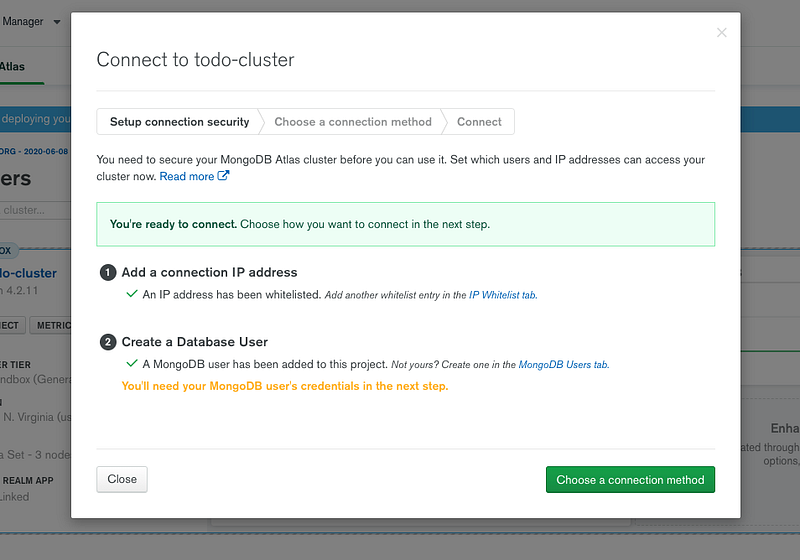
You can see three ways of connecting to the cluster on the next screen.
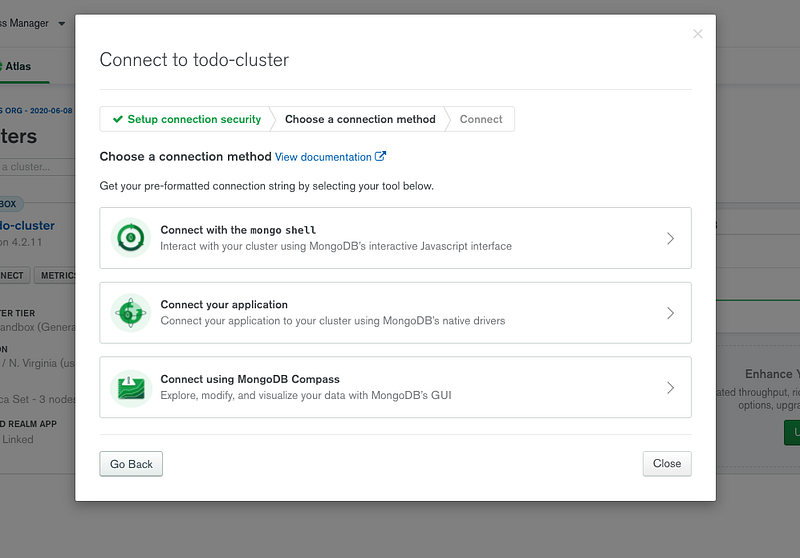
We will see all these three ways to connect to the cluster in the next sections.
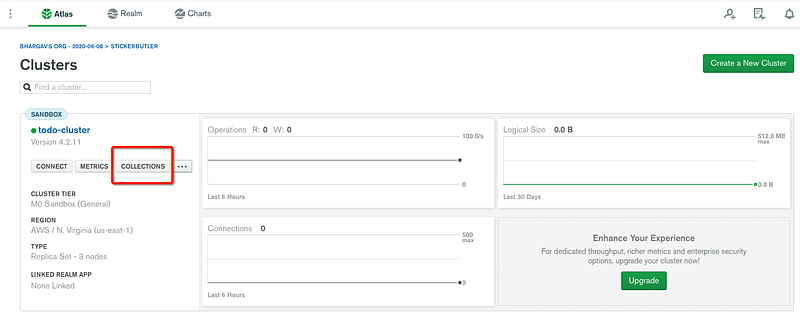
Create a Database
We have created a cluster and it’s time to create a database. Click on the collections to create a new database as below.
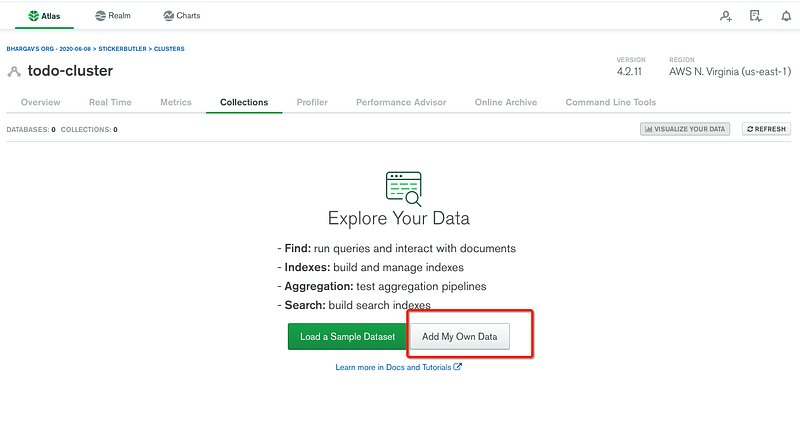
Click on the Add My Own Data Button to create a new database.
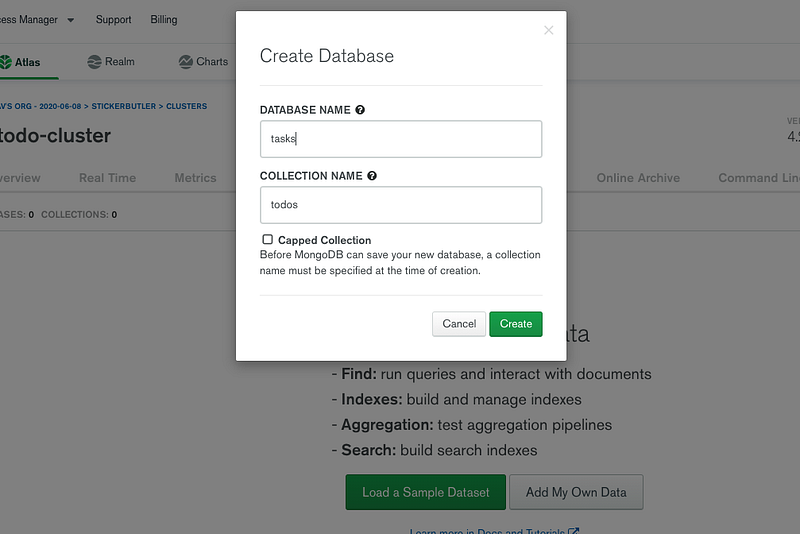
I have given a database name as tasks and the collection name is todos.
You will see the below dashboard once the database is created. We have a database with empty collections.
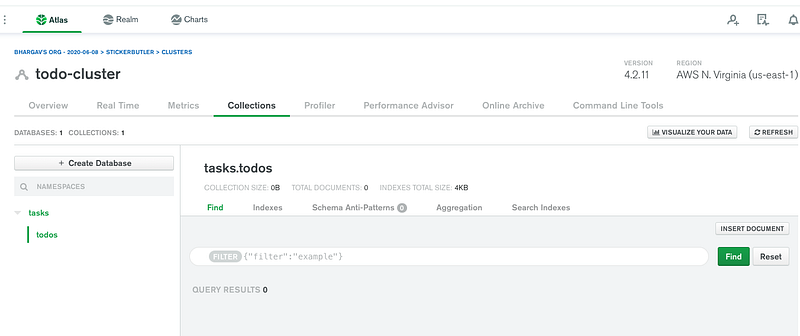
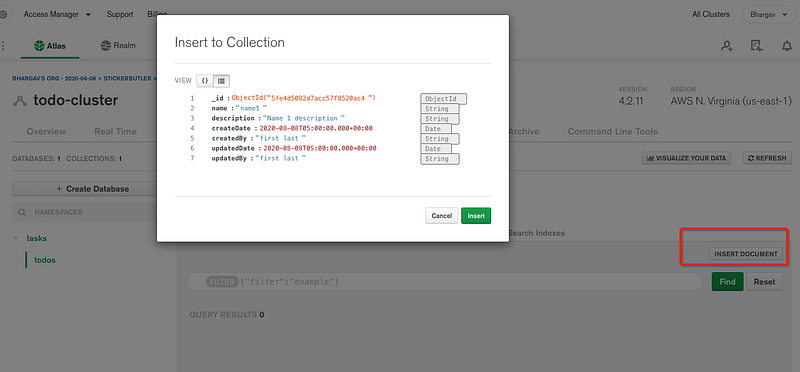
Let’s insert the first document into the collection by clicking the button insert document
Connect With Mongo Compass
We have seen three ways we can connect to this cluster and read the collections. Let’s connect to the database with Mongo Compass. The first thing we need to do is to download and install Mongo Compass from this link.
Let’s get a connection string from the Atlas dashboard as below.
Replace the password with the password that you created above.
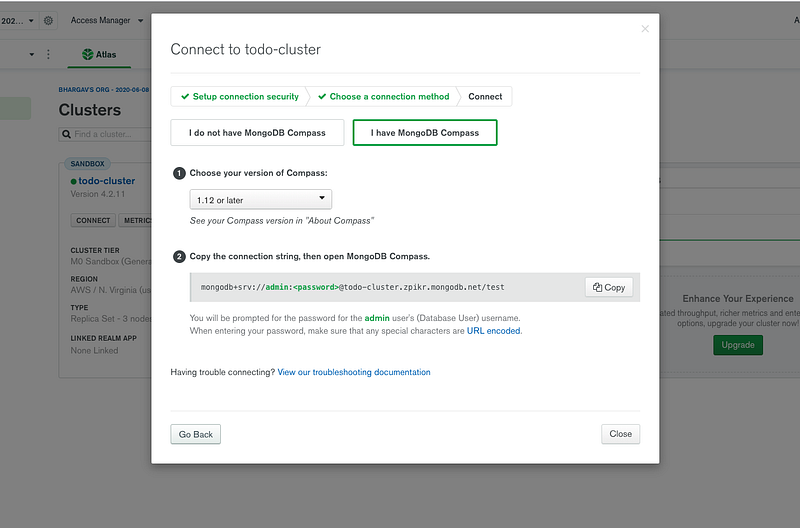
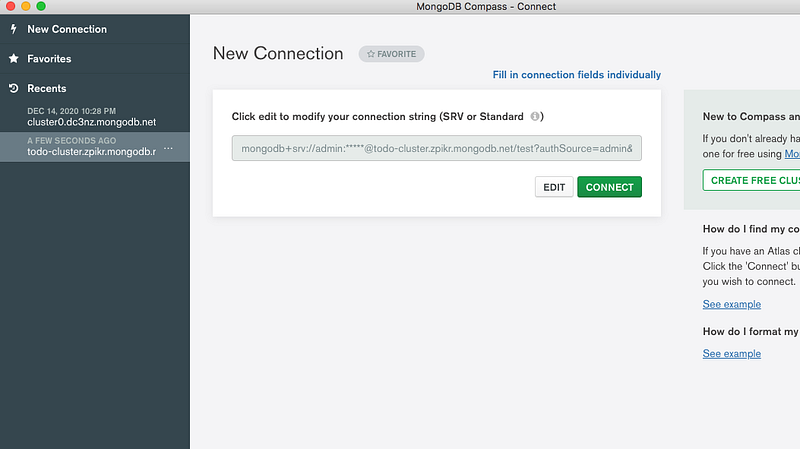
Let’s connect to the database with the connection string
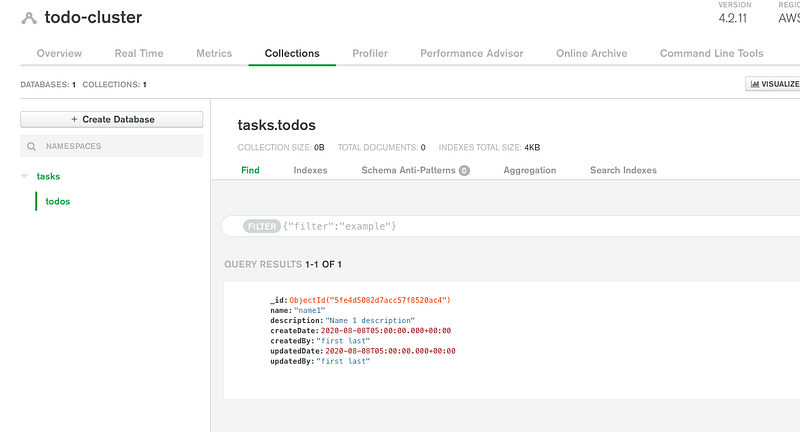
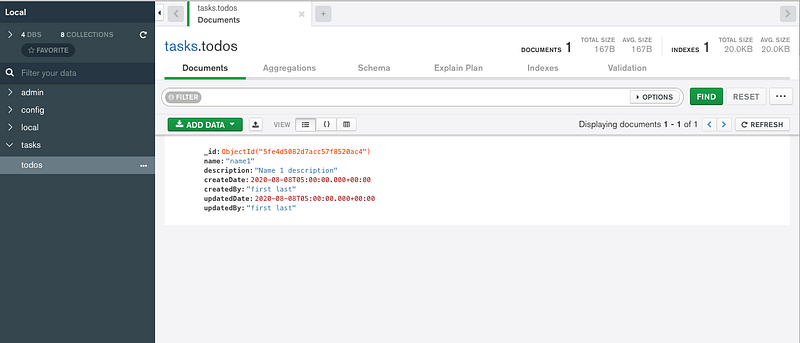
You can actually see the same collection in the MongoDB Compass as well.
Building API
We have configured MongoDB in the previous section, it’s time to build the API. I would recommend you go through two articles posted in the prerequisites section. Let me put those here as well.
How to write production-ready Node.js Rest API — Javascript version
The starting point of the API is the server.js file in which we define all the routes and import the express. Here is the file where the nodejs server runs on port 3080 and starts listening for the incoming requests.
We have defined 4 routes for CRUD operations. Notice that we are using four different HTTP methods for creating, updating, reading, and deleting operations. The request comes to these routes and each route calls the respective method in the controller class. You can read the body of the incoming requests in the req object defined in each route. The result of these methods is a promise based so you need to use then method to read and send back to the client with the method res.json().
Here is the controller class in which we are calling the service class with async/await. The async/await is the cleaner way of reading promises. You don’t need async/await here since we are directly returning the result of the service class.
Let’s look at the service class in which we call the repository to interact with the MongoDB data.
You need to know how to configure Mongo Connection in the NodeJS before looking at the repository so that you can read the data from MongoDB. Let’s find that out in the following section.
Configure MongoDB In API
Let’s configure the Mongo Client from our application. The first thing we need to do is to get the connection string.
Make sure you select the right language and the right MongoDB driver version.
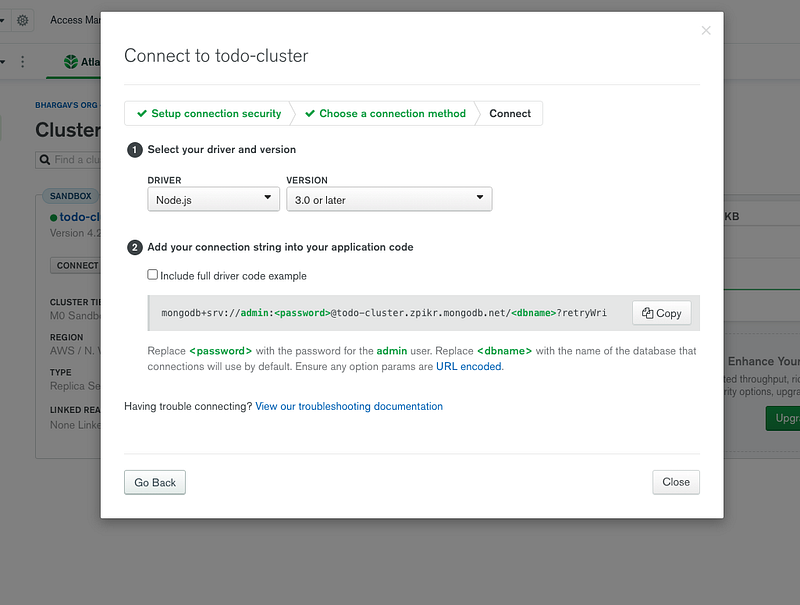
Let’s place the connection string and database name in the application properties file as below. You have to URL encode the password if you have any special characters in the password.
Here is the configuration file in which you connect to MongoDB with the help of the connection string. We are using Mongoose to connect with MongoDB for all the queries. Mongoose makes it easy for you to interact with MongoDB.
The next thing we should define is the schema for the database model as below.
Finally, we have a repository class as below using the above model for the CRUD operations.
Externalize the Environment Variables
We have seen how to configure your MongoDB connection in the API. We need to store this kind of configuration outside of your app so that you can build once and deploy it in multiple environments with ease.
We need to use the dotenv library for environment-specific things. Dotenv is a zero-dependency module that loads environment variables from a .env file into process.env. Storing configuration in the environment separate from code is based on The Twelve-Factor App methodology.
The first step is to install this library npm install dotenv and put the .env file at the root location of the project
We just need to put this line require('dotenv').config() as early as possible in the application code as in the server.js file.
Let’s define the configuration class where it creates a connection with the connection string we just copied from the Atlas Dashboard. We are fetching the Mongo connection string with the dotenv library and connecting it to MongoDB with Mongoose. We are exposing two functions from this file connect and disconnect.
Building UI
Once you create the separate folder for React code you need to start with the following command to scaffold the React structure with the help of React CLI. We will not build the entire app here instead we will go through important points here. You can clone the entire GitHub Repo and check the whole app.
npm create-react-app uiHere is the index.js file for the app and App Component as the bootstrap component which means this is the first component that loads in the browser.
Here is the starting point of the application in which we define the Home component to load for the path /. You need to import the react-router-dom library for the routing part of the app. The Home page will be loaded when we start the application.
Here is the Home component. This is a simple application where you add, update, delete tasks. You can go through the GitHub repo to check the rest of the files. We are using two hooks here one is for maintaining the local state and another is for fetching the data from the API.
We have another two important components here one is for the createTask Form component and another is for the Tasks table.
Run the React code in local with the following command which runs on the port 3000 on localhost. Make sure you are in the root folder of React code which is todo-app here.
cd todo-app
npm start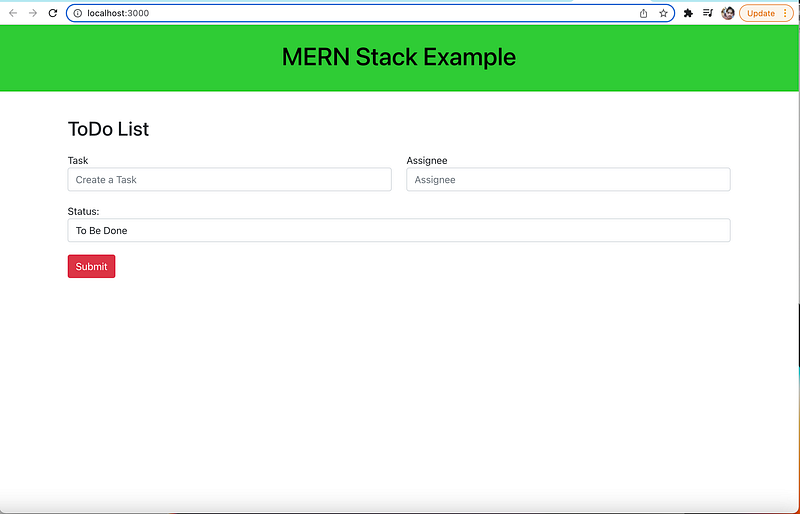
Make API Calls From UI
Here is the service file which calls the API, in this case. We have four API operations to get, add, edit, and delete tasks with root path /api.
From the react components you can call this service to get the data using React Hooks. Here is an example.
You can look at the below article for a detailed post.
Development Environment Setup
Usually, the way you develop and the way you build and run in production are completely different.
In the development phase, we run the nodejs server and the React app on completely different ports. It’s easier and faster to develop that way. If you look at the following diagram the React app is running on port 3000 with the help of a webpack dev server and the nodejs server is running on port 3080.
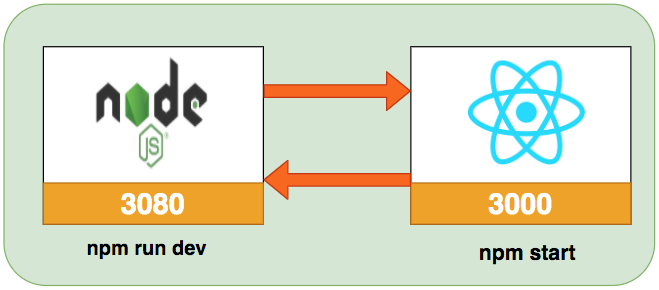
There should be some interaction between these two. We can proxy all the API calls to nodejs API. Create-react-app provides some inbuilt functionality and to tell the development server to proxy any unknown requests to your API server in development, add a proxy field to your package.json of the React. Have a look at the package.json below. Remember you need to put this in the React UI package.json file.
Now you can run both Reac UI and NodeJS API on different ports and the React Code interacts with the API.
// React Code
cd ui
npm install
npm start
// API code
cd api
npm install
npm run devRunning on Docker Compose
Docker Compose is really useful when we don’t have the development environment setup on our local machine to run all parts of the application to test or we want to run all parts of the application with one command. For example, if you want to run NodeJS REST API and MongoDB database on different ports and need a single command to set up and run the whole thing. You can accomplish that with Docker Compose.
In the below post, we will see what is Docker Compose and how we can do the local development of MERN Stack with Docker Compose, and its advantages as well.
Dockerize MERN Stack
Docker is an enterprise-ready container platform that enables organizations to seamlessly build, share, and run any application, anywhere. Almost every company is containerizing its applications for faster production workloads so that they can deploy anytime and sometimes several times a day. There are so many ways we can build a MERN Stack. One way is to dockerize it and create a docker image so that we can deploy that image any time or sometimes several times a day.
In the below post, we look at the example project and see the step-by-step guide on how we can dockerize the MERN Stack.
Linting
We need to lint our project in that way it’s easier to follow some standards in your project. We will see this in a separate article.
Coming Soon!!
Unit Testing API
There are so many tools out there to unit test your application such as Mocha, Chai, etc. We need a separate article for that to cover different libraries.
Coming Soon!!
Unit Testing UI
We will see how to unit test with UI with jest library.
Coming Soon!
Integration Tests
We will use cypress for the integration tests.
Coming Soon!
Build for production
We have to build the project for production in a different way. We can’t use the proxy object. Here is the detailed article on how to package your app for production.
Demo
Here is an example of a simple tasks application that creates, retrieves, edits, and deletes tasks. We actually run the API on the NodeJS server and you can use MongoDB to save all these tasks.
As you add users we are making an API call to the nodejs server to store them and get the same data from the server when we retrieve them. You can see network calls in the following video.
Summary
- There are so many ways we can build React apps and ship them for production.
- One way is to build the React app with NodeJS and MongoDB as a database. There are four things that make this stack popular and you can write everything in Javascript.
- The four things are MongoDB, React, Express, and NodeJS. This stack can be used for a lot of uses cases in web development.
- We will have two package.json: one for the React and another for nodejs API. It’s always best practice to have completely different node_modules for each one.
- The core of MongoDB Cloud is MongoDB Atlas, a fully managed cloud database for modern applications. Atlas is the best way to run MongoDB, the leading modern database.
- We need to use the dotenv library for environment-specific things. Dotenv is a zero-dependency module that loads environment variables from a
.envfile intoprocess.env. Storing configuration in the environment separate from code is based on The Twelve-Factor App methodology. - In the development phase, we run the nodejs server and the React app on completely different ports. It’s easier and faster to develop that way.
- We need to lint our project in that way it’s easier to follow some standards in your project.
- There are so many tools out there to unit test the API such as Mocha, Chai, etc.
- We can unit test with UI with jest library.
- We will use cypress for the integration tests.
- We have to build the project for production in a different way. We can’t use the proxy object.
Conclusion
MERN Stack is very good when you want to develop a simple web app and deploy your frontend and backend together. We have seen how to write MERN Stack in detail. In future posts, we will see how to build and deploy the MERN Stack on different Clouds such as GCP, Azure, AWS, etc.


