
How To Get Started With React
A Beginner’s guide with an example project
React is a javascript library for web applications. You can build features quickly with simple, declarative templates. You can build an application with React and reuse your code and abilities to build apps for any development target. There are so many things you need to understand before you even get started with React.
In this post, we will see how we can even get started with React if you are new to it or never tried any framework so far. If you are already familiar with how to get started and create a simple application with React this post is not for you. Let’s see how we can create a simple application with React.
- Prerequisites
- Example Project
- Getting Started with React CLI
- Understanding Project Structure
- Components
- Adding Styles
- Lifecycle Methods
- Adding Services
- Installing Dependencies
- Communication Patterns
- Implementation of Example Project
- Unit Testing
- Summary
- Conclusion
Prerequisites
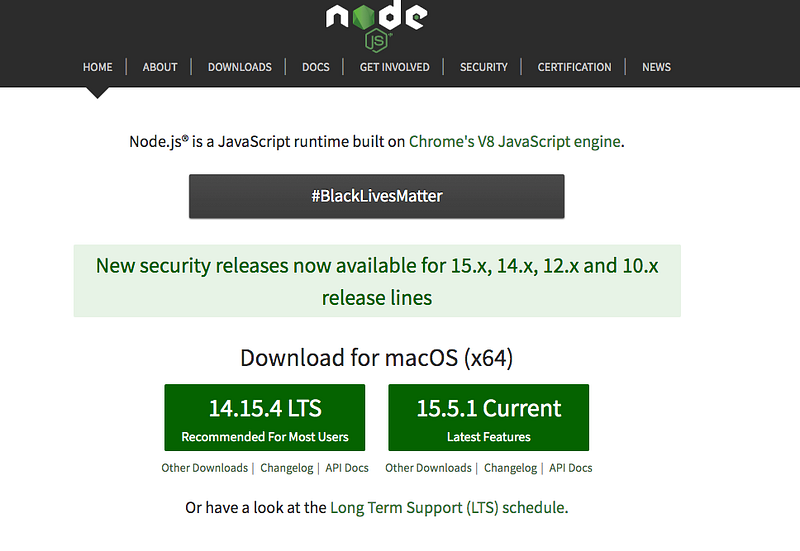
There are some prerequisites for this project. We need to have a NodeJS installed on your machine to install React-based dependencies. We need an editor to write the code. We are using a VSCode as an editor. There are many other editors as well to choose from such as web storm, atom, etc.
Once you are on the NodeJS website you can install the LTS one. Click on it and follow the further instructions.
You can check whether NodeJS installed or not with the following command. It gives you the version if the nodejs is properly installed on your machine.
node -vLet’s install the React CLI globally with the following commands. Make sure you install it globally so that you can use it from anywhere on your machine. The React CLI makes it easy to create an application that already works, right out of the box. You can generate components, etc.
// install globally
npm install -g create-react-app
// check the version
npx create-react-app --version
Example Project
Let’s see what we are running as an example project here. This is a simple project which demonstrates developing and running a React application. We have a simple app in which we can add users, count, and display them at the side, and retrieve them whenever you want.
You can clone this project and run it on your machine with the following commands.
// clone the project
git clone https://github.com/bbachi/getting-started-react.git
// install and run
npm installGetting Started with React CLI
We installed NodeJS and React CLI in the prerequisites section. Let’s see how we can create a full React application with just one command. The React CLI makes it easy to create an application that already works, right out of the box. My app name is getting-started-react. You can give any name after the new keyword, the React CLI creates the project with that name.
npx create-react-app getting-started-reactIt creates all the project structure for you as below.
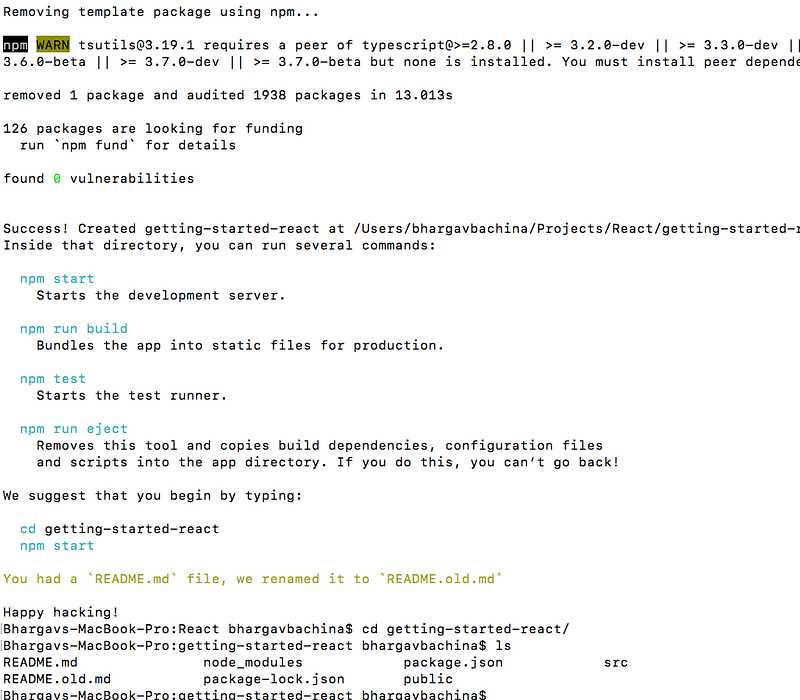
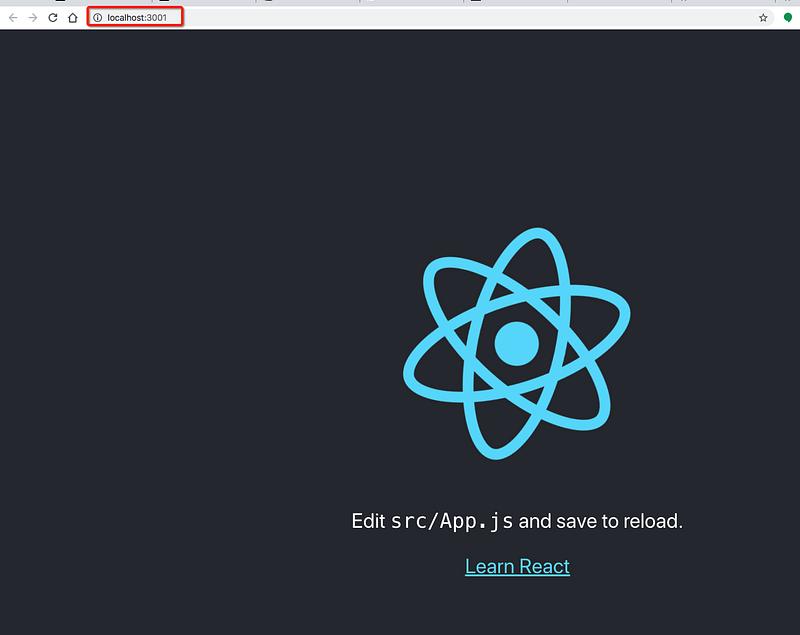
You can import this project into the VSCode and run this command which in turn runs this react-scripts start
npm start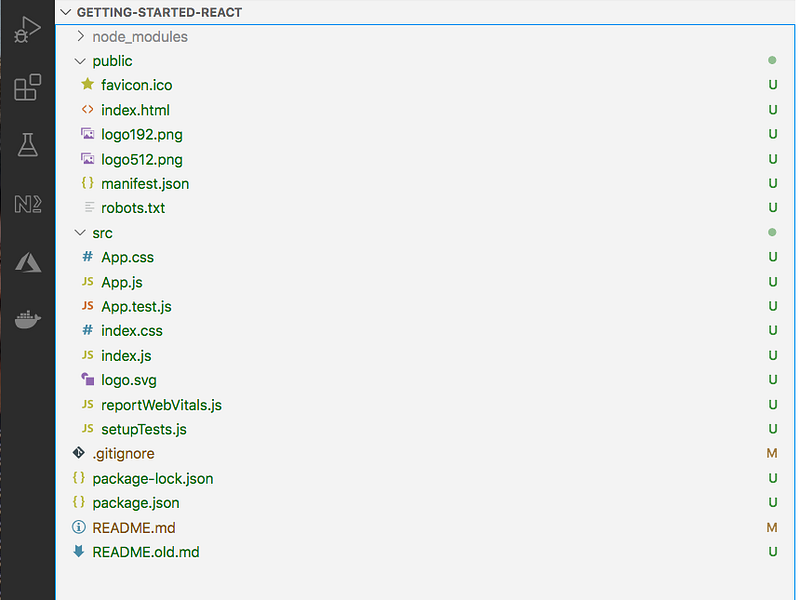
When you run the start command React CLI runs the webpack dev server and serves the entire application on port 3000 if it is available.
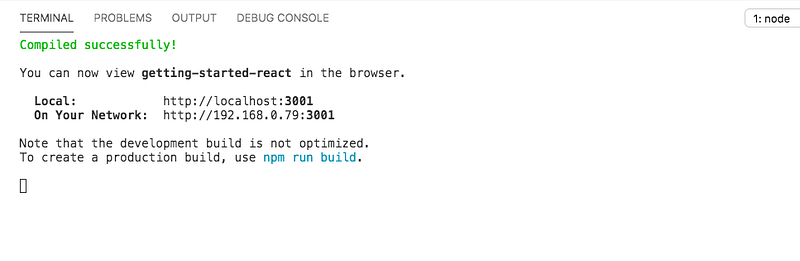
You can access the app on port 3001.
Understanding Project Structure
We scaffolded the React app with the React CLI and serve the app on port 3000, let’s understand the project structure. The first thing we need to understand is the package.json file.
The version starts with 0.1.0 and the name in the package.json is the name of your project. You can define your npm scripts under the scripts section so that you don’t have to remember long commands. The dependencies section contains all the dependencies that the project needs and whatever the dependencies under the devDependencies section are needed for the development environment which means these are not needed in a production environment.
If you notice the scripts section when you run this command npm start it actually runs the react-scripts start command.
The main file of the project is the index.js file. This is the starting point of your application in which we are importing the React and ReactDOM and passing the App component as an argument to the ReactDOM and also the id of the root element of the index.html below at line number 31.
Here is the first component App that is passed to the ReactDOM to render. This is the first component that renders in the browser. Since this is attached to the root id of the DOM.
We will see how we can create components in the following sections.
Components
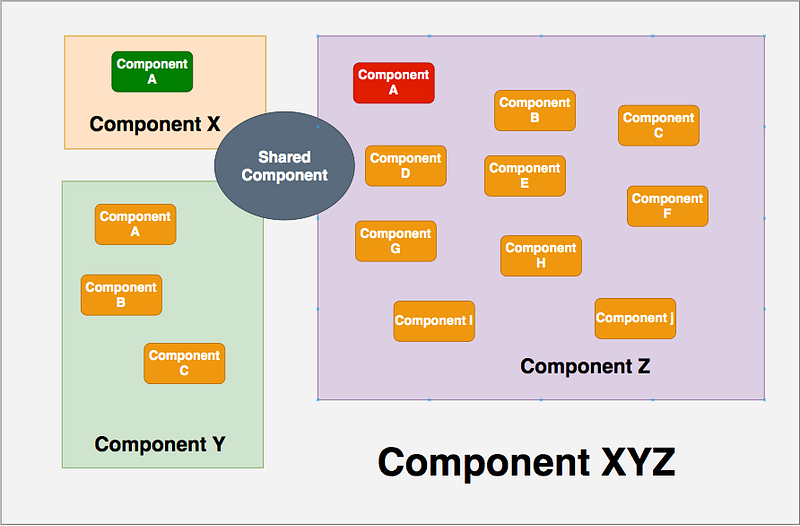
Everything is a component in react you can define components and import components into another component. One component may contain 100 components or one single component. It all depends on the requirement that you are working on. You can have shared components where other components can just use those as well. For example, we have Component X contains only one component or Component Z contains a lot of components, and all the components are part of Component XYZ which is the root component.
The root component of the React application here is App.js which is passed as an argument to the ReactDOM. There are several ways to define components, but we will see three types of defining a React component.
Stateless Component
This is the easiest one to create and understand. We usually call this kind of components are called dumb components because there is no state. All it takes props from the parent component and display some HTML in the browser. This has a return statement in which you can define the HTML that you want to render in the browser and use data from the props object as below. We are reading the property name from the props object.
Stateful Component
Stateful components are the components that contain the state. These types of components are also called class components. This usually extends the Component from the react library. You can define the state for these components and use the state data to pass to other components as in line number 15. As you notice we have a render method in this component that invokes or renders every time there is an input prop change. You can have logic inside the render method as well before the return method. We will see that in detail later.
Functional Components
Nowadays, we are mostly using functional components with the combination React Hooks. For example, useState at the line number is the React Hook and this is equivalent to the State object defined in the class component above. The functional component is similar to the stateless component but react hooks.
You get the following output by using either functional or stateful components.

Adding Styles
There are three ways you can add styles to the React components such as External Stylesheet, Inline Styles, and Style objects. You can explore more about this in detail in this post.
External Stylesheet
In this method, you can import an external stylesheet into your component use classes. But you should use className instead of class to apply styles for the React elements.
Inline Style
In this method, we can directly pass props to the HTML elements with the property called style. The important thing we should notice here is that we are passing javascript object to the style prop that’s why we are using backgroundColor instead of CSS way background-color.
With Objects
Since we are passing the javascript object to the style property, we can define a style object in the component and use it. Here is an example and you can pass this object down the component tree as props as well.
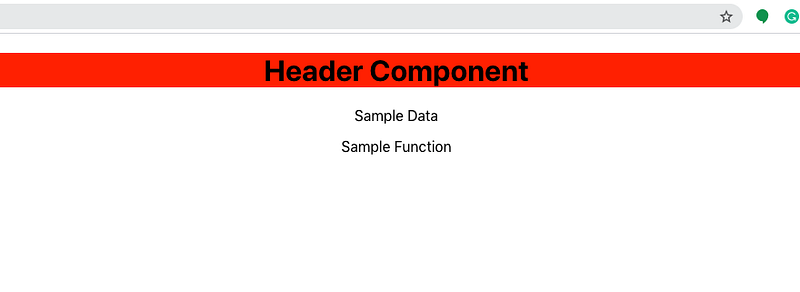
Let’s pick any of these methods and apply a background color to the heading. I used Inline styles for the header component.
Here is the result. If you have any global styles from App.css the inline styles override it.

Lifecycle Methods
If you use functional components you won’t be using these lifecycle methods. We generally use React Hooks. It’s good to know there are lifecycle methods if you use class components instead of functional components. Here is the lifecycle diagram.
The component goes through a series of lifecycle methods as it enters and leaves the DOM. Here are those lifecycle methods.
Constructor()
The constructor for a React component is called before it is mounted. When implementing the constructor for a React.Component subclass, you should call super(props) before any other statement.
static getDerivedStateFromProps()
getDerivedStateFromProps is invoked right before calling the render method, both on the initial mount and on subsequent updates. It should return an object to update the state, or null to update nothing.
componentDidMount()
This lifecycle method is called when the component entered the DOM and you can call the API in this lifecycle. It occurs only once.
getSnapshotBeforeUpdate()
getSnapshotBeforeUpdate() is invoked right before the most recently rendered output is committed to e.g. the DOM. It enables your component to capture some information from the DOM (e.g. scroll position) before it is potentially changed. Any value returned by this lifecycle will be passed as a parameter to componentDidUpdate().
shouldComponentUpdate()
This lifecycle method is called whenever there is an update to the props or state and it returns a boolean value true by default. You can return false if you don’t want to re-render the DOM for this change. This is really useful to improve the performance of the app.
componentDidUpdate()
This lifecycle method is called when the update to the component is completed. Never call this.setState() in this lifecycle method.
componentWillUnMount()
This lifecycle method is called before the component gets removed from the DOM. This is the right place to remove all the third party libs or clear all the events.
static getDerivedStateFromError()
This lifecycle is invoked after an error has been thrown by a descendant component. It receives the error that was thrown as a parameter and should return a value to update the state. is called during the “render” phase, so side-effects are not permitted. For those use cases, use componentDidCatch() instead.
componentDidCatch()
This lifecycle method is used in the ErrorBoundary class. Actually, any class becomes ErrorBoundary if it uses this lifecycle method. This is used to log the errors if something goes wrong in the component tree.
Adding Services
We have reusable logic in every application, for example, calling APIs and parsing the response, etc. We use services for this kind of reusable logic in React. Let’s see how we can add service to the React application.
There is no specific way to add services in the React application since it’s not an opinionated framework. Let’s create a folder called services and add a service called AppService.js.
You can import these methods from this service as below at line number 4 and you can use them directly in the HTML as in line numbers 15 and 16.
You can see the below result.
Installing Dependencies
Usually, we need to use so many dependencies while building our applications. We can’t write everything on our own and shouldn’t reinvent the wheel. If we are using any of these kinds of third party libraries we need to add those to our application as dependencies.
For example, if we want to use the Bootstrap library for the CSS and the responsiveness of the app, we need to install those dependencies with the following command.
npm install react-bootstrap bootstrap --save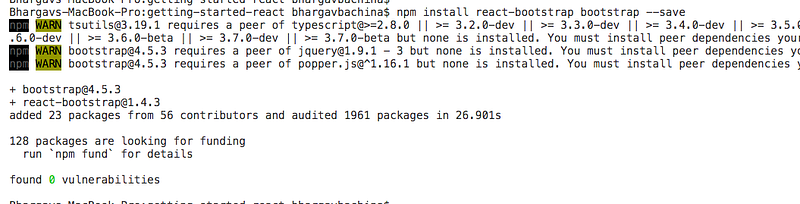
You can see the updates added to the package.json. You can notice line numbers 9, 11 in package.json.
You need to import the bootstrap library in the App component. Since this is the parent component it applies to all the components.
import ‘bootstrap/dist/css/bootstrap.min.css’;Communication Patterns
Data flows from top to bottom in React applications. There are several ways to communicate between components. We will see three patterns that can be used in this example project.
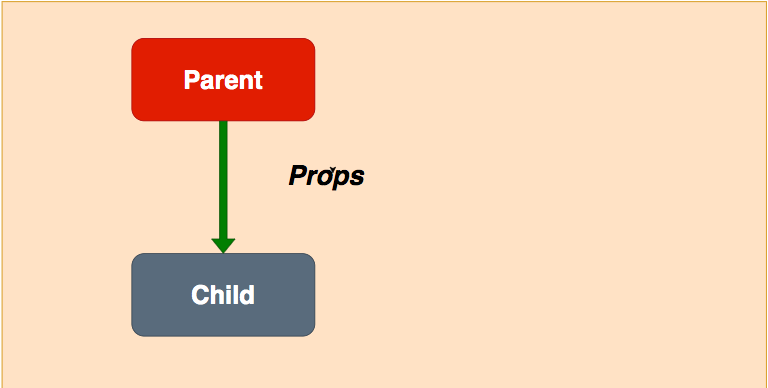
Parent to Child
The parent component to child component communication is the easiest one and can be achieved by passing props from the parent component to the child component.
Child to Parent
The child to parent communication happens with the help of callback functions as below. We define a function in the parent component and pass that as a prop to the child component.
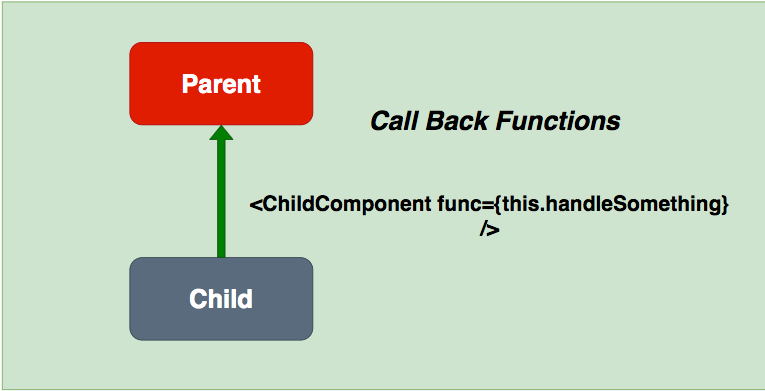
You can call this function in the child component like this.
props.func()Sibling Components
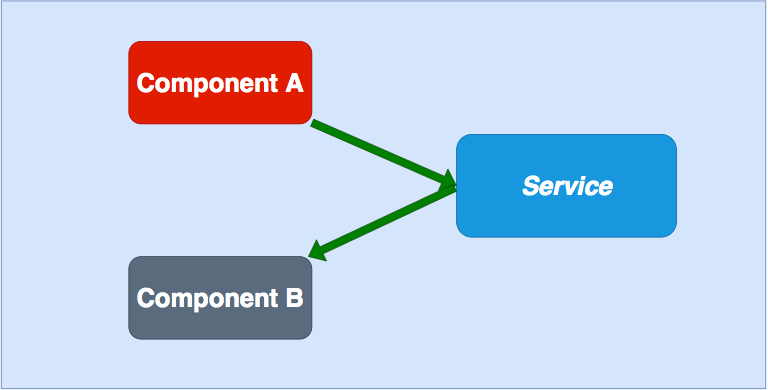
The communication among components happens with the services. You can call the function in the service and save data in the service so that any component that imports this service can access this data.
Implementation of Example Project
With the above basic knowledge, we can start implementing the example project below.
Header
The first thing we need to implement the header. We have already defined the header. Let’s add CSS to the App.css file.
Let’s place the header component in the App component HTML. Your application looks like this after adding a header in the app component.
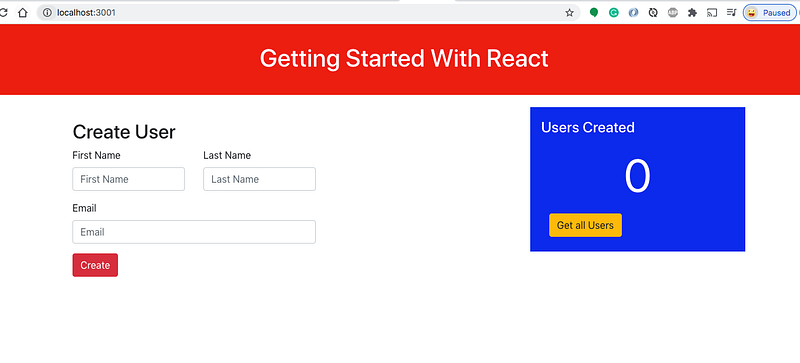
User Form
Let’s create a separate component for the user form for creating users. We used so many classes from the bootstrap library such as container, col-md-7, etc.
The screen looks like this after importing the above component in the App.js
import { CreateUser } from './components/CreateUser';return (
<div className="App">
<Header name={headerName} />
<CreateUser />
</div>
);
Display Board
We have a display board on the right side. Let’s create one component and add the necessary CSS changes to the App.css.
The screen looks as below once you place the display board component in the App Component.
User Interaction
We have added user form and display board components. Let’s see how we can take the user input and update the display board on the right side.
First, we need to add two methods to the App service as below. Since we don’t have a Backend we are maintaining the user’s array in the service at line number 1. These two methods are for creating users and fetching users.
Here is the updated App component. First, we imported two functions from the App service and defined the state for the component. We defined a user object for taking the input from the user form and users array to contain all the users and finally, numberOfUsers to count the users. We have defined a callback function called onChangeForm to take the input from the child component CreateUser.
We are passing user object, onChangeFunction, and the createUser functions as props to the CreateUser child component. Here is the CreateUser component. Every time you change anything we are triggering the onChangeForm function at line numbers 16, 20, 26. When you click the create button, we are involving the createUser function at line number 29.
Here is the display board component. numberOfUsers and getAllUsers are props for this component. The first one is just for the displaying number of users created and the second one is to fetch the users with the click of a button at line number 12.
Here is the demo of the user interaction.
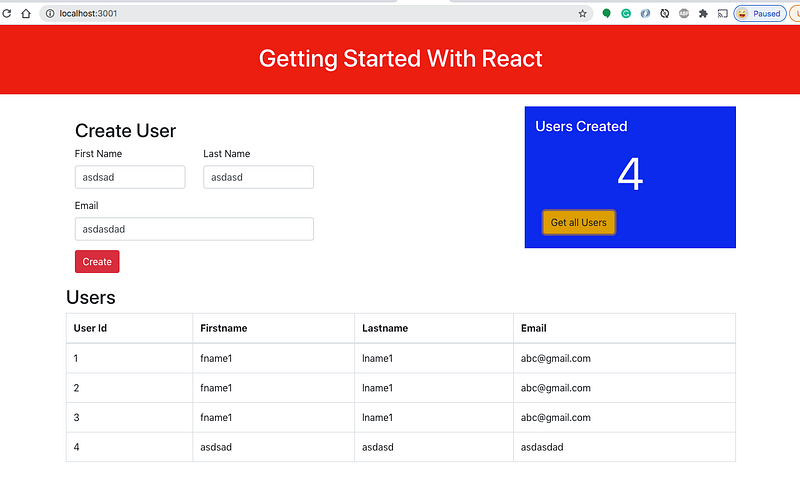
User List Table
Let’s add the user table. First, we need to add the users component which takes the users array as a prop and populates the table.
In the App Component, import the users and add that to that component.
The screen looks as below after all of our changes.
Unit Testing
Unit testing is as important as developing a project nowadays and it becomes an integral part of development. It actually boosts the quality of the code and the confidence of developers. Unit tests are written in the Jest framework in React.
Since we used create-react-app for creating the project, all we need to install this dependency.
npm install react-test-renderer --saveLet’s test the simple thing on our app. We have a heading Getting Started With React. Let’s test this. We have a file called App.test.js where we have written snapshot testing. We imported the App component that we need to test and get the header text and assert it.
Run this command and you can see the following result.
npm run test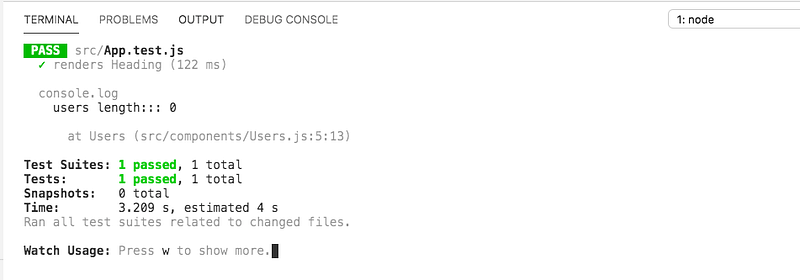
Summary
- React is a javascript library for web applications. You can build features quickly with simple, declarative templates.
- There are some prerequisites for this project. We need to have a NodeJS installed on your machine to install React-based dependencies. We need an editor to write the code. We are using a VSCode as an editor.
- The React CLI makes it easy to create an application that already works, right out of the box.
- The first thing we need to understand is the package.json file.
- The version starts with 0.1.0 and the name in the package.json is the name of your project. You can define your npm scripts under the scripts section so that you don’t have to remember long commands.
- The dependencies section contains all the dependencies that the project needs and whatever the dependencies under the devDependencies section
- The main file of the project is the index.js file. This is the starting point of your application in which we are importing the React and ReactDOM and passing the App component as an argument to the ReactDOM and also the id of the root element of the index.html.
- Everything is a component in react you can define components and import components into another component. One component may contain 100 components or one single component.
- There are three ways you can add styles to the React components such as External Stylesheet, Inline Styles, and Style objects.
- If you use functional components you won’t be using these lifecycle methods. We generally use React Hooks. It’s good to know there are lifecycle methods if you use class components instead of functional components. Here is the lifecycle diagram.
- Data flows from top to bottom in React applications. There are several ways to communicate between components.
- Unit tests are written in the Jest framework in React.
Conclusion
This post makes you get started with React and there are so many other features such as hooks, redux, etc. We will see more detailed posts in the future.