
How to Build NodeJS REST API with Express and MongoDB
A step by step guide with an example project
REST is an acronym for REpresentational State Transfer. Rest follows some guidelines to facilitate the communication between systems. In this post, we will how to build a REST API with NodeJS and MongoDB as a database. First, we will see how we start with Express Framework, create a structure and then we will see how to get started with MongoDB Atlas, create a database and finally configure the NodeJS application to read data from the MongoDB.
- Prerequisites
- Example Project
- Project Structure
- Setup MongoDB Atlas Cluster
- Create a Database
- Connect With Mongo Compass
- Configure Mongo In Express App
- CRUD Operations
- Logging
- Swagger
- Summary
- Conclusion
Prerequisites
There are some prerequisites for this post. You need to have a NodeJS installed on your machine and some other tools that are required to complete this project.
NodeJS: As an asynchronous event-driven JavaScript runtime, Node.js is designed to build scalable network applications.
Express Framework: Express is a minimal and flexible Node.js web application framework that provides a robust set of features for web and mobile applications.
Mongoose: elegant MongoDB object modeling for node.js
MongoDB: MongoDB is a general-purpose, document-based, distributed database built for modern application developers and for the cloud era.
VSCode: The editor we are using for the project. It’s open-source and you can download it here.
Swagger: API documentation
Postman: Manual testing your APIs
nodemon: To speed up the development
If you are new to NodeJS and don’t know how to build REST API with it, I would recommend going through the below article. We used the project from this article as a basis for this post.
How to write production-ready Node.js Rest API — Javascript version
Example Project
Here is the Github link for the example project you can just clone and run it on your machine.
// clone the project
git clone https://github.com/bbachi/nodejs-restapi-mongo.git
Here are the main and controller classes. The server.js file is the main file and starting file of the API and the controller is called from here.
Here is the controller file which has four methods.
We are using nodemon for the development phase that speeds up your development. You just need to run this command after installing all dependencies.
// install dependencies
npm install
// start the server in development phase
npm run dev
Project Structure
Let’s understand the project structure that we have here. The starting point of the application is server.js and we have all the scripts, dependencies, etc in the package.json.
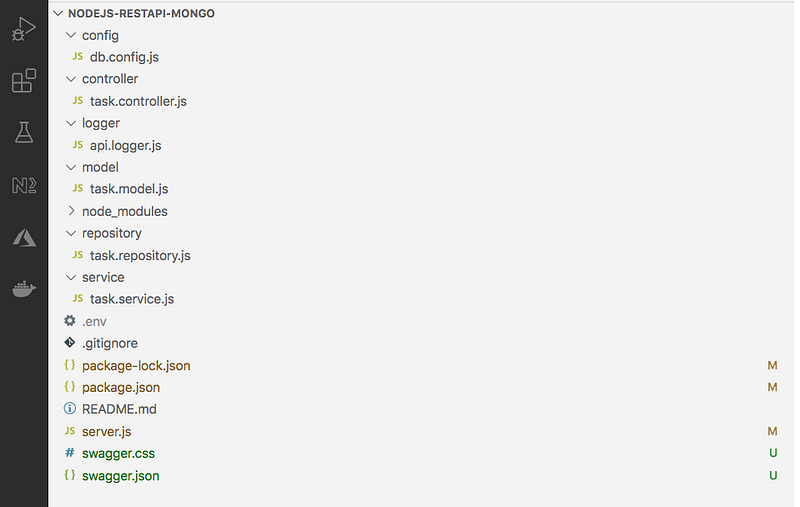
We have a controller, service, and repository in place. All the logging-related configuration goes into api.logger.js under the folder logger. We have the .env file for all the environment-related configurations. We have swagger.json and swagger.css for the swagger docs. We have a db.config.js file for all the database configurations.
Setup MongoDB Atlas Cluster
The core of MongoDB Cloud is MongoDB Atlas, a fully managed cloud database for modern applications. Atlas is the best way to run MongoDB, the leading modern database.
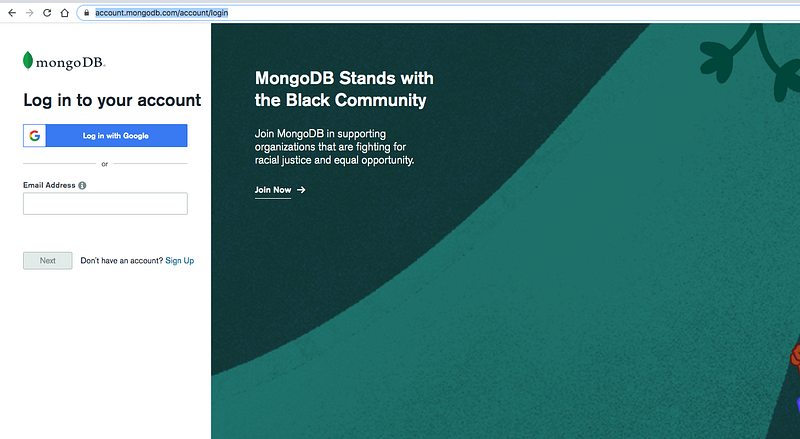
Let’s create your MongoDB Account here. You can either log in with any of your Gmail accounts or you can provide any other email address to create the account.
Once you log in with your account you will see the dashboard below where you can create clusters.
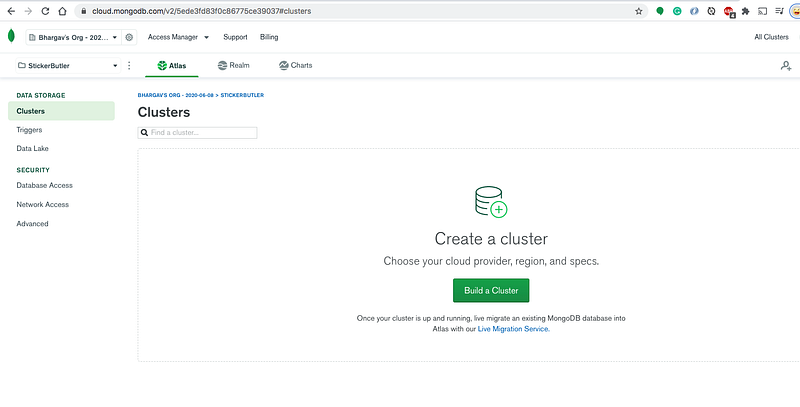
Let’s create a cluster called todo-cluster by clicking on the build a cluster and selecting all the details below.
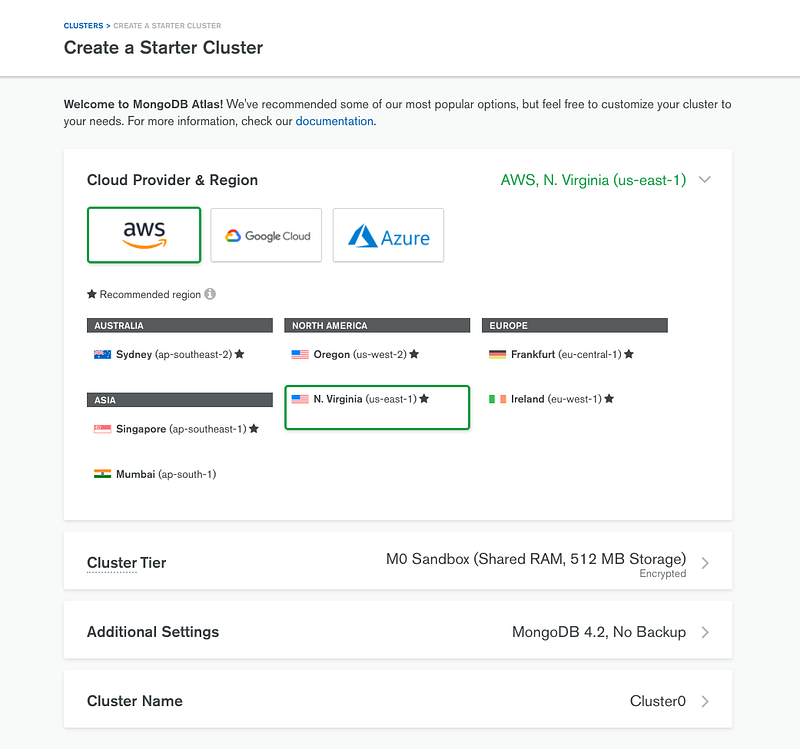
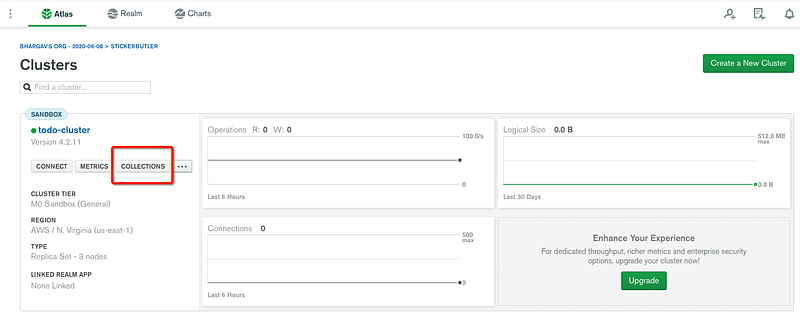
Here is the cluster we created below.
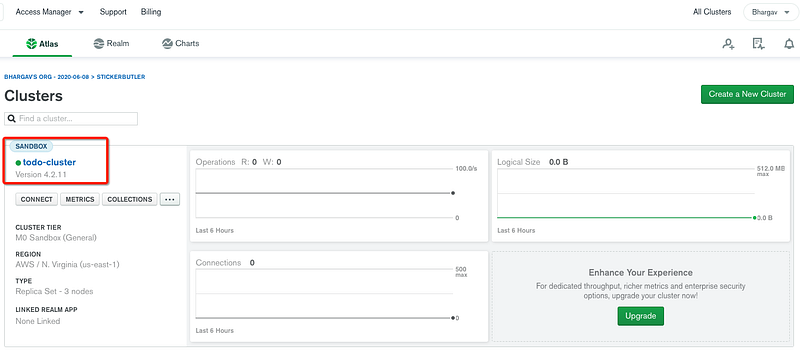
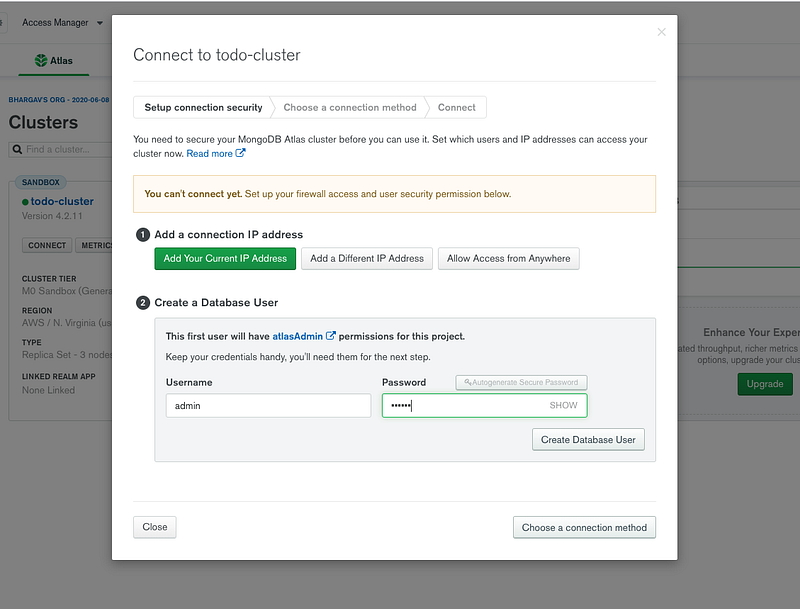
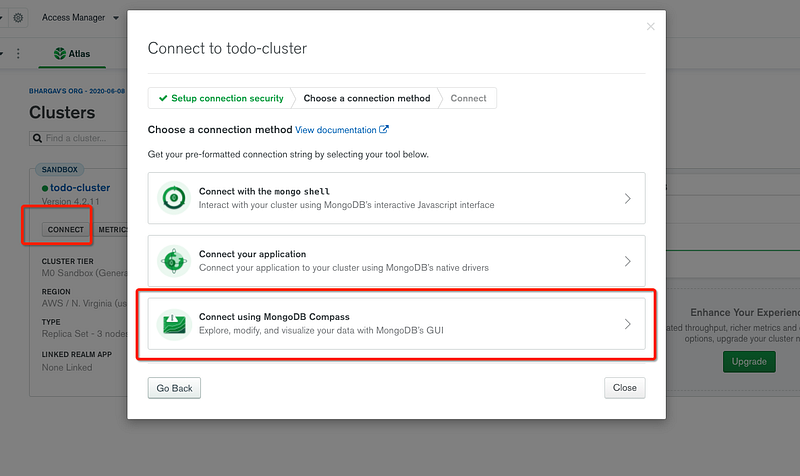
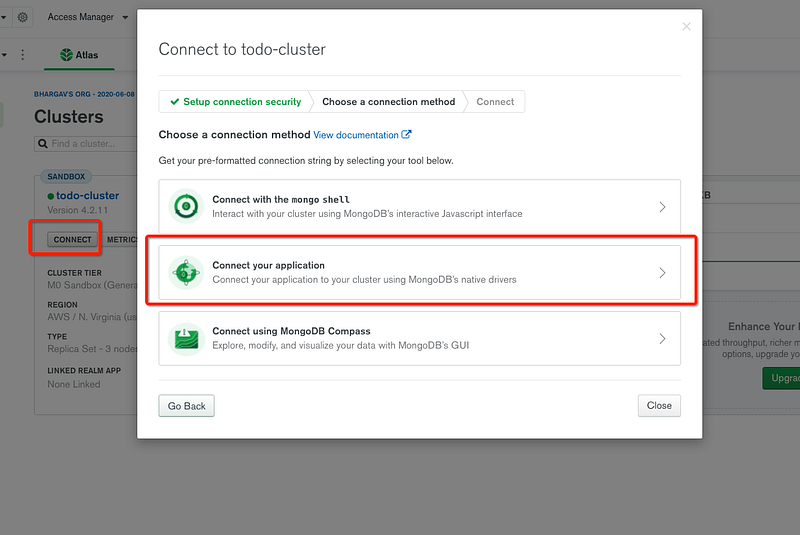
You can click on the connect button to see the details about connecting to the cluster. You need to create a user and Allow Access from anywhere for now.
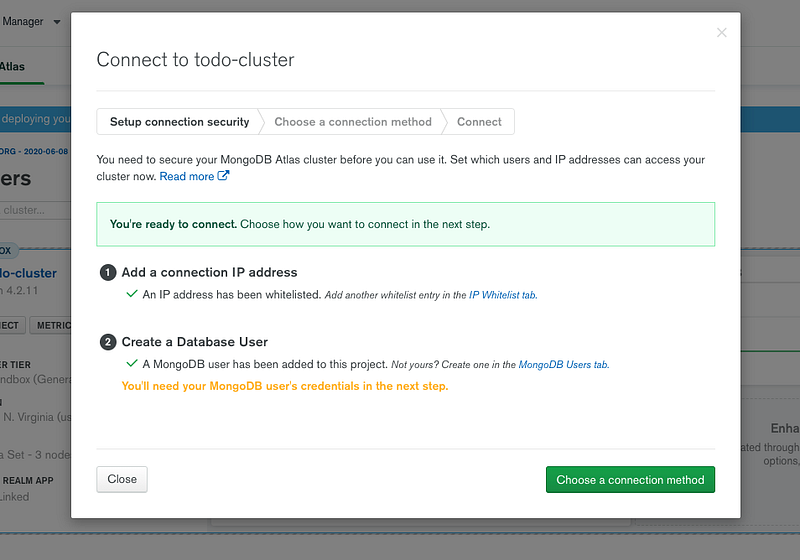
You can see three ways of connecting to the cluster on the next screen.
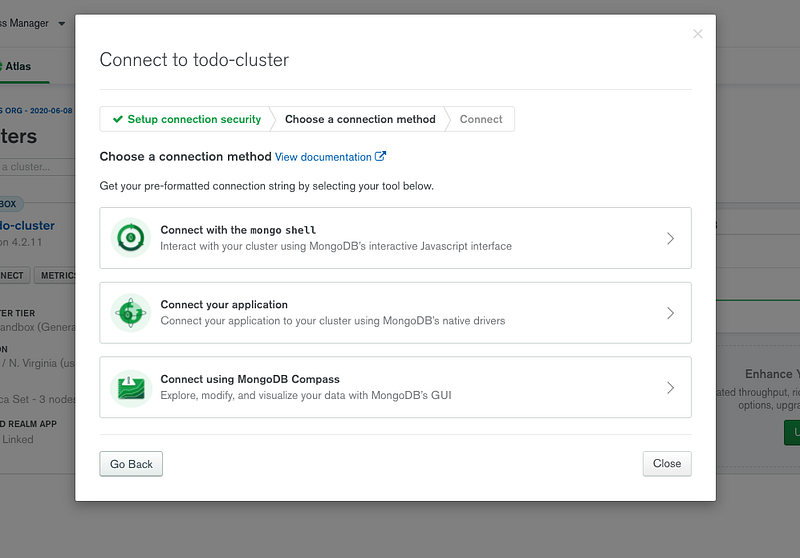
We will see all these three ways to connect to the cluster in the next sections.
Create a Database
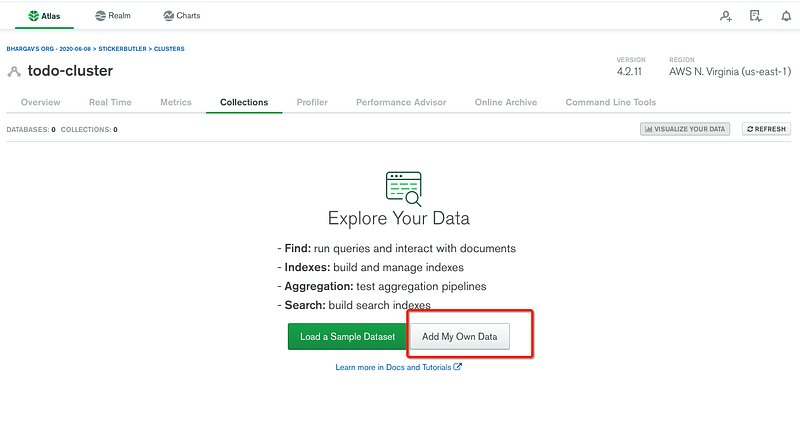
We have created a cluster and it’s time to create a database. Click on the collections to create a new database as below.
Click on the Add My Own Data Button to create a new database.
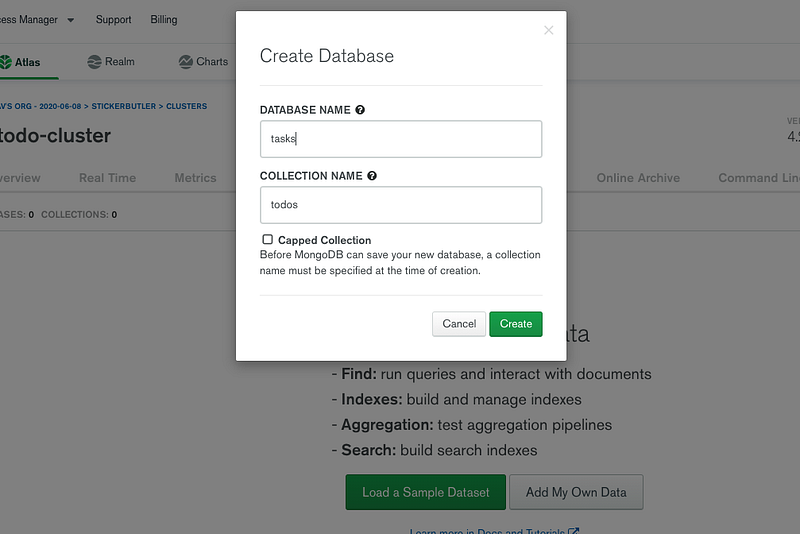
I have given a database name as tasks and the collection name is todos.
You will see the below dashboard once the database is created. We have a database with empty collections.
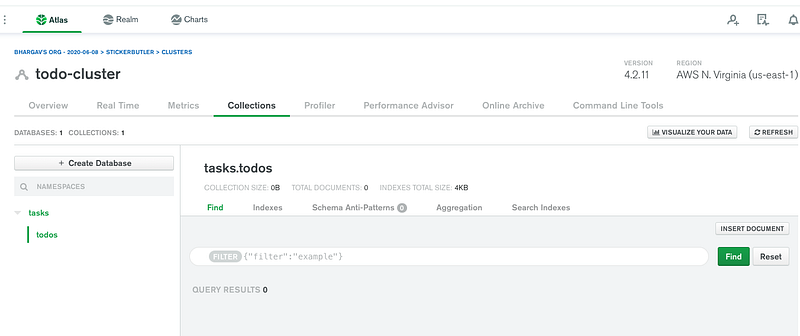
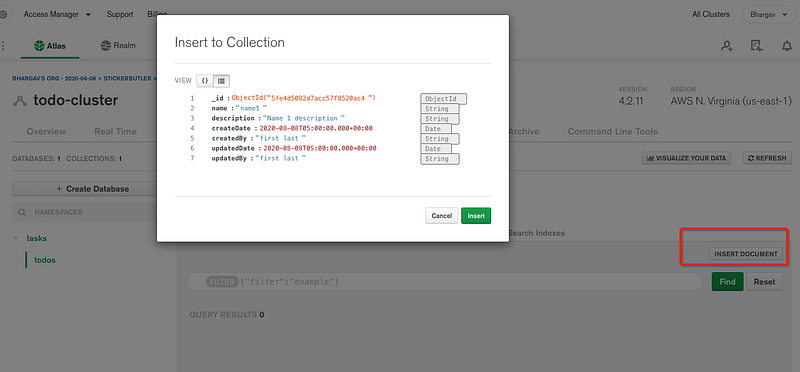
Let’s insert the first document into the collection by clicking the button insert document
Connect With Mongo Compass
We have seen three ways we can connect to this cluster and read the collections. Let’s connect to the database with Mongo Compass. The first thing we need to do is to download and install Mongo Compass from this link.
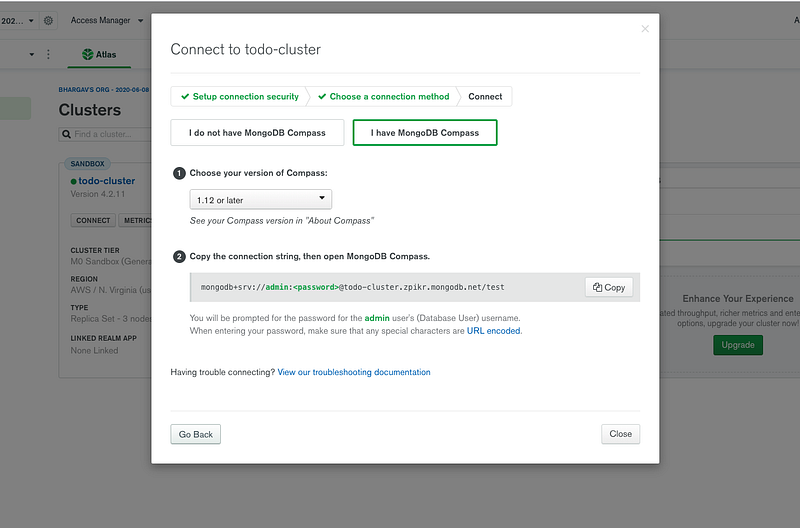
Let’s get a connection string from the Atlas dashboard as below.
Replace the password with your password that you created above.
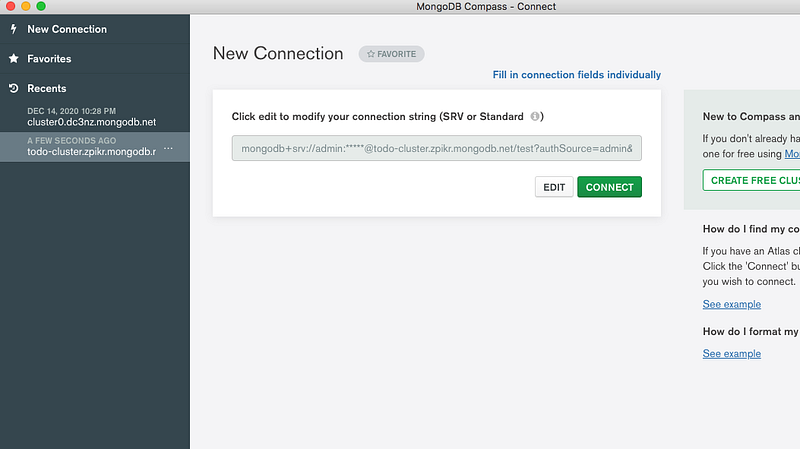
Let’s connect to the database with the connection string
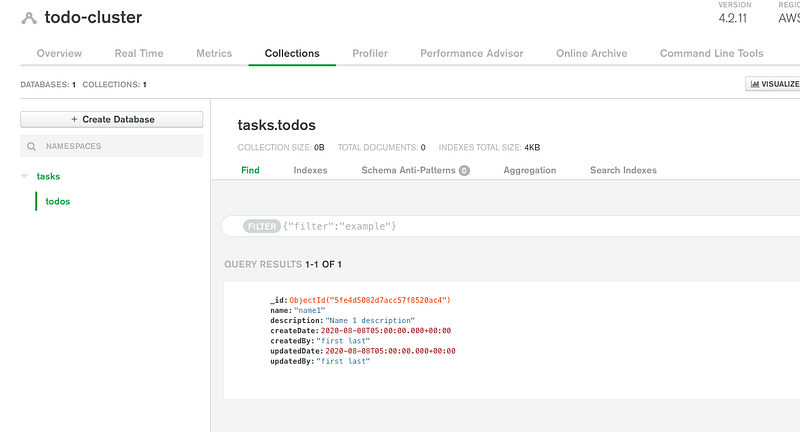
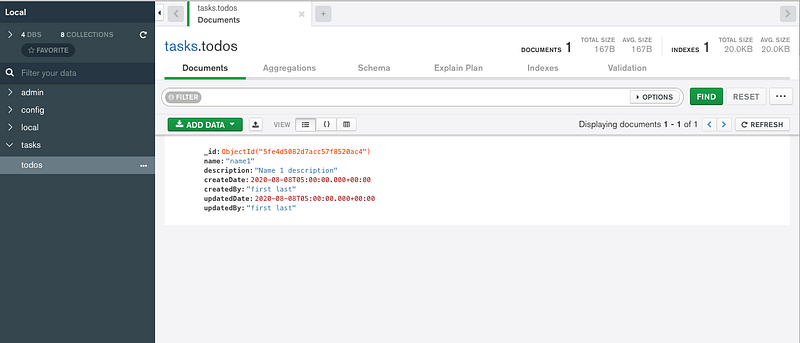
You can actually see the same collection in the MongoDB Compass as well.
Configure Mongo In Express App
Let’s configure the Mongo Client from our application. The first thing we need to do is to get the connection string.
Make sure you select the right language and the right MongoDB driver version.
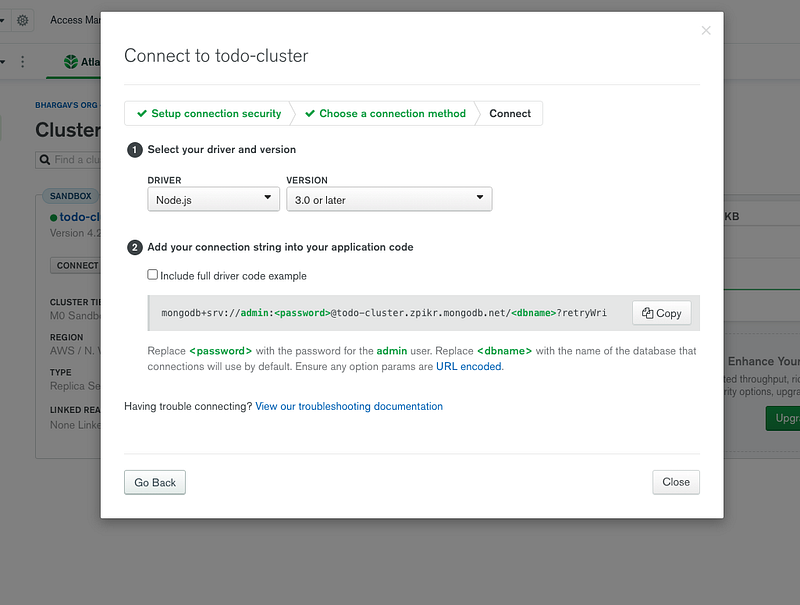
Let’s place the connection string and database name in the application properties file as below. You have to URL encode the password if you have any special characters in the password.
We need to use the dotenv library for environment-specific things. Dotenv is a zero-dependency module that loads environment variables from a .env file into process.env. Storing configuration in the environment separate from code is based on The Twelve-Factor App methodology.
The first step is to install this library npm install dotenv and put the .env file at the root location of the project
We just need to put this line require('dotenv').config() as early as possible in the application code as in the server.js file.
Let’s define the configuration class where it creates a connection with the connection string we just copied from the Atlas Dashboard. We are using Mongoose to connect with MongoDB for all the queries. Mongoose makes it easy for you to interact with MongoDB. We are fetching the Mongo connection string with the dotenv library and connecting it to MongoDB with Mongoose. We are exposing two functions from this file connect and disconnect.
We need to define a model for our collection in MongoDB as below. We need to define the schema for the collection and then you need to pass that schema to the model and export it as a module.
Finally, Here is the repository class where it uses the above model for all the CRUD operations.
We have this service file in between the controller and repository for any data manipulation if needed.
With all the above files in place, we can hit the following URL.
http://localhost:3081/api/tasks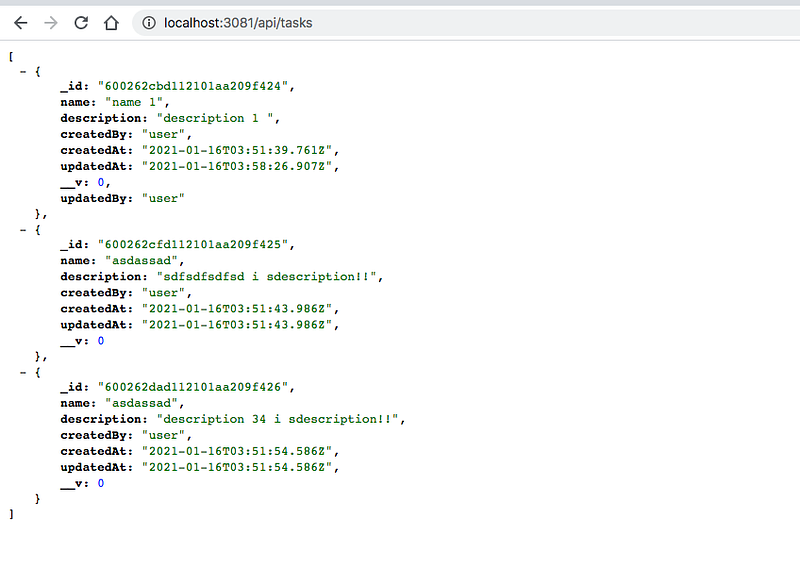
CRUD Operations
Let’s do some CRUD Operations.
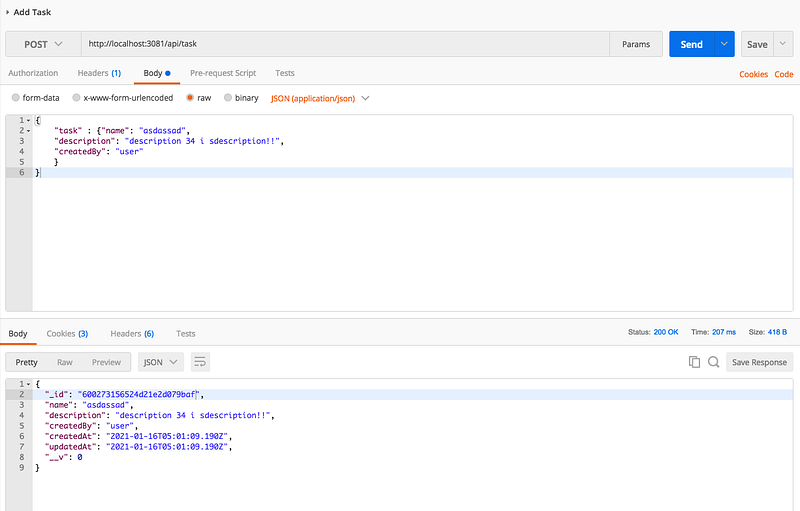
Create Task
Create Task is the post-call that takes the request body and saves that into the todos collection.
URL: http://localhost:3081/api/taskRequest Body:{
"task" :
{"name": "asdassad",
"description": "description 34 i sdescription!!",
"createdBy": "user"
}
}
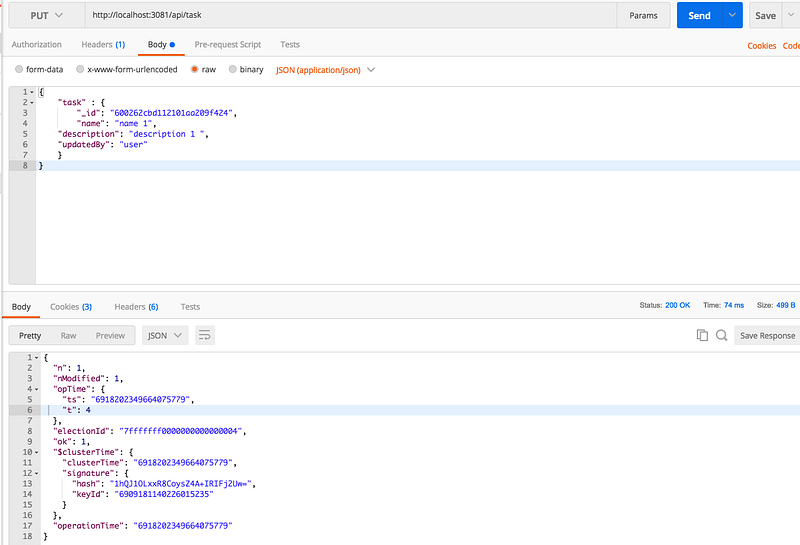
Update Task
Update Task is the put-call that takes the request body and updates that into the todos collection with the same id.
URL: http://localhost:3081/api/taskRequest Body:{
"task" : {
"_id": "600262cbd112101aa209f424",
"name": "name 1",
"description": "description 1 ",
"updatedBy": "user"
}
}
Delete Task
Delete Task is the delete call that takes the id as a path variable and deletes it from the todos collection.
URL: http://localhost:3081/api/task/60026294d112101aa209f423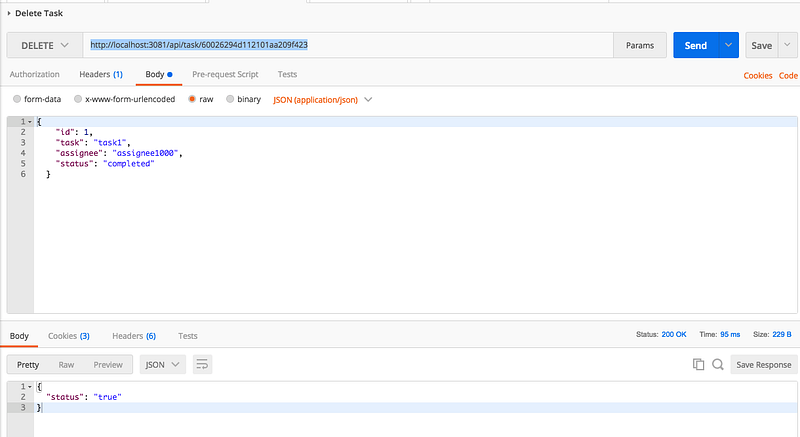
Get Tasks
Get Tasks is a simple GET URL that retrieves all the tasks from the todos collection.
URL: http://localhost:3081/api/tasks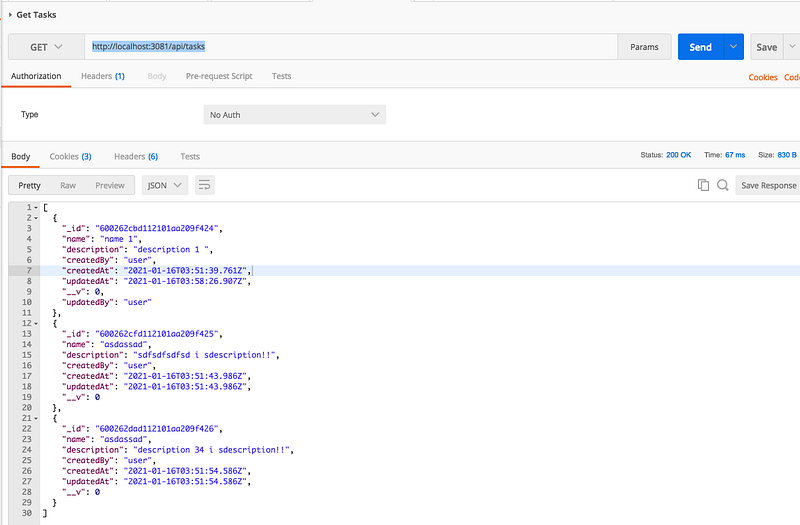
Logging
There are so many logger libraries and I used the pine library for the logging. It’s always best practice to have a separate file for logging and importing that file everywhere. You can configure and change the underlying logging library with one file change.
I have defined the following file.
You can import this in any file like below and use these methods.
Swagger
The Swagger is a tool that simplifies API documentation for the services. With Swagger, you can design your API and share it across teams very easily.
The first thing we need to do is to install swagger-related dependencies with the following command.
npm install swagger-ui-express swagger-jsdoc --saveThere are two things you need to understand before implementing swagger docs to your REST API.
Swagger.json
The first thing is to add the file swagger.json to define the operations. You can define schemas for the request and response objects, you can define in parameters and body and descriptions of each Http operation, etc.
Custom CSS
You can have your own custom CSS for your swagger docs Rest API. You need to define the swagger.css file where you can put all your CSS that can be applied to the Swagger page.
Once you have these files swagger.json and swagger.css in place, it’s time to add the swagger-related code in the server.js.
// import library and filesconst swaggerUi = require('swagger-ui-express');
const swaggerDocument = require('./swagger.json');
const customCss = fs.readFileSync((process.cwd()+"/swagger.css"), 'utf8');// let express to use this
app.use('/api-docs', swaggerUi.serve, swaggerUi.setup(swaggerDocument, {customCss}));Here is the complete server.js file
You can start the project in the development environment with the following command and access the
// start the project
npm run dev
// Access the swaggger docs here
http://localhost:3081/api-docs/#/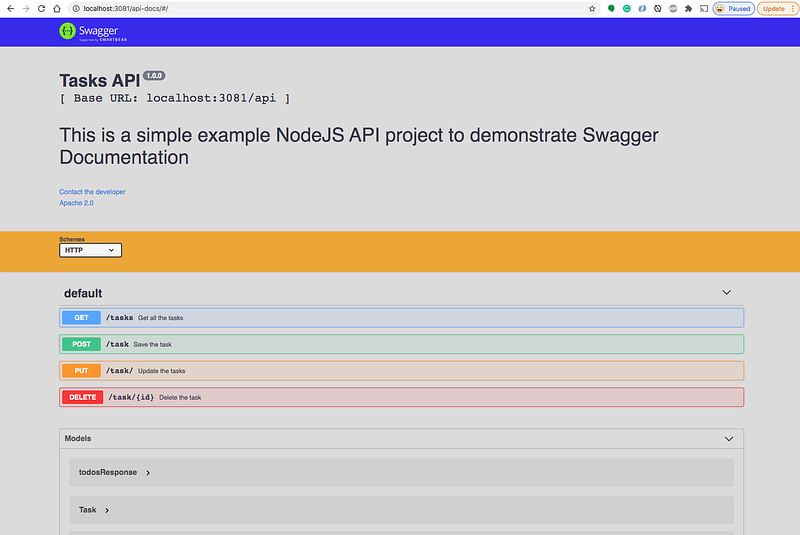
Summary
- REST is an acronym for REpresentational State Transfer. Rest follows some guidelines to facilitate the communication between systems.
- The core of MongoDB Cloud is MongoDB Atlas, a fully managed cloud database for modern applications. Atlas is the best way to run MongoDB, the leading modern database.
- You can log in with your Google account and you can create clusters and databases.
- You can connect to the cluster in three ways: Mongo Shell, MongoDB Compass, and Through application.
- You can get the connection string and configure the NodeJS application to talk to MongoDB with Mongoose, etc.
- The Swagger is a tool that simplifies API documentation for the services. With Swagger, you can design your API and share it across teams very easily.
Conclusion
We have seen how to set up a MongoDatabase and configure it in NodeJS API. In future posts, we will see how to Dockerize and put this API in the cloud and many more.


