
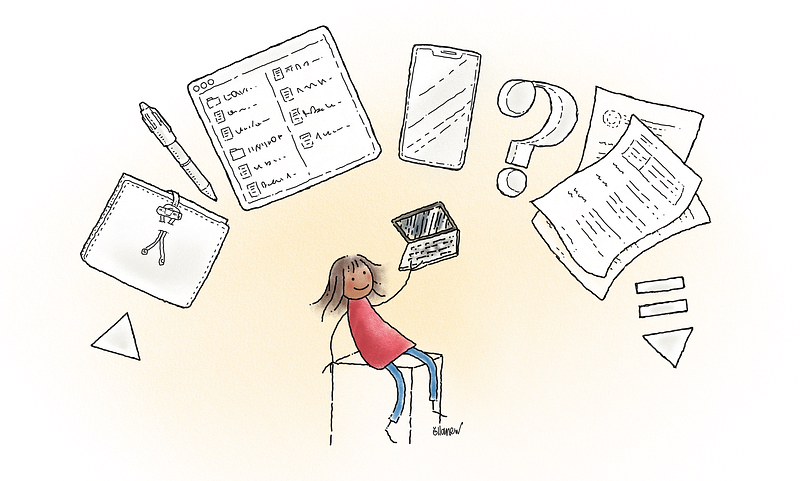
You’re Only 3 Simple Steps and 4 Apps Away From a Paperless Mac
A 5-minute system for organising your digital life (while keeping the paper that matters)
Deciding to go paperless is the easy part.
Knowing where to put things, and being able to find them when they’re needed? That can feel overwhelmingly hard! I’ve spent four years refining a paperless workflow for my design business and my personal life, and I’m happy to say that it now works well on all my Apple devices¹.
3 Steps
Every effective paperless method addresses three core functions: capture, file, and retrieve.
1. Capture
You’ll need at least one capture point—or inbox—for everything you choose to save in a digital form.
David Allen, in his Getting Things Done (GTD) method, recommends only having the smallest number of inboxes that you can function well with.
I have six capture points for important things (note: not one of them is a random, loose piece of paper!):
- Paper notebook (thoughts, notes, goals) Click here to read about the book I use
- Physical inbox for papers to be scanned
- Email (tasks, information, appointments)
- Texts and other Instant Messages (tasks, information, appointments)
- Transitory digital notes for information and ideas that don’t yet have a home—I use Drafts
- Downloads folder on my Mac
Where do you turn when you need to write something down? Make a list of every single inbox in your life. Go back over the list and trim it down to the essential few.
2. File
Step two requires sorting your digital information into some kind of structure.
My digital life changed forever the day I discovered Tiago Forte’s PARA system. PARA stands for Projects, Areas, Resources, and Archive.
Everything you have ever and will ever save — in any format — falls into one of these categories.
- Projects. These are multi-task goals that you’re already committed to. Create a folder inside the Projects folder for each project you’re currently working on. E.g. house renovations to freelance jobs.
- Areas. The broad categories of things you are responsible for. Both personal and professional. Create a folder within the Areas folder for everything you need to maintain to a particular standard. Some of mine are Finances, House and Garden, Website maintenance, and Marketing.
- Resources. What topics or themes are you interested in? Create a folder for each inside your Resources folder. E.g. Apps, Craft, Death, Graphic Design, and Teaching and Technology.
- Archive. This is the hold-all for any file you don’t know where to store, and for those you’ve finished with and may or may not need again. Call it a procrastination bucket if you like, even though it isn’t one. You’ll almost certainly find it helpful to refer to elements of a past project after it’s been dragged into this folder.
You can read more about the PARA method on Tiago’s website.
I’ve created the same four folders in Dropbox, iCloud, GoodNotes, and Noteshelf. Because I have the same structure in every app or storage system, it’s easy to find things because I’m always in familiar territory.
3. Retrieve
Now that you’ve captured and organised a particular file, how will you go about finding it again?
Try this 3-pronged approach:
- Careful file naming protocol, keywords and tags
- Maps Of Content/backlinks
- Advanced software search tools (see suggested apps in the next section)
When naming your files, choose no more than four highly relevant, descriptive words. No abbreviations unless they’re common and easy to remember. For names that include a date, always begin the name with the date in YYYY-MM-DD format. A well thought out tagging or keyword system can be helpful.
Remember, you are naming these files for future-you who has forgotten what’s inside.
Maps Of Content are index pages to your work when it’s not tied to one location. MOCs are very well suited to notes apps that allow hyperlinking to other notes. They can be a great time-saving reference point for projects or areas of interest. I’ve written about how I use MOCs here.
4 Apps
You’ll need one app from each of the four app categories below to help you with the three steps from the previous section.
- Scan
- Notes
- Calendar/Tasks
- Retrieve
1. Scan
A dedicated scanner is usually the best option, but you’ll also need something on the go. While your phone’s camera can probably do a reasonable job with snapping pictures of documents you’re looking to digitise, there are better options.
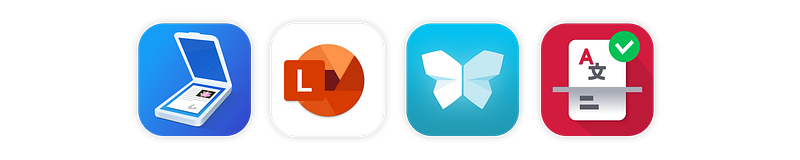
Scanner Pro (link) This is my main scanning app, bought when it was a 1-time purchase. Readdle is kindly allowing past purchasers access to new features — for the moment. Scanner Pro has now moved to a freemium model with just the basics. More advanced features are available to new users at $19.99 a year.
Scanner Pro’s Text Vision allows you to convert writing in images to editable text in 26 languages, and also allows for searching within PDFs. They have a good file management system and automatic uploading to the cloud.
Office Lens, Evernote Scannable and Scanbot merit a mention, though I can’t give an opinion because I don’t use them myself. Yes, I know there are lots more with bucketloads of reviews. Pick one and don’t worry about whether or not it’s mentioned here.

2. Notes
To determine which notes app will meet your needs, first make a list of everything you need it to do.
Obsidian (link) Working on a folder of plain text files, Obsidian is top of my list for organising notes. Ok, it’s not just my favorite: I’m a bit of a raving enthusiast at the moment! I’m currently using it for everything from my personal planner and goal tracker, to project management and my Zettelkasten. It truly is my second brain. You can read about how I use it here, and in conjunction with other apps as a task management system, here.
Notejoy (link) I bought Notejoy as a lifetime deal a couple of years ago when looking for an Evernote alternative. It’s an inexpensive alternative to Evernote and I wholeheartedly recommend it. It’s a fantastic app with a built-in web clipper, and backlinks. If you’re after a notes app with smooth collaboration features, Notejoy could be just what you need. I chose Obsidian over Notejoy because I’m a plain text convert and I wanted ultimate control over my files (no proprietary formats).
Noteshelf link I use Noteshelf for handwritten notes, and my interactive digital planner. Killer feature: the pencil tool! You can read about why I chose it over Notability and GoodNotes, here. All three apps are excellent, so check each out carefully and choose the feature set that suits you best.
Apple’s Notes App A lot has been said about this unassuming app; it’s much more capable than many people initially assume. As a light-weight keeper of thoughts, notes and ideas you can’t go wrong with Notes. If you find yourself outgrowing its limited feature set, take a look at my other suggestions.

3. Tasks and Calendar
I track projects and tasks in Obsidian, with the help of Reminders. BusyCal has replaced Fantastical for my everyday calendar, because it’s more price and Reminders-friendly.
Reminders (link) Apple’s stock reminder app is one I ignored for years, but it’s recently improved to the point where I decided to give it a serious go. Thanks to tips from Jon Mitchell, who moved his tasks from Omnifocus to Reminders (link), it’s working very well for me.
BusyCal (link) Apple’s stock Calendar app is a great choice, as is Fantastical. I’ve given BusyCal the calendar slot in this list because of its integration with Apple’s Reminders.
BusyCal is a one-time purchase. I’m not too keen on the name as I prefer to think of myself as productive rather than busy, but it’s a good app. Part of the Setapp subscription, but I owned a copy before jumping on the Setapp wagon. If you use Apple’s Reminders in any serious way, BusyCal is a great choice for a Calendar app. I like its Reminders integration much more than Fantastical’s.
Things (link) I still have a soft spot in my heart for Things. I remember how exciting it was when Things 3 came out, and how wonderful it felt to see my projects and tasks surrounded by their beautiful UI! This is a top-notch software and I’m happy to recommend it to people who want a dedicated task management app. It’s certainly not cheap, especially since you need to buy it separately for each device.
If you already have your tasks and projects in another app and it’s working well for you, stick with it.

4. Catalog/Retrieve
Here’s where we pull everything together! There’s no point in your efficient information capture system and beautiful folders if they’re an attractive cover for what’s essentially a black hole. Here are three apps that can help you fish out what you need, when you need it.
NeoFinder (link) This app would have to be the most exciting, useful, powerful, un-talked about app of the century. Hyperbolic, but (mostly) accurate!
NeoFinder can catalog your photos, drawings and any other type of file. It can keep catalogs on your hard drive complete with metadata, notes and ratings of the contents of any removable drive you choose to have it process. Affinity Designer and Photo files? Check!
I started using this app more than 20 years ago when it was still wet behind the ears and went by the name CD Finder. I relied on it heavily to keep track of the many disks I was using at the time. It’s free for up to 10 catalogs, so that means it’s completely free if all you’re cataloguing is the current contents of your hard drive.
As a designer with a LOT of tiny illustrations going back over a quarter of a century, I rely on NeoFinder to help me reuse what I’ve already created instead of reinventing the wheel because I’ve forgotten it already exists.
HoudahSpot (link) A super-powered search tool for anything on your hard drive, with as many conditions as you can muster. HoudahSpot allows you to save searches as templates.
It’s available as a standalone product, or as part of the Setapp subscription. I have to admit that while HoudahSpot is a great product, I’ve rarely needed to use it.
EasyFind (link) I’m new to this one and am impressed with what I’ve seen so far. It’s a free utility put out by DEVONthink—an app I’m currently looking at integrating into my paperless system. Think of it as a Finder search on steroids. Not as powerful as HoudahSpot, but works along similar lines.
5 Minutes
The irony of a 5-minute method being a 10-minute read is not lost on me! I’m impressed you made it this far. Take a deep breath and try to relax—it’s not a race. There is no timer, and even if there was it wouldn’t start until you were ready.
I can’t promise you paperless bliss in 5 minutes, but I can say with confidence that anyone can set up the bones of this system in 300 seconds or less.
If you’re feeling overwhelmed, forget about the past (for now) and start where you are. Don’t try to catch up by scanning years worth of documents before implementing this, or any other system. The moment you need to retrieve something that’s still in paper form is a good time to digitise and file that item.
By all means process a bunch of papers when you have even 5 minutes to spare, but don’t use your mountains of paper as an I’ll-never-be-organised weapon to beat yourself with. Go forward in the right direction today and, given time, the past will fall into its proper place.
I’ve still got piles of things that “should” have been digitised 10 years ago. That they’re not, tells me something about where they sit in my overall list of priorities. No big deal. Going through the motions of putting something in the trash is an excellent way to determine how much it means to you. If you wouldn’t care enough about something to pull it out of the trash, then that’s where it belongs.
Keep the paper you love
Am I completely paperless? No, and I don’t want to be.
My life wouldn’t feel complete without some beautifully bound books on my shelf, my daily notebook (and wonderfully practical pen), photos and handwriting samples from my great-grandparents, and the sticky notes I keep handy to write messages to myself and others.
When I think of the term paperless, my mind hears it as “Paper; less.”
The aim isn’t to be dogmatic about going completely digital. It’s to use the tools we have in front of us to do what they’re best at and to treat paper, and the limited time and space we have to store and retrieve it, as the precious resources they are.
Over to you: take it away!
3 Steps
- Capture — as few inboxes as possible
- File — use the PARA system
- Retrieve — logical file names, Maps Of Content (index pages)
4 App Categories
- Scan — Scanner Pro, Scanbot
- Notes — Obsidian, Notejoy, Noteshelf, Apple Notes
- To Do — Reminders, BusyCal, Things
- Catalog / Search — NeoFinder, HoudahSpot
5 Minutes
Using the structure I’ve outlined above you can set yourself up with the basics of a mighty fine paperless system on your Mac, iPad and iPhone in less than 5 minutes. Tackle any backlog in 5-minute increments and it’ll soon whittle down to a manageable size.
Best of luck! I’d love to hear how you go.
¹ My devices: 15 inch MacBook Pro, 12.9 inch iPad Pro with Magic Keyboard and (new) Apple Pencil, iPhone X, Apple Bluetooth keyboard and Magic Trackpad.


