
Running Apache Spark on EKS with AWS Spot Instances
Effective cost-saving for Apache Spark workloads on EKS with AWS Spot Instances
Apache Spark is a data processing framework that can perform rapid processing tasks on huge datasets and can distribute the data processing tasks across multiple nodes. With the rapid containerization of applications, organizations have also started running spark on a containerized platforms like Kubernetes and have also been using them in production. Ideally, there are two ways of running spark on Kubernetes.
a) Spark Submit: This is a single script used to submit a spark program and launch the Kubernetes cluster application.
Example:
b) Spark Operator: The spark operator allows Spark applications to be defined in a declarative manner and supports one-time Spark applications with SparkApplication and cron-scheduled applications with ScheduledSparkApplication.
Example:
Once you are convinced with any of the modes mentioned above, you decided to run your spark workloads on EKS. But, are you running it the right way? Let me give you an example here. Let us assume that your application Kubernetes pods require an instance type of t2.micro, but your spark workloads might require the worker nodes to be of type t2.large. You can create different autoscaling groups and make these pods scheduled on the correct type of nodes using nodeSeclector / nodeAffinity. This way of splitting the nodes is 50% effective. How do we achieve the rest of 50%? This can be done by using AWS spot instances. Yes, as the spark workloads are not kept running 24/7, we can have an autoscaling group configured with spot instances and having the min count to 0. Spot Instances are up to 90% less cheap than on-demand instances. In the scope of this article, we will understand how to set up an EKS cluster with a Spot Instances node group to run the spark workloads.
What is the entire story all about? (TLDR)
- Setup an EKS cluster with 2 different node groups ( On-Demand and Spot Instance Node Groups).
- Execute the spark workloads on the Spot Instances ( Using both spark-submit and Spark Operator ).
What is not covered in this article
- How to write a spark-submit file / Spark Operator file.
- How to set up a Production-based EKS cluster.
Prerequisites
- AWS Account.
- Helm, eksctl, spark-submit binary installed.
Story Resources
- GitHub Link: https://github.com/pavan-kumar-99/medium-manifests
- GitHub Branch: aws-spot-spark
Creating an AWS EKS cluster using eksctl
Well, there are many ways in the market on how an EKS cluster can be created. Out of them, the most used ones are Terraform, eksctl. We will use eksctl in the scope of this article. eksctl is a simple CLI tool for creating and managing clusters on EKS — Amazon’s managed Kubernetes service for EC2. It is written in Go, uses CloudFormation, was created by Weaveworks. The cluster config can be customized in a file ( YAML format ). eksctl can parse the input file and create the cluster out of it. Here is the eksctl config file that we would be using to create the EKS cluster.
Let us now understand the config file
a) metadata.name: The name of the EKS cluster to be created.
b) managedNodeGroups.name: The name of the Managed Kubernetes worker node groups.
c) managedNodeGroups.instanceType: The type of instances to be used in the node group.
d) managedNodeGroups.min/max/desired: The min, max, desired count of the autoscaling node groups.
e) managedNodeGroups.spot: Boolean value to specify if the node group should have spot instances.
So, the above config creates an EKS cluster with 2 managed node groups.
- eks-medium-on-demand-node-group: This node group gets created with a minimum of 1 t2.micro instance and auto-scalable to 8. All of the instances here are on-demand instances.
- eks-medium-spot-node-group: This node group gets created with 0 instances. Yes, you've seen this right. The node group will have 0 spot instances and be scalable to a max of 5 instances.
Let us now create the EKS cluster.
$ git clone https://github.com/pavan-kumar-99/medium-manifests.git \
-b aws-spot-spark
$ cd medium-manifests/$ eksctl create cluster -f eksctl-cluster.yaml

One point to be noted is that eksctl doesn't tag ASG’s with the tags specified in the config file. The ASG’s should be tagged manually for the Cluster Autoscaler to scale up the ASG’s that have 0 nodes ( For the nodeAffinity / nodeSelector to work ).
Let us now install the Kubernetes cluster autosclaer. Kubernetes Cluster Autoscaler automatically resizes the number of worker nodes in a given cluster, based on the demands of your workloads. You don’t need to manually add or remove nodes or over-provision your cluster. Instead, you specify a minimum and maximum size for your cluster and the scaling is automatic and is done by the cluster autoscaler on its own. I have made a detailed article on Kubernetes cluster autoscaler. I will share the link here once I publish it. For now, let us install the cluster autosclaer helm chart.
$ git clone https://github.com/pavan-kumar-99/medium-manifests.git \
-b aws-spot-spark
$ cd medium-manifests/$ helm repo add autoscaler https://kubernetes.github.io/autoscaler$ helm upgrade -i medium-ca-aws autoscaler/cluster-autoscaler -f ca-values.yaml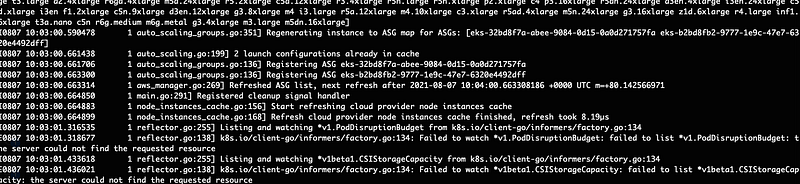
You should now see that the cluster autoscaler pods detect the correct autoscaling groups. Alright, let us now check the nodes.

Deploying Spark App with Spark Submit
We now have a single node created, which is an on-demand node. It is also evident from the node labels shown from the node. Let us now use the spark-submit command to submit a spark job. Well, the difference this time is the addition of this new node selector parameter in the spark-submit command.
$ --conf spark.kubernetes.node.selector.nodegroup-type=spotAs per spark’s documentation spark.kubernetes.node.selector.[labelKey], adds to the node selector of the driver pod and executor pods, with key labelKey and the value as the configuration's value. So, the final spark-submit job will look like this
Before we submit the job, a Kubernetes service account should be created for the driver pods to create the executor pods and access their services.
$ git clone https://github.com/pavan-kumar-99/medium-manifests.git \
-b aws-spot-spark
$ cd medium-manifests/$ kubectl apply -f spark-sa.yaml $ ./spark-submit.shAs soon as I submit my spark job, I should see that the nodes in the spot instances ASG start scaling up from 0 to 2. ( Based on the number of the spark-submit jobs created ).


Let us also try the same with Spark Operator to see if this works.
Deploying Spark App with Spark Operator
The spark operator allows Spark applications to be defined in a declarative manner and supports one-time Spark applications with SparkApplication and cron-scheduled applications with ScheduledSparkApplication. Let us first deploy the spark operator.
$ helm repo add spark-operator\ https://googlecloudplatform.github.io/spark-on-k8s-operator$ helm install spark-operator spark-operator/spark-operator\
--namespace spark-operator --create-namespace$ k get po -n spark-operatorNAME READY STATUS RESTARTS AGEspark-operator-5fb7bcf764-qm8np 1/1 Running 0 21mLet us now deploy the spark application. The spark application looks like this.
Out of the entire yaml file, the section to be highlighted is the nodeAffinity section. This affinity makes sure that the spark application ( Both driver and executed can be deployed on the spot instances ). Unlike spark-submit where both the driver and executor had the same nodeSelector ( Spark submit currently doesn’t support node affinity ), in the spark operator ( SparkApplication ) we have the flexibility to specify different affinities to both driver and executor. There might be situations where we might want to run the driver pods on “on-demand” nodes and executor pods on the “spot” nodes. In such cases spark operator allows us to create affinities separately for both driver and executor.
$ git clone https://github.com/pavan-kumar-99/medium-manifests.git \
-b aws-spot-spark
$ cd medium-manifests/$ kubectl apply -f spark-app.yaml$ k get SparkApplicationNAME STATUS ATTEMPTS START FINISH AGEpyspark-pi COMPLETED 1 2021-08-07T12:19:30Z 2021-08-07T12:21:49Z 16m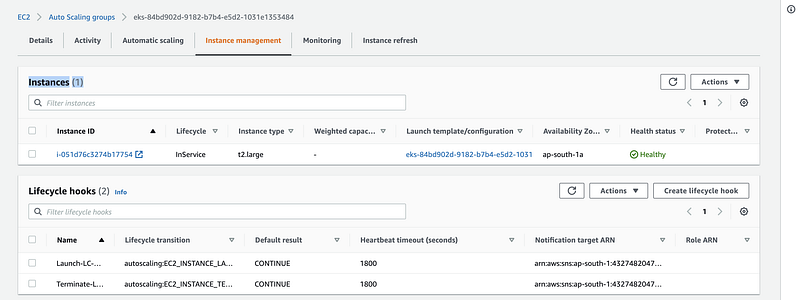
Handle Spot Instances termination effectively
AWS Node termination handler: This project ensures that the Kubernetes control plane responds appropriately to events that can cause your EC2 instance to become unavailable, such as EC2 maintenance events, EC2 Spot interruptions, ASG Scale-In, ASG AZ Rebalance, and EC2 Instance Termination via the API or Console. If not handled, your application code may not stop gracefully, take longer to recover full availability, or accidentally schedule work to nodes that are going down.
Project Link: https://github.com/aws/aws-node-termination-handler
Cleanup
$ eksctl delete cluster -f eksctl-cluster.yamlI hope this article covers how the spark applications can be effectively deployed on a Kubernetes cluster with minimal costs using AWS Spot Instances. Please feel free to comment down your thoughts and your best experiences with AWS spot instances in the comments section.
Thanks again for reading my article. Hope you have liked it. Here are some of my other articles that may interest you.
Until next time………..


