
Here’s How I’d Steal Your iPhone If I Were A Thief — [Step-by-Step]
— And tips to not succumb to this popular bulletproof theft strategy

The intention of this post isn’t to give you ideas.
But to help protect yourself from clever thieves who know the in-and-outs of Apple’s security preferences and can bypass them in no time just by knowing your passcode.
As a blogger who’s been writing on Apple for over 2 years, I consider myself a person with decent Apple knowledge.
So let me explain how I’d snatch your iPhone — if I were a thief — and
- lock you out of all your Apple devices forever,
- make you lose all your pictures you’ve been considering precious for a few decades,
- empty your banks.
— which is the exact bulletproof way thieves in the US are using to steal iPhones collectively worth millions of dollars, says The Wall Street Journal.
And finally I’ll explain the best security practices to protect your iPhones from such a strategy.
(Trust me, you won’t believe it’s so easy to steal your digital identity.)
Contents
CHAPTER-1: THE THEFT
1 — Finding easy iPhones 2 — Getting your iPhone into my hands 3 — Immediate steps 4 — Stealing your Apple ID 5 — Emptying your banks 6 — Erasing your iPhone and selling it
CHAPTER-2: BEST SECURITY PRACTICES
1 — Passcode is the king 2 — Ditch iCloud Keychain 3 — Disallow Account Changes using Screen Time 4 — The New iOS 17.3’s Stolen Device Protection Feature
~~Chapter-1: THE THEFT~~
#1. Finding easy iPhones
The best places to find easy iPhones are bars.
People go there to chill, so they’re likely to stay for extended periods. The longer they spend, the better my chance of swiping their iPhones.
(It isn’t easy to steal an iPhone in a busy place like a local train or shopping mall.)
I’d prefer (stealing) iPhones to Androids. Why?
They’ve got have better resale value than Androids and people who use them likely have bigger cash in their banks, or at least credit.
I’d look for iPhones by their telltale camera lenses:
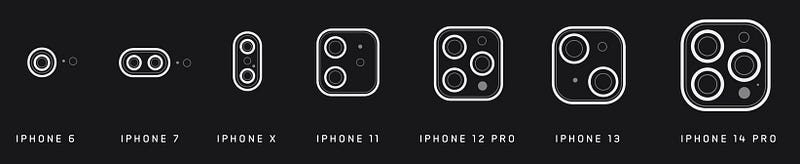
More specifically, I’d look for “Pro” iPhones. Why?
- A used non-Pro model usually sells for $300–400.
- But a used Pro model sells for over $650, depending upon its storage. If it’s 1TB, I can even tag it $900.
Thank heavens, “Pro” iPhones are very easy to spot. All of them have the iconic 3-camera system — as shown in the last picture of the above image.
#2. Getting your iPhone into my hands
Ah, spotted you with a nice iPhone! Now I’d approach you, offer you a drink, talk you to casually, and you’ll think I’m a cool guy.
You’d even wanna show me (or I’d curiously ask for) the photo you took with your family at the beach last year.
My first mission here is to know your passcode.
Attempt-1:
As you’re unlocking your iPhone to show the photo, I’ll observe your fingers/screen to get your passcode.
If I get it, it’s time for the theft.
Attempt-2: (If Attempt-1 fails)
If I don’t get your passcode (or if you’ve used Face ID), I’ll politely accept your iPhone for the photo, hold the volume up and side-button of your iPhone until it vibrates, and then press the side-button to lock it.
(“Oops! It’s locked. Can you unlock it please?”)
This way, you can’t use Face ID the next time you try to unlock your iPhone. You’ll have to use passcode — and that’s my second chance.
Got your passcode.
Attempt-3: (If Attempt-2 fails)
If I still don’t get your passcode, I’ll ask my fellow-thief (who’s been video recording over your shoulders as you’re typing your passcode) if he got it.
If yes, time for the heist!
I’ll snatch your iPhone with my theft-skills and you won’t know it until you know it.
#3. Immediate steps
I’ll quickly arrive at a safe place and start with the following steps — just to lock you permanently out of your Apple ID and make everything you own (digitally) mine.
Step-1: Changing your Apple ID Password
- I’ll go to Settings ⚙️ < your_name < Sign-In & Security 🛡️ < Change Password,
- Type your iPhone passcode (that I already know) for verification,
- Type a new password and verify it.
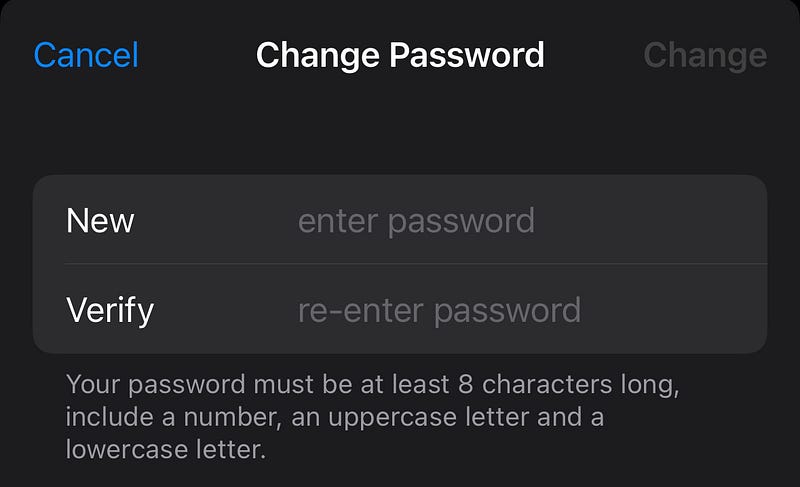
Do you see that?
I didn’t have to know your old Apple ID password to change it. Just having your passcode was enough. What a security loophole? Lucky for me.
— Thief.
Step-2: Logging you out of all your devices
After changing your password, your iPhone will prompt if it should sign out other devices on your Apple ID.
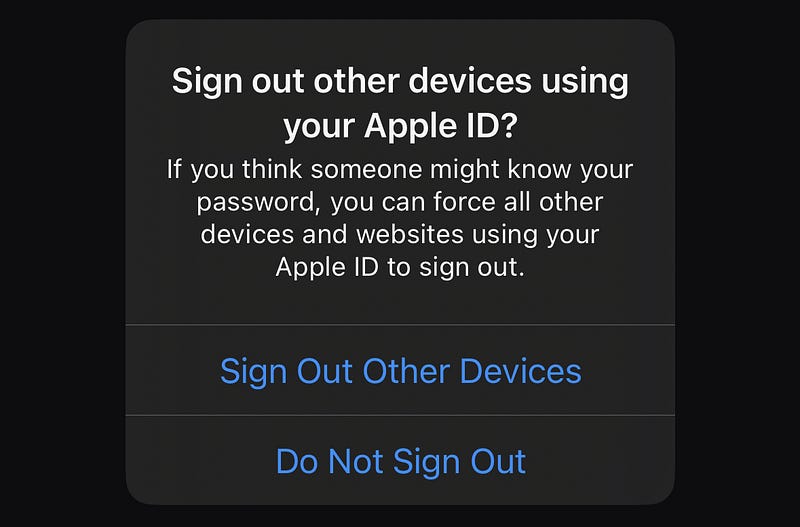
And I’m obviously hitting yes.
Now even if you realise your iPhone’s lost, you can’t quickly login from your Apple Watch or your friend’s iPhone. Why?
Coz you don’t know your new Apple ID password, and will keep making a couple futile attempts.
I’ve got enough time to execute my next steps… whistles.
But wait, you haven’t yet lost access to your Apple ID completely yet. I’ll tell you why, and I’ll take care of that shortly.
Step-3: Turning off Find My
As you didn’t lose access to your Apple ID yet, I won’t take risk.
If your hands are quick, you can still login to your Apple ID on your Apple Watch or a friend’s iPhone using your recovery phone number or email and can trace your iPhone via Find My.
So I’ll quickly turn off Find My iPhone (in Settings ⚙️ < your_name < Find My 🧭 < Find My iPhone).
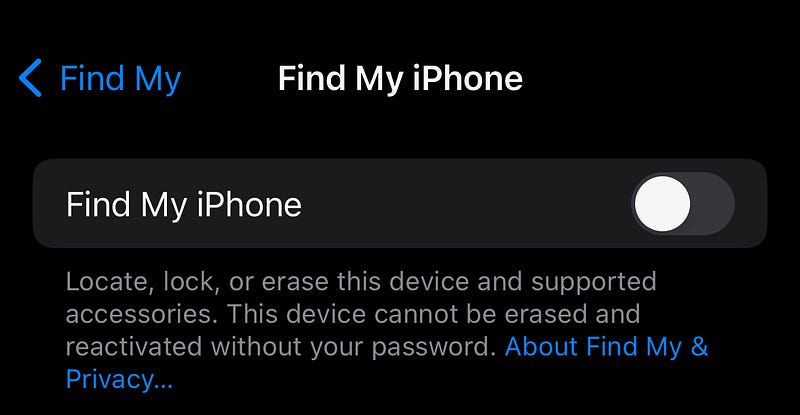
I just need your Apple ID password for that, which I know already!
Step-4 (Optional): Changing the face in Face ID
This is an optional step for comfort — putting my face in your Face ID. It helps me skip the hassle of typing passcode every time I have to, and just attend Face ID.
But as a smart thief, I’ll postpone this as I first have to close all the ways you have towards your account recovery.
However, let me just tell you how I’ll do it:
- I’ll go to Settings ⚙️ < Face ID & Passcode 🙂,
- Type your passcode,
- Click Reset Face ID < Set Up Face ID,
- And follow the steps to use my face for your iPhone’s Face ID.
#3. Stealing your Apple ID
(Or: Closing all the ways to account recovery)
Like I said before, you still have a chance to recover your account using your registered phone number & email via your Apple Watch and Mac.
And I don’t want that — coz I’m afraid you may lock the iPhone in my hands. So I’ll close all the ways you have to recover your account.
Step-1:
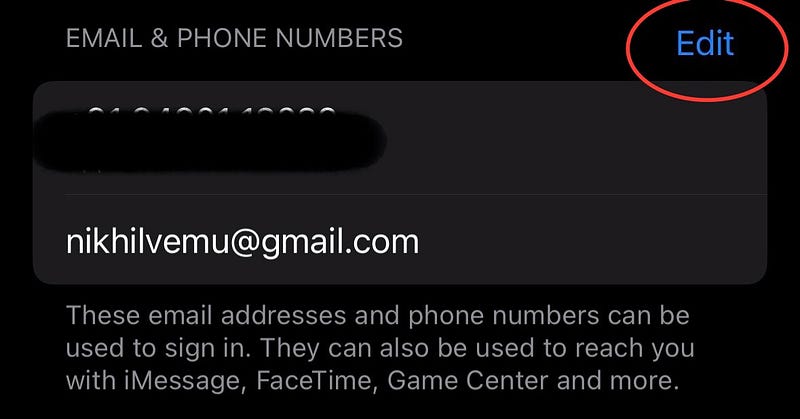
- I’ll go to Settings ⚙️ < Sign-In & Security 🛡️,
- Deregister your phone number and email from your Apple ID,
Step-2
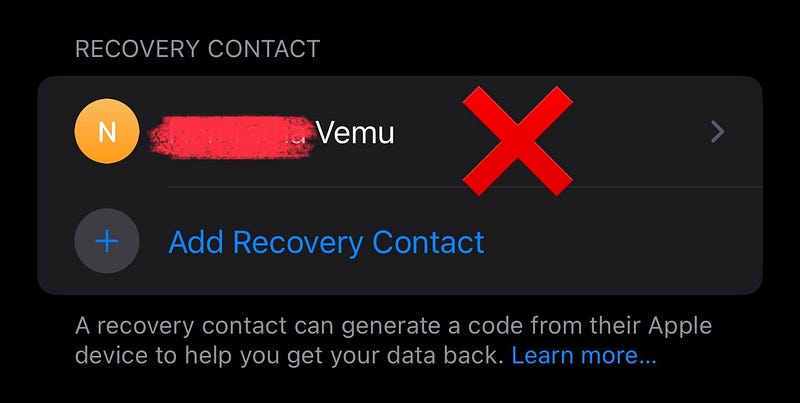
- Tap on ‘Account Recovery’ on the same page,
- Remove any recovery contacts you’ve set,
Step-3
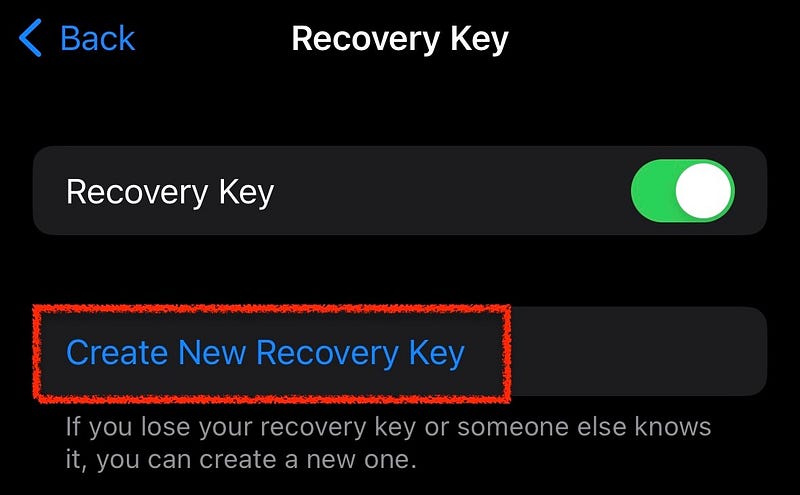
- Go to ‘Recover Key’ on the same page,
- Turn it off or generate a new recovery key so the old one would not work.
That’s it. You’re now locked out of your Apple ID.
Forever. Until Earth and Sun exist.
You’ve lost access to all your contacts, files, photos, passwords, notes, calendar events, Safari browsing history, game progresses, and subscriptions. All your Apple devices are signed out of your Apple ID. Forever.
Even Apple can’t help recover your account.
I know that’ll be heartbreaking — but I had to do it for my $$$.
#4. Emptying your banks
I’ll hit the easy target first — Apple Cash. It doesn’t offer Buyer Protection and you can’t get your money back by raising a dispute.
I’ll send to myself all your Apple Cash balance (using Face ID).
Next up, I’ll go for wallet apps like PayPal and Venmo where I don’t need to type any transaction password for getting your money into my account. Just Face ID.
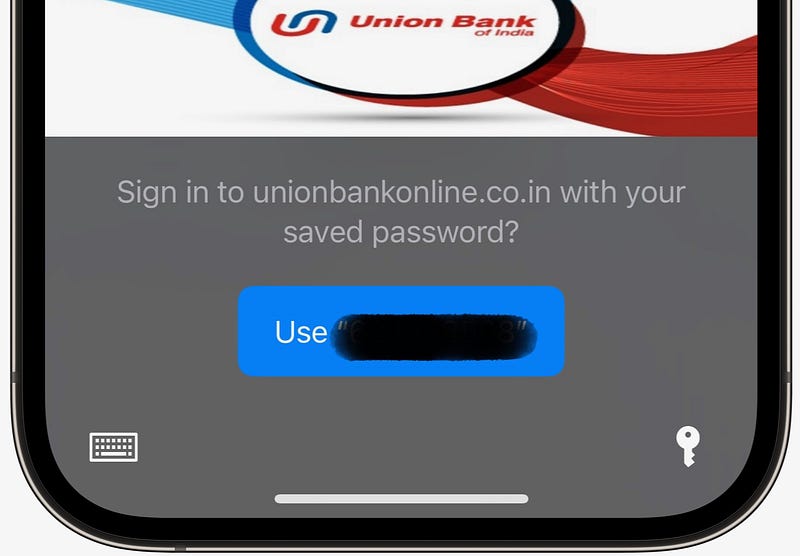
Then, I’ll go for bank apps. If they are Face-ID protected, well & good. I’ve already hacked your Face ID.
But if they’re password-protected and you have their credentials stored in iCloud Keychain, your iPhone will suggest autofilling them using Face ID, and I’ll do it.
God-forbid, if you’ve enabled 2-FA…
- Using verification code from iCloud Keychain (by following this article), I can fill that too using Face ID.
- Using OTP to your phone number, no problem… I already have your SIM card.
- Using security questions like what’s your favourite place, what’s your mother’s maiden name, I’ll try to figure them out from your Photos and Notes.
If your bank asks for transaction PIN, I’ll try your iPhone passcode. If that doesn’t work, I’ll snoop around for clues in your Notes or any docs.
And know what? I get luckier if you took photocopies of your cards, government IDs, and other legal docs and stored them locally unencrypted.
They’ll serve a great help if the bank thinks the transaction is fraudulent and wants to verify you. I’ll attend the verification on your behalf.
After emptying your banks, if you have a credit card or credit line in your Apple Wallet, I’ll go for shopping and use up your credit. You’ll be paying for it next month.
#5. Erasing your iPhone and selling it
Finally, I’ll erase your iPhone and resell it. Here’s how I’ll erase:
- I’ll go to Settings ⚙️ < General ⚙️ < Transfer or Reset iPhone < Erase All Content and Settings,
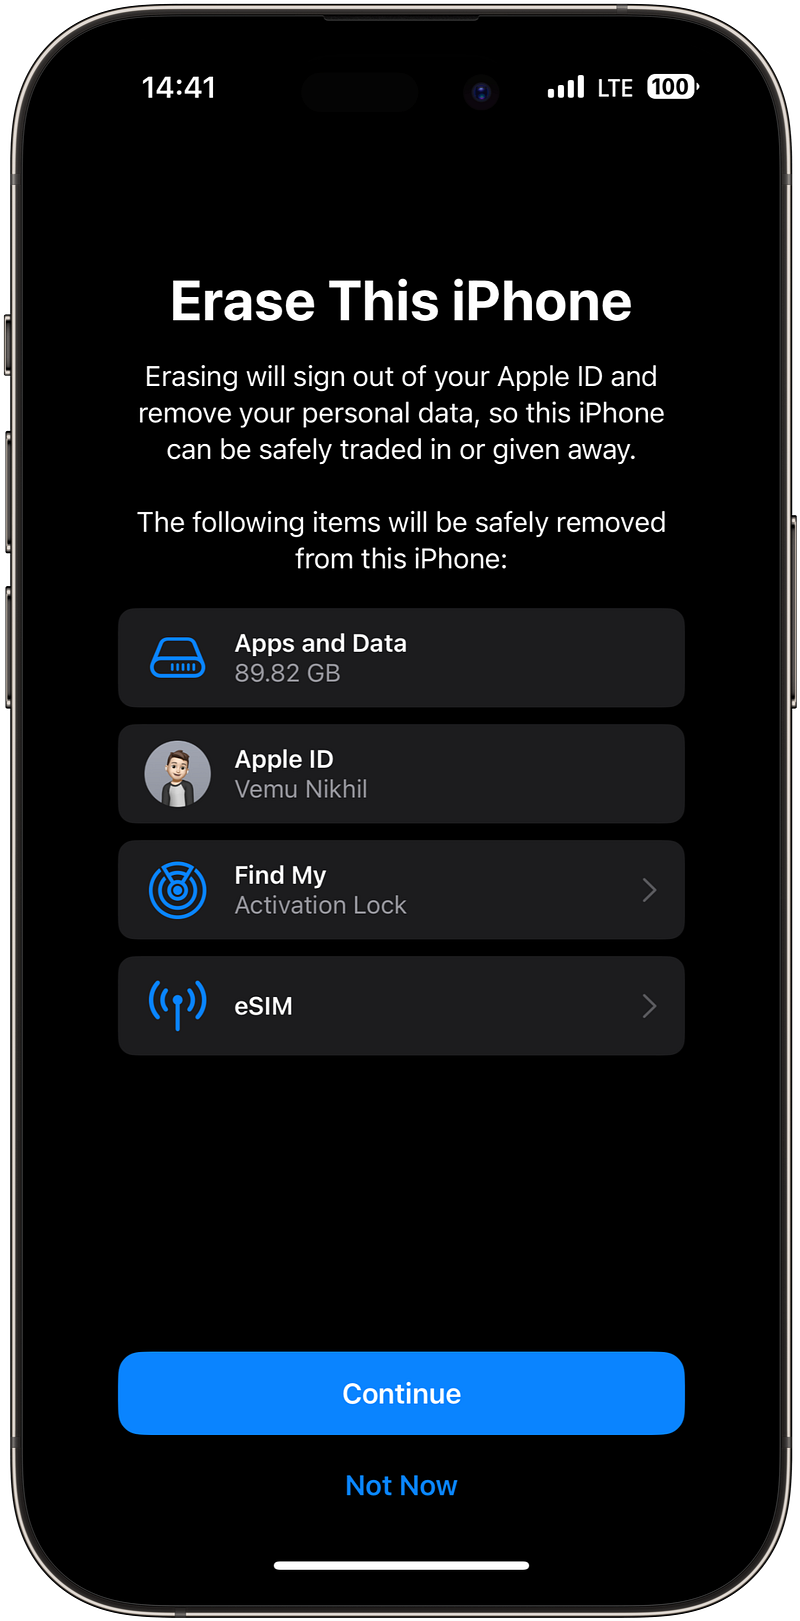
- Click Continue, type your passcode.
In a few seconds, your iPhone’s becomes as good as new, ready to be resold.
Regarding resale prices, as I told before,
- If it’s a non-Pro iPhone, I can sell it for $300-$400.
- If it’s a Pro iPhone, I can sell it for $650-$900.
A decent reward for my effort, what do you say?
Taking off my thief hat…
As I told before, this is exactly how thieves are stealing iPhones in the US, especially from people in bars. And you can’t deny it’s a bulletproof strategy.
They just need your iPhone and its passcode. And boom, everything is gone in a few minutes.
So let me tell you what loopholes these clever thieves are using to get into your iPhone. And how you can change it.
~~Chapter-2: BEST SECURITY PRACTICES~~
#1. Passcode is the king
The theft, losing access to Apple ID and money… everything boils down to the fact that the thief knew your passcode.
Just knowing a short series of numbers gave him the ability to lock you out of your own digital house.
I can’t stress enough on how confidential your passcode should be.
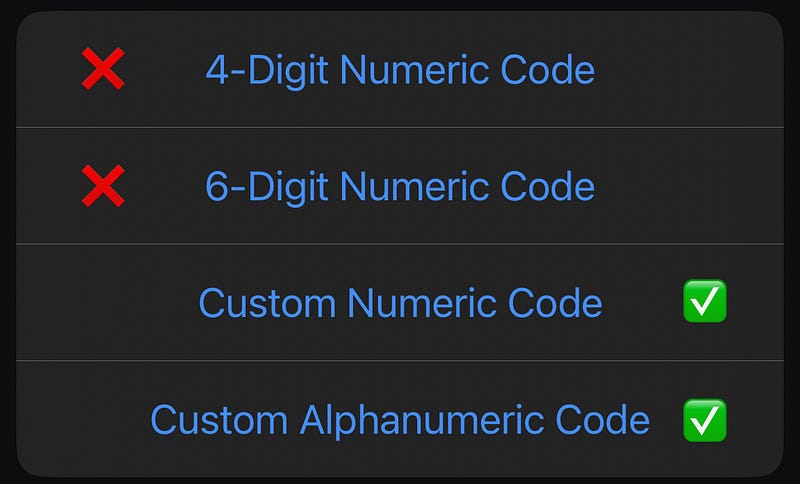
Instead of a simple 4-digit passcode, consider using a 6-digit one. Or better, use a custom numeric or alphanumeric passcode. That way, the thief will have a hard time comprehending it.
[“But isn’t it difficult to type for me?” Don’t worry, you won’t use passcode often if you use Face ID or Touch ID on your device. Maybe once in every 3 days.]
Also, stay extremely vigilant when you’re using your passcode in the public. Treat it like your ATM PIN. Make sure no one’s seeing it — even your friends and coworkers.
#2. Ditch iCloud Keychain
iCloud Keychain is the least secure Password Manager. Why?
If your iPhone’s passcode is compromised, all your Keychain passwords automatically get compromised. Coz they’re protected by your very passcode.
So instead, consider using a third-party password manager like 1Password, LastPass, or Dashlane, and lock it with a separate passcode that’s not your iPhone passcode.
You can not only store passwords in it, but also secure important files like Passport and Driver’s license photocopies — instead of leaving them unencrypted in local storage.
This keeps the thief away from your bank accounts and accessing crucial documents that help him impersonate you.
#3. Disallow Account & Passcode Changes using Screen Time
Screen Time does more than just calculating the time you spend on your iPhone and make you feel miserable.
It can also help prevent thieves from entering this area️ ↓ (which is exactly where they first visit after stealing your iPhone):

How? (Assuming you have Screen Time turned on)
- Go to Settings ⚙️ < Screen Time ⏳,
- Set or change your Screen Time passcode to something that’s not your regular iPhone passcode,
- Click on Content & Privacy Restrictions 🚫,
- Turn on Content & Privacy Restrictions,
- Scroll down and disallow ‘Passcode Changes’ & ‘Account Changes’.
Now come back and you’ll see the area greyed out:

Now no thief can access this area without your Screen Time passcode (that he doesn’t know anyways). And your account will be absolutely safe.
He also won’t be able to find Face ID & Passcode section in Settings ⚙️.

So though he may be able to steal your iPhone, it’s as good for him as a brick. And you’ll have a chance to lock your iPhone from wherever you are.
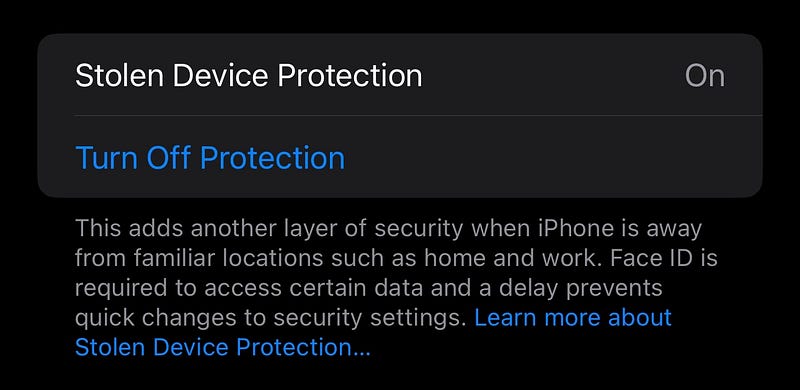
#3. The New iOS 17.3’s Stolen Device Protection Feature
Apple introduces a new layer of security for your iPhone in iOS 17.3 — called Stolen Device Protection.
The update will be released in the week beginning Jan 22, most likely on Tuesday, Jan 23, according to Forbes.
However, the security feature will come disabled by default, and you have to go enable it in Settings ⚙️ < Face ID & Passcode 🙂.
How does it work?
Generally, iOS gives you two Face ID attempts for accessing sensitive actions, and then it falls back to passcode auth, right?
But when Stolen Device Protection is enabled, Face/Touch ID will be the only authentication method for sensitive actions (I’ll list them all in a sec).
And this will appear once you (or the thief) fail two Face ID attempts:
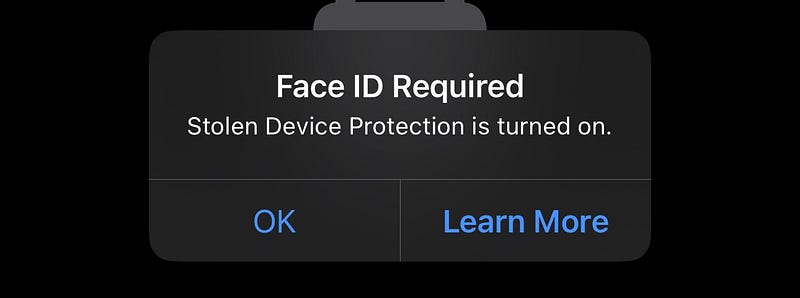
He can’t use passcode for the action until Security Device Protection is disabled.
But if the thief tries to turn it off, he needs to pass biometric authentication (which he can’t) and then needs to undergo a 1-hour countdown delay before he can do that (formally called Security Delay).
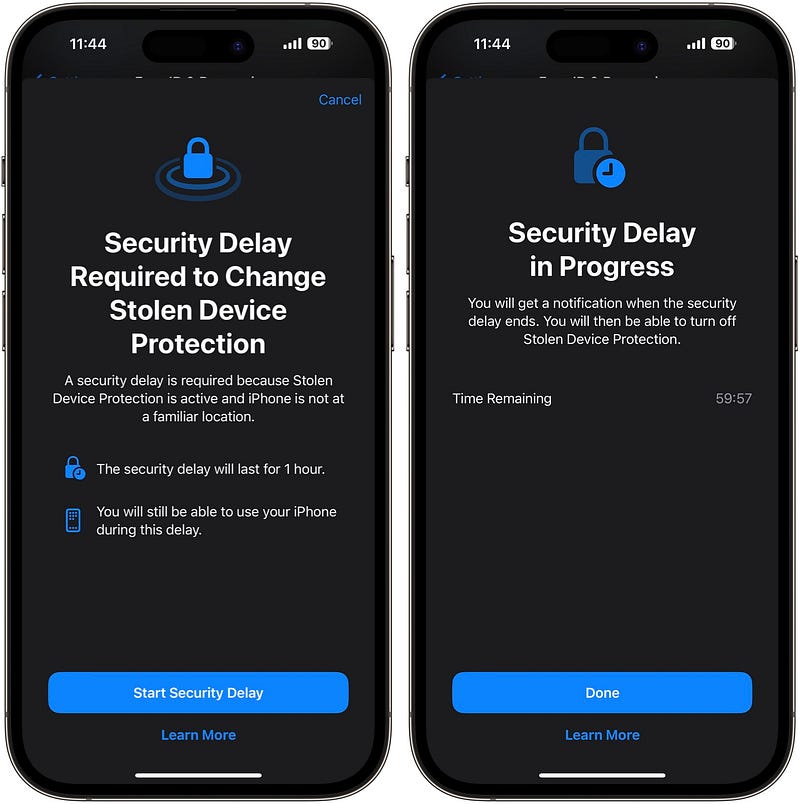
However, Apple says there will be no delay if the iPhone is in a familiar location, like home or work.
This requires Significant Locations to be enabled (in Settings ⚙️ < Privacy & Security ✋ < Location Services 📍 < System Services ⚙️ < Significant Locations).
If not enabled, your iPhone always requires Security Delay — even at your home or office.
Actions that require Face ID or Touch ID when Stolen Device Protection is enabled:
- Accessing passwords or passkeys in iCloud Keychain
- Applying for a new Apple Card
- Viewing a virtual Apple Card
- Turning off Lost Mode
- Erasing all content and settings
- Taking certain Apple Cash and Savings actions in Wallet
- Autofilling cards saved in Safari
- Using your iPhone to set up a new iPhone
Actions that require Face ID or Touch ID, plus Security Delay when Stolen Device Protection is enabled:
- Changing your Apple ID password
- Updating select Apple ID account security settings — like managing trusted devices, phone numbers, Recovery Keys, and Recovery Contacts
- Changing iPhone passcode
- Adding/Removing Face ID or Touch ID
- Turning off Find My
- Turning off Stolen Device Protection
Thanks to the new security feature, even if the thief succeeds in stealing your iPhone, he can’t pass the biometric authentication to access your critical settings.
Or even if he passes it somehow, he needs to undergo the Security Delay of 1 hour for doing anything.
This gives you enough time to find the iPhone, lock it, or erase it remotely.
So, whenever in public, make sure to regularly check for your iPhone in your pockets. Should it be absent, put it on Lost Mode immediately using your Apple Watch or friend’s iPhone.
Coz once the Security Delay ends, your iPhone is as vulnerable as usual.
For more amazing iPhone hidden tricks, read these →
Finally,
If you love exploring new iOS & Mac apps (like me), consider subscribing to Setapp. You’ll get access to a curated collection of 240+ amazing apps for just $9.99 a month, which rather cost hundreds of dollars if purchased individually.
- Use my affiliate link to start your Setapp journey! (It’s free for 30 days)
- Get my free list of 100+ Ultimate macOS Apps on Setapp here.
If you enjoyed this story, join 440+ others to get notified whenever I publish a new story.


