

Getting Started with Python, Pandas, and Jupyter Notebooks
Documentation for everything you need to set up your machine with Jupyter Notebooks and start programming in Python, Pandas, and other exciting data analysis packages.
Working with Python in a Jupyter notebook is — atleast to me — the fastest and most rewarding way to get started with programming. The combination of Python, Pandas, and Jupyter will open up a new world of data analysis, visualization, and exploration into the great wide world of data and programming.
In my opinion — as a person who still sees my own history as a beginner in the rear-view mirror — it’s the PERFECT onboarding ramp for someone new to programming.
It’s even more perfect if you are coming into programming in Pandas/Python/Jupyter by way of Excel. You will be very well positioned to pick up some of these Pandas concepts.
Without further ado, let’s dive in!

Note: What kind of machine are you working on?
All of this documentation is written for a person working on a Mac. This is the machine I have, and so I lack the point of view required to help with other machines/operating systems. This documentation may still be useful for you, but I can’t confirm at the moment.
Table of Contents
- Command Line/Terminal Navigation
- Anaconda Navigator and Setting up Python 3.7 Environment
- Launch Your First Jupyter Notebook
- Import Pandas and Other Packages
Step 1: Command Line/Terminal Navigation
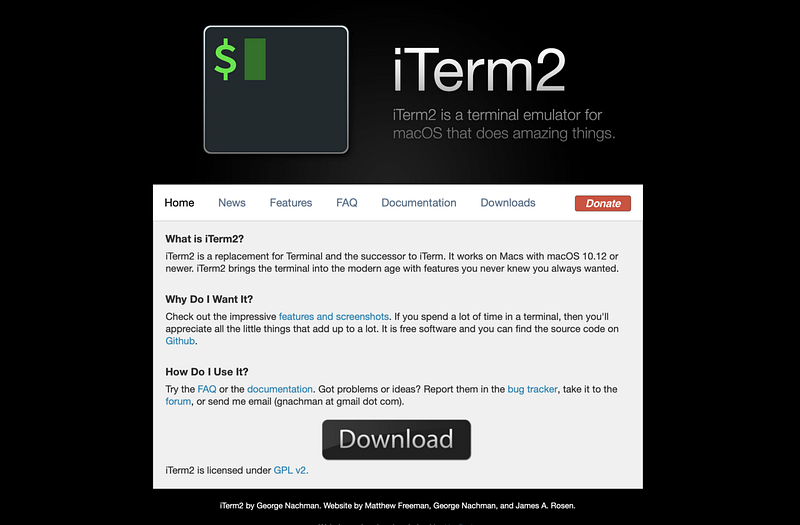
The very first thing we will do is download iTerm.
iTerm is not really required for this—you could just use Terminal.
This is simply a Terminal replacement. I just enjoy using it. Go ahead and hop over to download here.
Here are a few of the terminal commands that we’ll be getting used to:
ls = "list" // show a list of files in current directorycd = "change directory" // move down into a new directorycd .. // move backwards out of current directorymkdir = "make directory" // make a folderrm = "remove" // remove file or folderclear // clear terminalThis is about all you need to know to get started. There will be more command line knowledge required, but this will be a great starting point if you’ve never worked in the command line. I think it’s best to learn only what you need to know in the command line, and pick up new concepts as you require them.
I’ve always found that documentation without visual queues was difficult for me to follow, so I’ll be including some helpful gifs of me working in the command line or in the Jupyter notebooks for you, like so:
ls = list the files in the current directory
cd Desktop = change directory into "Desktop" directory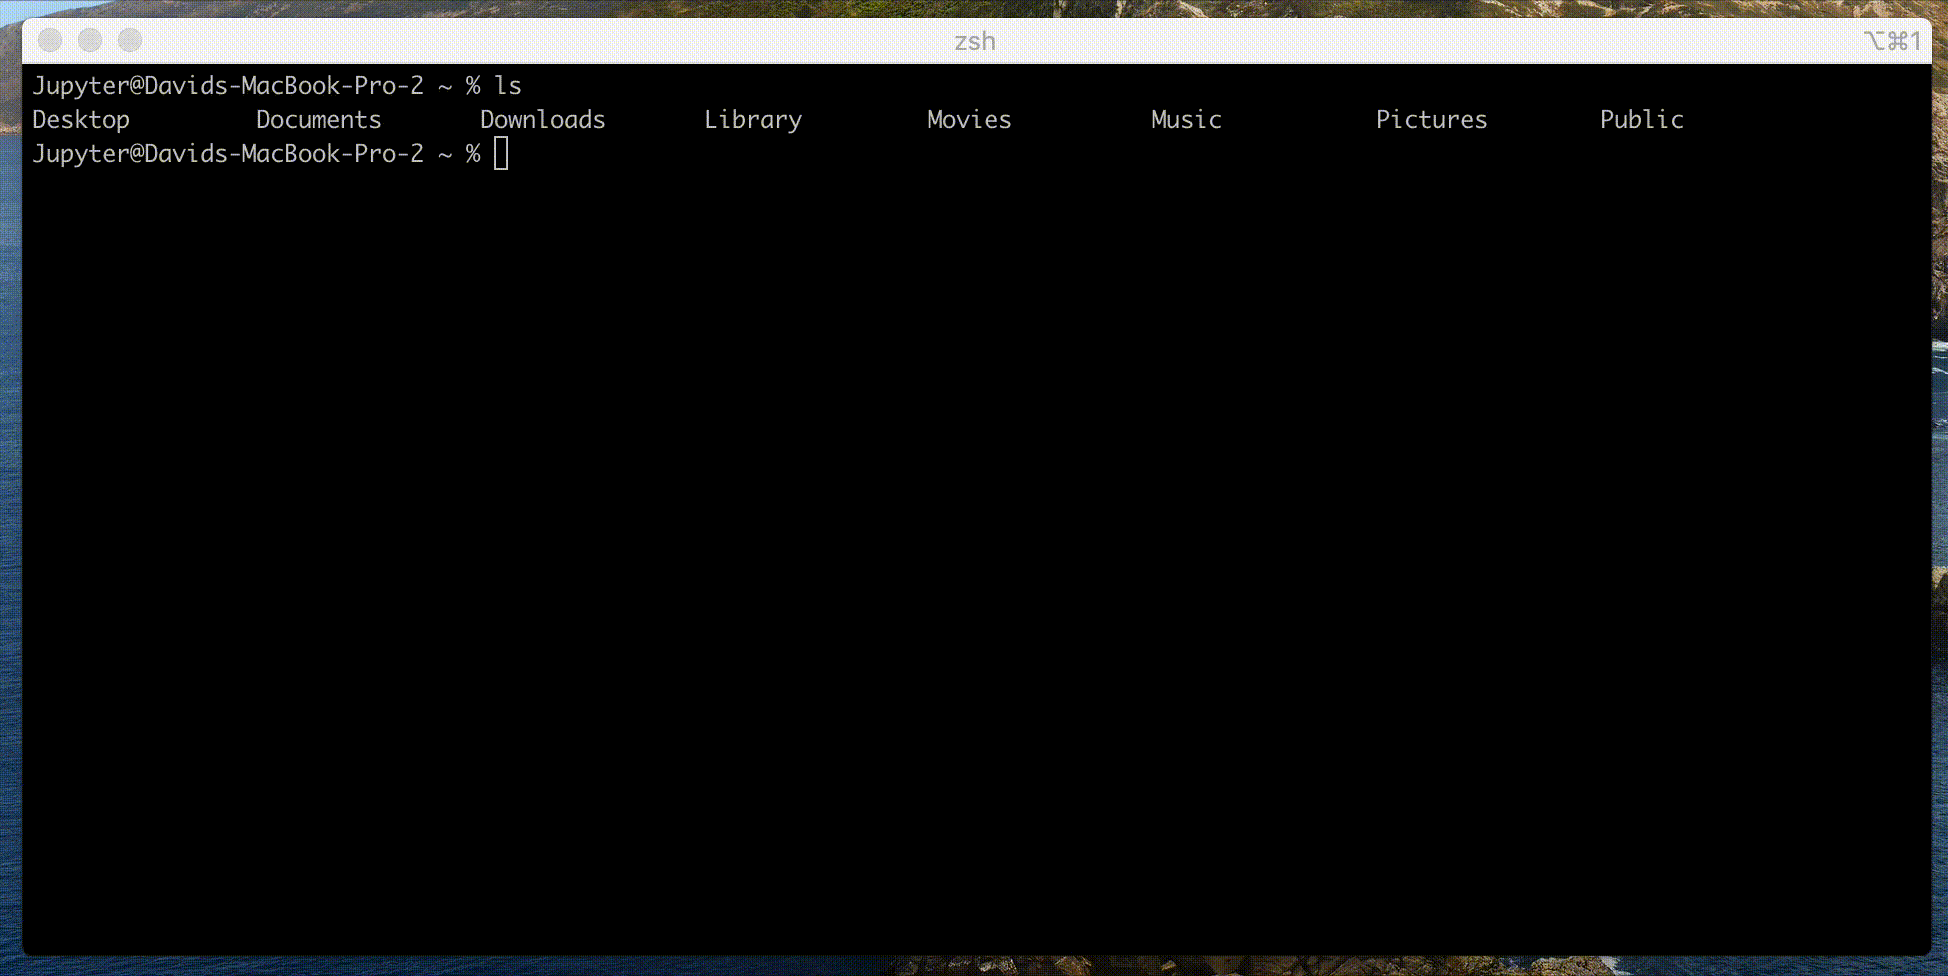
mkdir jupyter_notebooks = make a new directory called "jupyter_notebooks"ls = list everything in currenty directory (now you see the new directory that you just created)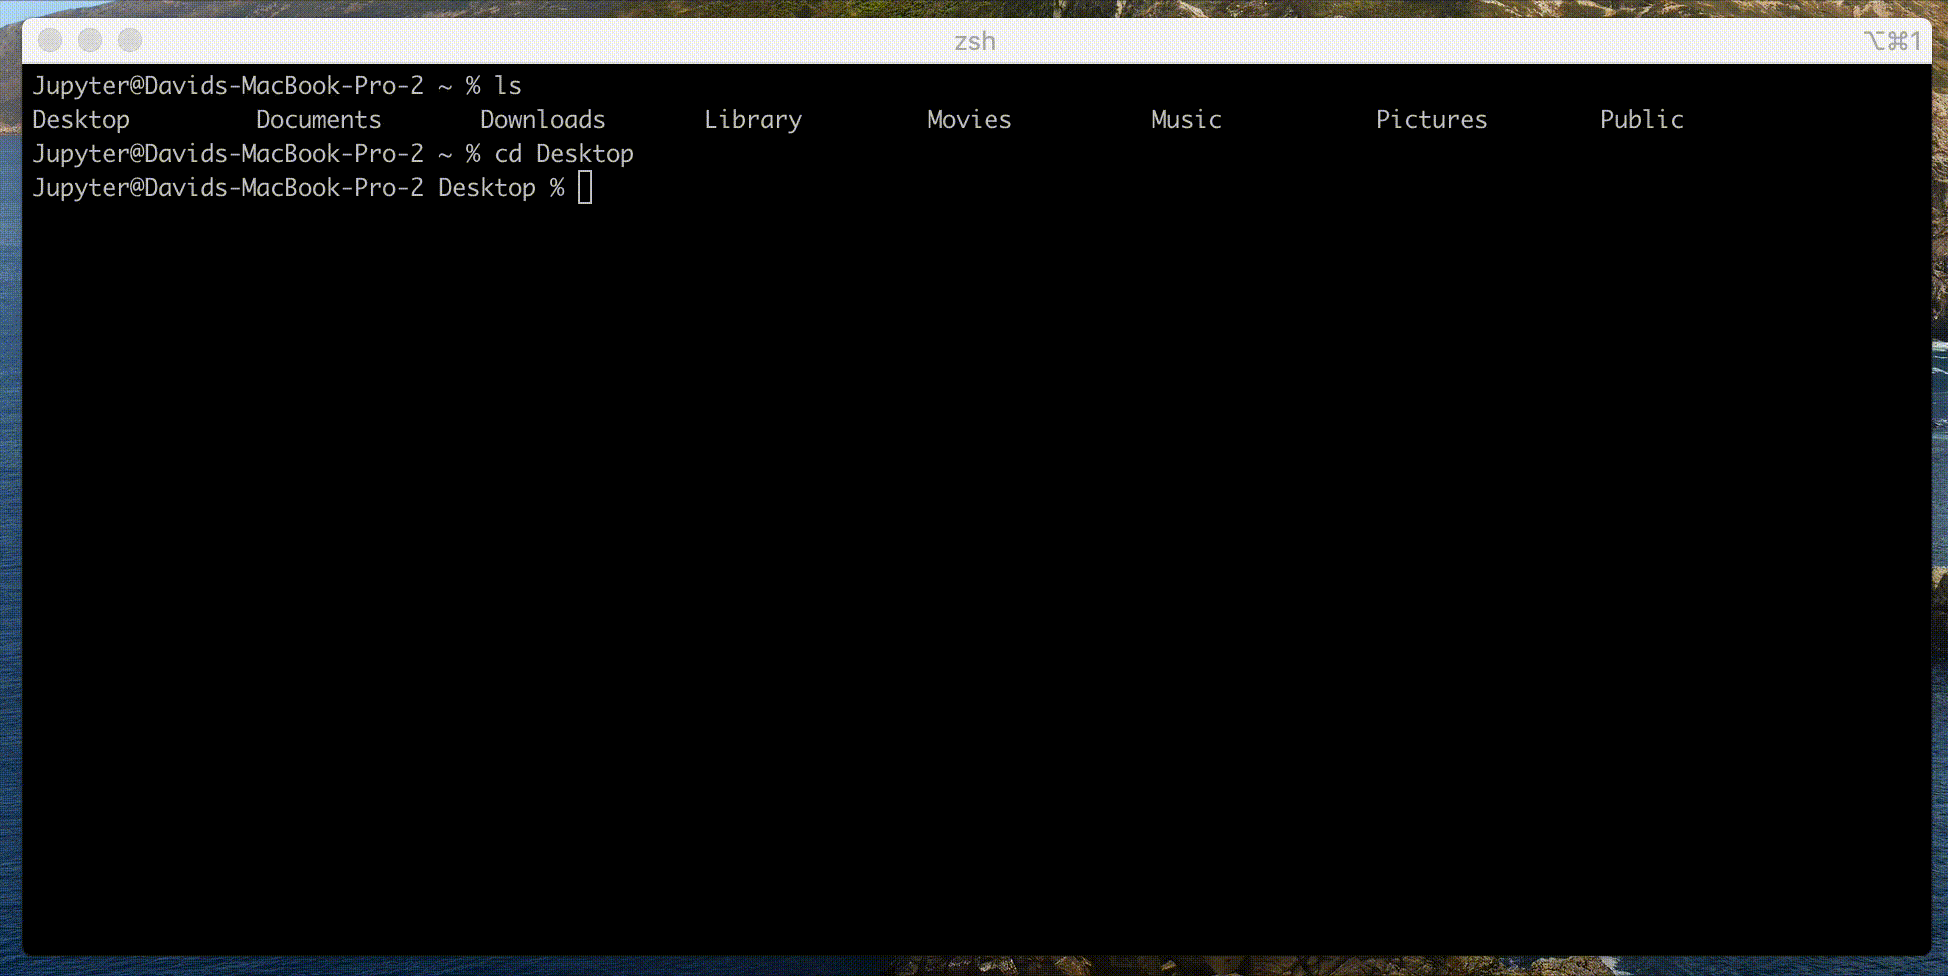
cd jupyter_projects = change directory into the new directory we just created. Notice I use "tab" after typing the first few letters. Terminal is smart enough to guess what path you are trying to finish.ls = list files in the directory. Notice nothing returns because there are no files in this directory yet.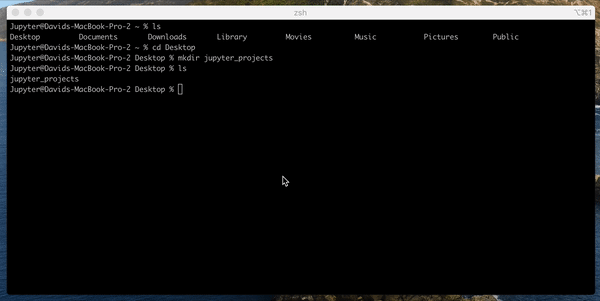
cd .. = change directory into previous directory in the hierachyls = list files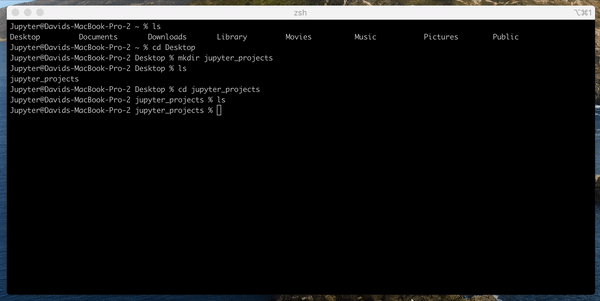
cd Desktop = you know what this does by now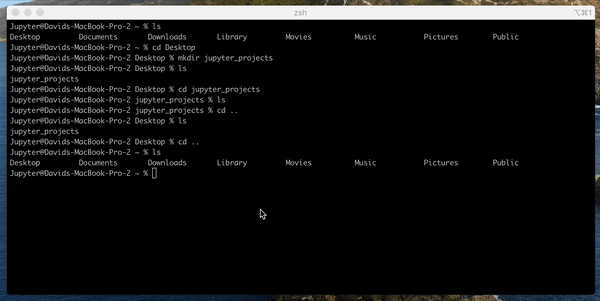
rmdir jupyter_projects = remove directory jupyter_projectsthis is how to delete a directory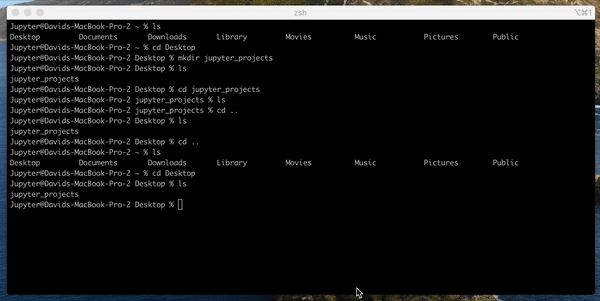
cd .. = you know what this means by nowls = you know what this means by nowclear = clear the terminal window
That’s it! Practice this stuff for a few days and it will become second nature. Don’t worry if you stumble at first. Stumbling is normal in the beginning. Stay motivated.
Step 2: Downloads and Software Requirements
Let’s start by checking our Python version in the terminal. Python should already be on your computer if you are using a Mac.
“Mac OS X 10.8 comes with Python 2.7 pre-installed by Apple. If you wish, you are invited to install the most recent version of Python 3 from the Python website (https://www.python.org).”
python --versionRunning this in the terminal should give you something like this:
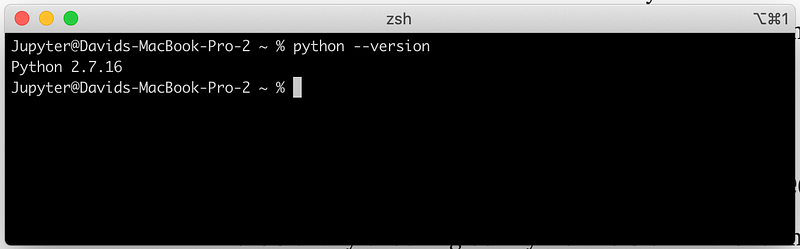
We are running 2.7.16.
Next, let’s download Anaconda Navigator. This is a tool we will use to manage our programming environment and the different packages we need to be installed in our programming environment that will allow us to run Jupyter Notebooks, Pandas, etc.
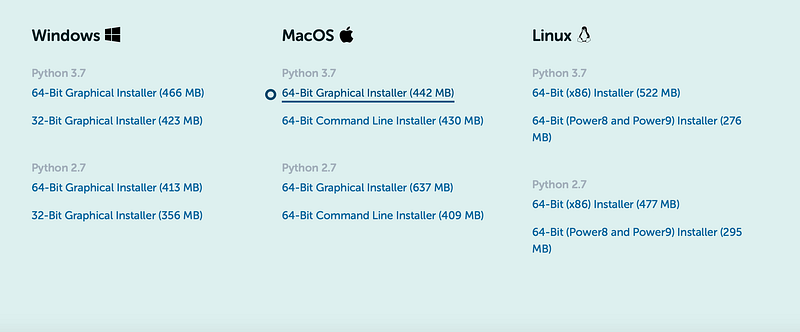
Head over to the download page for Mac here.
I’m going to choose the 64-Bit graphical installer under Python 3.7. We are going to be running our Jupyter Notebooks with Python 3.7
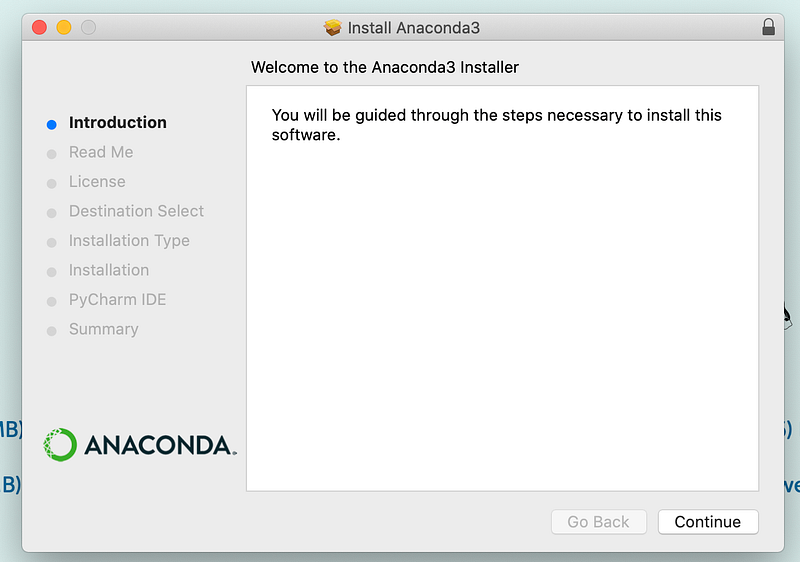
Run through the installer. You know what to do.
Next, open up Anaconda Navigator. You may be asked to update Anaconda. You can update, or just ignore it.
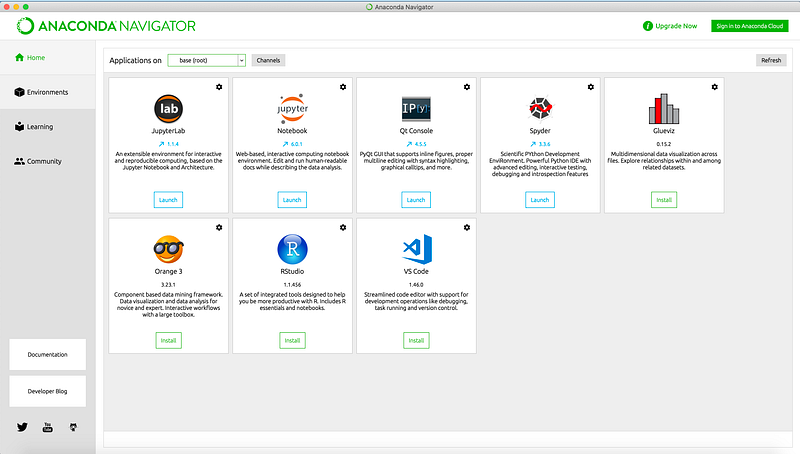
Click on the “Environments” tab. We are going to create a new environment using Python 3.7. This is what your environments tab should look like. You’ll just have one “base” environment.
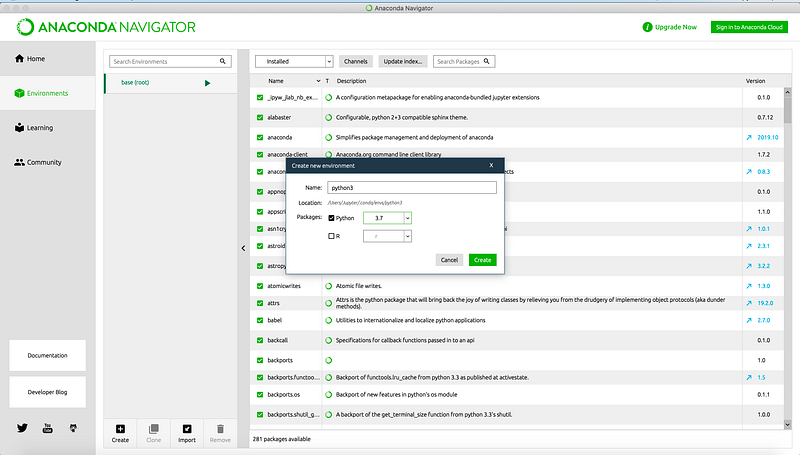
Click “create” at the bottom, near the social media icons. You can name your environment anything you like. I recommend something that is short and makes some sense. Like “python3” for our environment running Python 3.7:
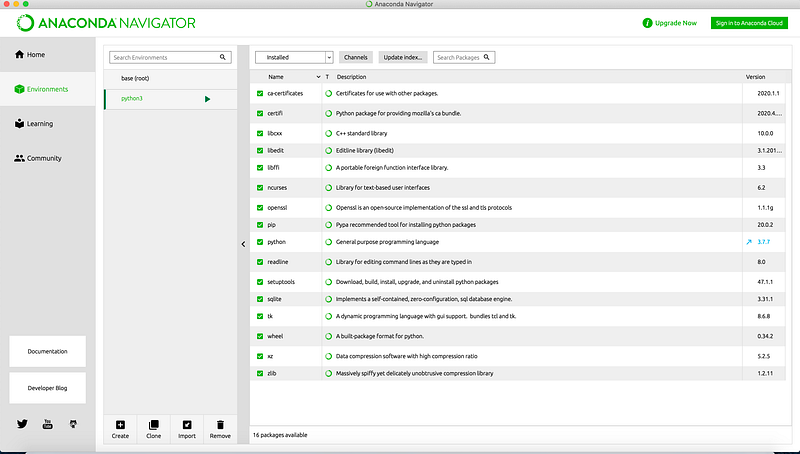
Now, we have an environment that runs Python 3.7. We will also install our Jupyter Notebooks packages here.
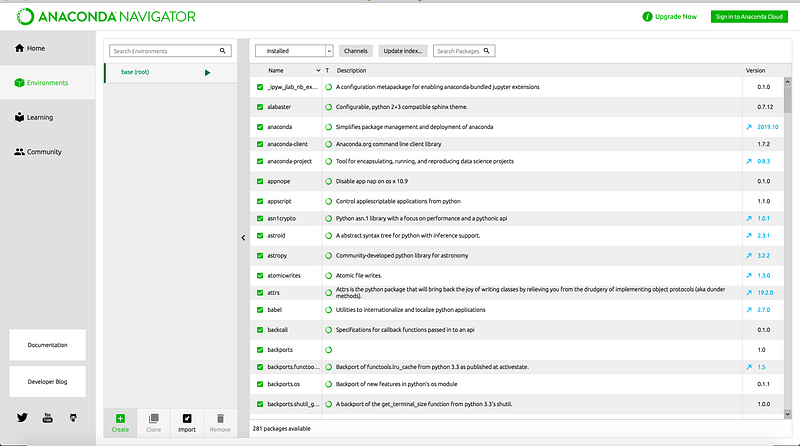
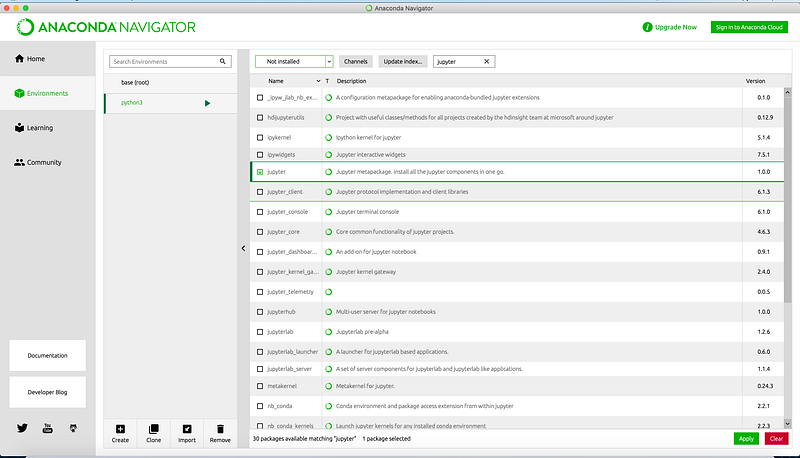
Hit the “Installed” drop-down, and let’s select “Not Installed”.

Then, we’ll search for the packages we need and add them to our environment.
We will need:
- Jupyter
- Pandas
- Requests
- Numpy
Just search for the packages using the search bar. And then select the package you’d like to install:
Then, hit “Apply”. Your screen will show you a message like so:
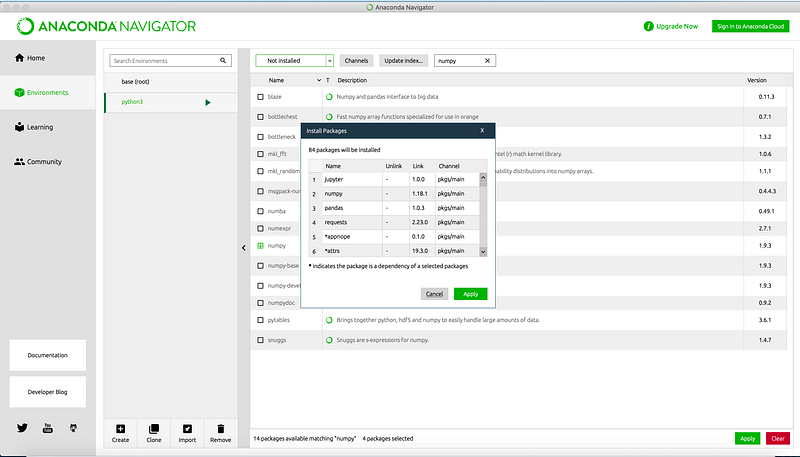
Hit “Apply” again, and the install with complete itself.
Now we should be ready to launch our first Jupyter Notebook.
Step 3: Launch Your First Jupyter Notebook
First, before we do anything else — and this is very important — we need to restart our terminal for our changes made in Anaconda Navigator to be recognized.
Now, back in Terminal, navigate to the directory or your choosing — I’m going to save my projects on the Desktop — and create a new directory for your jupyter files:
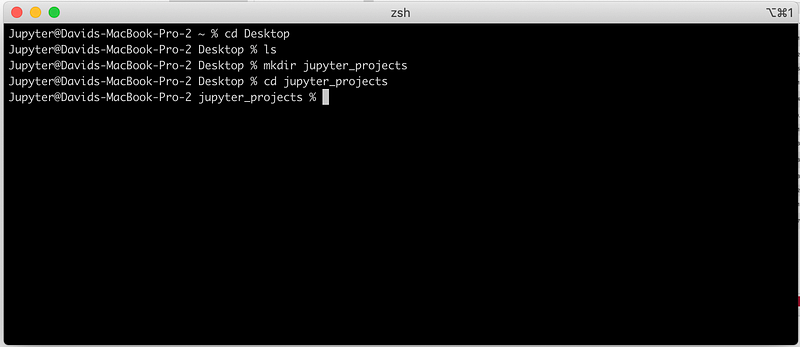
Now, for the first time, we’ll activate our Python 3.7 environment using our environment name.
Like so:
conda activate python3And then, check your python version:
python --version
Nice. We are in business.
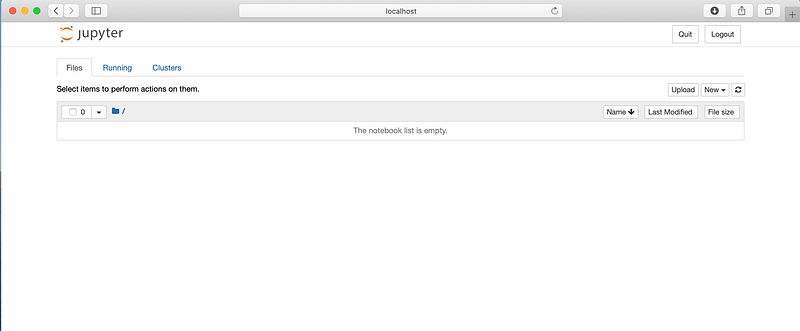
Next, let’s launch our first Jupyter Notebook with the command:
jupyter notebookYour browser should now look something like this:
Now, let’s create a new Python 3 file:
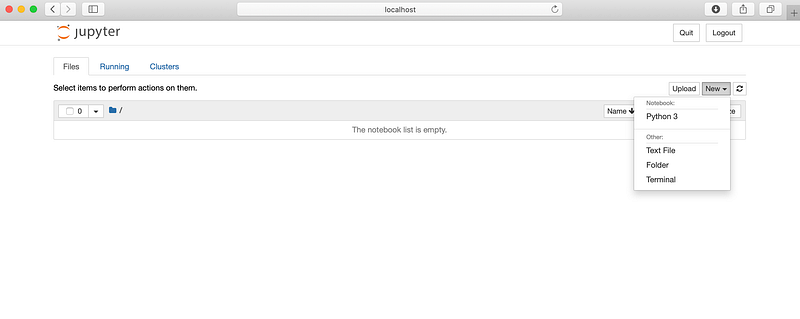
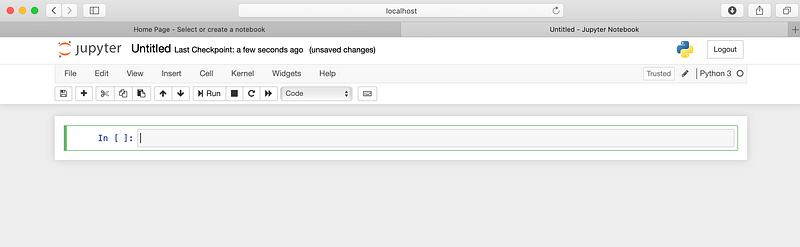
After clicking, Python 3, your page should look like this:
Step 4: Import Pandas and Other Packages
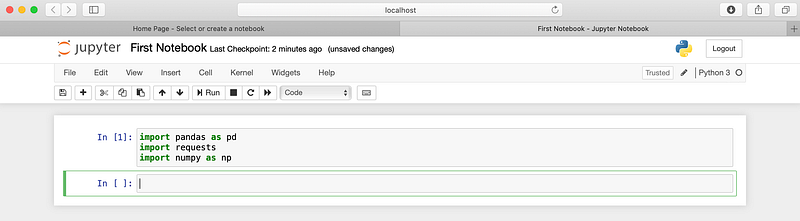
Now let’s update the name of our file to something that makes sense, maybe “First Notebook”, and then import a few packages that will be very common in future tutorials.
Just import the packages like so. Pandas is often imported as pd and numpy is often imported as np :
import pandas as pd
import requests
import numpy as np- Pandas “is a fast, powerful, flexible and easy to use open source data analysis and manipulation tool, built on top of the Python programming language.”
- Requests “is an elegant and simple HTTP library for Python, built for human beings.” It’s used to make requests to APIs. We’ll be doing a lot of that to grab data to analyze with Pandas and Numpy.
- NumPy is “the fundamental package for scientific computing with Python”
And then hit shift+return to execute the cell:

When the cell is done executing, you’ll see an integer pop in between the square brackets [here]. Like so:
See that [1]? That means we’ve set up our environments correctly, and we are ready to move on to the meat of the matter.
Ok, that’s it for now! Nice work. Way to stick with it.

We’ll move on to some more exciting things in future tutorials, but even a journey of 10,000 miles starts with one step. This is our first step towards the wide open world of Data Analysis and programming with Python.
If you are ready to move on to some new materials, these tutorials below are a perfect next step:
Until next time… cheers.

If you enjoy reading stories like these and want to support me as a writer, consider signing up to become a Medium member. It’s $5 a month, giving you unlimited access to thousands of Python guides and Data science articles. If you sign up using my link, I’ll earn a small commission with no extra cost to you.


