
Flutter and Desktop
Flutter and Desktop
What if, I wanted my code to run on desktop ? Hmmmm….
All in one Flutter resource: https://flatteredwithflutter.com/flutter-and-desktop/
Flutter has bridged the gap between Android and iOS development, but now Flutter is expanding to the web, desktop and more, growing closer to the “write once, run anywhere” dream.
But, how ???
Begin…

At the end of this article, you should be able to run a sample app on desktop….
We will structure this article into :
- Enable Desktop Support
- Fetch platform files
- Configure Flutter project with Desktop

Enable Desktop Support:
- Switch to the master channel :
flutter channel masterPossibly, you might need to upgrade also,
flutter upgrade2. Enable the Desktop Feature for your platform as
flutter config --enable-linux-desktopto enable Linux.flutter config --enable-macos-desktopto enable macOS.flutter config --enable-windows-desktopto enable Windows.
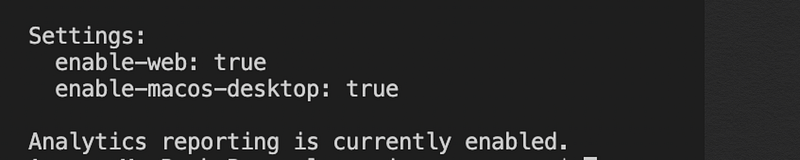
Note: Confirm again by running
flutter config
You should see like :
3. Check the devices supported now :
flutter devices
Note: See the macOS now !!!
Fetch Platform Files
- Clone the flutter-desktop-embedding repo
2. Go to example directory and you should see
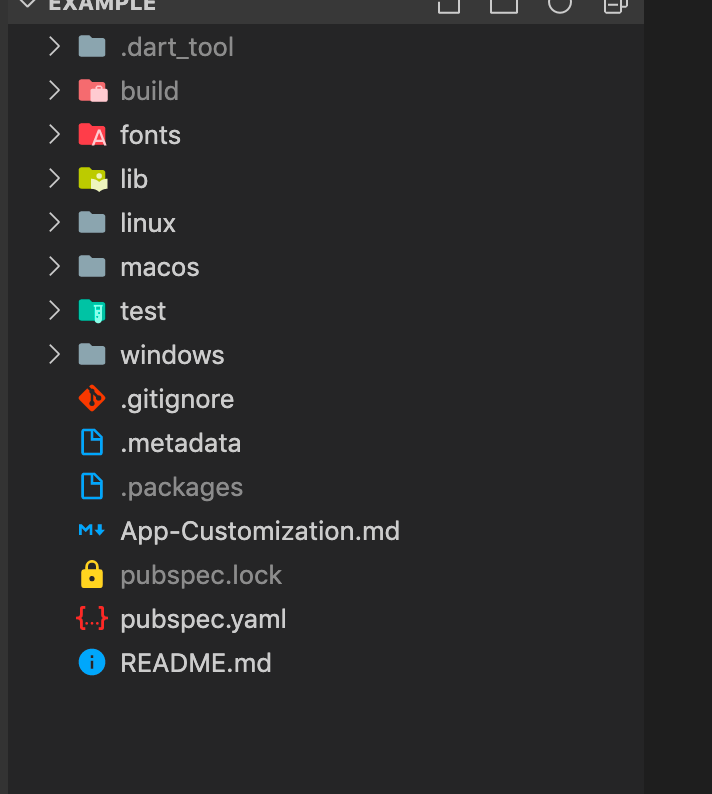
We will return to this step shortly…..
Note : You can run the program inside example directory via
flutter runOutput will be something like this :
Configure Flutter project with Desktop….
- Initialize a flutter project, either using VSCode or
flutter create "YOUR NEW PROJECT NAME"2. Go to the example directory from the previous step,
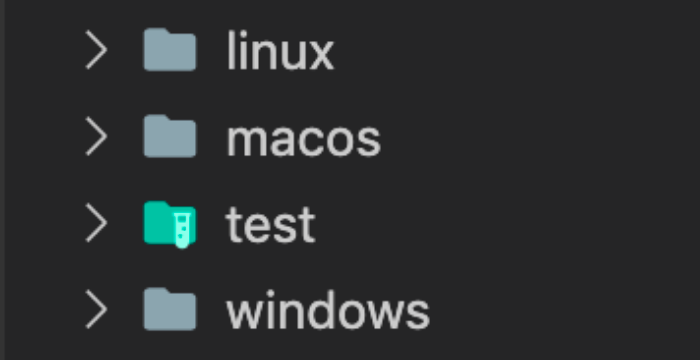
copy windows folderfor users on Windows.copy linux folderfor users on linux.copy macos folderfor users on mac.
NOTE : Also copy fonts folder from the example folder.
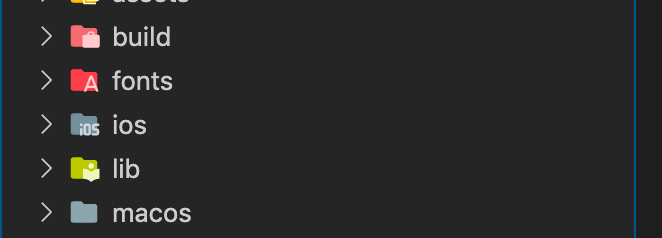
Paste (macos in my case) and fonts in the new project you created just now
3. In your main.dart file (of new project), you need to add these lines :
// ADD THIS IMPORT
import 'package:flutter/foundation.dart'
    show debugDefaultTargetPlatformOverride;

void main() {
// ADD THIS LINE
debugDefaultTargetPlatformOverride = TargetPlatform.fuchsia;
runApp(MyApp());
}4. Final step, in your pubspec.yaml (of new project), under environment section, add
flutter: '>=1.10.2-pre.54'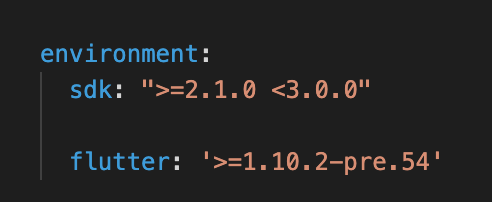
Add the following under flutter section,
fonts:
    - family: Roboto
      fonts:
        - asset: fonts/Roboto/Roboto-Thin.ttf
          weight: 100
        - asset: fonts/Roboto/Roboto-Light.ttf
          weight: 300
        - asset: fonts/Roboto/Roboto-Regular.ttf
          weight: 400
        - asset: fonts/Roboto/Roboto-Medium.ttf
          weight: 500
        - asset: fonts/Roboto/Roboto-Bold.ttf
          weight: 700
        - asset: fonts/Roboto/Roboto-Black.ttf
          weight: 900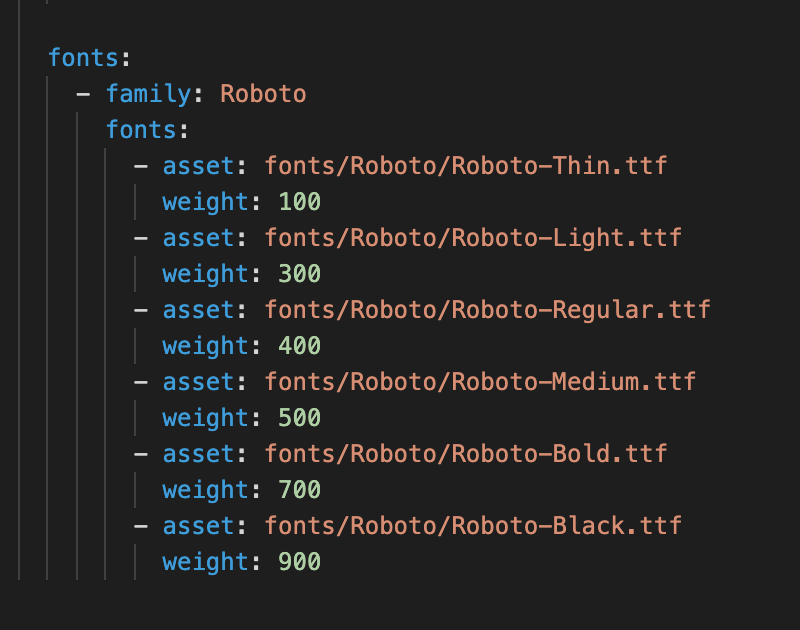
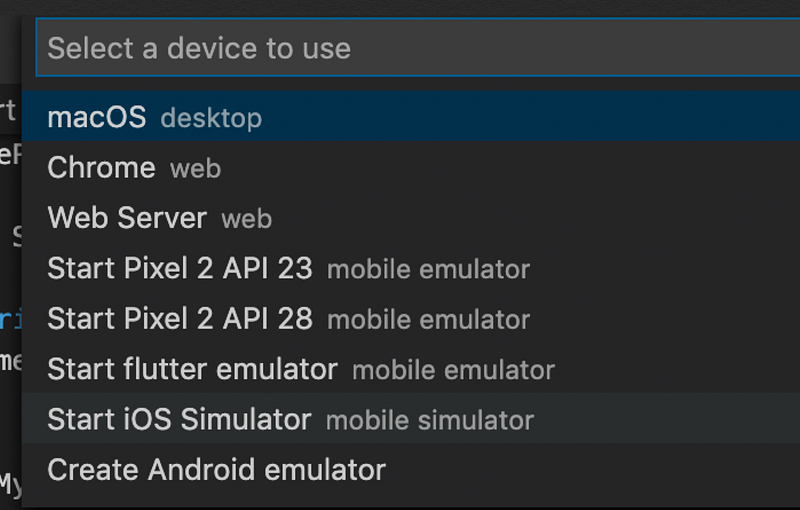
Select the device before running the project now,
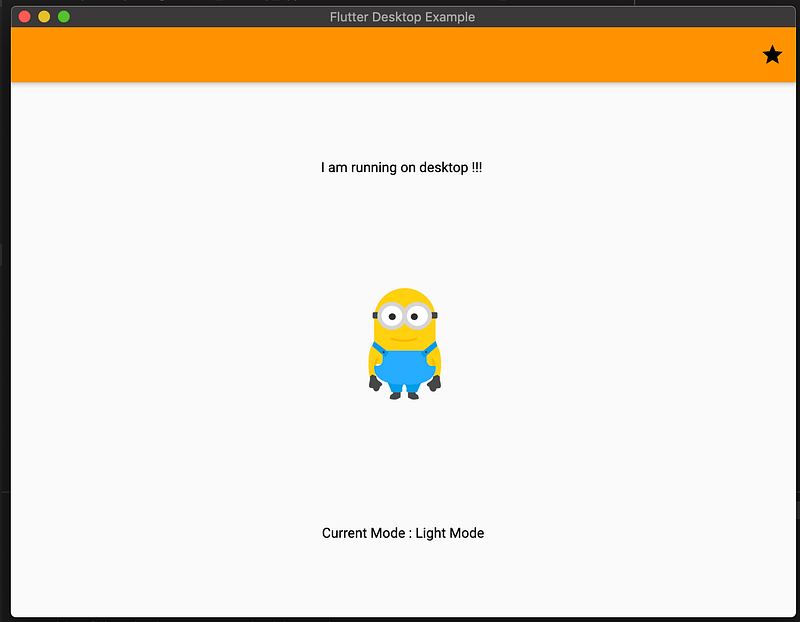
Finally, run the project, and see your application running on desktop…!!!!!
Note: You can also use this command to run…(macOS for my case)
flutter run -d macOS
In case, you got something wrong, look at the source code here,
Output: (Pss, click on star to see theming…)
Articles related to Flutter Desktop:
Check out this animation
