
British Network Television
‘Father Brown’: S03.E04. “The Sign of the Broken Sword”
Father Brown visits the local barracks for the unveiling of a Dunkirk war memorial
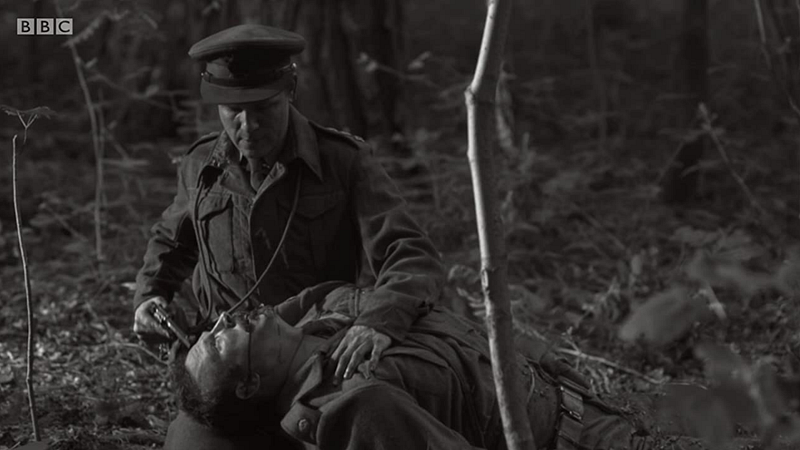
This episode opens with a flashback to the Second World War. Shortly before the Dunkirk evacuation, June 1940, we find two British Army officers trying to evade the enemy whilst making their way towards the port.
One of the officers, Major Desmond Murray (Craig Whittaker), has been wounded significantly and is potentially close to death. Major David Rawlings (Jamie Ballard), not seeing how he can get his colleague to the port without first being discovered by the enemy, puts the major out of his mystery.
The authenticity of the scene, with it being filmed in black and white, adds a degree of historical accuracy to the episode. The Dunkirk evacuation, for the British military, is considered one of the lost points of the conflict.
Sidney “Sid” Carter (Alex Price), immediately after the opening credits sequence, is driving Father Brown (Mark Williams), Mrs Bridgette McCarthy (Sorcha Cusack), and Lady Felicia Montague (Nancy Carroll) to the local British Army barracks where they are scheduled to attend a ceremony. The ceremony, dedicated to the unveiling of a Dunkirk war memorial, was only possible because of fundraising carried out in Kembleford. It sounds like Lady Felicia would rather have Mrs McCarthy sit up front with Sid.
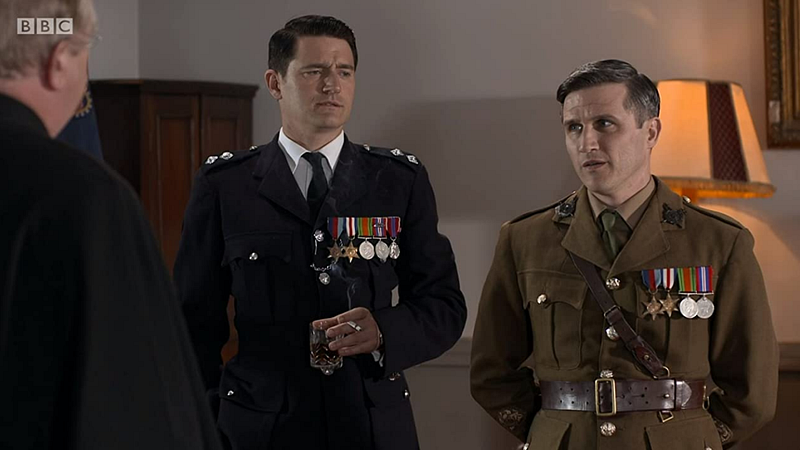
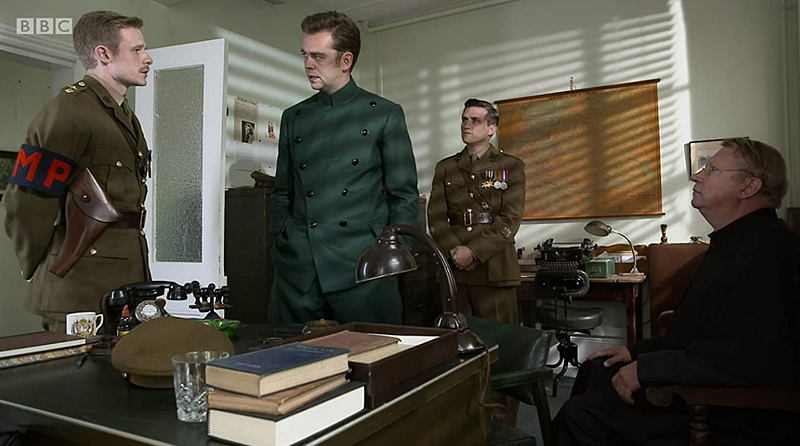
When arriving at their destination, parking on the parade ground, Sid draws the attention of Lt (Lieutenant) Anthony Graham (Steven Miller) because he’s not supposed to park there. RSM (Regimental Sergeant Major) Reginald Davis (William Ash) introduces himself to the guests. Lt Graham, something Inspector Sullivan (Tom Chambers) agrees with, takes a dislike to Sid right off the bat.
Shortly thereafter, at a brief gathering, we find Lt Graham and RSM Davis conversing with their guests. The are regaling the guests with a war story revolving around Colonel Laurence St Clare (Angus Wright) and his heroics. Lt Graham’s comment about Colonel St Clare leading from the front doesn’t go unaddressed by Major Rawlings as he seems to have a dim view of the commanding officer. Lt Graham, momentarily glancing at Major Rawlings, suggests there is no love lost between the two men.
Whilst Lt Graham credits Colonel St Clare for getting so many troops out alive, Major Rawlings notes that less than half the number of men deployed made it out alive. RSM Davis suggests to Lt Graham, because Major Rawlings is visibly inebriated, it would be best to keep an eye on him as he is likely to cause trouble. There is no denying the major is drunk.
Note the brief scene between Major Rawlings and Father Brown where they exchange glances. It is remarkable how the actor could present his character as being so “p*ssed.” Major Rawlings’ condition doesn’t escape Father Brown’s attention.
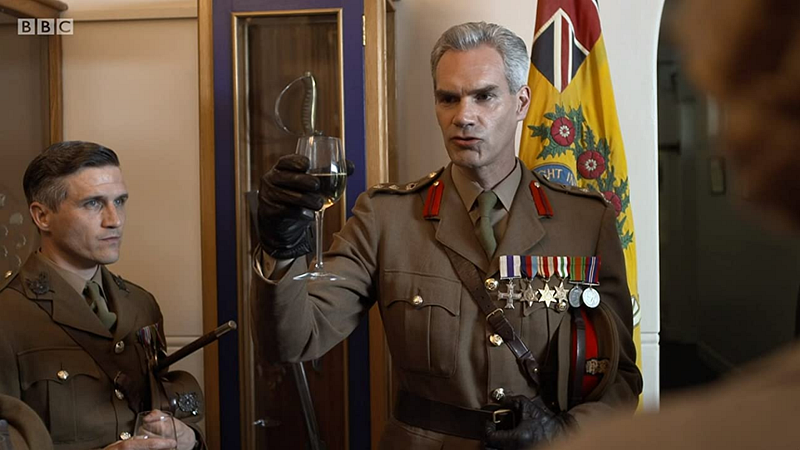
On route to the dining room, after taking a wine glass from Sid, we see Lady Felicia conversing with Colonel St Clare. Lady Felicia’s familiarity with the commanding officer, noting how she addressed him by his first name, there is an obvious past between the two characters. We soon find the guests dining with the military top brass.
Lt Graham’s use of the word “Blighty” is historically correct as it was used by many British soldiers during and after both world wars. Blighty is an informal and typically affectionate term for Britain or England. Whilst Father Brown isn’t seen smoking, several men and women seated at the table, inclusive of Mrs McCarthy, can be seen with a cigarette in hand. The presence of smoking adds to the historical accuracy of the scene.
Major Rawlings makes a scene at the dining room table which causes more than a modicum of embarrassment. Lt Graham tries to get the major to resume his seat as he had stood and proposed a toast. The toast, not that anyone should be surprised, contained within it a backhanded complement for the commanding officer. Facial expressions all around are aghast.
RSM Davis, despite Major Rawlings’ continued harassment of Colonel St Clare, suggests that everyone attend the shooting range so the men of the Third Regiment can show off their skills.
As the attendees begin to make their way to the shooting range, noting how Major Rawlings is seemingly agitated by something, Father Brown takes a moment to speak with the drunk officer. Major Rawlings doesn’t believe the Catholic priest can help him and exits the building. Colonel St Clare noticeably follows the major when he leaves the table.
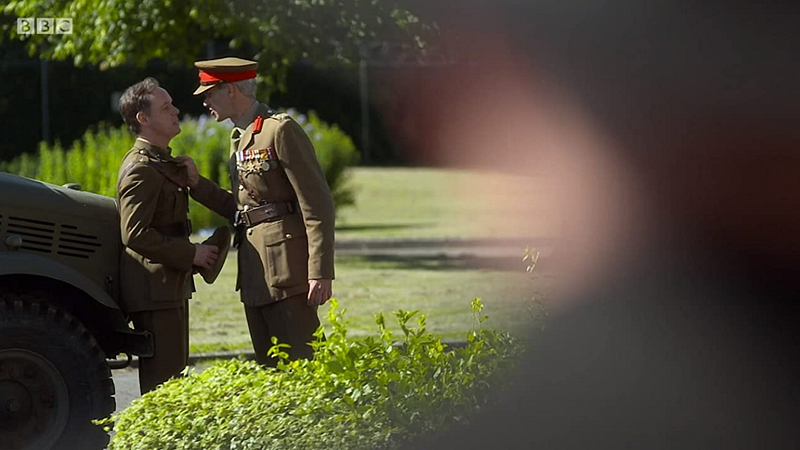
There is a confrontation, as expected, between Colonel St Clare and Major Rawlings. This confrontation, even though it is brief, doesn’t go unnoticed by RSM Davis, Lady Felicia, and Father Brown. A sergeant, with news of the broken sword having been stolen, is asked to accompany Lady Felicia and Father Brown to the shooting range whilst RSM Davis investigate the theft.
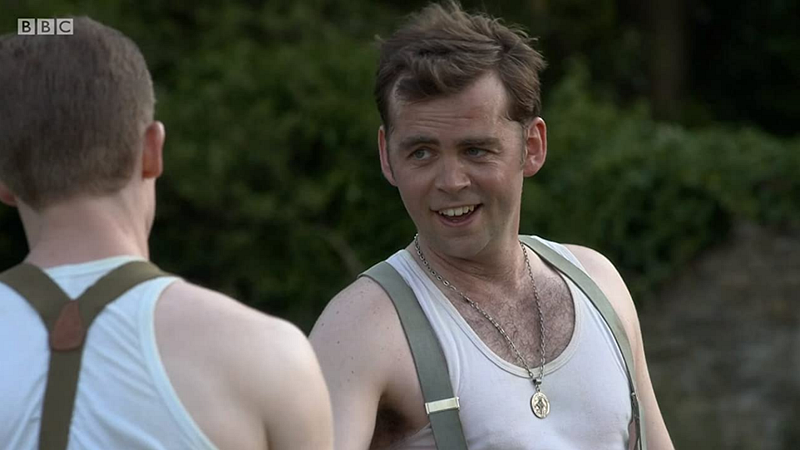
Sid, close by, is obviously bored. Lady Felicia’s chauffeur simply has nothing to do with his time whilst waiting for the day to run its course. Lt Graham, not liking how Sid apparently ducked out of National Service, has an issue with Lady Felicia’s chauffeur which can easily be resolved.
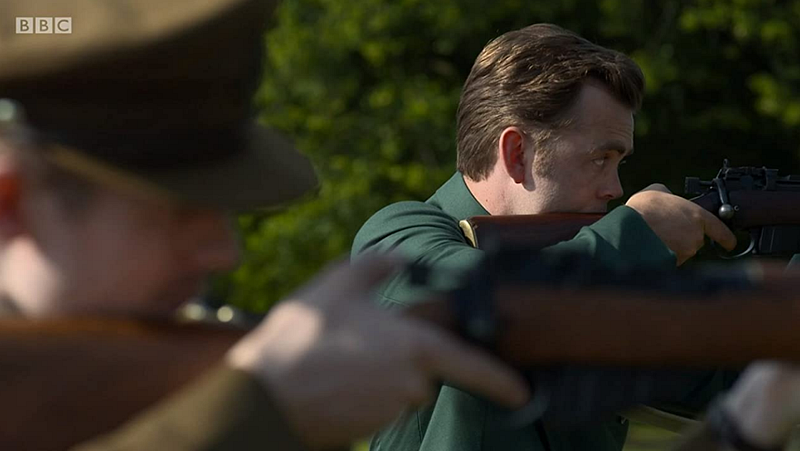
Whilst RSM Davis suggests a competition between the two men, Lt Graham initially indicates a lack of interest, Sid’s comments on the lieutenant being all mouth. This doesn’t remotely please Lt Graham. The two men get to fire off five shots each and take a turn around the assault course. RSM Davis places a bet with Father Brown on Lt Graham winning against Sid. Colonel St Clare, having arrived at the shooting range, thinks it splendid that there be a competition between the British Army and civvy street.
Colonel St Clare, briefly with Lady Felicia, converse regarding their personal history. It’s obvious that, if Colonel St Clare had returned for her after the war, there is a good chance Lady Felicia wouldn’t have married Monty.
Noting how Lt Graham and Sid had tied on the shooting range, with no bull’s eyes, Colonel St Clare takes up the challenge and scores five consecutive bulls without giving it much effort. It is here that we hear Lady Felicia’s trademark scream. She has discovered a dead body. It’s Major Rawlings and he has the broken sword sticking out of him.
Too late for medics, as Father Brown correctly observes, the catholic priest tries to bestow upon the now dead Major Rawlings last rites. Lt Graham, having no interest in Major Rawlings’ immortal soul, momentarily prevents Father Brown from doing his job. Colonel St Clare allows Father Brown to continue with last rights.
Anyone with a ounce of intelligence could have seen jurisdiction issues quickly approaching. With the murder having been committed on a military installation, even though Inspector Sullivan is present, civilian police have no jurisdiction to investigate the crime. Lt Graham, a military policeman, declines Inspector Sullivan’s offer of assistance.
Instead of going directly to the officer’s mess, piquing his curiosity, Father Brown is seen entering the museum from which the broken sword was taken. Even though RSM Davis tells Father Brown that Lt Graham wants everyone in the officer’s mess, noting the presence of blood on the broken display case glass, the Catholic priest draws the regimental sergeant major’s attention to it. RSM Davis correctly observes, on an army base, there isn’t a day that goes past where the men aren’t injured in some way.
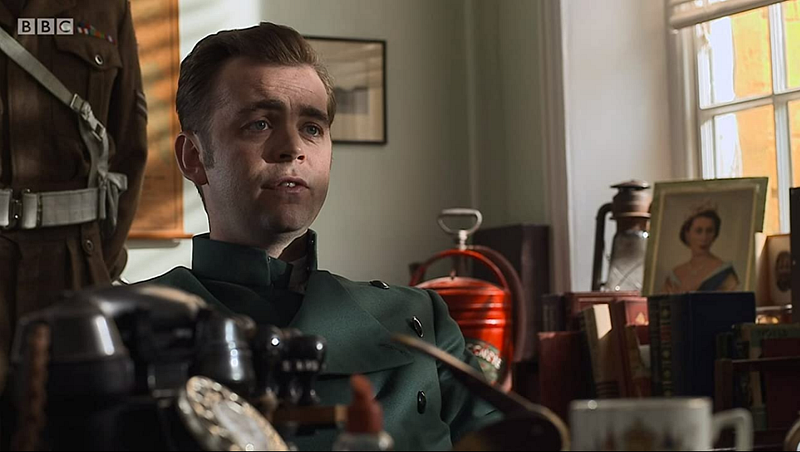
Sid, mainly because of Lt Graham’s dislike for Lady Felicia’s chauffeur, is questioned as to his whereabouts at the time Major Rawlings was murdered. There is nothing to suggest Sid and the major ever crossed paths the entire time he had been at the military installation. The attention to detail, with a period specific framed photograph of Queen Elizabeth II, is exceptional.
Anyone that knows Sid, not that that is many people, can tell you he tends to annoy people very quickly. Lt Graham isn’t able to answer Sid’s question because he knows there is no reason for Lady Felicia’s chauffeur to kill the major.
The second person questioned by Lt Graham, after being visibly annoyed by Lady Felicia’s chauffeur, is Father Brown. Does Lt Graham seriously think Father Brown would take a life?
Noting the time displayed on Major Rawlings’ broken wristwatch, 12:43, Father Brown recalls how Lt Graham arrived at the shooting range after the referenced time. Lt Graham, immediately taking offence at Father Brown’s intimation, tells the Catholic priest that he isn’t a suspect. Father Brown correctly observes that’s not the case because everyone is a suspect. Lt Graham soon finds Father Brown every bit as infuriating as Sid.
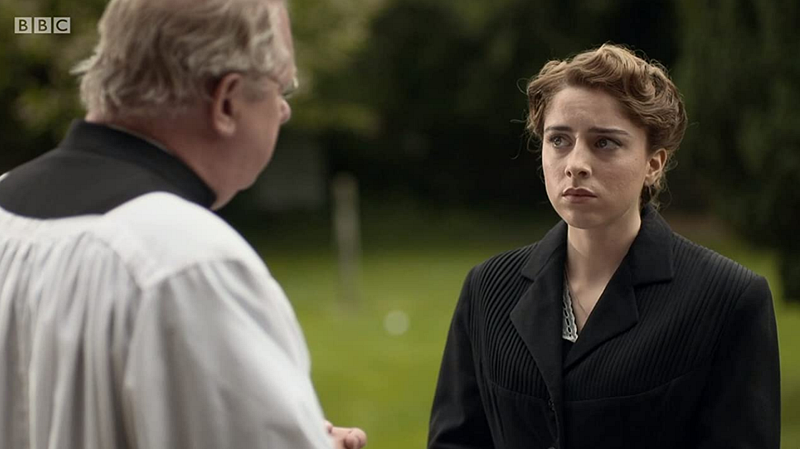
Simone Murray (Grace Cassidy), a maid in the officer’s mess, catches Father Brown’s attention when he notices a bandage on one of her hands. Could Miss Murray have killed Major Rawlings?
It’s not as if Miss Murray didn’t have a motive for killing him. The opening sequence to the episode saw Major Rawlings killing Major Murray. Miss Murray states that the cut on her hand was merely an accident in the kitchen. This is of course plausible as kitchen accidents do happen.
When asked is she was to attend the scheduled St Mary’s service, referencing her father’s death at Dunkirk, Miss Murray tells Father Brown that she no longer attends church services. The death of her father was enough for her to lose faith. When Father Brown asks Miss Murray to attend the service, after a brief pause, the maid states she would think about it.
As Colonel St Clare accompanies Lt Graham out of the officer’s mess, presumably to answer questions, Father Brown tries for a third time to offer his assistance. The Catholic priest is immediately shutdown.
Colonel St Clare answers most of Lt Graham’s questions to his satisfaction. There is a reference to the altercation Colonel St Clare was engaged in with Major Rawlings.
Sid wants to know why the killer didn’t just shoot Major Rawlings. Does anyone have a good answer?
The Catholic priest notes how vexed Major Rawlings was about Dunkirk. Interestingly, as RSM Davis recalls, Dunkirk was seemingly the making of Major Rawlings as it afforded him the opportunity for a promotion.
Major Murray, Major Rawlings’ predecessor, died in battle. Inspector Sullivan’s reference to dead man’s shoes sparks a thought in Father Brown’s head which causes him to rush from the room. Sid, wanting to know where Father Brown is going, follows the Catholic priest to Major Rawlings’ office. There is a moment where we see Father Brown on his knees ready to pick the lock on the door. Sid comically opens the door.
Father Brown, in Major Rawlings’ office, finds newspaper clippings displayed on a pin board. The Catholic priest finds these clippings most curious as they indicate a very different account of history than the one that has been banded about. Father Brown correctly observes Major Rawlings was obsessed with Dunkirk. There is something seriously fishy about the entire operation.
Father Brown and Sid are soon joined by Lady Felicia. Not long thereafter, Inspector Sullivan makes his presence felt. The police inspector’s attitude suggests he is more annoyed with Lt Graham for not letting him help with the investigation than he is with Father Brown for following his own line of inquiry.
Inspector Sullivan obviously wants in on what Father Brown is doing. The police inspector, not entirely comfortable with the Catholic priest’s behaviour, hopes Father Brown knows what he’s doing as it could all backfire in their faces.
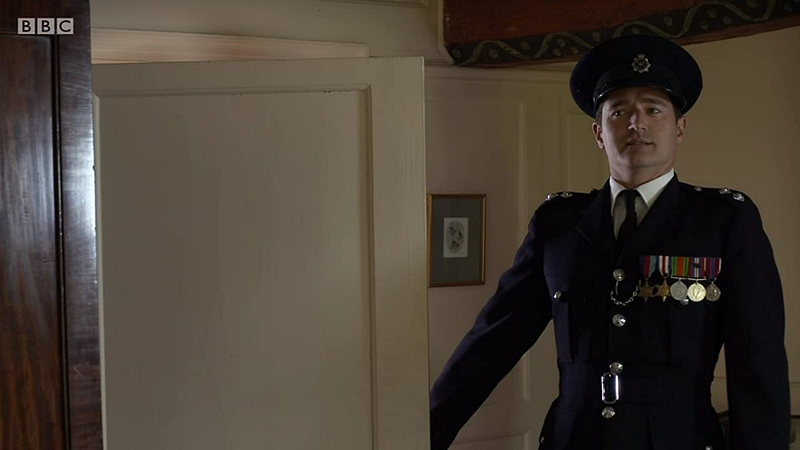
Unbeknownst to any of them, as they leave Major Rawlings’ office, they are observed. The episode, noting the presence of a military shoulder patch, is edited to conceal the identity of the individual. With Colonel St Clare still being with Lt Graham in his office, we are left wondering if it could be RSM Davis.
Colonel St Clare remembers receiving a telephone call from someone at the War Office. Lt Graham is merely trying to cover all angels because this is not someone that likes to leave any stone upturned. The commanding officer, even though he doesn’t seem to like Lt Graham’s investigative approach, should understand the position the lieutenant finds himself is difficult.
When Father Brown broaches Lt Graham’s door, with the military policeman not interested in anything the Catholic priest might have to offer, the door is closed in his face. Lt Graham has even less interest in seeing Father Brown solve the case than Inspector Sullivan would if it were a civilian matter.
Lady Felicia asks Colonel St Clare why it is he didn’t return to her after the war. Colonel St Clare, with the war having changed him significantly, notes how he saw things he’d never previously thought possible. Retiring to his quarters, noting how important it was for him to get something off his chest, Colonel St Clare directs Lady Felicia to follow him.
Father Brown, Sid, and Inspector Sullivan observe Colonel St Clare heading towards his quarters. The police inspector, even though he mockingly suggests Mrs McCarthy could be the killer, seems to think the commanding officer is the primary suspect.
As Father Brown and Sid chase after Colonel St Clare, noticeably in the background, we see Lt Graham and a sergeant with the police inspector. Father Brown and Sid come under fire from an unseen assailant. Who could possibly want to shoot either Father Brown or Sid?
Lt Graham, because of the priest’s meddling, directs one of his sergeants to place Father Brown in Cell Three. Inspector Sullivan, even though it obviously pains him, tells Lt Graham that there are times when Father Brown’s investigative skills have proven useful.
Later, back in his office, we find Lt Graham confirming Colonel St Clare received a call from the War Office. It is here that we see Father Brown and Sid waiting for Lt Graham to finish his phone call.
Father Brown, after Lt Graham shows the Catholic priest Major Rawlings’ wristwatch, tells the lieutenant the major’s timepiece can be found on his desk in his office. Not answering Lt Graham’s question, Father Brown details how the killer made everyone think the major was killed at 12:43 when he was killed at a different time.
The crown used to correct the time on this kind of wristwatch had been pulled out. The killer, after smashing the wristwatch, forgot to push the crown back to the proper position. Consequently, because of this, Colonel St Clare’s alibi becomes worthless.
Elsewhere, we find Lady Felicia conversing with Colonel St Clare in his quarters. Colonel St Clare tells Lady Felicia that he did in fact return to Kembleford for her. It was the day the Kembleford men returned from Dunkirk. He believed she deserved better than him.
Lady Felicia finds the scabbard to the broken sword hidden behind books on Colonel St Clare’s bookcase. This is just too easy. All the dots are pointing everyone in the same direction. Lady Felicia has no choice but to inform Lt Graham of what she discovered. Lt Graham arrests Colonel St Clare on suspicion of murder.
Father Brown, referencing the assault course competition, suggests to Lt Graham and RSM Davis that it go ahead. RSM Davis, mainly because he wants to collect his winnings from Father Brown, believes it a splendid idea.
Lt Graham’s facial expression, even though RSM Davis talks the lieutenant into it, doesn’t feel the competition is appropriate. It doesn’t take long for Sid to figure out Father Brown doesn’t believe the colonel killed Major Rawlings.
You can’t say the assault course scenes aren’t without at least a modicum of entertainment. Father Brown suggests to the regimental sergeant major that he could be putting on a brave face. During the competition, something which completely surprised Lt Graham, Sid showed his sporting side when he assisted the military policeman over the roped fence.
The Catholic priest takes an opportunity to layout the case as he sees it. The evidence, as Father Brown understands it, suggests someone other than Colonel St Clare killed Major Rawlings. There is the possibility that Colonel St Clare, with him having established an alibi, had someone steal the broken sword for him.
Something happened, as Father Brown details it, before the charge at Dunkirk which somehow haunted the major. What could that something be?
Lt Graham, as RSM Davis recalls, was a corporal at the time of the Dunkirk evacuation. The then Corporal Graham wasn’t with either Colonel St Clare or Major Rawlings. The only person that could have killed Major Rawlings is RSM Davis. How could Father Brown prove it?
Lt Graham, even though Sid could have easily beaten him, won the assault course. It was the assistance Sid gave to Lt Graham that made the difference. Sid, not wanting to let Father Brown down, asks Lt Graham about the charge at Dunkirk.
It is here that the lieutenant reveals he arrived shortly before seeing Colonel St Clare and Major Rawlings emerge from the woods together. There was no sign of Major Murray anywhere. Colonel St Clare, even though the men weren’t in any fit condition to execute such a manoeuvre, ordered the charge.
At St Mary’s Catholic Church, with Mrs McCarthy busy cleaning the church for the coming service, Father Brown, Sid, and Lady Felicia are far more interested in discussing the charge at Dunkirk than they are with cleaning. Could the change have been ordered to hide Major Murray’s murder?
The best way to hide a leaf, as Father Brown correctly observes, is in the middle of a forest. Hiding a body in a stack of other bodies, especially when there is a war, must have been easy.
When Miss Murray arrives at the church, with the Catholic priest standing at the entrance, we learn Father Brown has figured out her identity. It turns out that Miss Murray’s father Major Murray, was the only one that would stand up to the commanding officer when he was obviously wrong.
Colonel St Clare stabbed Major Murray through the back with his sword. Major Rawlings, because of what the commanding officer did, shoots Major Murray. This was the only option open to him. The Royal Engineers, close by, never made it back to their families. If Colonel St Clare had done the right thing, something Major Murray implored, those deaths wouldn’t have occurred.
Later, when RSM Davis, Mrs McCarthy directs him to Father Brown’s office as he has something for him. RSM Davis tells Father Brown to give his winnings to those in need. When the Catholic priest asks of RSM Davis the time, it is revealed he is missing his wristwatch. The jig is up.
RSM Davis had Miss Murray steal the broken sword and he used it to kill Major Rawlings. Major Rawlings believed it would be best if Colonel St Clare confessed to killing Major Murray. RSM Davis, because of his loyalty to the Third Regiment, was obviously not going to listen to anything Major Rawlings said on the subject. RSM Davis, recognising Colonel St Clare was no hero, hid behind his men rather than lead the fight from the front. His heroism was a fiction.
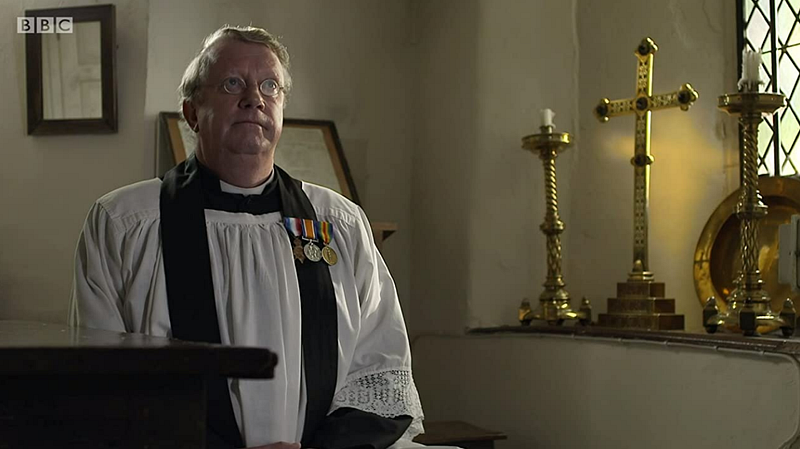
Father Brown tells Colonel St Clare that he knows he didn’t kill Major Rawlings. In recognising the terrible mistake he made, Colonel St Clare asks Father Brown if he will hear his confession. As long as the colonel places his reputation first, something that goes against true repentance, Father Brown declines the request.
Father Brown, near a war memorial, promises RSM Davis he will not tell anyone of what he knows. The Catholic priest doesn’t have to reveal anything because Colonel St Clare comes forwards with the truth. Lt Graham, accompanied by other military policeman, arrives at the memorial.
With military police on one side and civilian police on the other, RSM Davis has nowhere to run. The first time we see Sergeant Daniel Goodfellow (John Burton) in the entire episode. It’s almost as if showrunners were looking to give the actor something to justify his presence. Lt Graham remains silent whilst Inspector Sullivan arrests RSM Davis.