Domain Names Used by Devices
Figuring out to what domain names your devices connect
~~~~~~~~~~~~~~~~~~~~~~~~~~~~~~~~~~~~~~~~~~~~~~~~~~~~~~~~~
⚙️ Check out my series on Automating Cybersecurity Metrics. The Code.
🔒 Related Stories: Unifi | Dream Machine Pro | Ubiquiti | pfSense | Network Security
💻 Free Content on Jobs in Cybersecurity | ✉️ Sign up for the Email List
~~~~~~~~~~~~~~~~~~~~~~~~~~~~~~~~~~~~~~~~~~~~~~~~~~~~~~~~~
In my post on Watching the Network Watchers, I promised I would explain a bit more about DNS connections the Ubiquiti Dream Machine Pro made and how I figured that out. It took me a while to get back to this because I’ve been very busy!
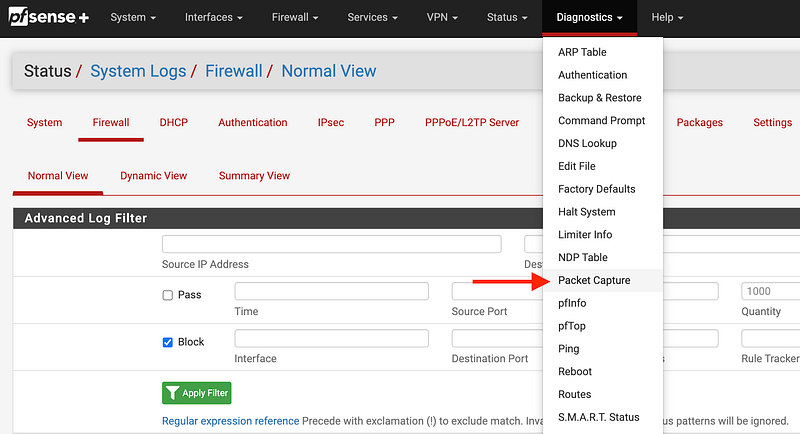
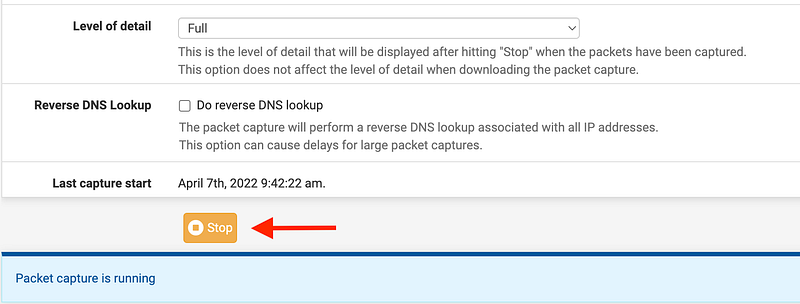
I explained that when I started the device I put it behind a PFSense firewall so I could monitor the traffic. Within PFSense you can capture packets. Click on Diagnostics at the top and then Packet Capture, as shown below.
Initially, I had just plugged the UDM WAN port into a PFSense WAN port. That didn’t work as I’ll explain in another post, but I was still able to capture DNS requests.
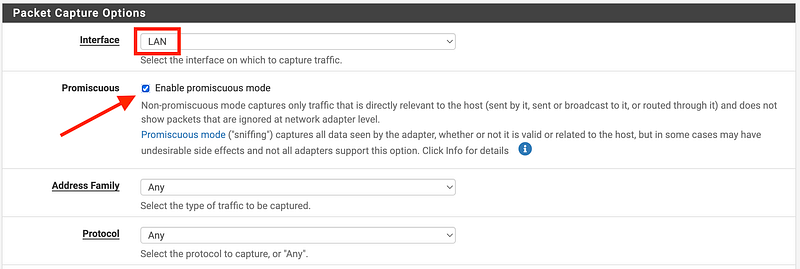
On the packet capture screen, select your LAN interface (or whatever interface you’ve got your device plugged into that you are inspecting). Enable promiscuous mode. I like to see everything I can.
Scroll down. Enter count 1000 to get more packets if you need. Choose the level of detail Full. Click start. Let that run for a while. I started the packet capture after I fired up the device and it was the only thing on my LAN at the time so I could focus on traffic from the device I wanted to see.
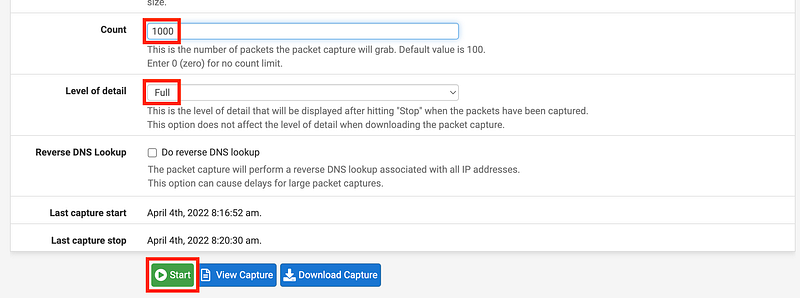
Note that I did not check “Do reverse DNS lookup” because that is generally a waste of time. You’ll get back domain names like Amazon CloudFront domain names or Amazon EC2 domain names with the IP in them, not the actual domain name that the device requested. It also takes more time for the device to process those reverse lookups. You can easily do a reverse lookup later if you want to use dig on Linux or Mac:
dig -x 8.8.8.8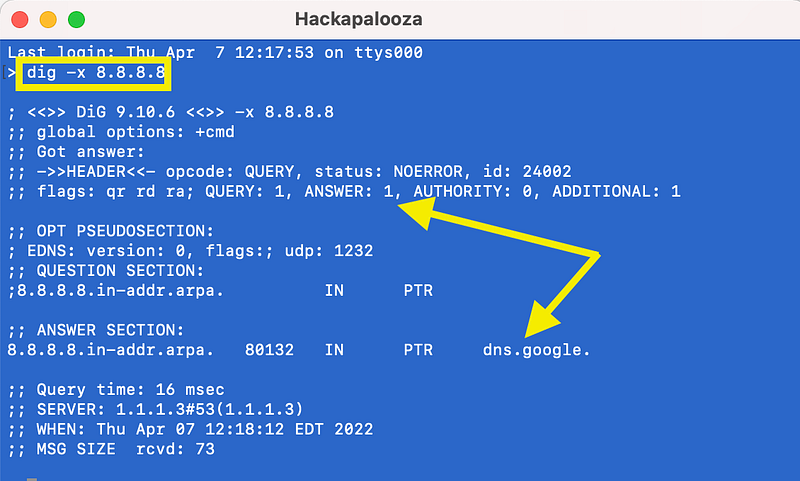
On windows you can use:
ping -a 1.1.1.1or
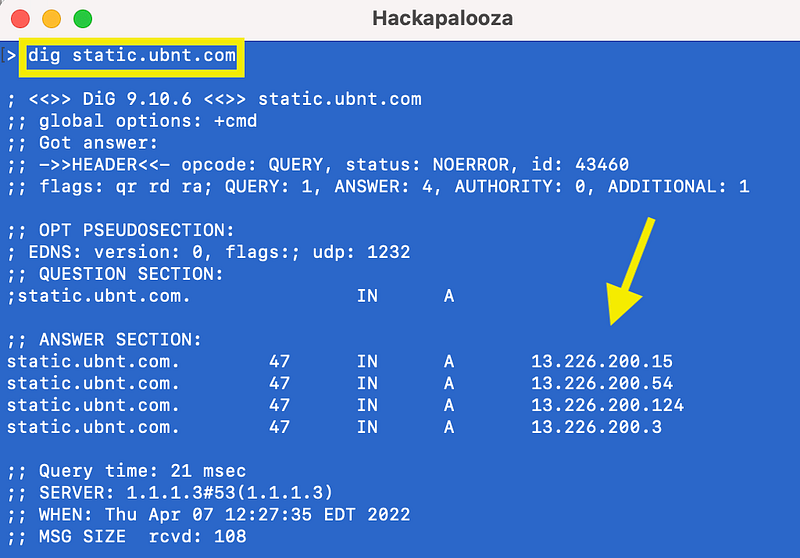
nslookup 1.1.1.1As I mentioned, if you do this reverse lookup you’ll often just get a generic cloud domain. Run a dig (no -x) command on static.ubnt.com to get back the IP addresses. That’s one of the domains to which the UDM tried to connect.
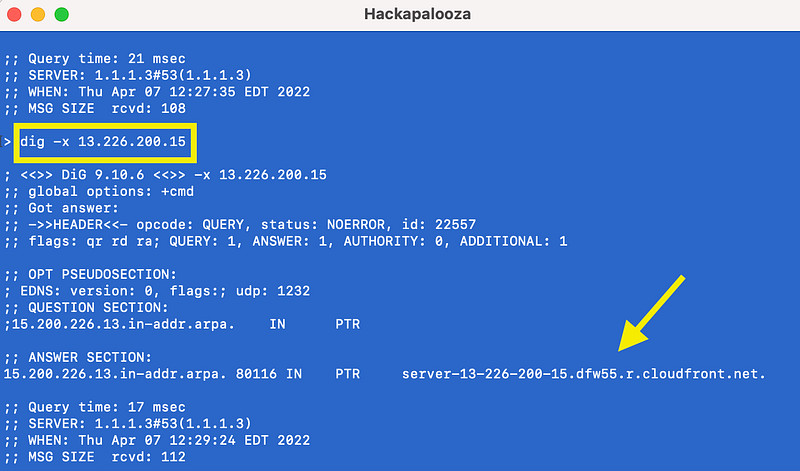
Now do your reverse DNS lookup on one of those addresses. You get back a generic AWS CloudFront address. You can’t tell from that information what domain name your machine requested to get that IP address.
You might be able to do some additional querying to get all the CNAMES for an IP address but that’s not what I wanted to show you in this post.
Finding a Domain Name for an IP address using a Packet Capture
OK back to our packet capture. Hopefully, you followed the instructions above and have had it running for a while. Stop the packet capture.
You’ll see a bunch of traffic there but that’s a bit hard to read and impossible to query. I like to query my packets like they are a packet database. Click download to get a pcap file.

If you’re not familiar with pcap files and packet captures I explained that in a prior blog post and how to use Wireshark.
Once you’ve downloaded your file, presuming you have Wireshark installed, click on it and it will open in Wireshark.
Search for the domain name for a single IP address
In the pcap file, you will be able to see the source IP address connecting to several other IP addresses. If you want to determine the DNS name for any of those IP addresses you can follow these steps:
- Filter on the IP address you want to identify by entering a filter in the top bar like this and then press enter. Replace the x.x.x.x with the address with the one you are trying to identify.
ip.addr = x.x.x.xThat will look like the screenshot below in Wireshark.

Notice the record numbers in the first column with “No.” as a header. The first one is 807. Somewhere just prior to record 807 a DNS query should exist that asks a DNS server what the IP address is for a particular domain name. The response will contain the IP address you’re trying to identify.
2. Scroll to the records just before the first time you see the IP address (or you can do some fancy filtering but I’m trying to keep it simple here). Find the corresponding DNS query.
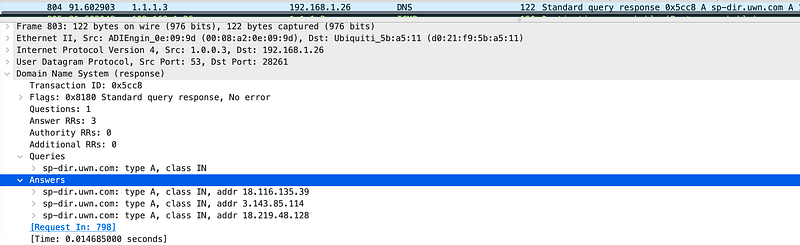
In the example above, this is the response to a DNS request for sp-dir.uwn.com. One of the answers is the IP we’re investigating. 18.116.135.39.
So now we know that the IP address that the UDM is trying to reach in records containing a destination IP of 18.116.135.39 corresponds with sp-dir.uwn.com.
Query all the DNS records and review the responses
An alternative to quickly see all the DNS requests would be to simply type “dns” in the Wireshark filter bar and hit enter. Then review all the responses such as the one above to get a list of the DNS requests the device made.
Set up firewall rules to allow or block traffic accordingly
I noticed that one of the things the UDM tried to connect to was a domain stun.freeswitch.org on a stun port. Before allowing that traffic I wanted to better understand why it existed and how it is used. I know that incorrectly configured stun services can be a problem. I was also concerned that the service to which the stun port connects exists on Digital Ocean. That network is constantly scanning and attacking my systems as I’ve written about previously. I chose to leave that blocked until I can investigate further.
I didn’t do deep packet inspection on everything the UDM connects to yet. Not sure if or when I will have time. But I was able to reverse-engineer a more complete list of domain names and ports that I needed to allow the device to connect to to operate properly including port and protocol.
I can allow these connections for the appropriate networks involved in configuring and managing the device and disallow unnecessary domains and ports. Here are the domain names I discovered (so far):
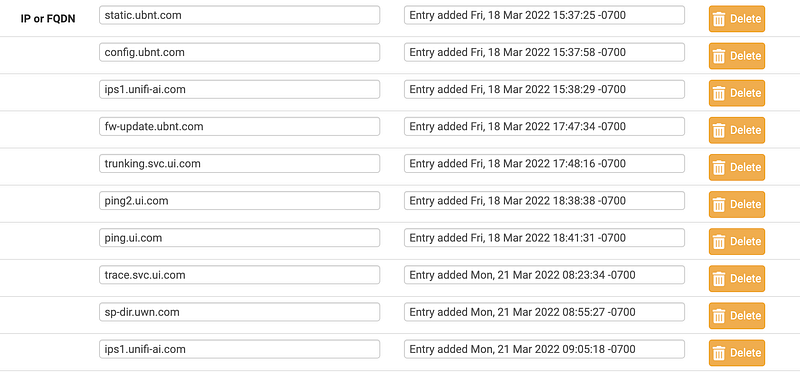
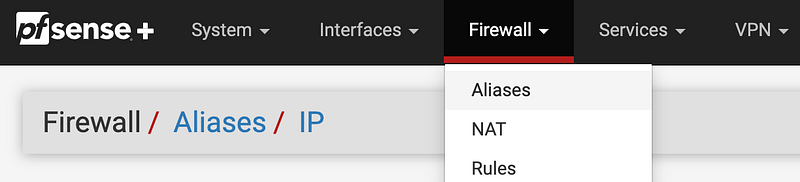
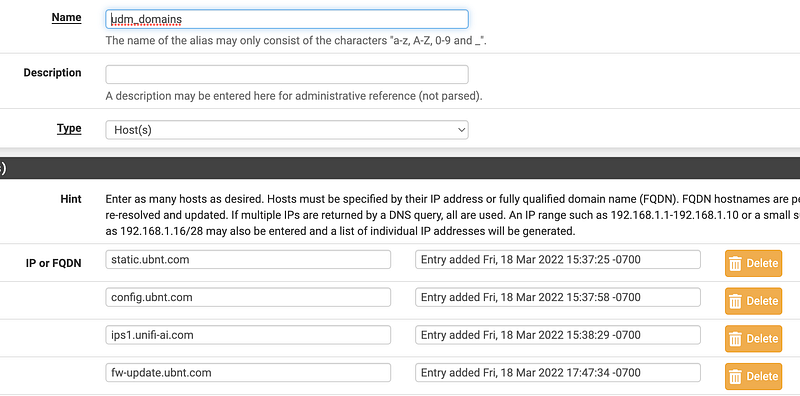
I created an alias for these domain names in PFSense by going to Firewall > Aliases:
Enter a name and choose Type = Hosts. Enter the necessary domain names.
I added a rule to allow the UDM to contact these hosts on port 443. Initially, I allowed the IP address of the UDM specifically from the LAN but I’ll show you another option in a future post that is more specific.
Local network traffic
In addition to the traffic that traverses the Internet, you’ll need to add rules for local traffic but I’ll cover that in another blog post. For now, just wanted to help you understand how to determine what domain names a device connects to create appropriate firewall rules.
What if you can’t create rules for domain names?
Of course, if your network devices or appliances (or cloud security groups) don’t work with domain names and that’s all the vendor gives you, then you’re out of luck creating firewall rules. That’s the challenge with cloud networking such as AWS Security Groups and Network Access Control Lists (NACLs) and similar on other cloud providers. You can only use CIDRs in rules.
In that case, you need to get CIDR ranges from vendors and they don’t always provide those. It appears that Ubiquiti is not using the bring-your-own-ip option on AWS to provide specific CIDR blocks you can add to your firewall rules. That is unfortunate. They could also use load balancers with static elastic IP addresses (EIPs) and provide those but doesn’t seem like that is what they are doing for all domains.
You could try to dynamically query and update the IPs using some mechanism that tries to detect changes but that gets a little tricky. Hopefully, vendors and clouds will come together to make this easier in the future for more easily configurable zero-trust networks.
Follow for updates.
Teri Radichel | © 2nd Sight Lab 2022
About Teri Radichel:
~~~~~~~~~~~~~~~~~~~~
⭐️ Author: Cybersecurity Books
⭐️ Presentations: Presentations by Teri Radichel
⭐️ Recognition: SANS Award, AWS Security Hero, IANS Faculty
⭐️ Certifications: SANS ~ GSE 240
⭐️ Education: BA Business, Master of Software Engineering, Master of Infosec
⭐️ Company: Penetration Tests, Assessments, Phone Consulting ~ 2nd Sight Lab
Need Help With Cybersecurity, Cloud, or Application Security?
~~~~~~~~~~~~~~~~~~~~~~~~~~~~~~~~~~~~~~~~~~~~~~~~~~~~~~~~~~~~~
🔒 Request a penetration test or security assessment
🔒 Schedule a consulting call
🔒 Cybersecurity Speaker for PresentationFollow for more stories like this:
~~~~~~~~~~~~~~~~~~~~~~~~~~~~~~~~~~~~~~~~~~~~~~~~~~~~~~~~~~~~~
❤️ Sign Up my Medium Email List
❤️ Twitter: @teriradichel
❤️ LinkedIn: https://www.linkedin.com/in/teriradichel
❤️ Mastodon: @teriradichel@infosec.exchange
❤️ Facebook: 2nd Sight Lab
❤️ YouTube: @2ndsightlab