

Twitter Sentiment Analysis in Python — Sklearn | Natural Language Processing
Detailed Step by Step Process of a Sentiment Analysis in Python
With the massive introduction of ChatGPT and other similar types of applications, it’s impossible not to notice the importance or implications of Natural Language Processing in the industry today. Also, from social media and online businesses, a huge amount of text data is generated every day. Businesses are also working to utilize those data in their own way.
You do not have to always build ChatGPT-like applications with text data. There are a lot of simple machine learning models that can also help utilize the text data in a very useful way.
This tutorial will work on sentiment analysis of tweet data using the sklearn library. This will be a simple classification practice. We will try to find out from texts if the texts carry positive sentiments or negative sentiments.
I used ‘twitter.csv’ dataset from Kaggle. Here is the link for the dataset. Please feel free to download the dataset and follow along:
This dataset has an Attribute 4.0 International License.
First, create a DataFrame using this CSV file:
import pandas as pd
df = pd.read_csv('twitter.csv')
df.head()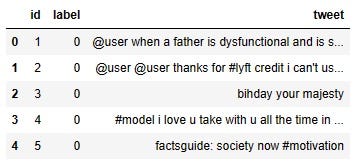
The dataset has a column ‘tweet’, which will be our focus today. The ‘label’ column has the labels 0 or 1. When the label is 1 that means the sentiment in the tweet is positive and when the label is 0 the sentiment is negative. As this is a supervised learning process, we will need the label to train the model.
Text Preprocessing
When you deal with the text data, the additional work that is required is text preprocessing. It is impossible to get the raw data that is very clean and ready for the model already. These extra steps or steps make Natural Language Processing tricky. In my last tutorial, I demonstrated some very popular text preprocessing techniques.
Please check this if you are totally new to the text data.
I am going to use some of those techniques in this exercise.
Remove Punctuation
If you notice in the tweet data, there is a lot of punctuation like ‘@’, ‘#’, ‘:’. I wanted to clear those to get text only. This remove_punctuation function goes through each character and removes the punctuations from the texts.
import string

def remove_punctuation(text):
    return ''.join([i for i in text if i not in string.punctuation])
Now, apply this function to the ‘tweet’ column and create a new column, ‘tweet_clean’.
df['tweet_clean'] = df['tweet'].apply(lambda x: remove_punctuation(x))
df.head()
Please notice, there is no punctuation in the tweet_clean column.
Lemmatization
The next text processing we will do is called ‘lemmatization’. What does it do? It brings the words to their base form such as ‘trying’ becomes ‘try’, ‘going’ becomes ‘go’, ‘talked’ becomes ‘talk’, ‘cleans’ becomes ‘clean’, and so on. In short, whatever changes a word needs to go through to make a sentence, lemmatization changes that and makes it the original base word.
Lemmatization is applied to words not to sentences. So, we should split the sentences and separate the words. The ‘Tokenize’ function below will just do that.
def tokenize(text):
    return text.split(' ')

df['tweet_clean'] = df['tweet_clean'].apply(lambda x: tokenize(x))
df.head(10)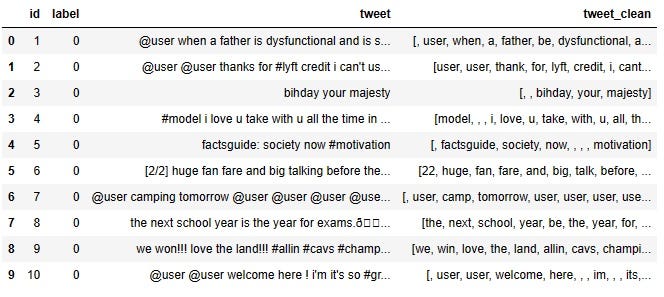
Now, we can perform the lemmatization. In the code block below,
We do the necessary imports first.
Then download “wordnet” and “omw-1.4” from ‘nltk’ otherwise, you will get error messages.
Initialize WordNetLemmatizer.
Define ‘lemmatization’ function where we want to lemmatize only verbs. That’s why we need to include “pos=’v’” in the ‘lemmatize’ function.
import nltk
from nltk.stem import WordNetLemmatizer
nltk.download("wordnet")
nltk.download("omw-1.4")

wnl = WordNetLemmatizer()
def lemmatization(text):
    return [wnl.lemmatize(w, pos='v') for w in text]

df['tweet_clean'] = df['tweet_clean'].apply(lambda x: lemmatization(x))
df.head(10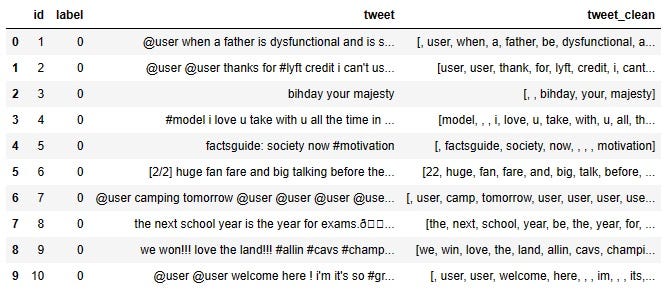
Finally, we will join the words in the list of the words again to make them look like sentences again:
def join_words(list_words):
    return ' '.join(words for words in list_words)
df['tweet_clean'] = df['tweet_clean'].apply(lambda x: join_words(x))
That’s all the preprocessing for this project.
Let’s try the model on it.
Model development
As usual, training features and labels need to be defined. For this project, the training feature is the ‘tweet’ column and the label is the ‘label’ column.
X = df['tweet_clean']
y = df['label']
Let’s separate the training and testing data.
from sklearn.model_selection import train_test_split
X_train, X_test, y_train, y_test = train_test_split(X, y,
                                                    test_size=0.4, random_state=21)
As our training feature is text data, we have to do an extra step to extract numeric features from the test data. I tried two methods here for extracting numeric features from test data in this tutorial.
The first one is CountVectorizer. If you are not familiar with CountVectorizer, here is a detailed tutorial on CountVectorizer.
This tutorial will focus on the code part only. Here we import the CountVectorizer from the sklearn library and transform the training and testing features with it.
from sklearn.feature_extraction.text import CountVectorizer
cv = CountVectorizer(stop_words='english')
train_vec = cv.fit_transform(X_train)
test_vec = cv.transform(X_test)
So, the train_vec is our training feature and test_vec is our test feature now.
Now we can treat this problem as a regular machine learning problem. This is a classification problem. I used the logistic regression model for this.
from sklearn.linear_model import LogisticRegression
lr = LogisticRegression(random_state = 23).fit(train_vec, y_train)
Model training is done. Checking the accuracy score for the test data:
lr.score(test_vec, y_test)
Output:
0.9520531873289011Accuracy score for the training data:
lr.score(train_vec, y_train)
Output:
0.9841476769046253The accuracy score for training data is 98% which is slightly higher than the accuracy score for testing data (95%).
I also wanted to try with TFIDF vectorizer. Again, if you need to learn about TFIDF vectorizer in detail, please check this tutorial on this.
In the code block below, first TFIDF vectorizer is imported from the sklearn library, then both training and testing data are transformed to extract numeric features from them.
from sklearn.feature_extraction.text import TfidfVectorizer
tfidf = TfidfVectorizer(stop_words='english', max_df=0.8)
train_tfidf = tfidf.fit_transform(X_train)
test_tfidf = tfidf.transform(X_test)
Using the logistic regression model again,
lr1= LogisticRegression(random_state=1).fit(train_tfidf, y_train)Accuracy of training data,
lr1.score(train_tfidf, y_train)
Output:
0.9511915315221359Accuracy of testing data,
lr1.score(test_tfidf, y_test)
Output:
0.942588971450919This time, both training and testing accuracy were very close.
Conclusion
This article was a tutorial on Sentiment Analysis for Twitter data. The same technique can very well be used for other text data as well. I used Logistic Regression here. Please feel free to try other machine-learning models.
Feel free to follow me on Twitter and like my Facebook page.
The video version of this tutorial is here:


