
Create a new component in Angular
Angular uses component-based architecture. These components contain reusable code applicable across various parts of the application. Each component encapsulates data, logic, and presentation aspects of a specific UI segment.
If you are new to Angular, I recommend checking out my articles titled “Create a new Angular application” and “Understanding Angular project structure”.
If you’re interested in video tutorials, you might want to explore playlist dedicated to Angular in my YouTube channel InterviewPro.

Anatomy of Angular Components
The Angular component contains multiple elements:
- class: Every Angular component is a TypeScript class that holds the logic of a component. It contains properties and methods that define the behavior of a component and how it interacts with other parts of the application.
- decorator: The ‘@component’ decorator is used to represent an Angular component. It provides metadata such as selector of the component, HTML template, styles, etc.
- template: The template contains HTML code that represents the component’s UI. It includes directives to bind data, events, and many more. I will create detailed articles on these topics. HTML code can be defined within the component using ‘template’ property or specify the HTMl code inside .html file and reference it inside the component using ‘templateUrl’ property.
- styles: This is optional. It defines the appearance of a component. The styles can be defined directly inside the component metadata using the ‘styles’ property or can be specified in separate files and specified using the ‘styleUrls’ property.
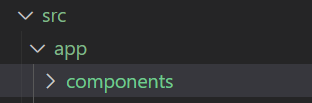
Create a new directory named ‘components’ within the src/app folder.
Create a new component manually
Let’s create a new component manually so that we understand how Angular integrates the new component with the project.
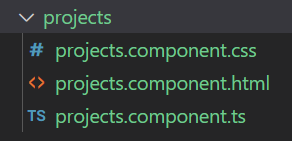
We’ll create a folder named ‘projects’ inside the components folder. All files related to the ‘projects’ component will reside within this folder.
Every component will have a TypeScript file (.ts), an HTML file (.html), and optionally a CSS file (.css). So
- Create a TypeScript file named
projects.component.ts. This file will contain the logic for your component. - Create an HTML file named
projects.component.html. This file will contain the template for your component. - Optionally, create a CSS file named
projects.component.cssfor styling.
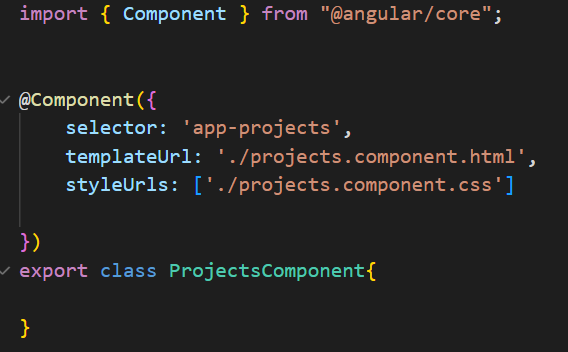
Inside the projects.component.ts file, you can add the @Component decorator imported from the '@angular/core' library. This decorator provides metadata for the component, including the selector, templateUrl, styleUrls, and other configurations. Additionally, you should export a class named ProjectsComponent.
Inside the projects.component.html file, you can write the HTML template for the 'projects' component. This template will define the structure and layout of the component's user interface.

Now, it’s time to integrate this newly created component into our project. In the ‘app.component.html’ file, insert the selector <app-projects></app-projects>.
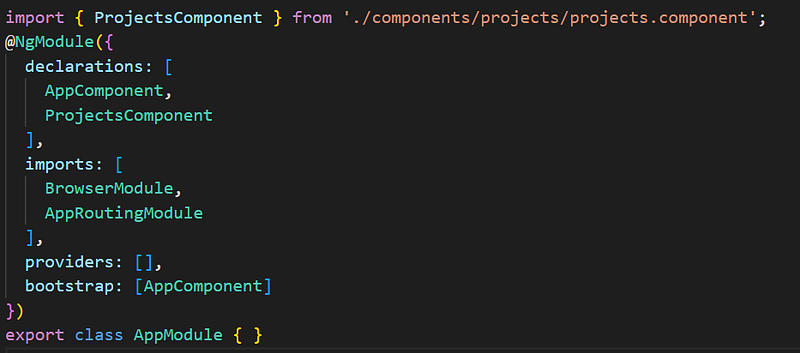
It’s important to note that <app-projects> is not a standard HTML element; it's an Angular component selector. Therefore, we need to inform Angular about this selector and associate it with the 'ProjectsComponent' class. To achieve this, navigate to the 'app.module.ts' file, import the 'ProjectsComponent' class, and add it to the declarations array within the @NgModule decorator.
Every time you create a new component, make sure to add the component to the app.module.ts within the declarations array.
Save the code.
Run ng build in the terminal.
Browse the localhost url generated by the build.
Hurray, our new ‘projects’ component is rendered on the screen.
Create a new component using Angular CLI
Navigate to the components folder in the terminal.
To create the ‘projects’ component, use the command ‘ng generate component projects’ or its shortcut ‘ng g c projects’.
Then, press Enter.

Angular CLI automatically generates a new folder named ‘projects’ along with all the necessary files when creating a new component.
Additionally, it automatically adds the ‘ProjectsComponent’ class to the declarations in the ‘app.module.ts’ file. The ‘@Component’ decorator with the required configurations is also added inside the ‘.ts’ file by Angular CLI.
In this article, we explored Angular components and discussed how to create them both manually and using Angular CLI.
Next: app.module.ts in Angular
Follow InterviewPro for more.