Building and Deploying a FastAPI App with Hugging Face
Introduction
Did you know you can build interactive applications using FastAPI (API: Application Programming Interface) to interact with your machine-learning models? In previous articles, we explored using Gradio and Streamlit to create interactive interfaces for our machine-learning models. Now, let’s explore how we can achieve the same using FastAPI.
FastAPI is a modern, high-performance web framework for building APIs with Python. While it’s primarily designed for creating APIs, it can also be used to build interactive applications that provide a user interface to interact with machine learning models.
Building a FastAPI
Here is an overview of the steps involved in building an interactive application using FastAPI:
- Define the input and output models
- Build the FastAPI endpoints
- Integrate your machine-learning model
- Start the FastAPI server
- Deploy the application
Using the Sepsis dataset from Kaggle, I developed a machine-learning model to use in this project. The steps involved in building a machine-learning model can be found in this Article where I used a similar dataset.
- Setting Up
1.1 Create a directory for the FastAPI project
1.2 Initialize a virtual Python environment
python -m venv venv
venv/Scripts/activate
1.3 Install FastAPIand other dependencies
pip install fastapi uvicorn
1.4 Create a new Python file named ‘main.py’ and add the following code
# Import key libraries and packages
from fastapi import FastAPI
import pickle
import uvicorn
import pandas as pd
import os
import sys
2. Define the input and output models
# Define directory paths
sys.path.append(os.path.dirname(os.path.dirname(os.path.dirname(os.path.abspath(__file__)))))

DIRPATH = os.path.dirname(os.path.realpath(__file__))
ml_component= os.path.join(DIRPATH, "..", "src", "assets", "ml_sepsis.pkl")

# Function to load pickle file
def load_pickle(filename):
    with open(filename, 'rb') as file:
        data = pickle.load(file)
        return data

# Load pickle file
ml_components = load_pickle(ml_component)

# Components in the pickle file
ml_model = ml_components['model']
pipeline_processing = ml_components['pipeline']
3. Build the FastAPI endpoints and integrate Machine learning model
# API base configuration
app = FastAPI()

# Endpoints

@app.get('/Predict_Sepsis')
async def predict(Plasma_glucose: int, Blood_Work_Result_1: int,
                  Blood_Pressure: int, Blood_Work_Result_2: int,
                    Blood_Work_Result_3: int, Body_mass_index: float,
                    Blood_Work_Result_4: float,Age: int, Insurance:float):

    data = pd.DataFrame({'Plasma glucose': [Plasma_glucose], 'Blood Work Result-1': [Blood_Work_Result_1],
                         'Blood Pressure': [Blood_Pressure], 'Blood Work Result-2': [Blood_Work_Result_2],
                        'Blood Work Result-3': [Blood_Work_Result_3], 'Body mass index': [Body_mass_index],
                        'Blood Work Result-4': [Blood_Work_Result_4], 'Age': [Age], 'Insurance':[Insurance]})

    data_prepared = pipeline_processing.transform(data)

    model_output = ml_model.predict(data_prepared).tolist()

    prediction = make_prediction(model_output)

    return prediction
3.1 Prediction endpoints
#Prediction endpoints
def make_prediction(data_prepared):

    output_pred = data_prepared

    if output_pred == 0:
        output_pred = "Sepsis status is Negative"
    else:
        output_pred = "Sepsis status is Positive"

    return output_pred

if __name__=='__main__':
    uvicorn.run('main:app', reload=True)
4. Start the FastAPI server
''' with the last code in the above,
you can start the FastAPI server by writing this in your terminal'''
# Note 'src' is the folder where the main.py is located
python .\src\main.py
# OR
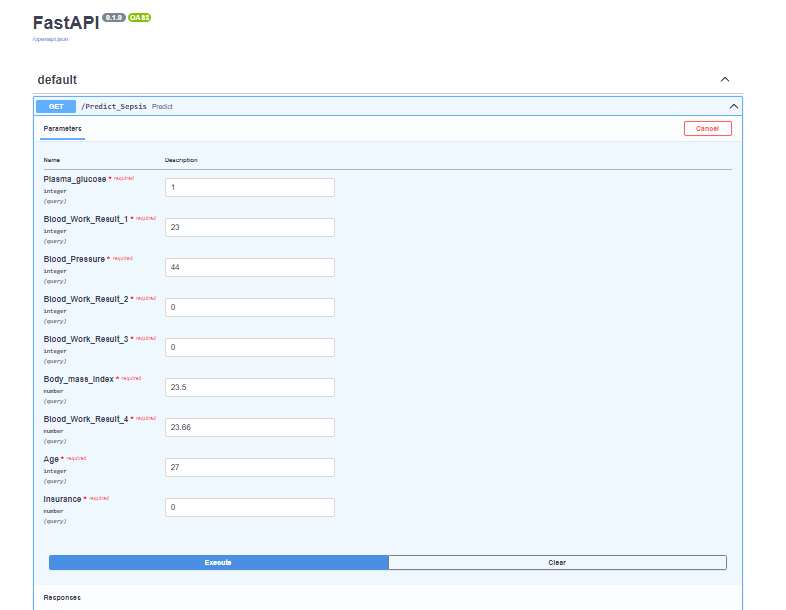
uvicorn main:app --reloadFastAPI Interface
Note: Don’t forget to add ‘/docs’ when it opens in your browser. It brings this interface.
Deploying FastAPI with Hugging Face
- Create a Hugging Face account if you don’t one.
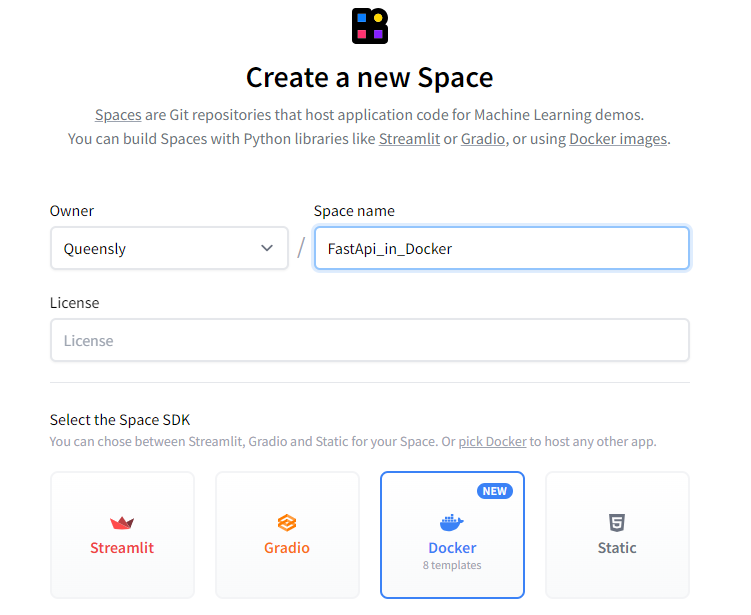
2. Create a new space and select Docker
3. After creating the space, you can go ahead and create the Dockerfile and main.py in the browser or clone the repository in your text editor.
4. In the text editor, create a Dockerfile
FROM python:3.9

WORKDIR /code

COPY ./requirements.txt /code/requirements.txt

RUN pip install --no-cache-dir --upgrade -r /code/requirements.txt

RUN useradd -m -u 1000 user

USER user

ENV HOME=/home/user \
 PATH=/home/user/.local/bin:$PATH

WORKDIR $HOME/app

COPY --chown=user . $HOME/app

CMD ["uvicorn", "main:app", "--host", "0.0.0.0", "--port", "7860"]
5. Add the main.py file that was used to create the FastAPI
6. Add the requirements.txt used when the FastAPI was created
7. Finally, add the model file that was used to build the FastAPI
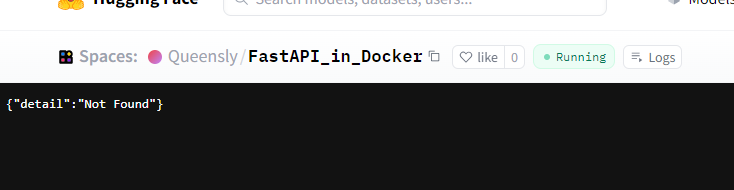
8. Using git add, commit and push commands, all the files are pushed to the remote repository and it begins to build automatically.
9. When it builds successfully, you will have an interface like this
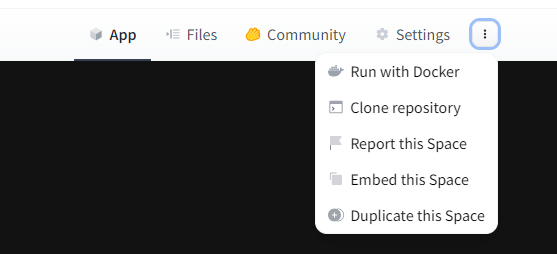
10. To be able to see the interface of the FastAPI, click on the 3 dots beside the settings tab and select ‘Embed space’. This will appear:
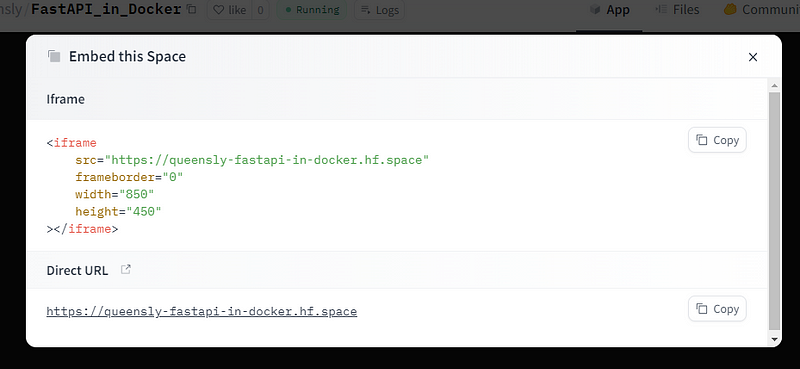
11. Click on ‘Direct URL’. When it shows in the browser, add ‘/docs’ to see the interface. Link to the deployed FastAPI_App
Conclusion
In this write-up, we learned how to build a web interface using FastAPI for a machine-learning model and later deployed it in Hugging Face using Docker. This provides a simple interface for users to interact with the built model and see how well the model performs.
Reference
Appreciation
I highly recommend Azubi Africa for their comprehensive and effective programs. Read More articles about Azubi Africa here and take a few minutes to visit this link to learn more about Azubi Africa’s life-changing programs.
Thank you for reading. Feedback will be well appreciated.


