
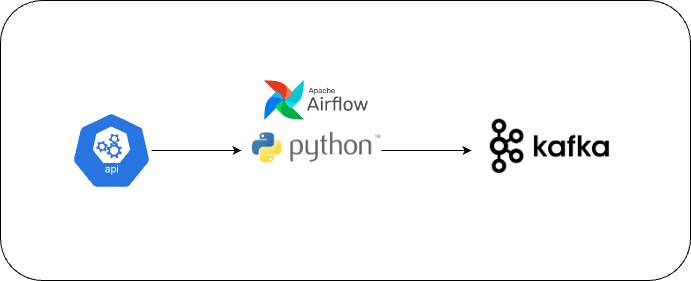
Building a Data Stream Pipeline — Part 1 with Crypto API, Python, Airflow, and Kafka
Introduction:
In this article, we will walk through the process of extracting data from a crypto API and publishing the data into Kafka topics using Python. We will also use Airflow to orchestrate this process.
Prerequisites:
- Python 3. x
- Kafka
- Apache Airflow
- CoinMarketCap API key
Step 1: Setting Up the Crypto API
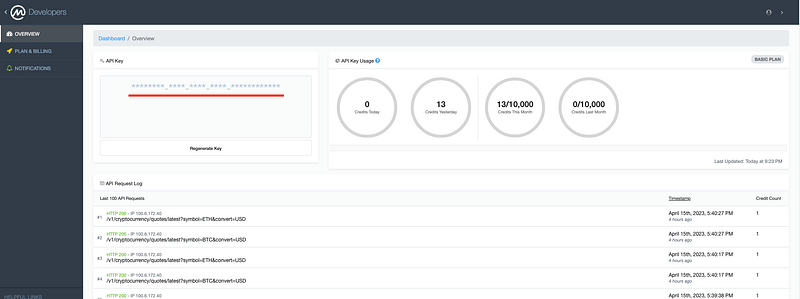
- Register for a CoinMarketCap API key by signing up at https://pro.coinmarketcap.com/signup.
- Copy the API Key. We will use this Key in our Python Script.
Step 2: Installing Kafka
You can refer to my article on Kafka to set it up.
https://readmedium.com/kafka-multi-node-cluster-simplified-6cea0ba5f1dd 🔥🔥🔥
Step 3: Writing Python Code to Extract, Transform, and Write Data into Kafka
Assuming you already have Python installed.
3.1 Install the required Python packages:
pip install kafka-python requests
3.2 Copy the Python code into a new file called crypto_data_stream.py.
import time
import requests
import json
import os
from kafka import KafkaProducer

def data_stream(sleep_interval=1):

    # Configure Kafka producer, replace localhost with your Kafka host IP address
    producer = KafkaProducer(bootstrap_servers=['localhost:9092'])

    api_key = os.environ.get('COINMARKETCAP_API_KEY')

    # Configure CoinMarketCap API endpoint and parameters
    url = 'https://pro-api.coinmarketcap.com/v1/cryptocurrency/quotes/latest'
    parameters = {
        'symbol': 'BTC,ETH',
        'convert': 'USD'
    }
    headers = {
        'Accepts': 'application/json',
        'X-CMC_PRO_API_KEY': api_key,
    }

    while True:
        # Make API request for BTC and ETH prices
        response = requests.get(url, headers=headers, params=parameters)
        data = json.loads(response.text)

        # Process and send BTC data to Kafka
        process_and_send_data(producer, data, 'BTC', 'btc_prices')

        # Process and send ETH data to Kafka
        process_and_send_data(producer, data, 'ETH', 'eth_prices')

        # Sleep for the specified interval before making the next request
        time.sleep(sleep_interval)

def process_and_send_data(producer, data, symbol, topic):
    price_data = data['data'][symbol]['quote']['USD']

    extracted_data = {
        'timestamp': data['status']['timestamp'],
        'name': data['data'][symbol]['name'],
        'price': price_data['price'],
        'volume_24h': price_data['volume_24h'],
        'percent_change_24h': price_data['percent_change_24h']
    }
    producer.send(topic, json.dumps(extracted_data).encode('utf-8'))

if __name__ == "__main__":
    data_stream(sleep_interval=1)
Step 4: Setting Up Apache Airflow
4.1 Install Apache Airflow
You can refer to my article on Airflow to set it up.
https://readmedium.com/apache-airflow-for-beginners-build-your-first-dag-542affef6192 🔥🔥🔥
4.2 Create a new DAG in the dags folder within your Airflow home directory. Name the file crypto_data_stream_dag.py.
4.3 Define the DAG.
from datetime import timedelta
from airflow import DAG
from airflow.operators.python import PythonOperator
from datetime import datetime
import os

# Import the data stream function from your Python script
from crypto_data_stream import data_stream

# Define the DAG
dag = DAG(
    dag_id='crypto_data_stream',
    default_args={
        'owner': 'airflow',
        'retries': 10000,  # Set a high retry limit
        'retry_delay': timedelta(seconds=10),  # Set a short retry delay
    },
    start_date=datetime(2023, 4, 15),
    catchup=False,
    schedule_interval=timedelta(days=1),  # Set a long schedule interval to avoid starting multiple instances
)

os.environ['COINMARKETCAP_API_KEY'] = 'your_api_key_here'

# Define the PythonOperator task
data_stream_task = PythonOperator(
    task_id='data_stream',
    python_callable=data_stream,
    dag=dag,
)

# Set the task dependencies
data_stream_task
High retry limit: By setting a high retry limit, you ensure that if the task encounters any issues (e.g., temporary API unavailability or other runtime errors), Airflow will automatically retry the task up to the specified number of times. This helps maintain the continuous flow of data, as the task is less likely to be permanently stopped due to transient issues.
Short retry delay: The retry delay determines the amount of time Airflow will wait before retrying a failed task. By setting a short retry delay, you minimize the downtime between task failures and retries. This ensures that your data pipeline resumes operation as quickly as possible after a failure, maintaining the near-real-time nature of the data stream.
Step 5: Running the Data Stream
5.1 Start the Airflow webserver and scheduler by running the following commands:
airflow webserver --port 8080
airflow scheduler
5.2 Open the Airflow web UI in your browser at http://localhost:8080 and enable the crypto_data_stream DAG.

5.3 The DAG will now run indefinitely, fetching the latest crypto data and writing it into Kafka.
You can run the Kafka Consumer commands to check if the data is flowing into Kafka.
kafka-console-consumer --bootstrap-server localhost:9092 --topic btc_prices --from-beginningkafka-console-consumer --bootstrap-server localhost:9092 --topic eth_prices --from-beginning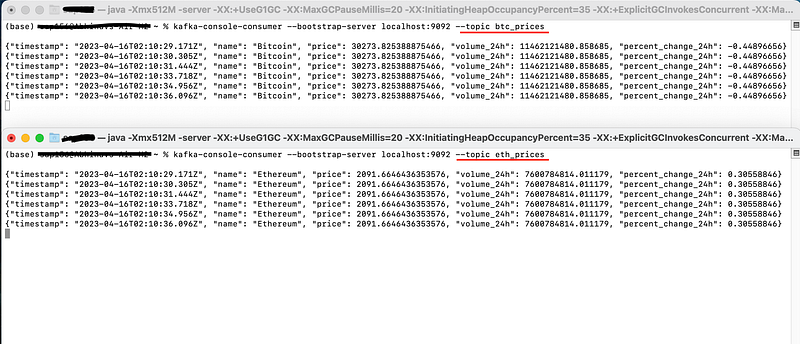
Conclusion
We have successfully built a data stream pipeline that ingests real-time cryptocurrency data from the CoinMarketCap API and writes it to Kafka topics using Python. This pipeline is efficient and adaptable, providing a solid foundation for further development, such as adding more cryptocurrencies, storing the data in a database, and performing real-time analytics on the data using Kafa Streams, which we will cover in PART-2 🔥🔥🔥.
Thanks for Reading!
If you like my work and want to support me…


