
Apache Airflow for Beginners: Build your first DAG

Apache Airflow is a fantastic tool that helps you automate, schedule, and monitor complex workflows easily. Imagine you’re the conductor of an orchestra, and you’re making sure every instrument is playing the right note at the right time. That’s what Airflow does with your data pipelines!
Why do we need Apache Airflow?
When you work with data, it’s like solving a puzzle. You often need to do different tasks like getting the pieces, putting them together, and finding where they fit (ETL). Doing these tasks by hand can take a long time and might lead to mistakes. Airflow helps you make these tasks automatic, so they run smoothly and without errors. It’s like having a super helper for your data puzzle!
The Architecture of Apache Airflow
Apache Airflow is like a cool machine that helps you plan, schedule, and watch over your work easily. The machine has a few main parts that work together to make everything run smoothly. Let’s take a look:
- Directed Acyclic Graph (DAG): A Directed Acyclic Graph (DAG) is like a recipe for a yummy dessert. It’s a list of steps (tasks) you need to do and the order you need to do them. In Airflow, a DAG is a Python script that shows your data pipeline. Each step in a DAG is something you want to do, and the order of the steps tells Airflow how to get the job done.
- Scheduler: The Scheduler is like a kitchen timer for your tasks. It’s in charge of looking at your DAGs, checking their schedules, and figuring out when it’s time to do each step. The Scheduler always checks on your tasks and starts new ones when needed, based on their order and schedules.
- Executor: The Executor is the helper that actually does your tasks. When the Scheduler decides it’s time for a task to be done, it tells the Executor. The Executor then does the task and lets the Scheduler know how it went. There are different types of Executors in Airflow, like the Local Executor, Celery Executor, and Kubernetes Executor, which let you spread out and manage your tasks better.
- Workers: Workers are like little helpers that do your tasks. Depending on the type of Executor you choose, you can have multiple workers helping on the same job, different jobs, or even in containers. Workers are in charge of doing the tasks and telling the Scheduler how they did.
- Webserver: The Webserver is like a window into Airflow’s world. It’s a website that makes it easy for you to see and manage your DAGs. With the Webserver, you can check on your tasks, start them manually, and even fix problems in your pipelines.
- Metadata Database: The Metadata Database is like Airflow’s diary. It saves information about your DAGs, tasks, and what’s been done before. Airflow uses this diary to remember what happened with your tasks and make sure everything goes smoothly.
Installing Apache Airflow
Before we start, you need to have Python installed on your computer. Airflow works with Python 3.6 or later. If you don’t have Python installed, check out python.org for the latest version.
Step 1: Create a virtual environment
A virtual environment is like a sandbox where you can play with different tools without messing up your entire computer. To create a virtual environment, open your terminal (Command Prompt for Windows users) and type the following command:
python -m venv my_airflow_env
Replace “my_airflow_env” with a name of your choice. This command will create a folder with the name you provided.
Step 2: Activate the virtual environment
To start using the virtual environment, you need to activate it. Run the following command:
- Windows:
my_airflow_env\Scripts\activate- Mac/Linux:
source my_airflow_env/bin/activateYour terminal should now show the virtual environment name in the prompt, like this: (my_airflow_env).
Step 3: Install Apache Airflow
Now that you’re inside the virtual environment, you can install Airflow using the following command:
pip install apache-airflow
This command will download and install Airflow and its dependencies.
Building a Simple DAG with Apache Airflow
In this example, we’ll create a DAG that performs the following tasks:
- Extract data from a CSV file
- Transform the data by adding a new column
- Load the transformed data into another CSV file
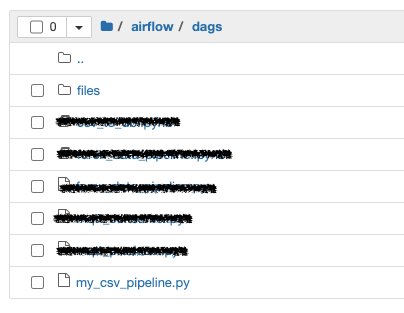
Now, let’s create a new DAG file named “my_csv_pipeline.py” inside the “dags” folder and add the following code:
from datetime import datetime, timedelta
import os
import csv
from airflow import DAG
from airflow.operators.python import PythonOperator
# Function to extract data from the CSV file
def extract(directory, filename):
# Read the CSV file and store its data
with open(os.path.join(directory, filename), 'r') as file:
data = list(csv.reader(file))
print("Data in extract:", data)
return data
# Function to transform the extracted data
def transform(data):
print("Data in transform:", data)
# Add a new column to the data
transformed_data = [row + [int(row[1]) * 2] for row in data]
return transformed_data
# Function to load the transformed data into a new CSV file
def load(transformed_data, output_directory, output_filename):
with open(os.path.join(output_directory, output_filename), 'w', newline='') as file:
writer = csv.writer(file)
writer.writerows(transformed_data)
# Define default arguments for the DAG
default_args = {
'owner': 'airflow',
'start_date': datetime(2023, 1, 1),
'retries': 2,
'retry_delay': timedelta(minutes=5),
'email_on_failure': False,
'email_on_retry': False
}
# Create the DAG
dag = DAG(
'my_csv_pipeline',
default_args=default_args,
description='A CSV processing pipeline',
schedule='0 * * * *',
catchup=False
)
# Define the extract_task operator
extract_task = PythonOperator(
task_id='extract_task',
python_callable=extract,
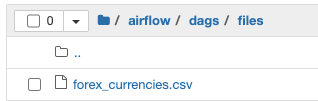
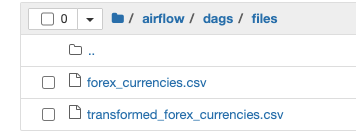
op_args=[r'/path/to/airflow/dags/files', 'forex_currencies.csv'],
dag=dag
)
# Define the transform_task operator
transform_task = PythonOperator(
task_id='transform_task',
python_callable=transform,
op_args=[extract_task.output],
dag=dag
)
# Define the load_task operator
load_task = PythonOperator(
task_id='load_task',
python_callable=load,
op_args=[transform_task.output, r'/path/to/airflow/dags/files', 'transformed_forex_currencies.csv'],
dag=dag
)
# Set up task dependencies
extract_task >> transform_task >> load_taskDefine the task dependencies
extract_task >> transform_task >> load_task
Running the Airflow DAG
In order to run your DAG in Airflow, you have to start the airflow webserver and scheduler.
- Open a terminal window.
- First, activate the virtual environment where you have installed Apache Airflow (if applicable). For example, if you’re using a virtual environment called
airflow_env, you can activate it using:
source airflow_env/bin/activate # For Unix-based systemsor
.\airflow_env\Scripts\Activate # For Windows3. Initialize the Airflow database (if you haven’t done it before) by running the following command:
airflow db init4. Start the Airflow webserver by running:
airflow webserver --port 8080This will start the webserver on port 8080. You can choose a different port if needed.
5. Open another terminal window (or tab) to start the Airflow scheduler. First, activate the virtual environment (if applicable) as described in step 2.
6. Start the Airflow scheduler by running:
airflow scheduler
This command will start the scheduler, which will monitor and execute the tasks in your DAGs.
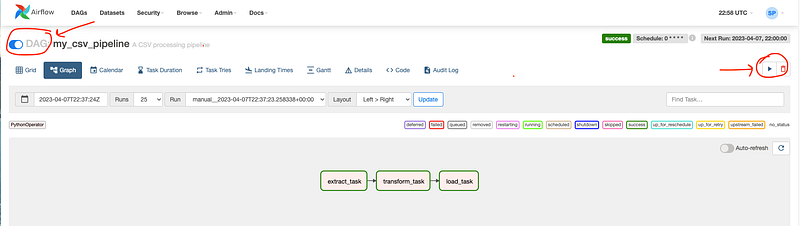
7. Open your web browser and navigate to http://localhost:8080. You should see the Airflow web interface with your DAGs listed.
8. To trigger the DAG manually, find your DAG (e.g., “my_csv_pipeline”) in the list, and click the play button (▶) in the “Links” column. This will trigger an instance of your DAG to run.

Alternatively, you can trigger the DAG from the command line by running:
airflow dags trigger my_csv_pipelineReplace “my_csv_pipeline” with the actual ID of your DAG.
Once the DAG is triggered, either manually or by the scheduler (based on your DAG’s schedule_interval), you can monitor the progress of the tasks in the Airflow web interface.

This code defines a simple ETL (Extract, Transform, Load) DAG with three tasks: extract, transform, and load. The DAG is designed to process a CSV file, transform its data, and store the transformed data in another CSV file.
- The
extractfunction reads the CSV file from the specified directory and stores its data in a list, which it returns.
2. The transform function processes the input data by adding a new column with double the value in the second column. It skips the header row to avoid processing non-integer values, and adds a new header field, 'double_value', to the transformed data. It then returns the transformed data.
3. The load function takes the transformed data and writes it to a new CSV file. This is the final step in the ETL process.
4. The three tasks, extract_task, transform_task, and load_task, are defined as PythonOperator instances. Each task uses the corresponding ETL function (extract, transform, or load) as its python_callable argument.

5. The tasks are executed sequentially, with the output of each task passed as an argument to the next task. This is achieved by chaining the tasks using the >> operator, like so: extract_task >> transform_task >> load_task.
6. The pipeline is scheduled to run every hour, as indicated by the schedule='0 * * * *' argument in the DAG definition.
Once you have saved the DAG file, start the Airflow webserver and scheduler. You should see your new “my_csv_pipeline” DAG listed in the Airflow web interface. Trigger the pipeline manually or wait for the scheduler to run it every hour.
When the pipeline completes successfully, you should see a new CSV file containing the transformed data. Note that the input and output directories, as well as the file names, should be updated to match your actual file paths.
In future articles, we will delve into more intricate DAGs and sophisticated data pipeline configurations to expand our understanding and skills.
Thanks for Reading!
If you like my work and want to support me…


