Build A React Pomodoro App With Material-UI And TailwindCSS
How to Use Material Components and TailwindCSS In Your React Web App

In this article, we’ll be building a Pomodoro Timer in React that uses components from Material-UI. Additionally, we’ll be using the TailwindCSS library to not only make our app look better, but also to make the website design responsive, that is, to make our web app look better on both large and mobile screens.
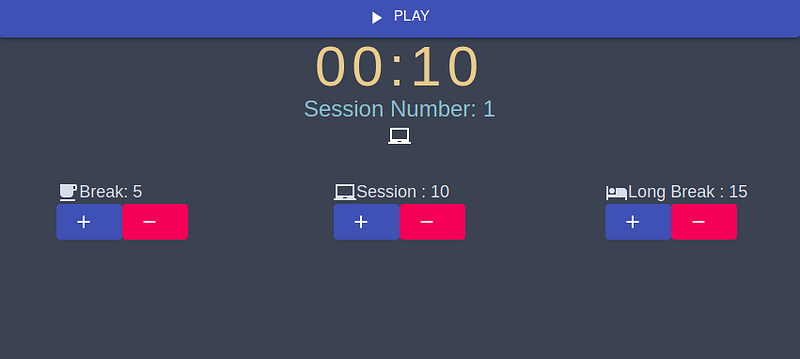
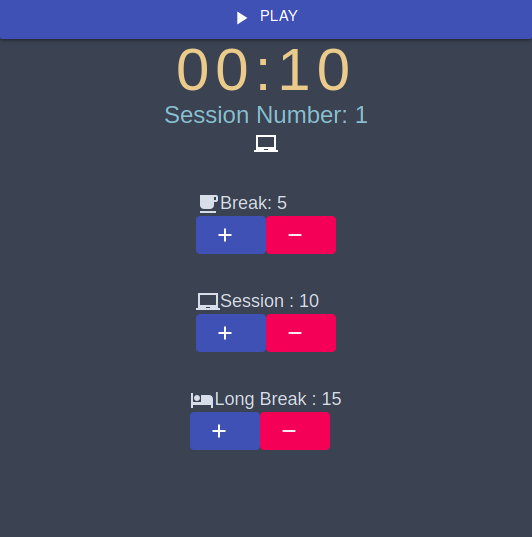
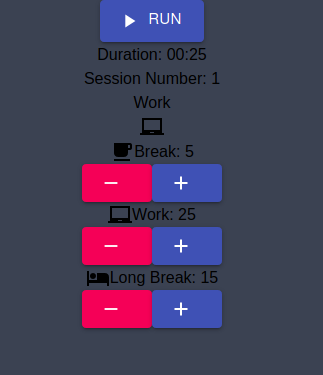
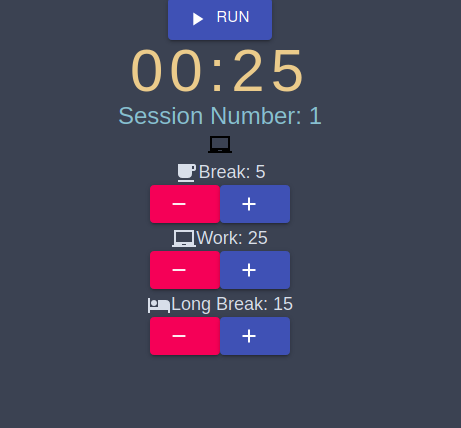
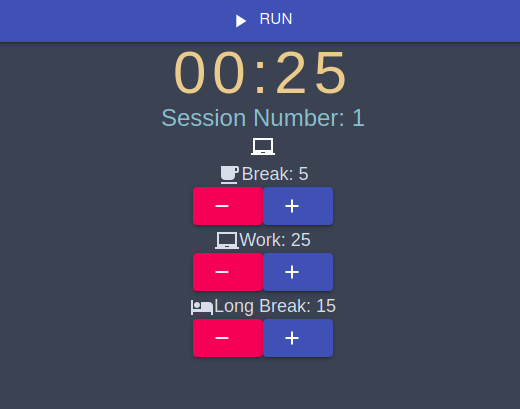
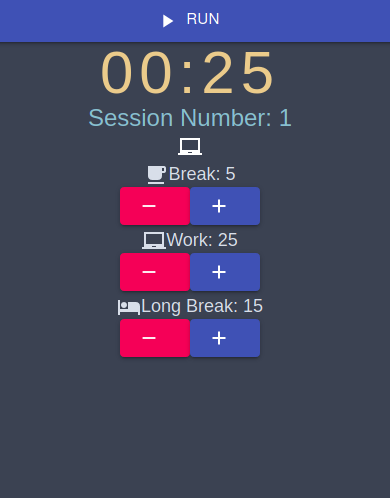
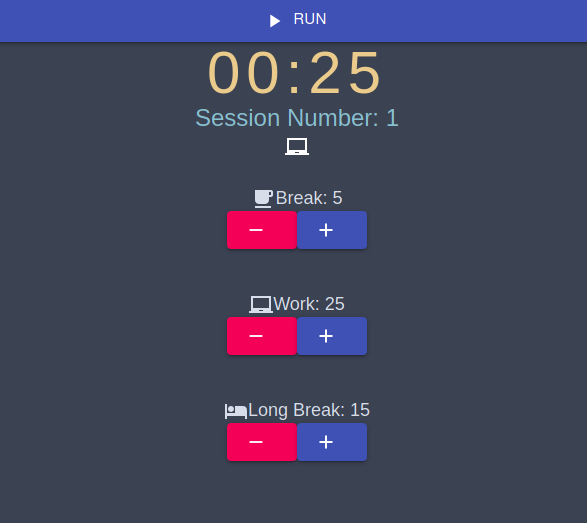
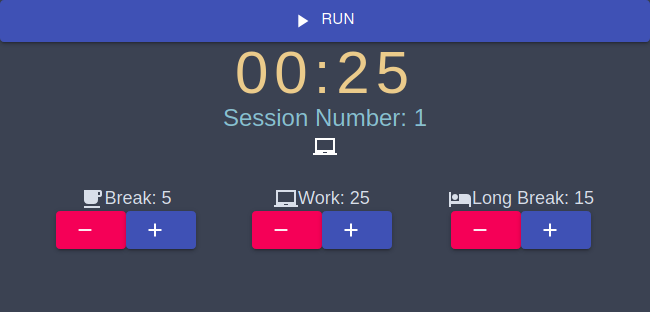
By the end of this tutorial, our app will look like this on both desktop and mobile devices:
Before getting started, let’s first discuss the function of a conventional Pomodoro timer.
What’s a Pomodoro Timer?
This timer allows the user to break down his work into intervals. These intervals can also be called as sessions. Here’s how it works:
- The first interval is the
Worksession. This typically lasts 25 minutes. - After the
Workinterval comes theBreakinterval. TheBreakinterval lasts 5 minutes. - Each Pomodoro session consists of one
Workand oneBreakinterval - After four Pomodoro sessions, we’ll commence a
Long Breaksession. TheLong Breaksession lasts for 15 minutes. - After the
Long Breakinterval, we will start again from pomodoro session number 1.
Getting Started
Initialize The Project
Let’s first tell create-react-app to initialize our app’s repository. To do so, run the following terminal command:
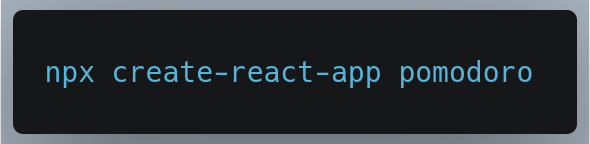
We’ve now initialized the project. Let’s now move on installing the needed libraries.
Install The Required Libraries
For this project, we’ll install the following modules:
luxon: This package will help in displaying the main timer in the correct format. Why not usemomentinstead? Sincemoment.jsis now a legacy project, we won’t utilize this library in our app. Security vulnerabilities is definitely the last thing we want.@material-ui/core: This package will allow us to use the elements that are provided by Material-UI. In this tutorial, we will use Material’sButtoncomponent.@material/icons: The icons that we will use in this project will be sourced from this package.
To install these libraries, run the following terminal command:

Next, we need to install TailwindCSS. To do so, follow the instructions on this page.
When that’s done, let’s now acquire the required audio files for this project.
Get The Required Audio files
We’ll be using the sound resources from the Material.IO website. There, download the .zip file and then extract it to your computer. From this extracted folder, we’ll be using the following sound files:
alert_simple.wavwhich located in thematerial_product_sounds/material_product_sounds/wav/02 Alerts and Notificationsfolder.notification_simple-01.wavwhich located within thematerial_product_sounds/material_product_sounds/wav/02 Alerts and Notifications
We now need to move these files into our project. To do so, perform the following steps:
- In the
srcfolder of your project, create a new folder calledAudio. - Now copy over the above mentioned sound files into your
Audiodirectory.
In the end, your file hierarchy should look like this:
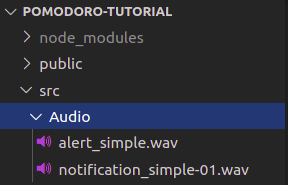
And we’re done! Now let’s move on to writing some code.
The Main Timer: The Timer.js file
Within the src folder of your project, create a file called Timer.js . The Timer.js file will be a component which will function as our main Pomodoro timer. In other words, this will be the foundation of our project.
When the steps mentioned above are completed, let’s now move on to importing necessary libraries into our project.
Since Timer will be a component, ensure that this following line is present at the end of the file:
This ensures that we can use the Timer component
Importing Required Modules
In Timer.js , write the following code at the top of the file:
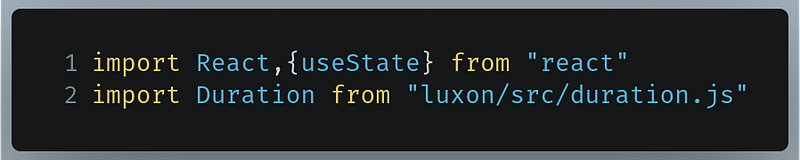
Line 1:Reactis needed sinceTimerwill be a component that will be rendered to the DOM. Additionally, we’re also bringing inuseStatesince we’ll store our timer length and other additional information in state variables.Line 2: TheDurationclass from theluxonpackage will be used to display our timer length in the correct format.
We’re now done. Let’s now move on to declaring states that we’ll use in our project.
Declaring The States
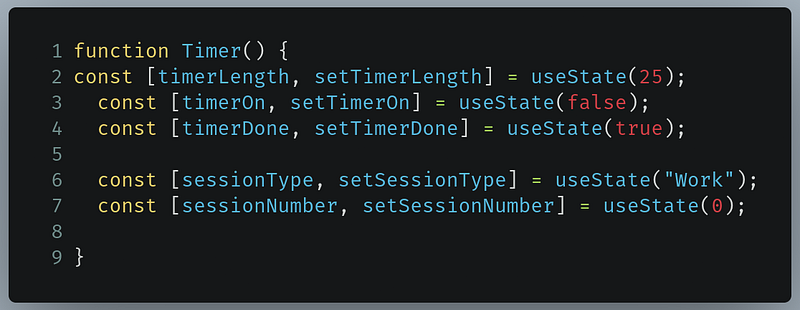
In Timer.js , we’ll be using the following states variables:
timerLength: This will store the length of the timer in seconds. Its initial value will be 1500 seconds, which equates to 25 minutes. This is because the user will first start with the work segment. However to save time during development, let’s set it to 25 seconds instead.timerOn: This will consist of a boolean value that will tell the Pomodoro timer to either run or pause. Its initial value will befalseto ensure that the main timer doesn’t run when the user opens the app.timerDone: ThetimerDonevariable will store a boolean value which will indicate whether the Pomodoro timer is running or has been completed. Consequently, this variable will also help us to provide the user with acoustic feedback to let them know if the timer has completed. It’s initial value will betruesince this will ensure that the timer is not running.sessionType: This state will store a string value which will indicate whether the user is having aBreakinterval, is on aWorksession or is going through aLong Breaksession. The value ofsessionTypewill alternate between three strings:Work,BreakandLong Break. Its initial value will beWork. This is because the client will first start with theWorksession.sessionNumber: This will store an integer value that will tell us the current number of the pomodoro session. It’s initial value will be 0.
Now that we’ve discussed our idea, let’s implement it in code. Go to Timer.js , and just after your imports, write the following code:
When that’s done, let’s move on to laying the groundwork for our user interface.
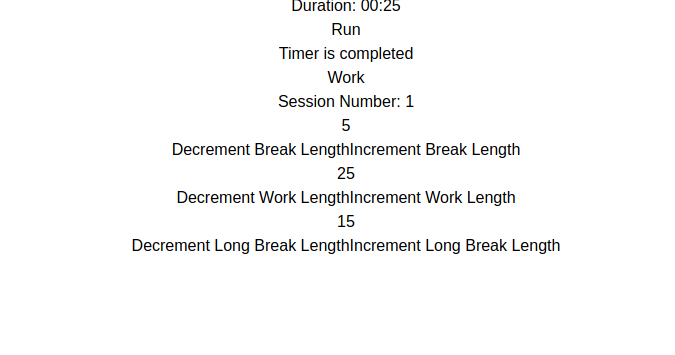
Display the State
In Timer.js , just after declaring your states, now write the following code in the Timer() function:
This piece of code essentially renders the values of our states to the DOM.
Lines 4–6: Here, we’re tellingluxonto display the value oftimerLengthin seconds and to display the value oftimerLengthin theminutes:secondsformat.Lines 7–9: Thebuttonelement toggles thetimerOnstate betweentrueorfalsewhen it is clicked. IftimerOnistrue, then the text of the button will sayPause, otherwise it will sayRun.Lines 10–12: These lines will render the values of the statestimerDone,sessionType, andsessionNumber.
Before running the program, go to App.js and import Timer.js into your project like so:

Now, staying in App.js, find the following piece of code:
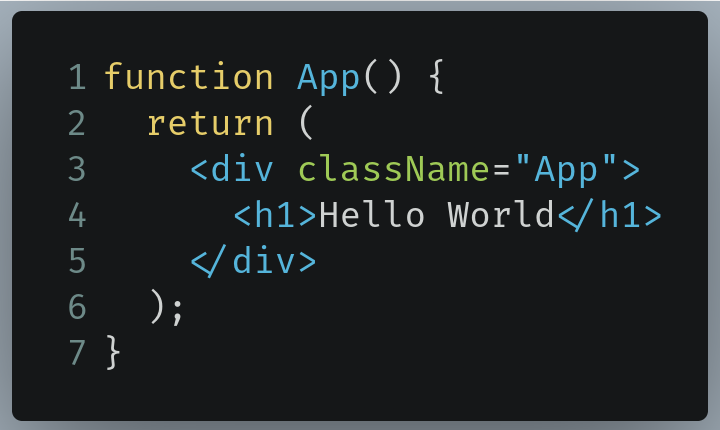
Now replace it like so:
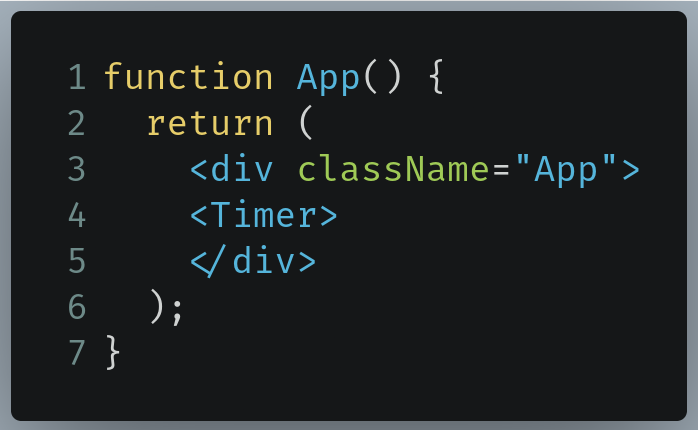
The code at Line 4 tells React to display the Timer component onto the DOM.
Now run the program with the following terminal command:
This will be the output of the code:

Great, our code works! Let’s now move on to making our main timer work.
In the end, this is how Timer.js should look like:
Running The Pomodoro Timer
To make our Timer run, we need to do the following:
- Create a function that decrements the value of
timerLengthby 1. - Use
setIntervalto make this method run every second. - Use the
timerOnstate to pause or resume this interval. Consequently, this means that we’ll now be able to pause or resume our Pomodoro timer. - Moreover, we’ll also set
timerDonetofalseif the value oftimerOnistrue.
Let’s now write code to implement these steps.
In the Timer function, write the following code:
Here, we’re running the useEffect hook to tell React to find changes in the timerOn state. If the value timerOn does change, then this piece of code should run.
Line 2: Here we’re declaring a variable calledintervalwhich equates to asetIntervalfunction.Line 3–5: If the value oftimerOnistrue, then decrement the value oftimerLengthby 1. Otherwise, don’t decrement the length of the timer session. This means that we have added pause functionality to our Pomodoro timer.Line 7-9: This is a cleanup function that runs only when the component unmounts. Here, we’re clearing the interval function to prevent memory leaks.
In the end, this is how our output looks like:
Voila! Our code works! As you can see, every time timerOn is true , then the timer will run. Otherwise it will pause itself.
Let’s now move on to handling the event when the timer has been completed, that is, when the value of timerLength reaches 0.
In the end, this is how Timer.js should look like:
Handling The Timer Done Event
To handle the event when the timer is complete, we have to do the following:
- Detect whether the time left(
timerLength) is 0. - If the above condition is
true, then changetimerOnto false. This is done so that the timer doesn’t run. - Set
timerDonetotrue. This will then create a sound. We’ll work on this later on in this tutorial. - Change the
sessionTypeto eitherWork,BreakorLong Breakto show the next session. We will work on this later on in this tutorial.
Now we need to implement this idea into code.
In the Timer function, write the following code:
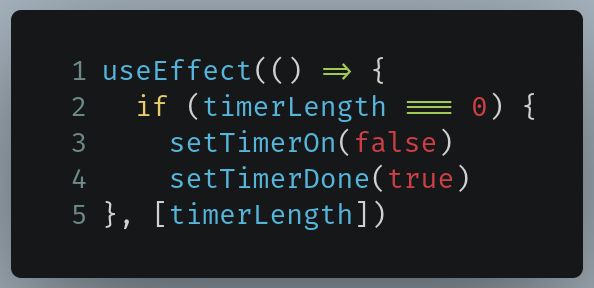
As evident by Line 5, we’re telling React to run the above code only if the value of timerLength changes.
Now run the code. This will be the result:
Great, our code works! However, there’s a major problem with our code currently.
Try running the timer after the timer has been completed. This will be the result:
Obviously in the real world we don’t want our timer to reach a negative value! In later sections we’ll mitigate this error. In the next section, we’ll learn how to change the interval types.
In the end, this is how Timer.js should look like:
Switching Session Types
To switch our interval types, we need to change the value of sessionType like so:
- If the value of
sessionTypeisWork, then switch toBreak - If the value of
sessionTypeisBreak, then switch toWork - If the value of
sessionTypeisLong Break, then switch toWork. We’ll work more on our Long Break intervals later on in this tutorial.
In your Timer function, find the following piece of code:
Now, replace it with the following snippet:
The only changes are present in Lines 5 to 10
Line 5: The previous value ofsessionTypeis stored in theprevTypevariable.Line 6:If the previous value of thesessionTypestate wasWork, then change the value forsessionTypetoBreak.Line 7: Compare the last value ofsessionTypewith the StringBreak. If they both are equal, then change the value ofsessionTypetoWorkLine 8: IfprevTypeisLong Break, then change the value ofsessionTypetoWork. We’ll work more on theLong Breakintervals later on in this tutorial.
This will be the output of the code:
As we can observe, the value of sessionType changed to Break . This means that our code works!
Now that we’ve switched sessions, we’ll move on to switching between the Work, Break and Long Break timers depending on the previous session type.
In the end, this is how Timer.js should look like:
Switching Timers: Going From Work to Break Mode
In order to alternate between timers, here’s what we have to do:
- If the current value of
sessionTypeisWork, then set thetimerLengthto be 25 minutes. - However, if
sessionTypeis set toBreak, then set the value oftimerLengthto be 5 minutes. - Furthermore, assuming that
sessionTypeisLong Break, then change the timer length to be 15 minutes.
Now let’s write code to implement our process.
In your Timer function, write the following code:
Lines 2–4: If the current value ofsessionTypeisWork, then set the length of the Pomodoro timer to 25 minutes. To save time, let’s temporarily change it to 25 seconds.Lines 5-7: Assuming the value ofsessionTypeisBreak, then set the length of the main timer to be 5 seconds.Lines 8–10: Otherwise, set the length of the main timer to be 15 seconds, which is the default length of theLong Breaksession.
Run the program. This will be the output:
As you can see, when sessionType switched from Work to Break , then the timer immediately switched from the Work session to the Break mode as well! This means that our code works. Great!
In the next section, we’ll write code to switch to the Long Break session depending on the number of sessions the user has been through.
In the end, this is how Timer.js should look like:
Switching Timers: Going From Break To Long Break Mode
To switch our main timer to Long Break , here’s what we need to do:
- Each session ends after a
Breakinterval. This means that we have to increment thesessionNumberstate by 1 every time thetimerDonestate istrueand the currentsessionTypevalue isWork. - Check if the user has completed 4 sessions(
sessionNumber > 4) - If the above condition is
true, then change the value ofsessionTypetoLong Break.
Let’s now implement this in code.
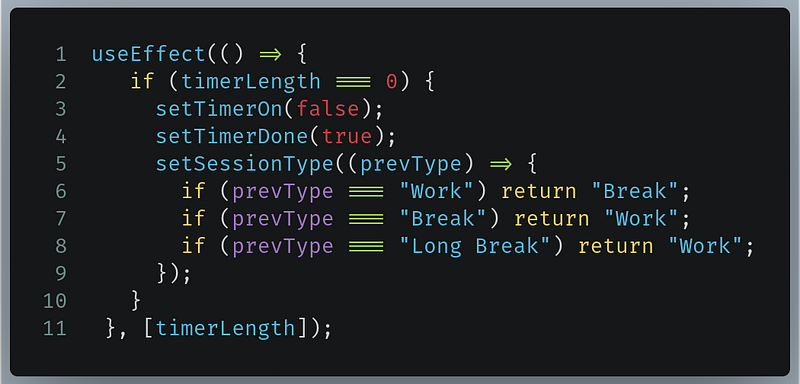
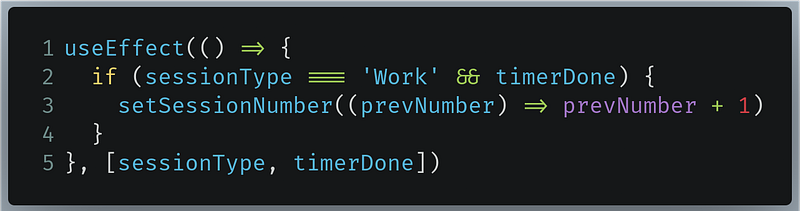
In your Timer function, find the following piece of code:
Now replace it with the following:
The only changes are present from Lines 11 to 14.
Line 11: Check if the user is on theWorksession andtimerDoneistrue. This indicates that he has been through aBreaksession.Line 12: If the condition above istrue, then incrementsessionNumberLine 14: Addition oftimerDoneto theuseEffectdependency array means that now React has to detect changes to thetimerDonestate as well. If any change is detected, then run this code.
This will be the output of the code:
As you can observe, our sessionNumber state incremented itself when the user completed a session. This means our code works!
All that’s left is to write code to get the Long Break session in our Pomodoro app.
In your Timer function, write the following code:
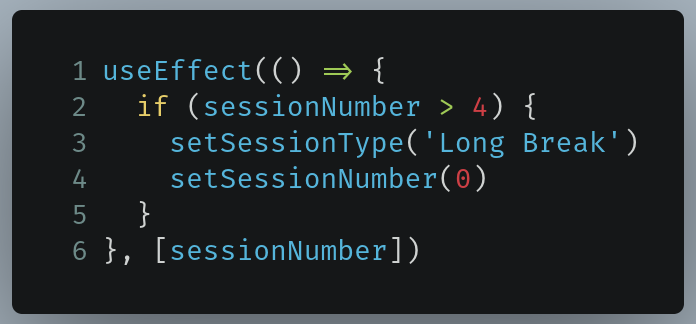
Line 2: Check if the value ofsessionNumberis more than 4.Line 3: If this condition istrue, then set the interval type toLong Break.Line 4: Reset the interval number to 0.Line 6: AddingsessionNumberto our dependency array means that React will run this code whenever it detects any changes to thesessionNumberstate.
This will be the result of the code:
As you can see, after the fourth session, instead of the Work session, the Long Break interval came up instead. Moreover, notice that after the Long Break session, the Work session came as well. This means that our code works!
If you’re wondering how the Work session came up automatically, let’s recap. Recall that we wrote this piece of code earlier:
As you can see, according to Line 8 , if the previous value of sessionType wasLong Break , then the new value of sessionType should automatically be Work .
We’re now done with this section! In the next section, we’ll introduce support for customizing the length of our Work , Break and Long Break sessions.
In the end, this is how Timer.js should look like:
Customizing Timers: The Customizer.js File
In your src directory, create a new React component called Customizer.js . This component will allow the user to customize the timers of his interval sessions. We will use the Context API to make this possible. We’ll talk more on this later in this tutorial.
Let’s start by writing the following code in Customizer.js :

Here, we’re importing React since Customizer.js will be a React component. Moreover, we’re also bringing in the createContext method as well since we’ll rely on the Context API to send states to other React components. Additionally, we’re also importing useState because we’ll use states to handle the manipulation and storing of our timer data.
Furthermore, ensure that this line stays at the end of the file:
When that’s done, let’s move on to declaring states in our Customizer.js file.
Declaring States
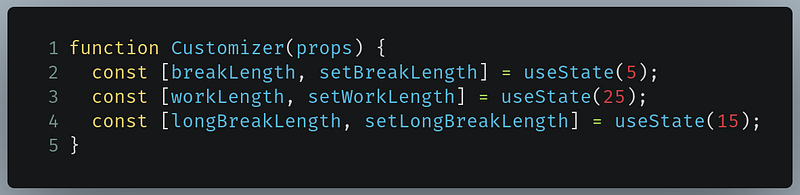
Here, we’ll have three states:
breakLength: The timer length of ourBreaksession type. Its initial value will be 5 minutes.workLength: The length of ourWorkinterval type. Its initial value will be 25 minutes.longBreakLength: The timer length of ourLong Breaksession type. Its initial value will be 5 minutes.
In your Customizer.js file, write the following code:
Line 1: Here, we’re passing inpropsas a parameter so we could use the Context API. We’ll use Context later on in this tutorial.
When that’s done, let’s now move on to creating buttons to manipulate our states.
Manipulating States
In this section, we’ll create three pairs of buttons. Each pair will increment or decrement the value of breakLength , workLength or longBreakLength .
In your Customizer function, write the following code:
This may seem like a long code snippet, but this is really easy to follow. We’re essentially creating button elements that increment or decrement our states.
Lines 5-8, 18-20 and 30–32: Here, we’re decrementing thebreakLength,workLengthand longBreakLength states. In these lines of code,prevLengthstores the previous value of our state. IfprevLengthis 0, then let the current value of the state stay at 0. In other words, we don’t want to let our timer lengths have a negative value.Lines 13, 24 and 37: Here, we’re incrementing the value of our states.
Before running the code, go to App.js and import Customizer like so:

Now let’s render it. Find the following piece of code in App.js :

Now replace it like so:
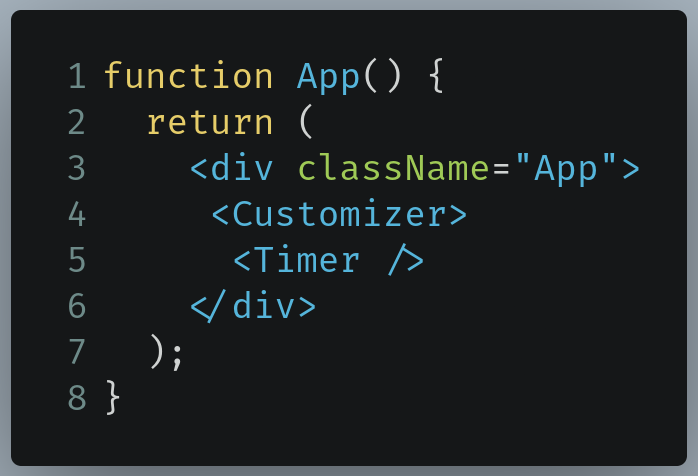
The code at Line 4 tells React to render the Customizer functional component onto the DOM.
This will be the output of the code:
Voila! Our code works. In the next section, we’ll work on sending these state variables to Timer.js by using React’s Context API.
In the end, this is how Timer.js should look like:
And this is how Customizer.js should look like:
Transferring Our States From Customizer.js To Timer.js
We now have our states in Customizer.js and want these variables to be sent to Timer.js . This way, we’ll finally have custom timers in our app. However, there’s a minor problem: how do we send this data?
One way to do so could be through Props. However using Props in our project would seem to be an extremely tedious task. Another way could be to put all of the code of Customizer.js into Timer.js. As a result, this would make Timer.js seem like a big, cluttered mess of code.To mitigate this issue, let’s use the Context API.
Just before the Customizer function declaration, write the following code:

Here, we’re creating a Context object for every state variable and then exporting them so that they could be used with the Timer component.
Now go to your return block in Customizer.js , and write the following piece of code:
Here, we’re exporting all of the values of our state variables.
Now go to your Timer.js file, and perform the following steps:
- Import the Context variables from the
Customizercomponent, like so:

- Additionally, ensure that you have also added
useContextto your list of imports:

- Now add the following lines of code just after your state declarations,

The values of the states longBreak , breakLength , and workLength have now been stored in these variables. This means that we’re almost done in bringing the values of the state variables from Customizer.js into Timer.js .
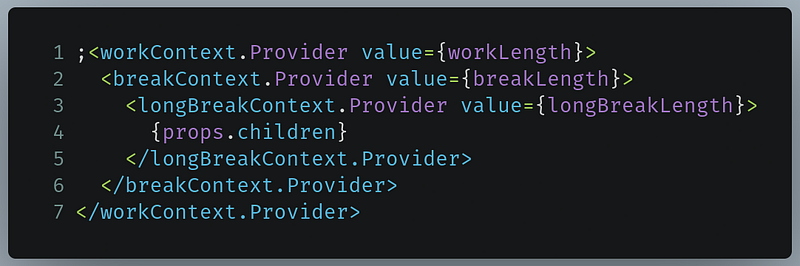
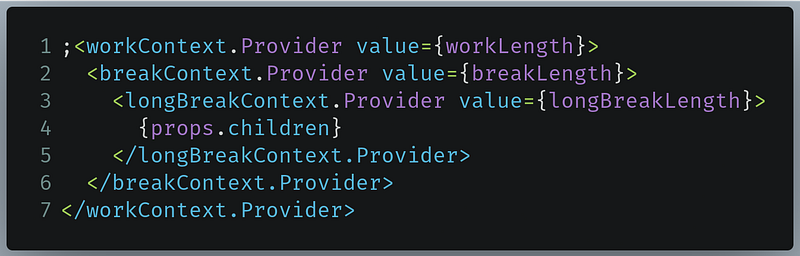
- Now add this block of code in your
returnblock:

Finally, go to your App.js file, and find the following piece of code:

And then replace it with the following:
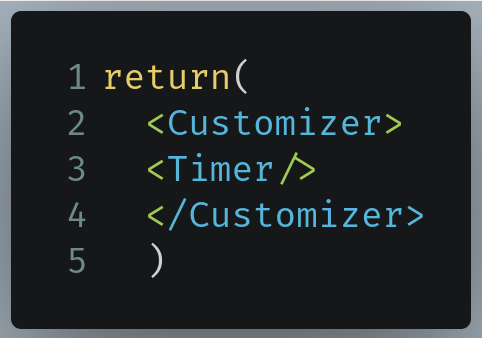
This means that now Timer.js has access to the states data in Customizer.js .
Run the code. This will be the output:
Great! Our code works! As you can observe, the Timer.js renders the values of the states that we defined in Customizer.js .
In the next section, we’ll introduce support for custom timers in our Pomodoro app.
In the end, this is how Customizer.js should look like:
And this is how Timer.js should look like:
Finally, this is how App.js should look like:
Getting Customized Timers
Here, we’ll have to make a handful of changes to Timer.js . This is what we have to do:
- Replace the hard coded timer lengths with
workLength,breakLengthandlongBreakLength. - Detect if the user has clicked on the Increment and Decrement buttons of the length timers.
- If the user has clicked those buttons, then use the new length in the Pomodoro timer.
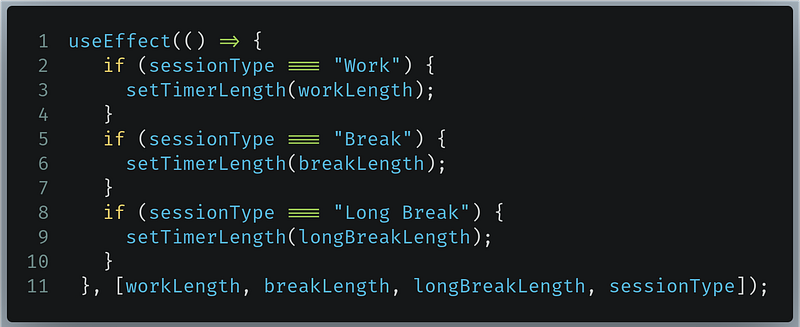
In Timer.js , find the following piece of code:
And now replace it with the following:
Here, we’re telling React to run this piece of code whenever the values of the workLength , breakLength and longBreakLength states change. In other words, this code will run when the user clicks on the Increment or Decrement buttons.
This will be the result of the code:
As you can see, our code works! But there’s one major bug. Try altering the timers while the Pomodoro timer is running.
As you can see, the timer resets itself regardless of whose state value is altered.
If you’re wondering why, let’s backtrack to this snippet of code that we recently wrote in the Timer.js module:
Why is this code causing a problem? Let’s say, as an example, the user is in the Work session. Later on, while the Work interval type is running, he decides to change the breakLength state. Consequently, the code in this hook was executed. The if statements will first get the value of the sessionType state. Since in this case, the value of sessionType is Work , which consequently ran the piece of code from Line 2 to Line 4 which sets the timer length back again to workLength , essentially resetting the timer.
To prevent this problem, find this piece of code:
And now replace it with the following:
Now this piece of code ensures that the Pomodoro timer does not reset if the irrelevant timer length is altered.
This will be the result of the code:
Great! Our code works!
However, before going to the next section, let’s work on tidying up our user interface.
Go to Timer.js , and remove the following piece of code:

Now go to Customizer.js and move this code snippet at the top of your return block.
In the end, this is how your output should appear:
We’re now done with this section! In the next section, we’ll add Material-UI and Tailwind CSS to our React app. Additionally, we’ll also be adding sound assets.
In the end, this is how Customizer.js should look like:
And this is how Timer.js should look like:
Finishing Touches
Material-UI
In this segment of the tutorial, we’ll use icons and Button elements provided by Material-UI.
Go to Customizer.js and start by importing Button from @material-ui/core/Button and a handful of icons from @material-ui/icons:
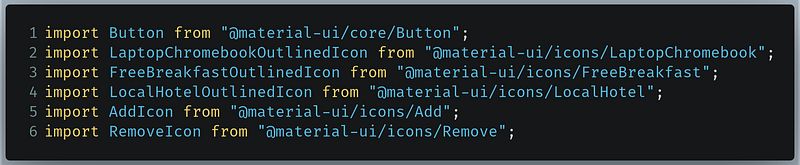
- The
LaptopChromebookOutlinedIconwill represent theWorkinterval - The
FreeBreakfastOutlinedIconwill represent theBreakinterval - The
LocalHotelOutlinedIconwill represent theLong Breaksession - The
AddIconandRemoveIconwill be used as icons on theButtoncomponents to show the Increment and Decrement options.
Staying in the same file, find the following piece of code:
Now replace it with the following block:
This code does the following tasks:
- Render the icons next to the
pelements. For example, we rendered theLaptopChromebookOutlinedIcononLine 37. - Replace the
buttonelement with theButtoncomponent provided by Material-UI. An example is provided onLine 40. - Set the icon(the
startIconproperty) of the Buttons to eitherAddIconorRemoveIcon. An example is atLine 44andLine 55. - Their colors to be either blue(
color=”primary” ) or red (color=”secondary”). Example atLine 52andLine 65. - Give them the
containedvariant so that they could be full. An example atLine 18. - Notice that we’ve also wrapped each group with
divelements(for exampleLine 11toLine 34. We’ve done this so that we can use TailwindCSS later in this tutorial
Run the code. This should be the result:
Great! Our code works! The buttons look noticeably nicer and we now have icons. Let’s now move on to doing the same to our Timer.js file.
As before, import the Button and these icons into Timer.js :

When that’s done, go to your return block in the Timer function:
Now replace it like so:
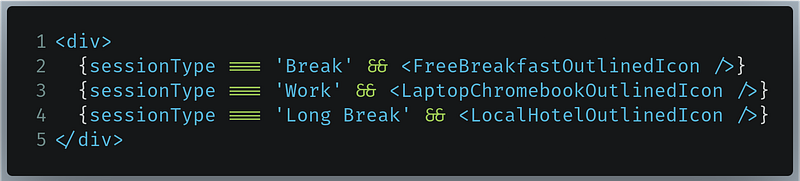
Line 4–12: Here, we’re just creating aButtonelement. However, focus onLine 8. OnLine 8, we’re telling Material that if the value of thetimerOnstate istrue(the timer is currently running), then render the Pause icon. Otherwise render the Play icon which tells the user that the timer has been paused.Line 19-23: Here, we’ve removed the ability to display value ofsessionTypeand replaced it with icons instead. In these lines, we’re telling React to render theFreeBreakfastOutlinedIconif the value ofsessionTypeisBreak. However if the interval type isWorkthen render theLaptopChromebookOutlinedIcon. Otherwise display theLocalHotelOutlinedIcon.
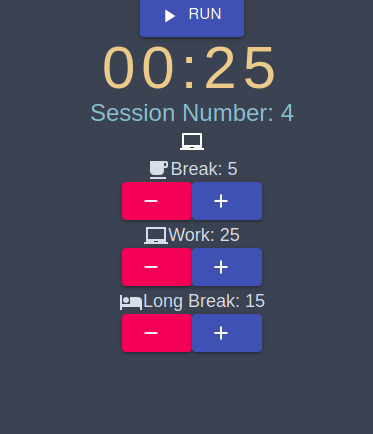
Run the program. This will be the result:
Great! Our code works! In the next section, we’ll integrate TailwindCSS in this React web app.
In the end, this is how Customizer.js should look like:
And this is how Timer.js should look like:
TailwindCSS: Setting The Colors
Before starting with this section, let’s first alter the primary and secondary color values of Tailwind.
To do so, go to tailwind.config.js in the root of your project folder. There, find the following piece of code:
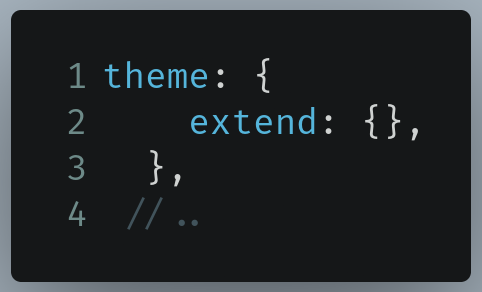
Now replace it with the following:
Line 4: Here, we’re telling TailwindCSS to replace the background color of the page to#3b4252when we set the background color tobg-primary.Line 7: Change the text colors oftext-primary,text-secondaryandtext-sessionNumberto its corresponding values.
Let’s now move on to setting the background color of this page.
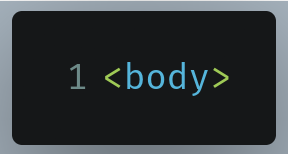
Go to your public directory and find the index.html file. There, find the opening body tag:
Now give it a class name of bg-primary :
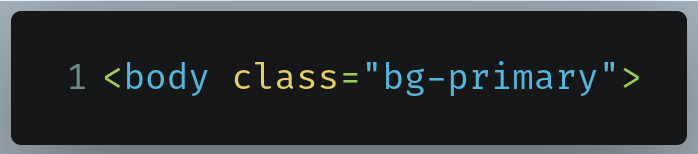
Run the code. This will be the result:
Great! Our code works. Let’s now customize our text styles to make text more readable.
Let’s first start by making our timer look more prominent. To do so, first go to Timer.js and find the p tag that renders the timerLength state value:

Now add a className property to the p tag like so:

Here, we’re assigning the following class names to this paragraph element:
font-sans: Change the font family of the text toSanstracking-widest: Set the widest letter spacing to ensure maximum ease of readability.text-6xl: Set the text size to extra large.text-primary: Change the font color to attract maximum attention. Remember that we defined thetext-primarycolor intailwind.config.jsearlier.
Let’s now change the text style of the p tag that displays sessionNumber . In your Timer.js file, find the following line in your return block:

Attach the following class names to it like so:
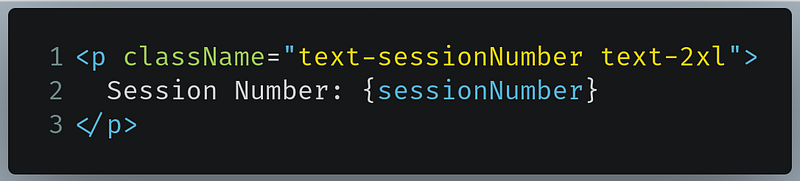
text-sessionNumber: We defined this color earlier in ourtailwind.config.jsfile. This color makes our text readabletext-2xl: Makes our text appear larger.
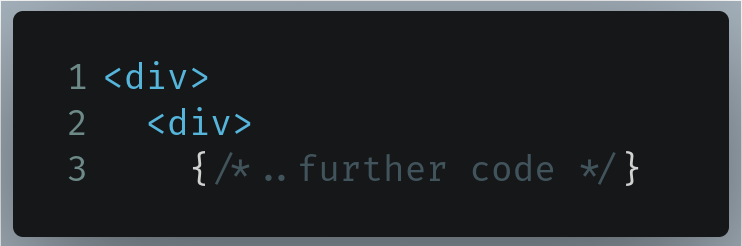
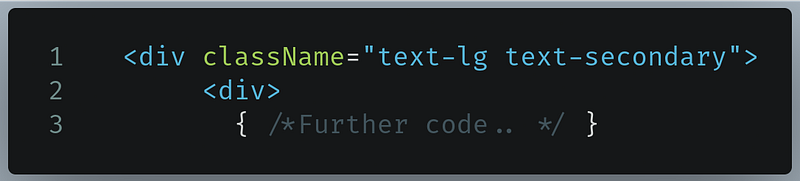
Let’s now do the same for our Customizer component. Go to Customizer.js and find the first opening div tag:
Now attach the following class names like so:
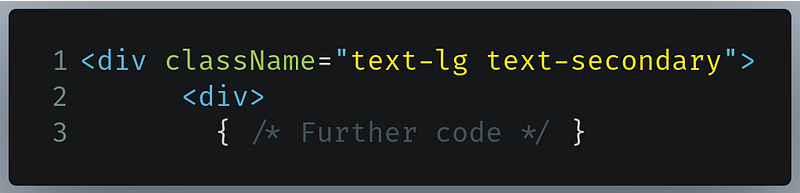
text-lg: This will make the text large.text-secondary: Change the text color to make it readable. We defined this color intailwind.config.js.text-secondaryessentially makes our text white.
Run the code. This will be our result:
Lastly, let’s now make the session type icon more visible.
In Timer.js , find the piece of code that performs conditional rendering to display the icon depending on the interval type:
To each of the icon components, add the following style property that turns the icons white:
This will be the output of the code:
Great! Our text is visible and our app looks really nice. In the next section, we’ll bring in responsive web design into our React app.
In the end, this is how Timer.js should look like:
And this is how Customizer.js should look like:
TailwindCSS: Responsive Web Design
As a first step, go to Timer.js . Let’s start by positioning our components using a Flexbox. We’ll position our items vertically like a column.
In Timer.js , find the first opening div tag:
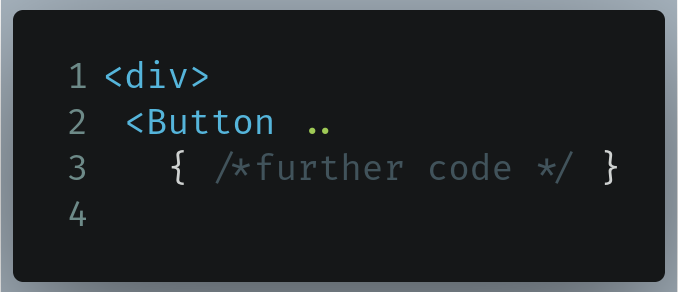
Attach the following classes to this div element:
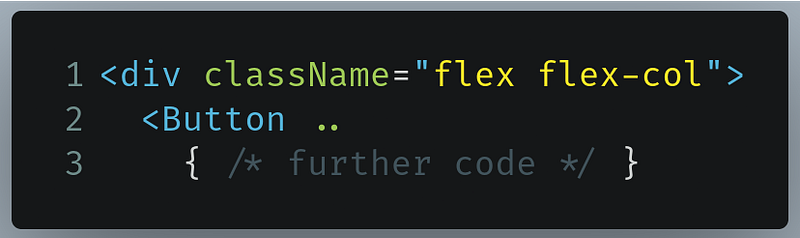
flex: Tell TailwindCSS that ourdivHTML element will be a flex container.flex-col: This property will position our items vertically.
This will be the output of your code:
Great! Our code works. Let’s now work on Customizer.js .
In Customizer.js, we’ll be leveraging the power of flex containers as well. However the elements of this component should be positioned according to the device our app is being used on. Let’s discuss how should the elements in the Customizer component should be rendered.
On mobile devices, we want to have a flex-col container, otherwise on larger devices, we want a flex-row container instead. In other words, we want our components to be positioned vertically on handheld screens, and on bigger screens we want our components to be positioned horizontally. Additionally, all items in the container should be aligned in the center of the cross-axis.
Go to your Customizer functional component in Customizer.js and find the first div opening tag:
Let’s first tell TailwindCSS to turn this div container into a flex box and that it should position the child elements vertically:

This should be the output of the program:
Let’s now increase the vertical space between the child elements and add some padding on the top. Add the following classes to the same div element:

space-y-10: Each child element will have 10 units of vertical space.mt-6: Thedivcontainer should have a top margin of 6 units.
This will be the output of the code:
Our child elements now have space between each other, which undoubtedly makes our program appear better. This means that our code works!
Let’s now inform TailwindCSS that we want to position this horizontally on a larger device. Append the following classes to the same div element:
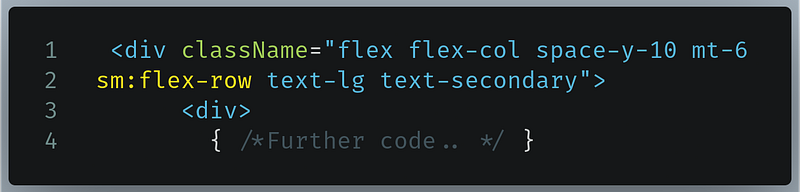
sm:flex-row: On a screen that isn’t small,that is, on a larger display, display the elements horizontally-just like a row.
This will be the output:
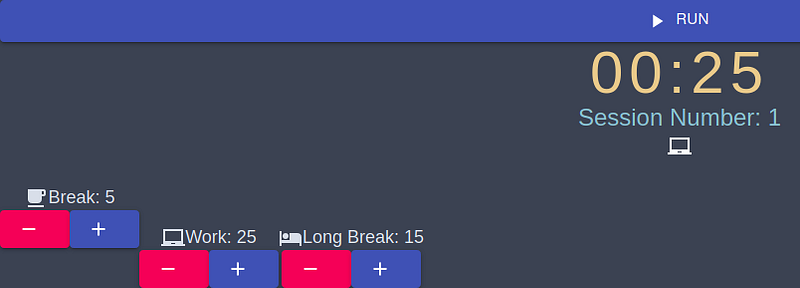
As you can see, our elements have now been positioned horizontally, indicating that our code works. However the first child component isn’t aligned properly. To do so, let’s first inform TailwindCSS to remove the vertical space between child elements when the page is viewed on a large screen.
Add the following classes to the same div class:

sm:space-y-0: On a large screen, there should be no vertical space between the childdivelements.
This will be the result:
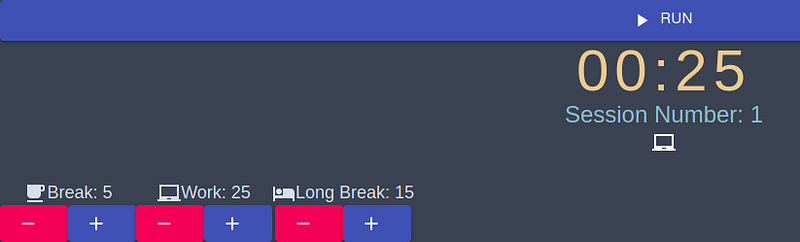
Great! Let’s now justify these items such that there is an equal amount of space around each item.

This will be the output:
Great! Let’s now test our design responsiveness by resizing the window.
As you can see, our Customizer functional component converted itself from the flex-col container to flex-row and vice versa depending on the window size. This means that our design works!
In the last section, let’s now add audio to our app.
In the end, this is how Timer.js should look like:
And this is how Customizer.js should look like:
Adding Audio
In the beginning of this tutorial, we brought in some audio assets into our project. Let’s now use them.
Let’s import these files into Timer.js . Write the following lines of code Timer.js :

Here, we’re importing the wav files from our Audio folder located which is within the src file.
startedAudiowill be played when the user starts the Pomodoro timer.endedAudiowill be played when the timer ends.
Now declare a couple of Audio instances within your Timer function:

This piece of code allows the browser to recognize our wav files as Audio objects so that they can be played.
In Timer.js , find the useEffect hook that detects changes for timerDone and timerDone :
Now replace this with the following code in this hook:
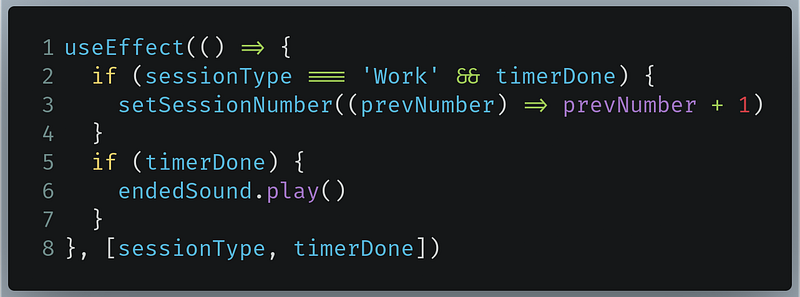
The changes are present in Line 5 to Line 7 .
Line 5: Detect whether the value oftimerDoneistrueorfalse.Line 6: If it istrue, then play theendedSoundaudio file. This indicates that the timer has been completed.
Let’s now play the startedSound file. In the return block of the Timer component, find the Button component that plays or pauses the timer.
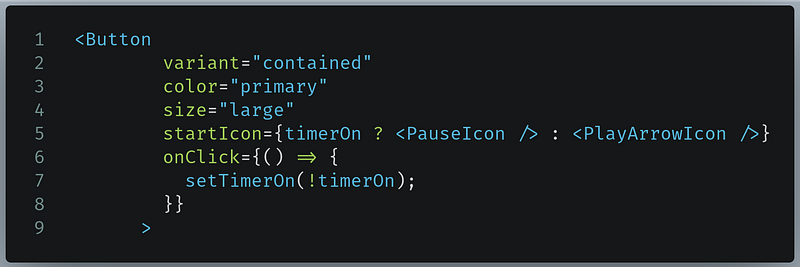
Change it like so:

The change is present in Line 8 . Here, we’re telling React to play the startedSound audio file when the user clicks the button.
Let’s now run the code. This will be the output:
Notice that the title bar of the browser indicates that our app played a sound whenever the timer started and also when the timer ended. This means that our code was successful.
We’re finally done with our project! In the next section, we’ll discuss on how you can extend this app’s capabilities.
In the end, this is how Timer.js should look like:
And this is how Customizer.js should look like:
Ideas To Make This App Better
- Toggling between light and dark mode: You can add light mode for this app so that it becomes easier on the eyes if the user is using this app during the day or in the morning. This tutorial can help you get a toggle for your dark and light mode.
- Add alarm functionality: Notice that in our app only a sound is played once every time the timer ends or starts. To make this app better, you can play a sound whenever the timer ends and then make it stop when the user clicks on a Stop button.
- PWA: You can also make this web app into a Progressive Web App so that the user can run it even if he’s offline.
Conclusion
This was a long tutorial! I encourage you to play with the code and deconstruct the program to comprehend the code better. You’re also encouraged to research extensively in case you have confusions. Don’t give up!
Thank you for making it to the end! Have a great day.
Github Links And Further Learning Resources
Github Link
This is the repository for our project.
Further Reading
- React’s Context API Explained
- Material-UI React Tutorial- Traversy Media
- Using TailwindCSS With React- CodingTheSmartWay
- React And TailwindCSS Image Gallery- Traversy Media
Next Post: React Routers, Explained Previous Post: Build A Notes App With Google Authentication In NodeJS


