
ASP.NET Core Security
Authentication and Authorization in Blazor Server Application

Authentication and authorization are two aspects of security that are very important in an application. Both are different but go hand in hand.
Authentication is the process of verifying the identity of a user whether or not he is allowed to use the application. Users who are not verified are still sometimes allowed to use the application on a limited basis. Authentication can be done in various ways, the most common for applications is checking the username and password. Another example is the use of fingerprints on smartphones, or pin codes when using a debit card at an ATM.
When a user first opens a website that requires authentication, he will register on that website. All relevant information, such as usernames, passwords, e-mails, etc., will be stored in the website database. When users enter their names and passwords, the data will be checked in the database. If the data match the database, then he is a valid and authenticated user. If the user enters a name or password that does not match the database, the login page will respond, for example giving the message “Invalid login attempt.”
Authorization is done after authentication. Authorization is the process of checking user access rights to resources according to their role. For example, in the academic system, students are allowed to see grades but are not allowed to change or delete them.
Security scenarios differ between Blazor Server applications and Blazor WebAssembly. The Blazor Server application runs on the server. Thus, authorization can determine the user interface options presented to a user and access rules for areas of the app and components.
The Blazor WebAssembly application is run on the client. Thus, authorization is only used as a way to determine what UI will be displayed. The actual enforcement of authorization rules must be applied to the backend server because any client-side authorization can be modified or skipped.
Furthermore, this article discusses: • Blazor Server authentication • identity database • account management • simple authorization
Precondition
Building Blazor applications require the installation of the following software:
- ASP.NET Core 3.1 or newer.
2. NET Core SDK version 3.1.201 or newer.
• Check by opening the command prompt and typing the command:
dotnet -version
• If the results show an older version, install the latest version.
• The latest version can be downloaded here.
3. SQL Server. Download the latest version here. • Choose the free edition for developers, SQL Server 2019 Developer.
Note. SQL Server 2019 is usually paired with SSMS (SQL Server Management Studio) version 18.x. Unfortunately, SSMS 18.x has a problem with the database diagram feature. We recommend using an older version, for example, SQL Server 2017 Developer which can be downloaded via the following link.
SSMS 18.x cannot be used for SQL Server 2017. Use SSMS 17.9.1 which can be downloaded via the following link.
Creating an Authenticated Server Blazor Project
- Using Visual Studio 2019, create a Blazor Server project by name
BlazorServerSecurityApp. The following link describes how to create a Blazor Server project step by step.
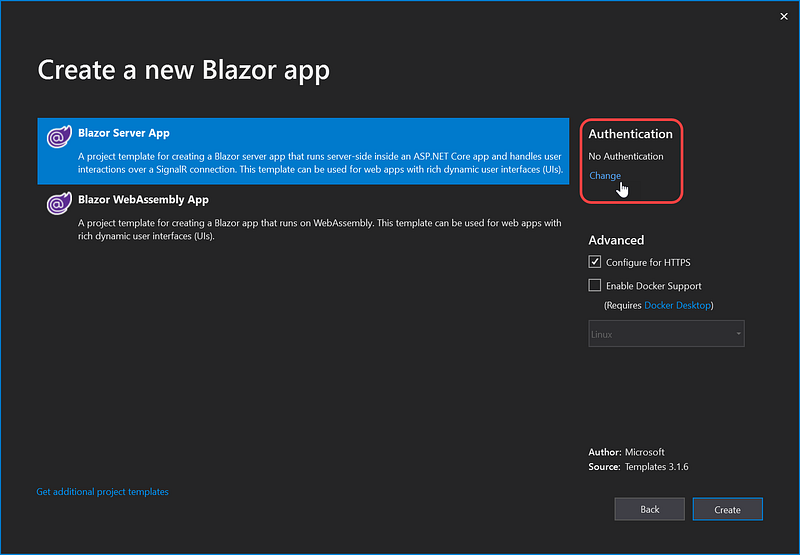
- When the following screen appears,
- Select
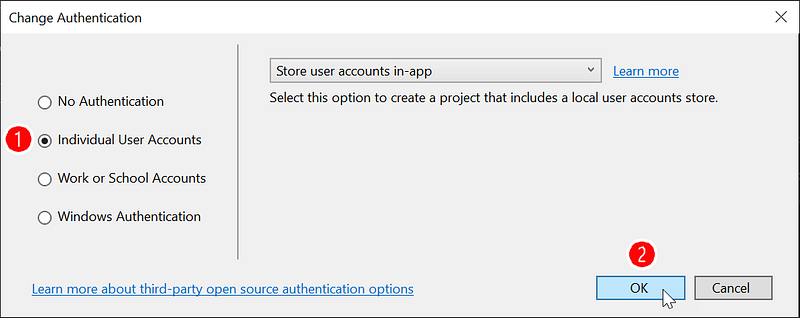
Blazor Server App, clickChange, the following screen appears.
- Select
Individual User Accounts, clickOK.
- Click
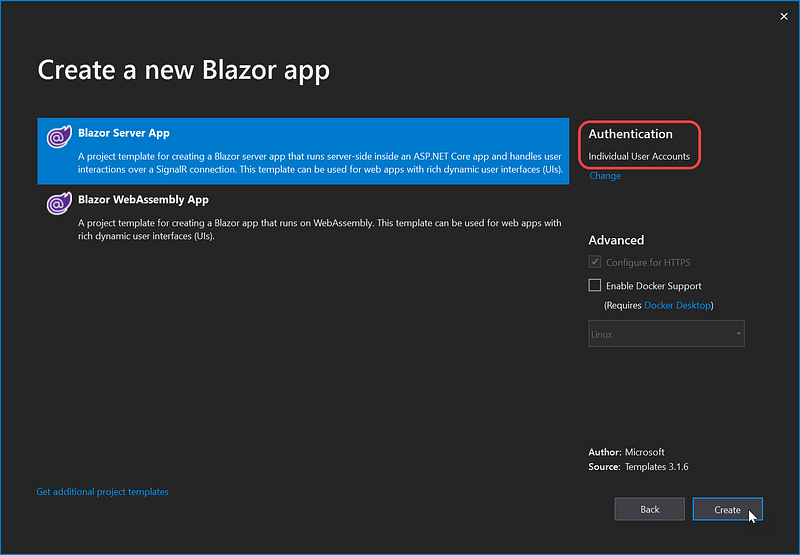
Create. - The result is a project structure which when compared to the project structure without authentication is as follows.
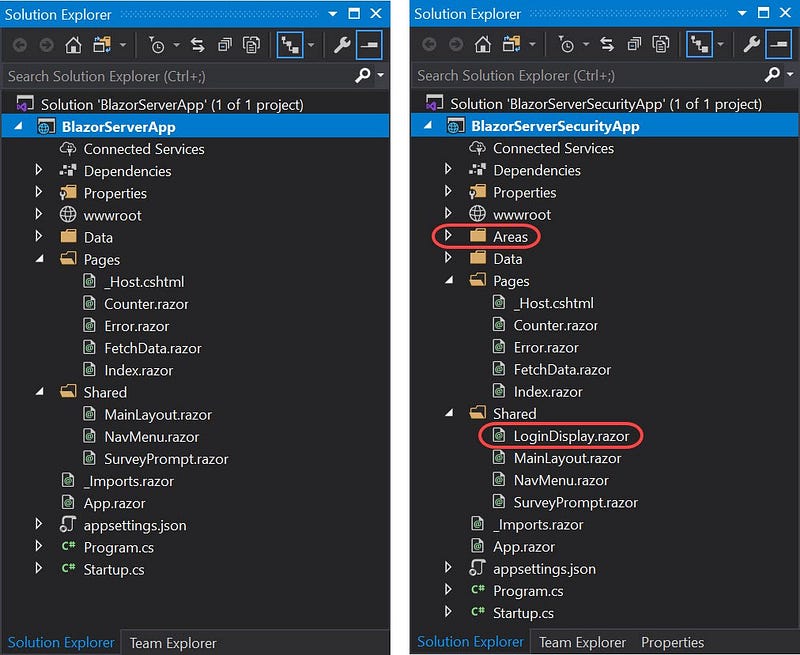
- The figure on the left shows the project structure without authentication, while the one on the right is the project structure with authentication.
- In projects with authentication, there are additional
Areasfolder andLoginDisplay.razorfile.
Creating an Identity Database
If the application is running now, ASP.NET Core will create several security-related tables that by default use (localdb)\MSSQLLocalDB. SQL Server 2017 Developer is installed on the computer with the server name PRIMARY-PC. This server will be used. For that, follow the steps below.
- Select menu:
View|SQL Server Object Explorer, the following screen appears.
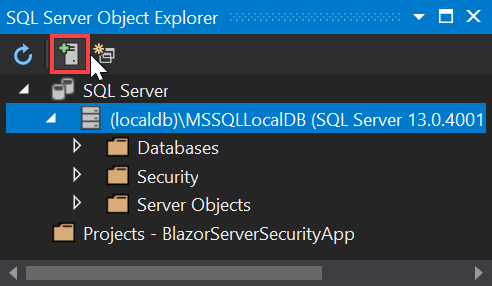
- To use SQL Server that is already installed, click on the toolbar,
Add SQL Server, as shown in the figure above.
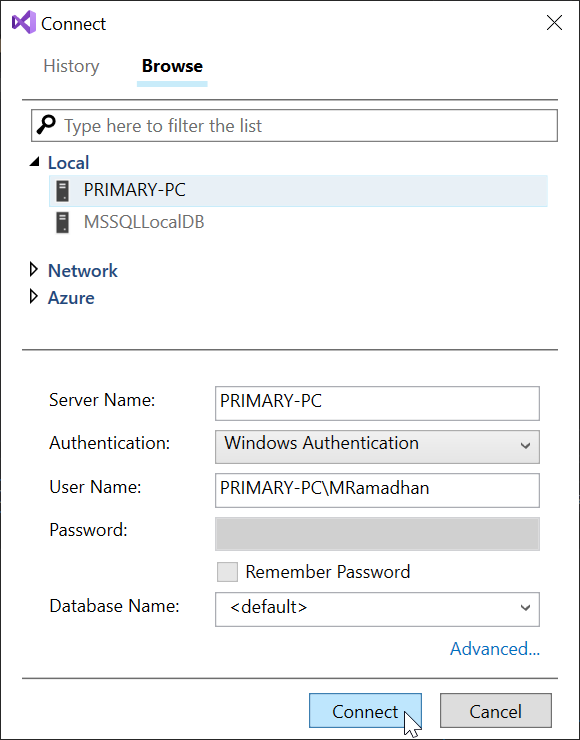
- Choose:
Local|PRIMARY-PC|Connect
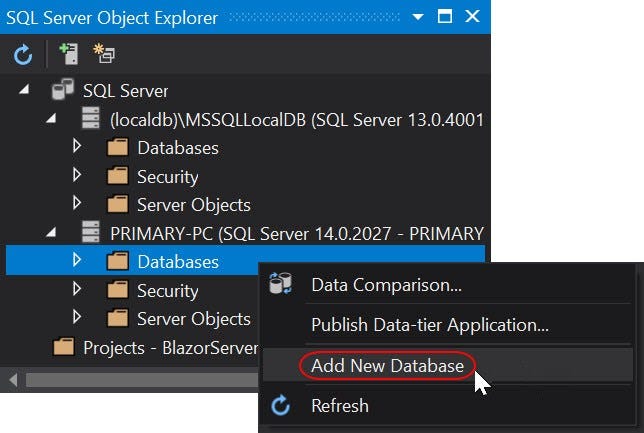
- To create a new database using the
PRIMARY-PCserver, right-clickDatabasesunder thePRIMARY-PCserver, then selectAdd New Database. - Type the name of the database, for example
SecurityDB. - Next, update the connection string to the
SecurityDBdatabase in the following way.
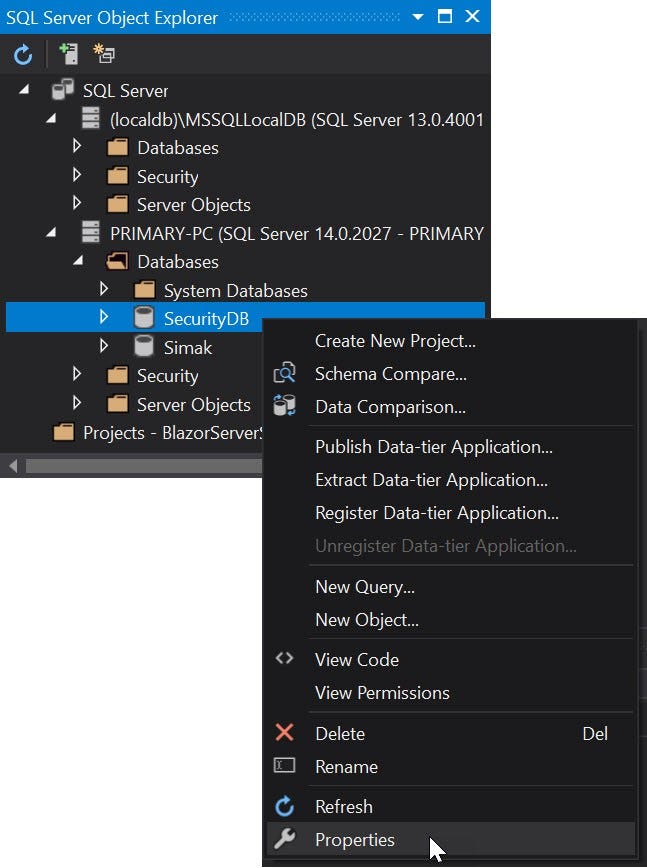
- Right-click
SecurityDB, clickProperties.
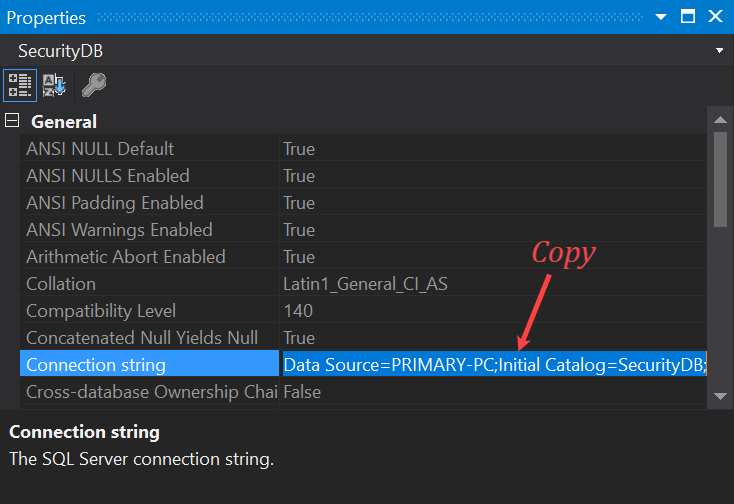
- On the
Propertiesscreen, copy the connection string.
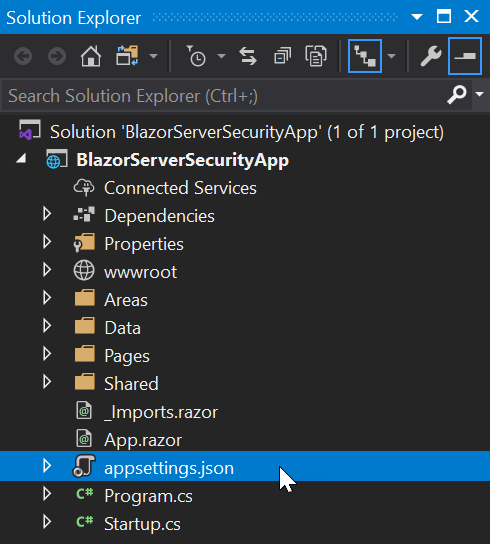
- On the
Solution Explorerscreen, clickappsettings.jsonto open the file.
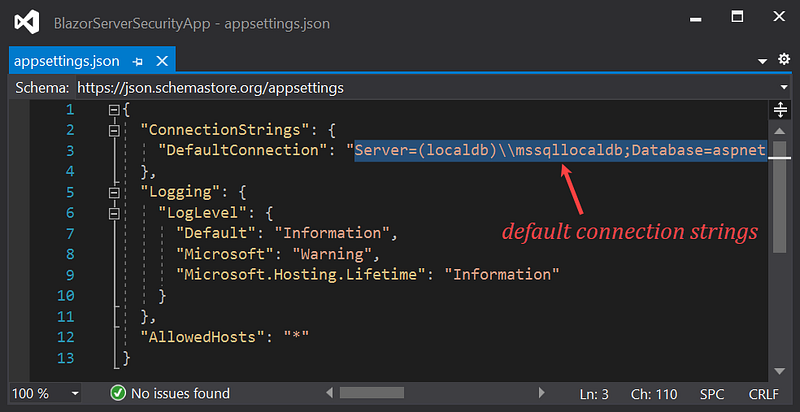
- The connection string still points to the default server,
localdb\\mssqllocaldb.
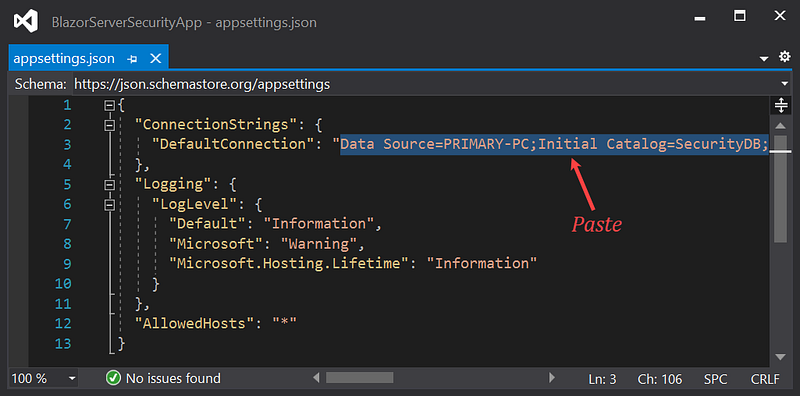
- To connect to the
SecurityDBdatabase on thePRIMARY-PCserver, update the connection string in theappsettings.jsonfile by pasting the copied connection string. - Save
appsettings.jsonfile.
Run the Authenticated Blazor Server Application
Regarding security, we can register users, login, manage accounts, and log out.
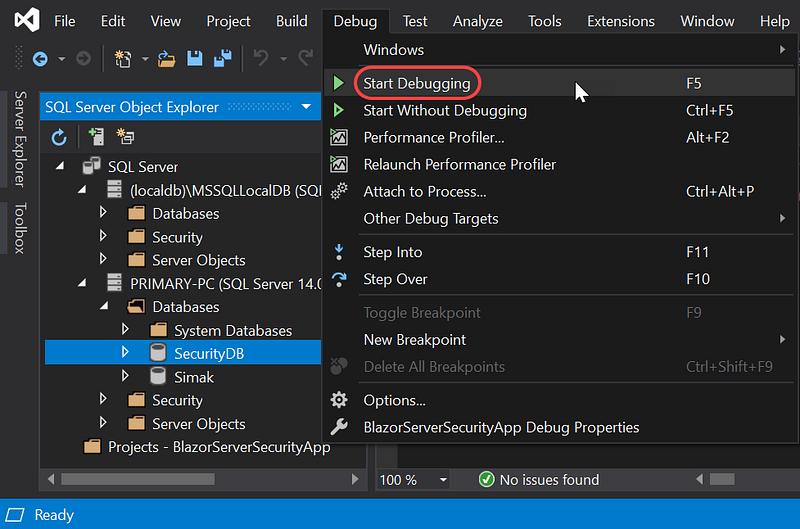
- Select menu:
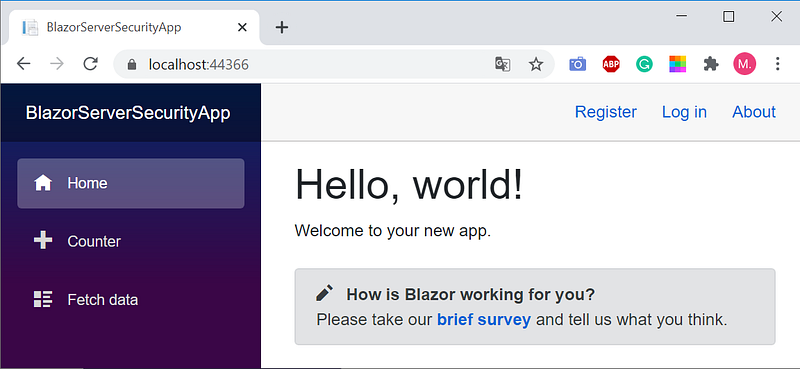
Debug|Start Debuggingor pressF5to debug and display the following homepage.
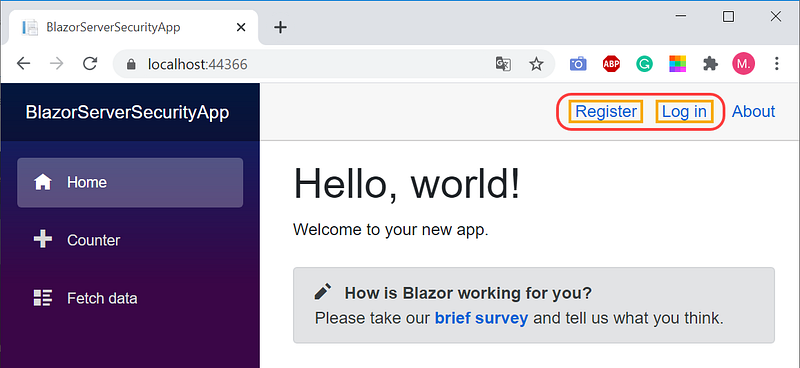
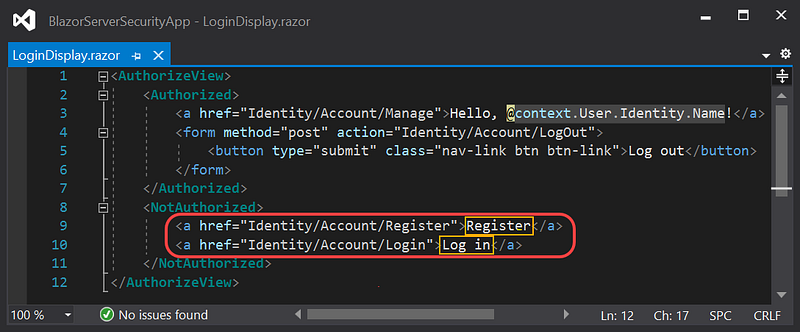
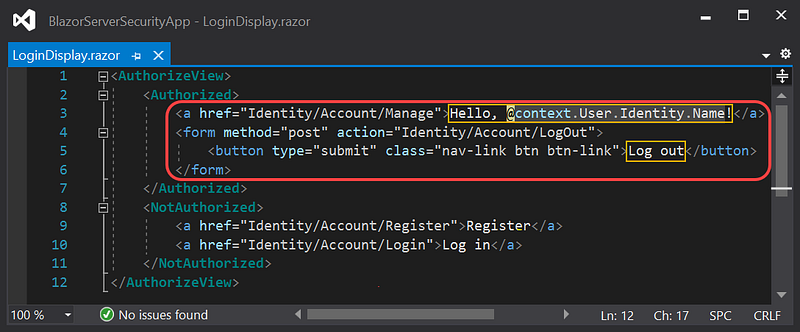
On the homepage above there are additional options Register and Log in which do not appear in the application without authentication. This is because of the LoginDisplay.razor component. Because it hasn't logged in, it means the user hasn't been authenticated, then the markup in the NotAuthorized block is run.
User Registration
- On the homepage screen, click
Register - The application runs markup on line 9 of the
NotAuthorizedblock:<a href="Identity/Account/Register">Register</a> - The following screen appears.
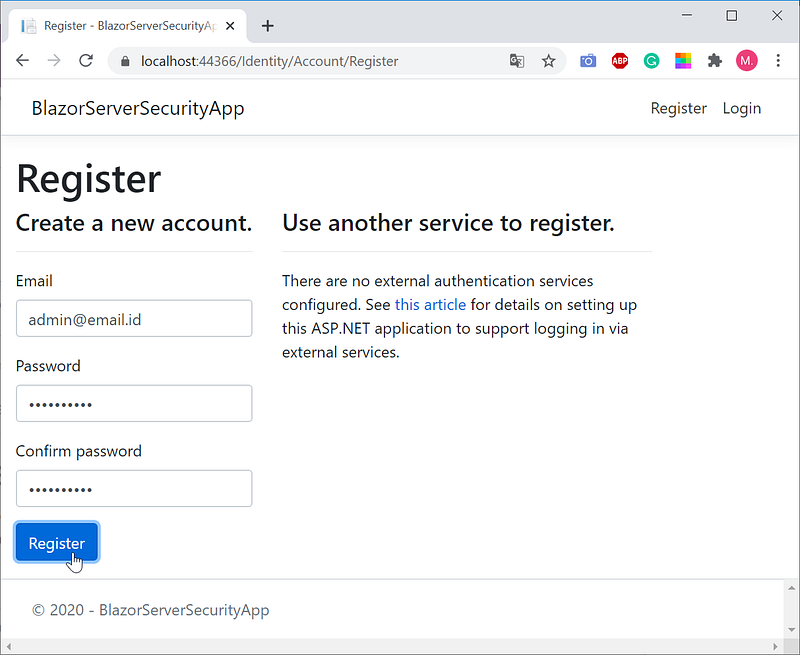
- Enter email data, password, and password confirmation.
- Click the
Registerbutton. - Because this is the first registration, the following screen appears.
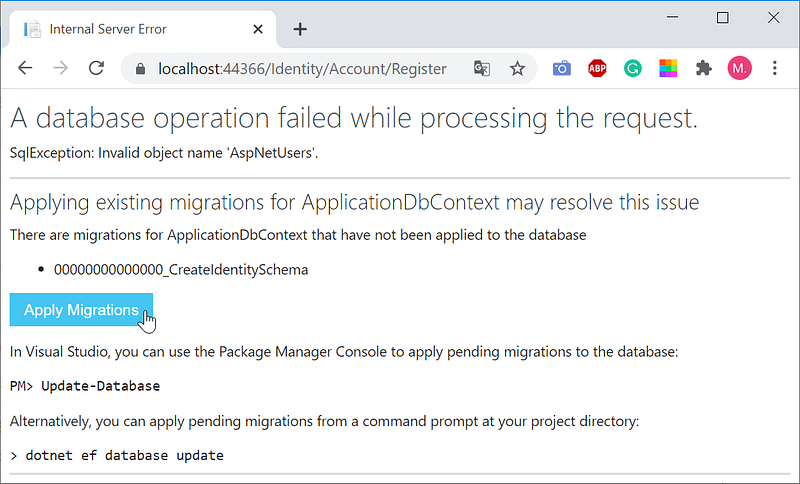
- Click
Apply Migration, the application will do the migration process by running the following00000000000000_CreateIdentitySchema.csprogram.
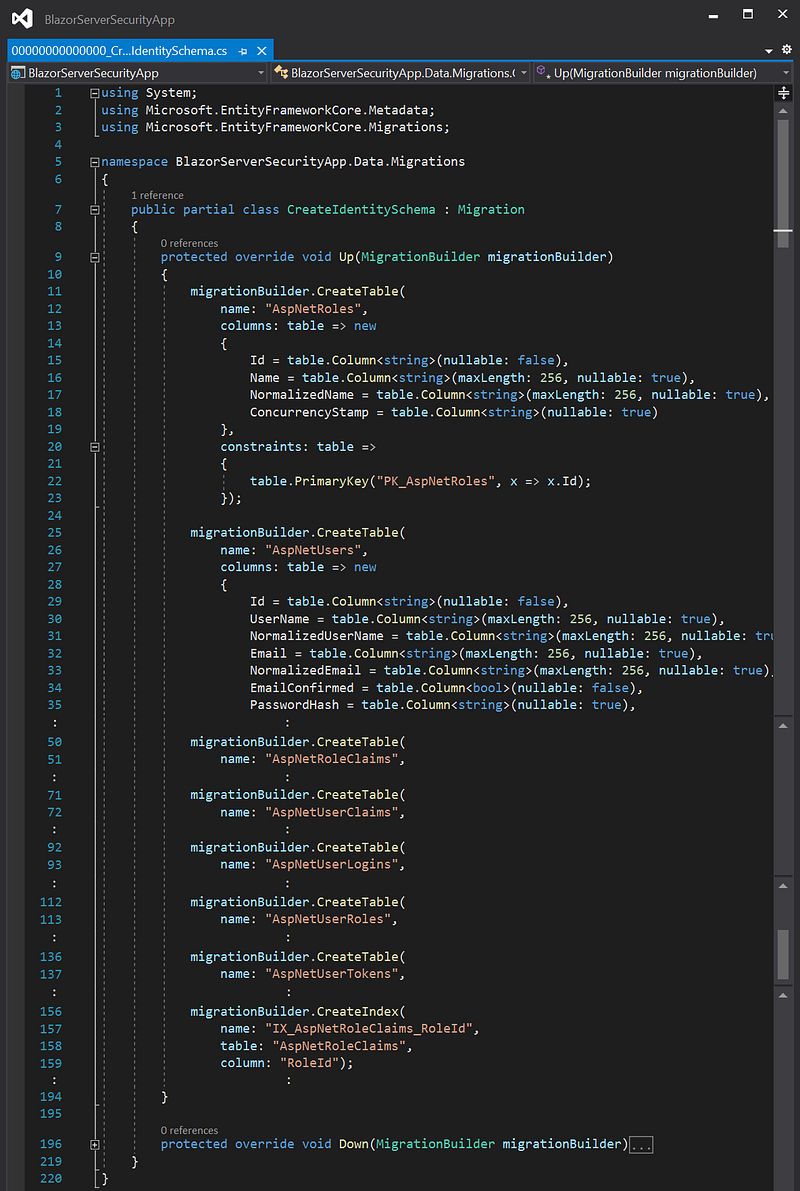
- The migration process generates an identity database, consisting of seven tables needed for the security and storage of user account details.
- The screen changes to as follows.
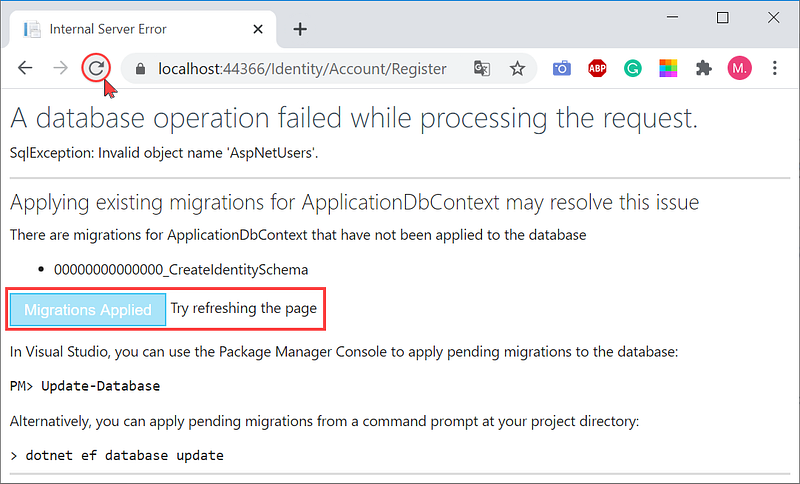
- Click refresh.
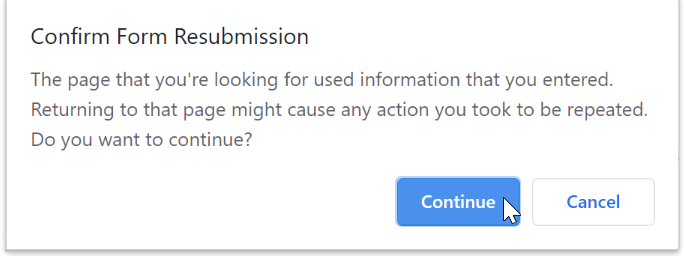
- Click
Continue, the following registration confirmation screen appears.
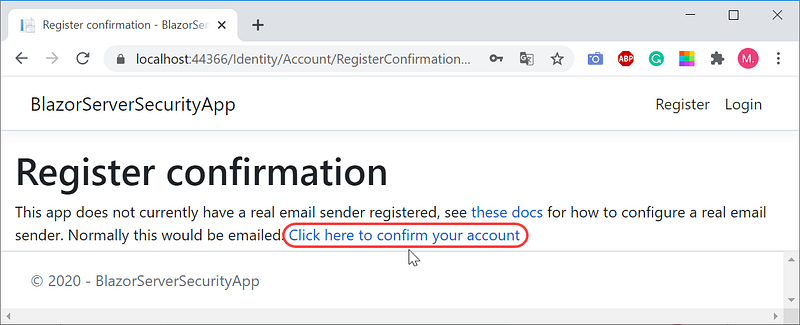
- Click
Click here to confirm your account.
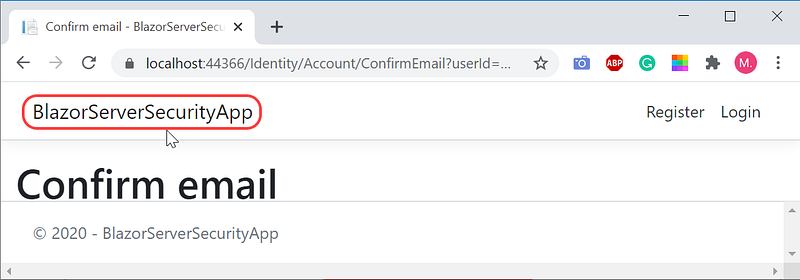
- Click the application name,
BlazorServerSecurityApp, to display the following homepage
- Register for other users, for example
[email protected],[email protected],[email protected].
Authentication Using Login
- Log in with a variety of mistakes, for example
Emailand/orPasswordblank,Emailand/orPasswordwrong. The error message that might appear is as follows.
The Email field is required.
The Email field is not a valid e-mail address.
Invalid login attempt.
The Password field is required.
The Password must be at least 6 and at max 100 characters long.
Passwords must have at least one non alphanumeric character.
Passwords must have at least one digit ('0'-'9').
Passwords must have at least one uppercase ('A'-'Z').
Passwords must have at least one lowercase ('a'-'z').
The password and confirmation password do not match.- Log in with the correct data.
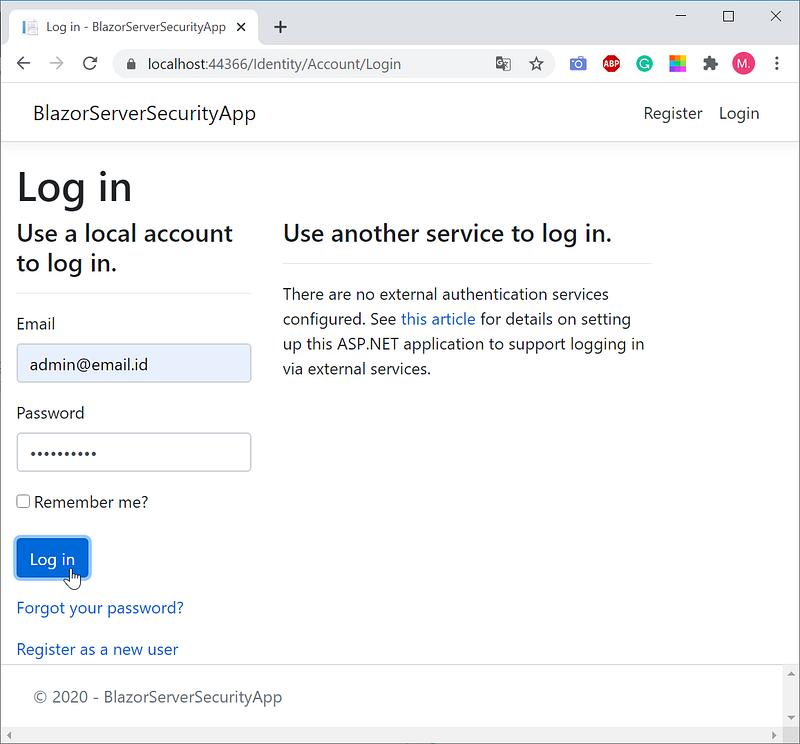
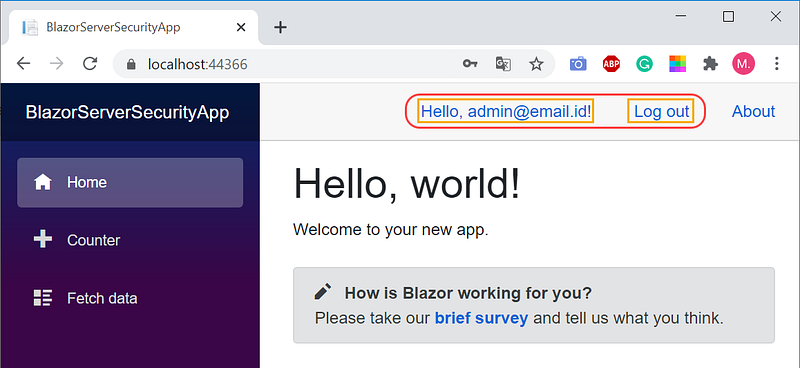
- The following homepage appears.
Managing Account
Authorization is done after authentication. Authorization determines what users can do.
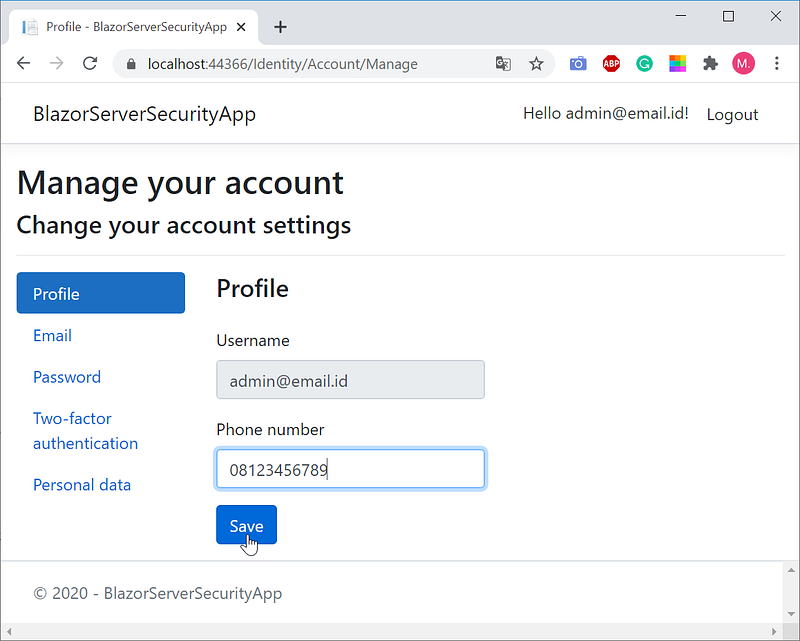
Because it is logged in, it means that the user has been authenticated, markup in the Authorized block is run. Additional options on the original homepage are Register and Log in change to Hello,username and Log out. By clicking Hello,username, the user has the authority to manage their account. Users can add telephone numbers, change e-mails, change passwords, add the second authentication, download and/or delete account data. Here is an example of how [email protected] manages his account.
- Click
Hello, [email protected]. - The application runs markup on line 3 of the
Authorizedblock:<a href="Identity/Account/Manage">Hello, [email protected]</a> - The following screen appears.
- Click
Profileto add a telephone number. - Click
Emailto change email. - Click
Passwordto change the password. - Click
Two-factor authenticationfor additional authentication settings. - Click
Personal datato download and/or delete account data.
Log out and close the application
- Click
Logoutto exit and return to the homepage. - Close the application.
Identity Database
When registering the first user, the application performs a migration process by creating a database of identities needed for the security and storage of user account details.
- There are seven tables generated by the migration process. To see a list of tables, select the menu:
View|SQL Server Object Explorer.
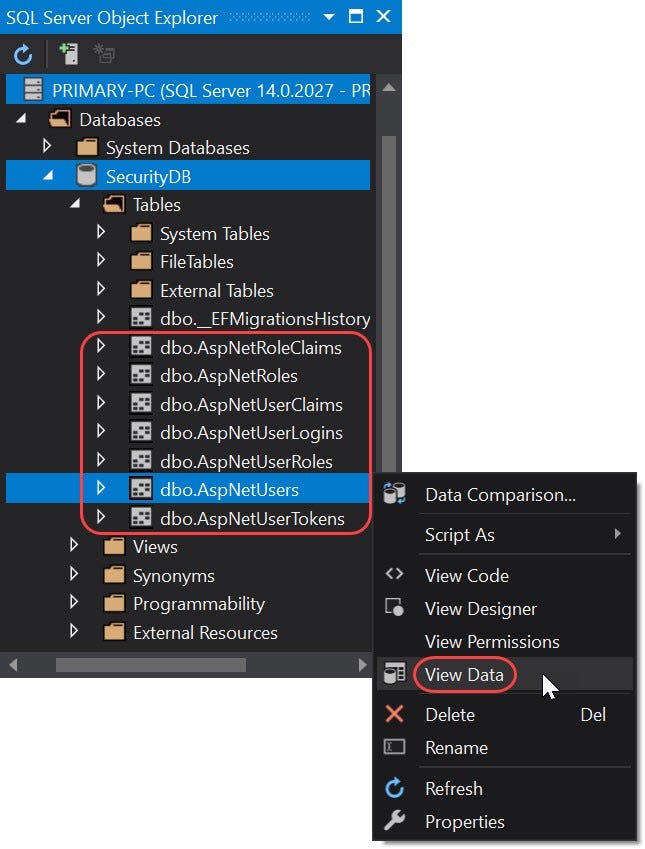
- Data entered during the registration and those entered or changed when managing accounts are all stored in the
dbo.AspNetUsertable. - To view the data, right-click
dbo.AspNetUsers, then selectView Data. - Shown the following data.
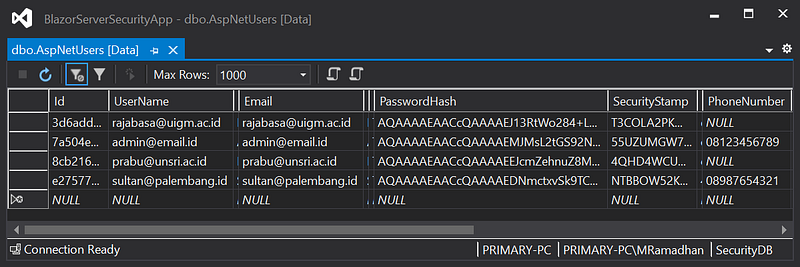
- The figure above shows only 6 of the total 15 columns.
dbo.AspNetRolestable stores role data,dbo.AspNetUserRolestable saves details of user roles. Both are related to role authorization.
Simple Authorization
Reopen the application by pressing F5 or Ctrl+F5. Don't log in. Try clicking on the menu Home or Counter or Fetch data. It turns out that even without logging in, all pages can be accessed. From the beginning, the three-page components did not require authentication to access them.
A simple way to restrict page access is menu authorization, which determines what menus are displayed only for authenticated users and what menus are for all users. Alternatively, the menu can be accessed, but the information on the page is limited.
AuthorizeView Component. This component selectively displays the user interface depending on whether the user is authenticated or not. If the user is authenticated, markup in the Authorized block is executed. Conversely, if the user is not authenticated, the markup in the NotAuthorized block is executed.
Following is an example of using AuthorizeView components to show the menus selectively.
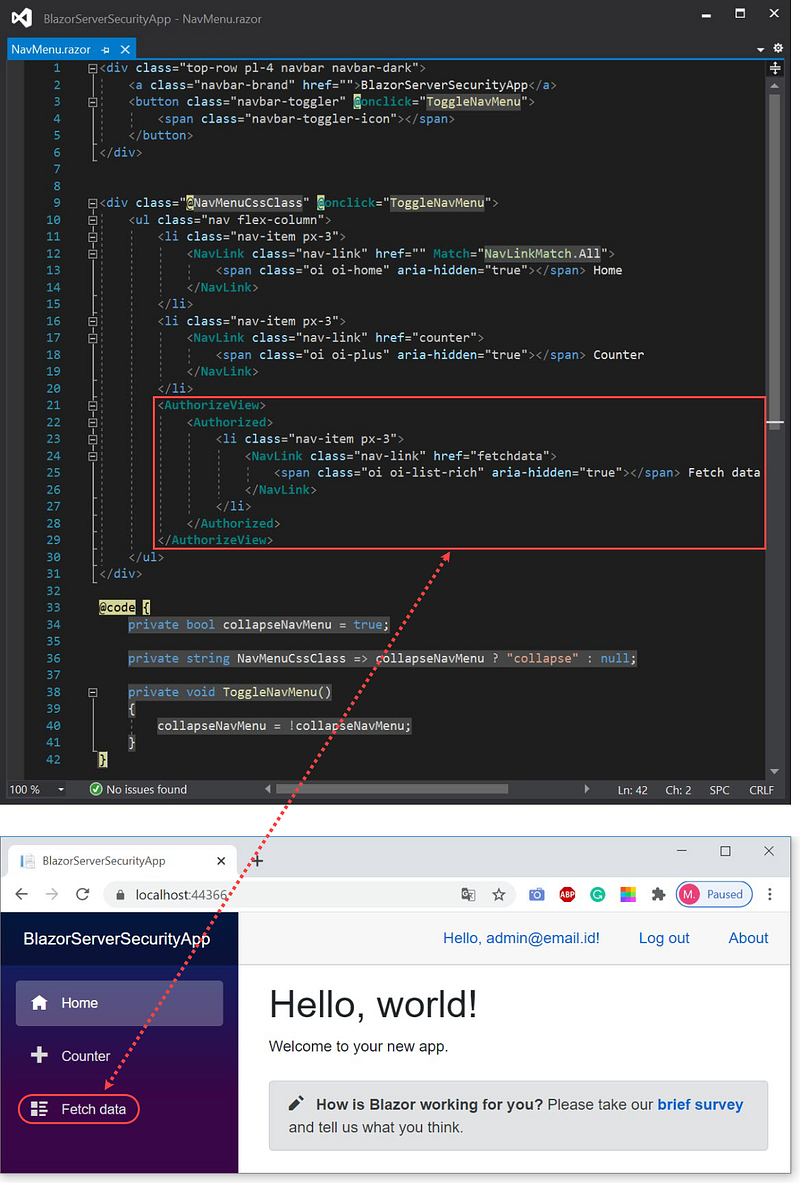
- If the user is authenticated, the
Fetch datamenu is displayed.
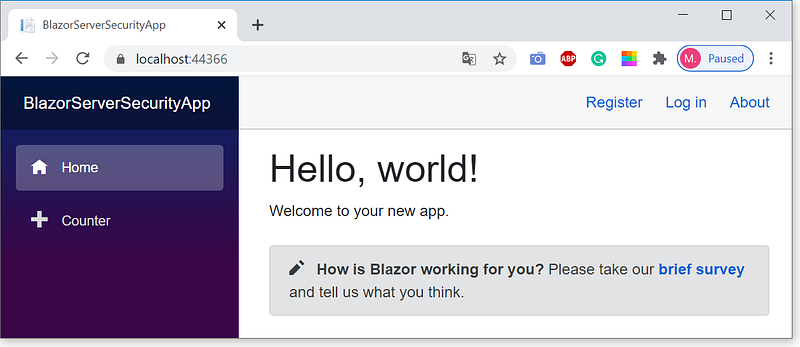
- If the user is not authenticated, only the
HomeandCountermenu are displayed, theFetch datamenu is not displayed. - Following is an example of the contents authorizing of a page.
- Only authenticated users can access the entire contents of the page.
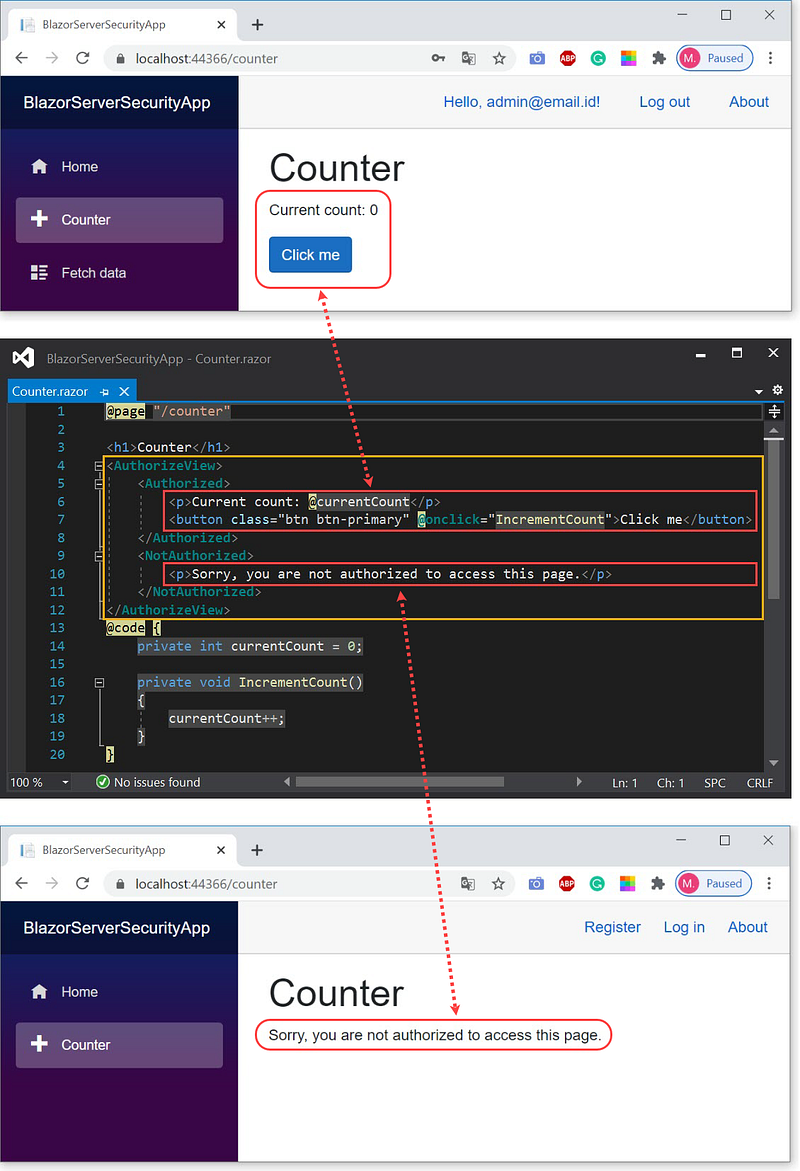
- Users who are not authenticated can only see the title of the page, cannot see its contents.
There are still other types of authorizations that will be discussed at other times.
Download BlazorServerSecurityApp.zip


