
Angular 11 CRUD with .Net 5 REST API Tutorial

Oh crud! How to CRUD?
Announcements:
- On May 12, 2021, Google released Angular version 12. The Angular app in this tutorial has been upgraded from version 11 to 12. You can find the upgraded source code in the ng-12-upgrade branch. The master branch is still at version 11.
- If you are looking for an end-to-end solution, check out the Angular Starter Kit for Rapid Prototype. The starter kit contains boilerplate code for UI/UX, REST API/CRUD, Single-SignOn (SSO), and Identity/Access Management.
Introduction
Imagine you are a developer at a Fortune 500 company. Your new assignment is to build an Angular SPA that searches and updates employee position records. The backend database has 100,000+ records. The requirement is to create a responsive app accessible on desktop, mobile, and tablet. The technology stack is Angular and ASP.NET Core REST API.
Tutorial Content
In this tutorial, I will provide instructions to clone a complete, working, responsive Angular app from Github, set it up on the local, and walk-thru source code pertinent to CRUD. The task is divided into three parts:
Part 1: Clone Angular and WebAPI projects from Github
Part 2: Walk-thru TypeScript CRUD-related code in Angular
Part 3: Walk-thru C# CRUD-related code in NetCore 5
At the end of the tutorial part, I include a complementary screencast so you can see how it was done on my desktop. Grab a drink and relax while watching the video!
Related Tutorials
This tutorial will focus on CRUD-related coding and it does not go into the detail of pagination (filter, sort, paging). To learn pagination, check out my other tutorials.
- Angular 11 Pagination 100,000+ Rows
- NetCore 5 Pagination 100,000+ Rows
- Angular 11 Modal Form, Dialog, and Toaster with Bootstrap
Prerequisites
The following tools and knowledge are recommended
- Visual Code — free code editor for Angular
- Visual Studio 2019 Community — free code editor for C#
- Ability to read Javascript code
- Ability to pronounce C# (c-sharp not c-pound)
Github Repositories
- AngularCrud is the front-end Angular app. The source code for this project was generated by the Ngx-Rocket template. Custom code was added to show (a) data listing and (b) drill-down to detail for editing.
- AngularCrudApi is the backend REST API written in ASP.NET Core 5. The source code for this project was generated by the OnionAPI template and added custom code to support pagination and CRUD.
Live Demo
Developers like to be shown how something works so we can decide whether we want to spend our valuable time learning it. Check out the live demo.
Opensource Project Highlights
rxweb/reactive-form-validators is an Angular validation library with 260+ stars on Github. The library provides all types of complex validation and dynamic validation on Reactive Form, Template Driven Form, and Model-Based Form. The developer is Ajay Ojha who is based in India.
You can show your appreciation to Ajay Ojha by giving a “star” on his Github Repo.
CRUD Overview
In computer programming, create, read, update, and delete (CRUD) are the four basic functions of persistent storage. — Wikipedia
Before diving into the tutorial, let’s get a better understanding of CRUD. CRUD is an acronym for:
CREATE — to add new records via SQL INSERT statement
READ — to retrieve records for display via SQL SELECT statements
UPDATE — to modify records via SQL UPDATE statement
DELETE — to remove records via SQL DELETE statement
CRUD provides logical mapping to low-level database commands. CRUD was not designed to expose API for consumption. For the Angular app, the bridge between CRUD and Database is the REST API.
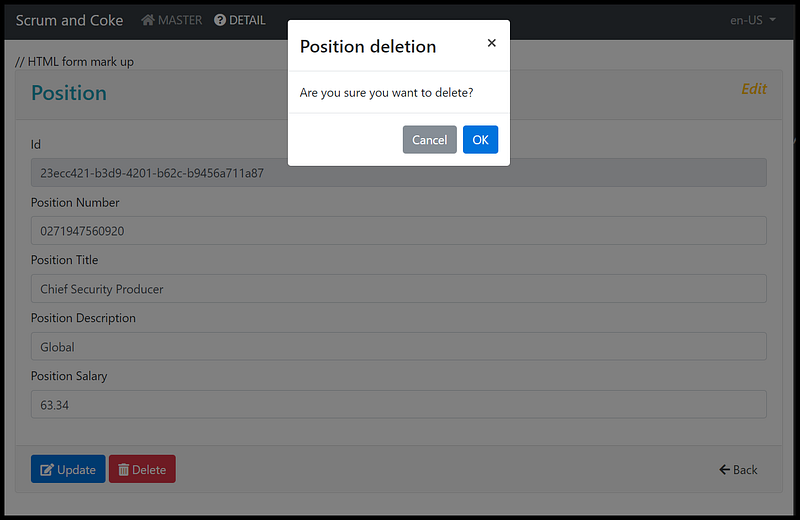
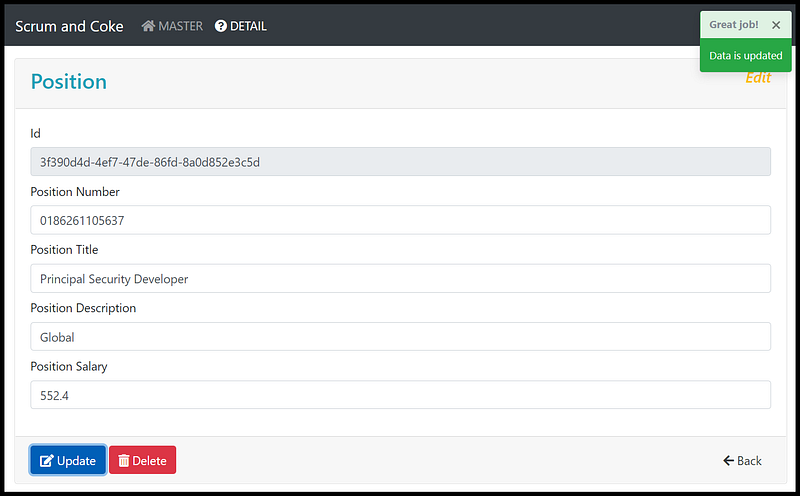
When programming CRUD, it is important to inform users of the intent and status of data operation. The app source code includes two (2) user-experience features.
- Modal — modal management service that requires users to confirm the data deletion (Figure 1)
- Toaster — toast management service to let users know if the update is successful (Figure 2)
Let’s get started!
Part 1: Clone Angular and WebAPI projects from Github
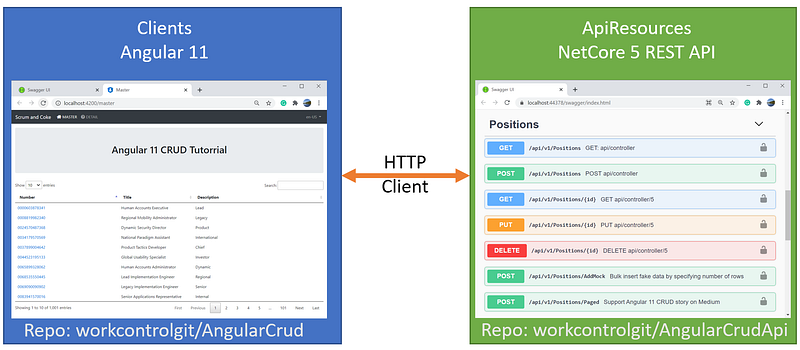
The objective of the Part 1 tutorial is to clone and run the Angular and REST API on localhost. Refer to Figure 3 for the application architecture diagram.
Task 1.1 — Clone Angular Project
In this task, we are going to clone the Angular project from Github via Command Pallet in Visual Code. Prior to making the clone, be sure to create a folder (C:\apps\devkit\Clients) on your desktop for storing Angular source code.
- Start Visual Code
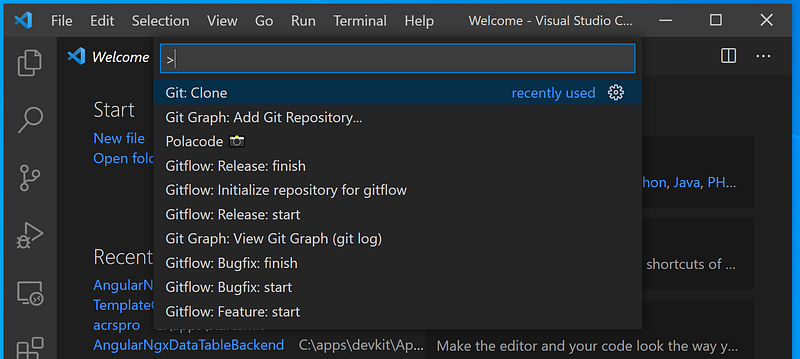
- Go to menu View>Command Pallete (or Ctrl-Shift-P). See Figure 4 for visual aids.
- Type in “Clone” and select Git: Clone. See Figure 5 for visual aids
- Enter https://github.com/workcontrolgit/AngularCrud when prompt for Provide repository URL or pick a repository source. See Figure 6 for visual aids.
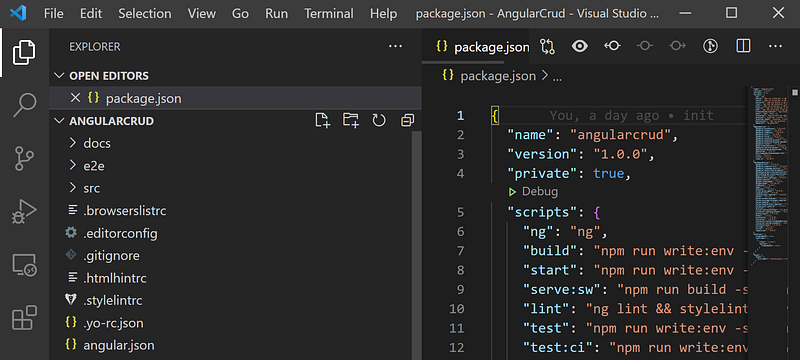
- Select the folder C:\apps\devkit\Clients to save the source code. You should see the AngularCrud project in Visual Studio as shown in Figure 7.
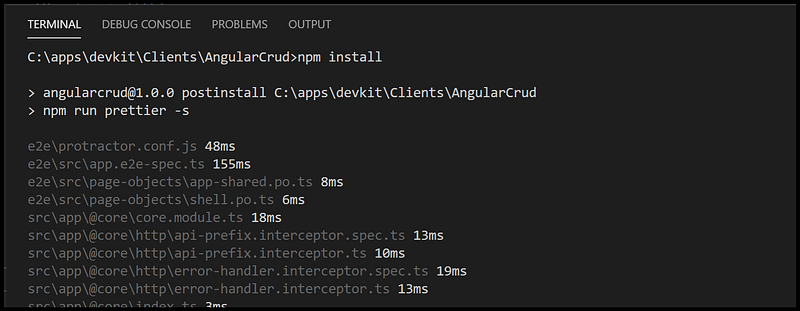
- To restore NPM packages, go to menu View > Terminal (or Ctrl + ‘), type in npm install, and hit Enter. It may take a few minutes to restore the package depending on your network speed. See Figure 8 for visual aids.


Task 1.2 — Clone REST API Project
In this task, we are going to clone the NetCore5 REST API source code from Github using Visual Studio.
The source code for the REST API project is on Github. The solution consists of five projects, structured following the Clean Architecture design pattern. Follow the steps below to open source code:
- Start Visual Studio 2019 and select the option ‘Clone a Repository’
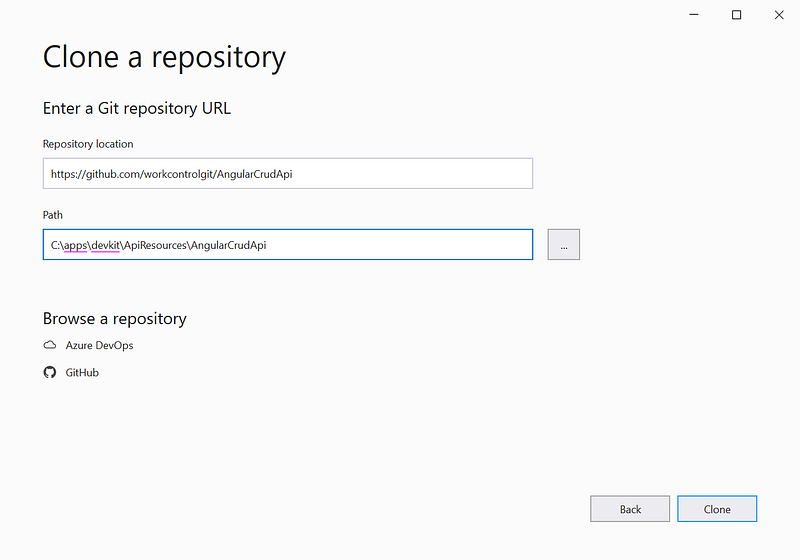
- Clone the repo https://github.com/workcontrolgit/AngularCrudApi to C:\apps\devkit\ApiResources\AngularCrudApi (see Figure 9)
Task 1.3— Run Application
To run the application, start the ASP.NET Core REST API backend first and then the Angular frontend.
Start ASP.NET Core REST API backend
In Visual Studio, run REST API solution by hitting F5. You should see the ASP.NET CORE REST API swagger running on https://localhost:44378/swagger/index.html.
Notice that when you run the solution for the first time, it may take a few minutes to seed 100,000 rows of position test data.
Start the Angular frontend
To run the Angular frontend, from Visual Code > Terminal screen, run ng serve -o to automatically open the Angular app in the browser pointing to URL http://localhost:4200.
After the app is open, you should see the Position table on the Master page. Click on a Position Number to go to the Detail page.
Screencast of Part 1
The complementary Youtube video is a record of the steps in this part of the tutorial. If you find the video helpful, please like and subscribe.
Part 2: Walk-thru TypeScript CRUD-related code in Angular
In this part of the tutorial, we will explore UI navigation and CRUD-related source code.
Task 2.1 Explore UI Navigation
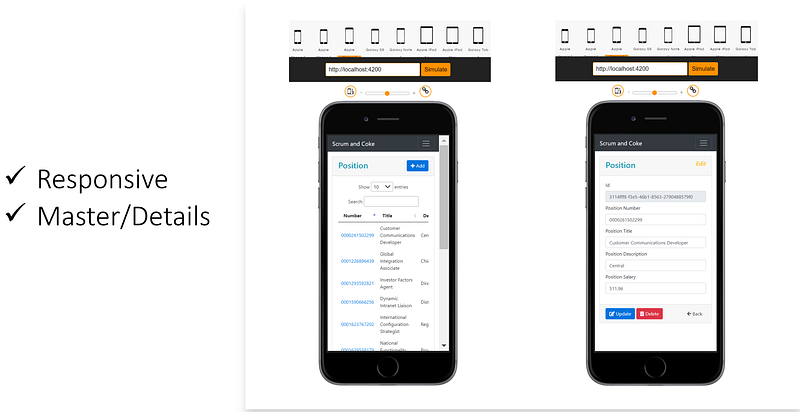
The navigation design supports the app display on desktop, tablet, and mobile. The stacked master/details pattern was chosen— placing the master view on one page, and the details pane on a separate page. See Figure 10 for example screenshots of the responsive display on the iPhone.
UI Navigation for CRUD > Create
To create a new record,
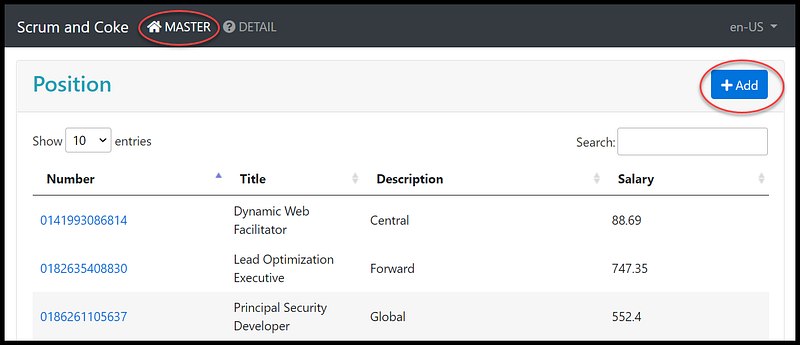
- On the Master page, click on the Add button on the upper right (see Figure 11)
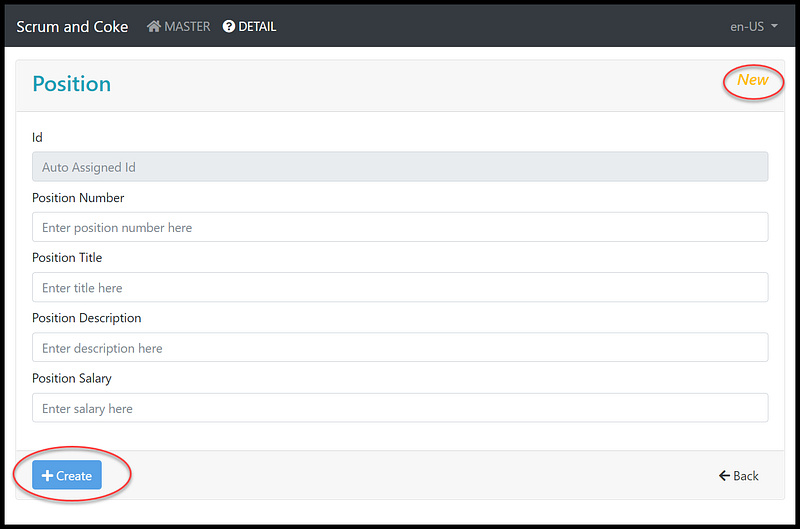
- Complete the form on the Detail page
- Click on Create button (see Figure 12)
UI Navigation for CRUD > Read, Update, Delete
To make an edit to an existing position,
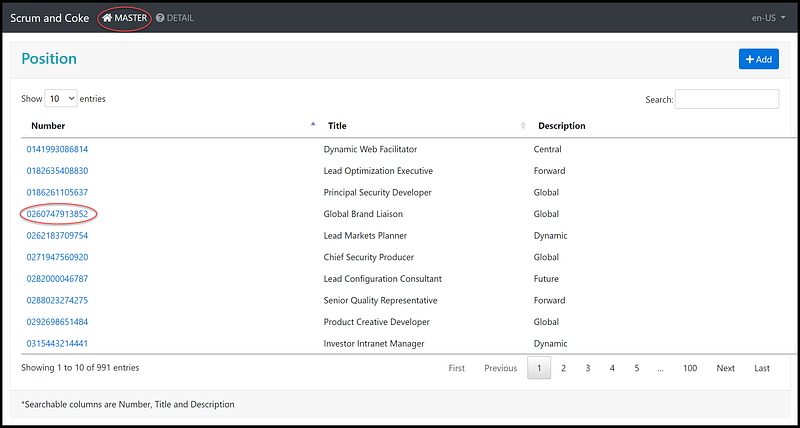
- On the Master page, click on a position number to go to the Detail page (Figure 13)
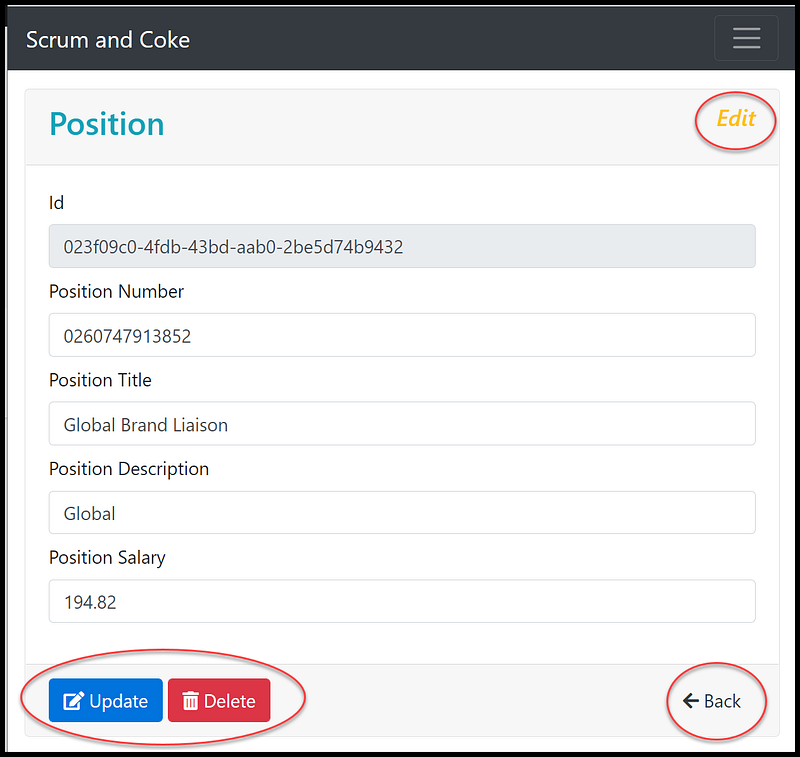
- On the Detail page, the app does the Read and display the entry form (Figure 14)
- Click on the Update or Delete button
- To go back to the Master page, click the Back button
Task 2.2 Explore TypeScript code for CRUD
The primary typescript source code files for CRUD are in four files.
- src\app\master\master.component.html — contains HTML markup to display the position table
- src\app\master\master.component.ts — contains the Typescript code to support pagination
- src\app\detail\detail.component.html — contains HTML markup to display entry form and buttons to do CRUD actions
- src\app\detail\detail.component.ts — contains the Typescript code to call REST API to support CRUD
Source code walk-thru of master.component.html (Figure 15)
- Line 7: Add button link to the Detail page
- Line 13: HTML table markup for pagination (filter, sort, paging)
- Line 26: Hyperlink the Position number with URL to the detail page with position Id as router parameter
Source code walk-thru of master.component.ts (Figure 16)
- Line 27–39: call REST API to suport pagination
- Line 41–57: setup table column title and data field
Source code walk-thru of detail.component.html (Figure 17)
- Line 9: show the formMode variable, define in detail.component.ts with value either New or Edit
- Line 123–131: HTML markup of the Create button, calling OnCreate() in detail.component.ts
- Line 133–139: HTML markup of the Update button, calling OnUpdate() in detail.component.ts
- Line 143–152: HTML markup of the Delete button, calling OnDelete() in detail.component.ts
Source code walk-thru of detail.component.ts (Figure 18)
- Line 55: onCreate() to handle the Create button click on detail.component.html
- Line 56: call the create routine and pass in form values to insert a new record
- Line 62: onUpdate() to handle the Update button click on detail.component.html
- Line 63: call the put routine and pass in record id and form values to update an existing record
- Line 68: onDelete() to handle the Delete button click on detail.component.html
- Line 69–71: call the modal confirmation of the deletion and process confirmation
- Line 73: call the delete routine and pass in record id
- Line 82–101: call HTTP GET record by Id and popular the entry form
- Line 103–115: call HTTP DELETE record by Id
- Line 118–124: call HTTP POST to add a new record
- Line 127–131: call HTTP PUT to update the existing record
- Line 134–142: define Reactive form
- Line 144–151: toaster service
Screencast of Part 2
The complementary Youtube video is a record of the steps in this part of the tutorial. As a bonus, I delineate the master/details pattern of stacked vs side-by-side and how to test the responsive app on tablet/mobile. If you find the video informative, please like and subscribe.
Part 3: Walk-thru C# CRUD-related code in NetCore 5
In part 3, we will explore the C# code in the controller that facilitates the REST API endpoints.
Notice that this ASP.NET REST API project was generated using the OnionAPI template and then added custom code to support pagination. To learn advanced programming techniques such as pagination and CQRS, please see NetCore 5 Pagination 100,000+ Rows
The CRUD operations are written in the source code file PositionsController.cs in the project AngularCrudApi.WebApi (see Figure 19). The mapping from HTTP commands to CRUD are:
HttpPost for Create
HttpGet for Read
HttpPut for Update
HttpDelete for Delete
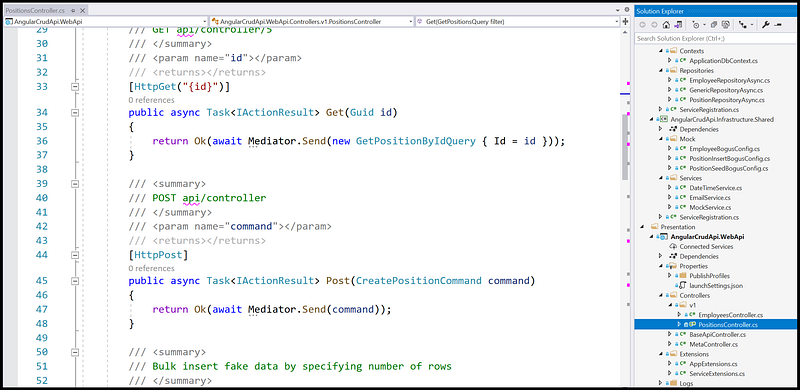
Source code walk-thru of PositionsController.cs (Figure 20)
- Line 33–37: HTTPGet to select a record by Id; MediatR sends to the query handler GetPositionByIdQuery.cs
- Line 44–48: HTTPPost to insert a record; Mediator sends to the command handler CreatePositionCommand.cs
- Line 67–72: HTTPGet to select records for pagination; Mediator sends to the query handler PagedPositionsQuery.cs
- Line 80–88: HTTPPut to update an existing record; Mediator sends to the command handler UpdatePositionCommand.cs
- Line 80–88: HTTPDelete to delete a record by Id; Mediator sends to the command handler DeleteProductByIdCommand.cs
Screencast of Part 3
The complementary Youtube video is a record of the steps in this part of the tutorial. In the video, I step thru the line of code to show CRUD commands mapping to HTTP verbs. If you find the video helpful, please like and subscribe.
References
- rxweb/rxweb - The most powerful validation framework for angular-based enterprise applications. This provides all types of complex validation and dynamic validation on Reactive Form, Template Driven Form, and Model-Based Form.
- CRUD, Filter, Sort, Page, and Shape Data in Asp.Net Core REST API with OnionAPI Template
- CAT architecture pattern for modern app SPA/Mobile
- Bogus Library for Fake Data In ASP.NET Core WebAPI
Summary
In this tutorial, you learned how to implement CRUD in Angular 11 frontend and ASP.NET Core 5 REST API backend.
Oh yeah, CRUD can be fun!


