
Python Setup on MacOs: Python Complete Course — Part 6
Before we start let me tell you that:
- This article is a part of the Python Complete Beginner to Expert Course which you can find it here.
- This article is also available as a YouTube video here.
Introduction
To start learning Python, you should get Python installed on your machine. Also, you need an editor to write and run your code.
If you are a macOS user, this article is for you. The following articles are for Windows and Linux users.
This article will cover the following outlines:
1. Python Setup on macOS

To get Python on your macOS follow these steps:
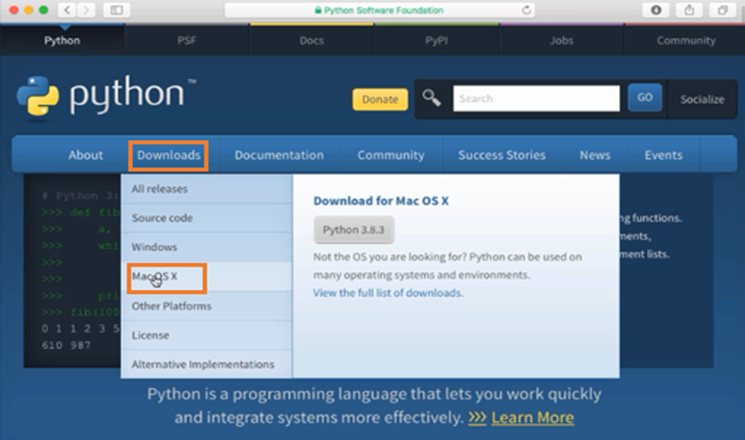
- Go to the official Python site Python.org and select MacOS X from the Downloads dropdown menu. Refer to Figure 1.
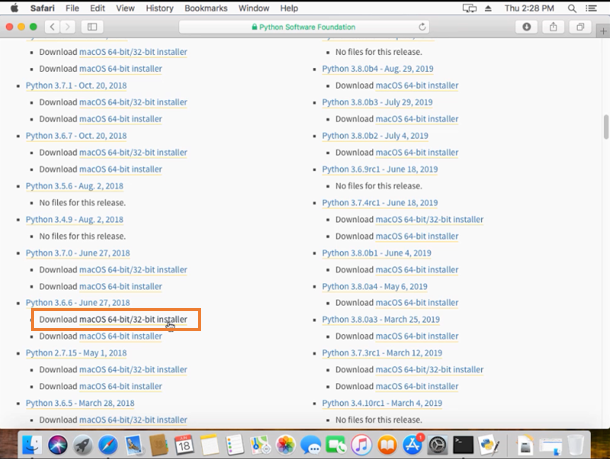
2. Select the Python release and download macOS 64-bit/32-bit installer (pkg file). Refer to Figure 2.
3. Once the pkg file has been downloaded on your computer, open the downloaded file. Now you can see the macOS installation wizard install Python on your computer.
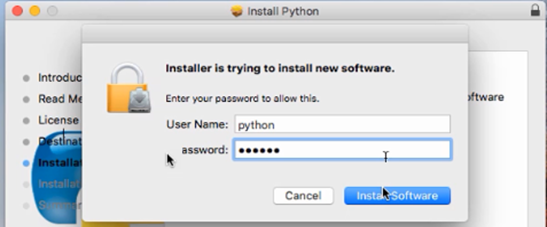
4. You have to agree to the license agreement and keep clicking continue until the installer asks you to insert your user password, enter your password then click on install software. Refer to Figure 3.
5. Click Close, after the installer has successfully installed Python on your computer.
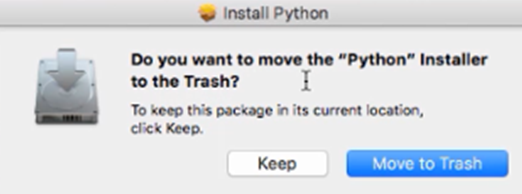
6. You will see a dialogue box asking you if you want to keep or remove the installation file, choose what you want. Refer to Figure 4.
Now we are going to test whether Python was installed successfully or not
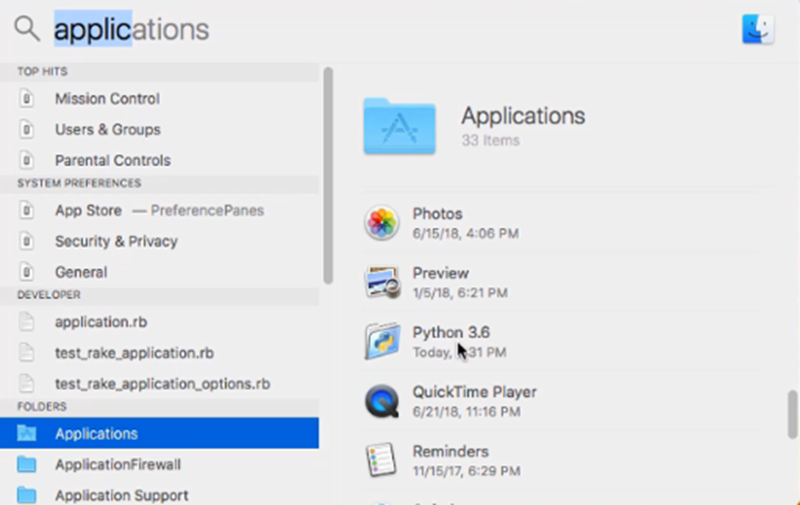
- Open your applications folder, and check whether you have Python there. Refer to Figure 5.
- Second Open your terminal window and type:
python3 --versionClick enter.
You should get the Python version. Refer to Figure 6.

Let’s move on and install PyCharm IDE.
2. PyCharm Setup on MacOs

Simply, follow the steps:
- Visit the PyCharm download page from your Internet browser.
- Under Mac, select the Community version from the download page. Then click download. Refer to Figure 7.

3. Once the dmg file has been downloaded on your computer, open the downloaded file.
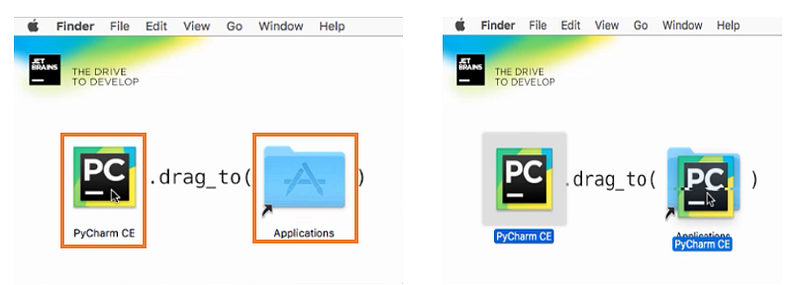
4. After the installer finished Opening and verifying your PyCharm dmg file, you should drag and drop the Pycharm file into your computer application folder. Refer to Figure 8.
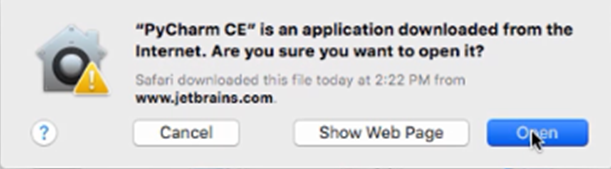
5. When the installer finished copying PyCharm to your computer application folder click on the PyCharm icon in that folder, then click open. Refer to Figure 9.
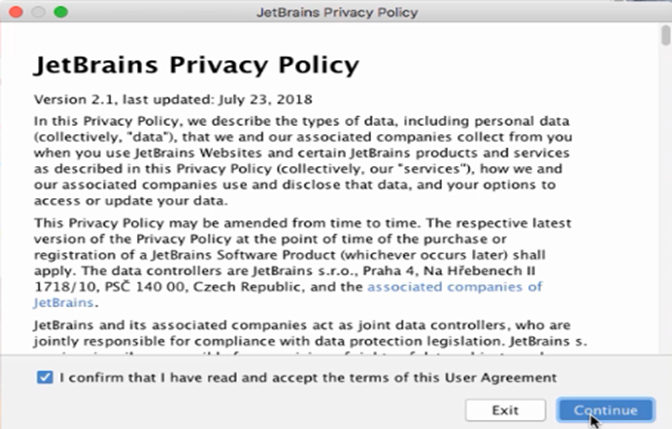
6. Accept the JetBrains privacy policy and click continue. Refer to Figure 10.
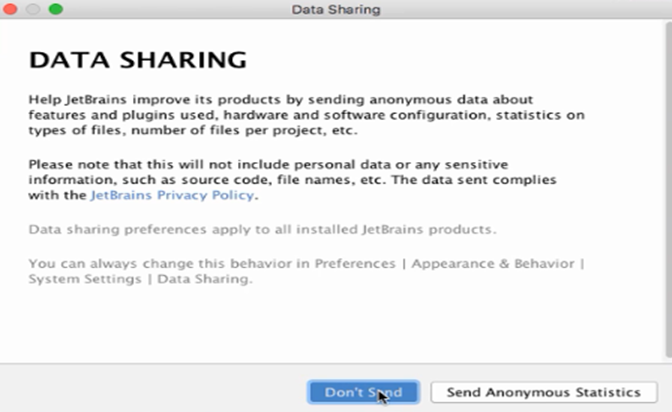
7. It is up to you to share some data from your environment or don’t share. Refer to Figure 11.
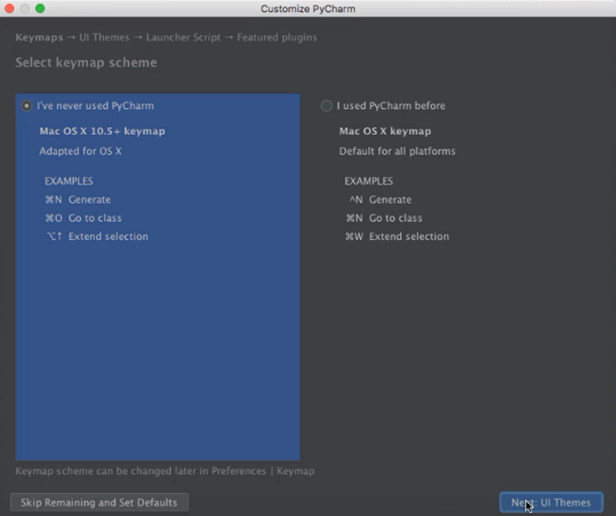
8. Now we can start customizing our PyCharm. Select your preferred Keymap scheme, then click next. Refer to Figure 12.
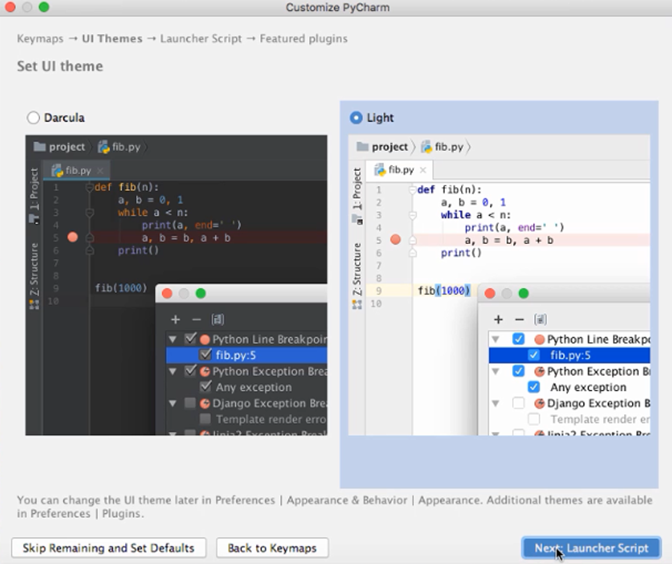
9. Select your preferred UI theme, then click Next. Refer to Figure 13.
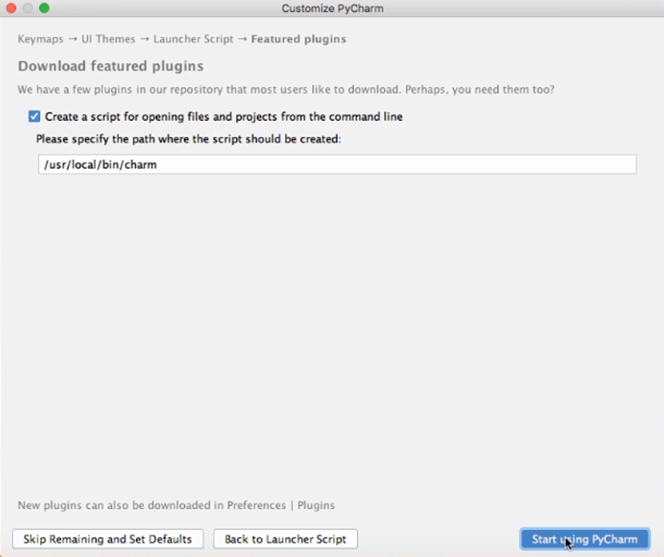
10. Check the box (create a script….), then click start using PyCharm. Refer to Figure 14.
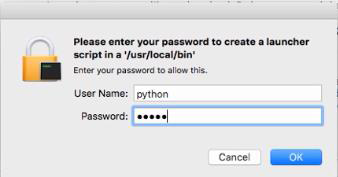
11. The installer asks you to enter your user password, enter the password, and then click OK. Refer to Figure 15.
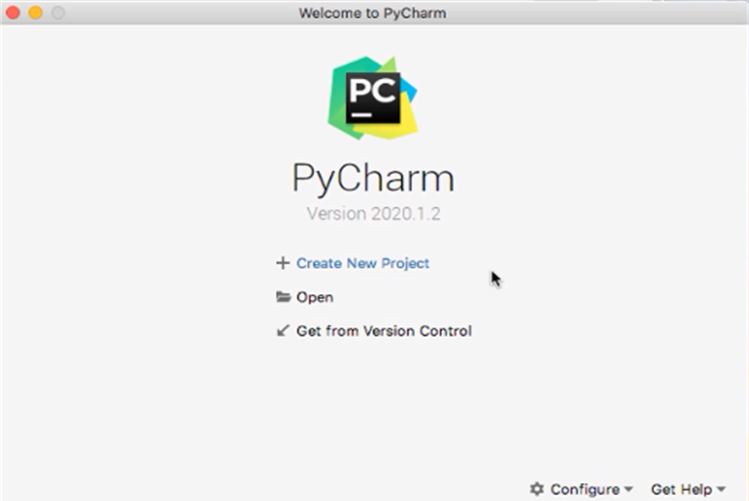
A welcome window appears, you can start and create your first project. Refer to Figure 16.
Congratulations! You can start coding on your computer…
Now, let us summarize what we have learned in this article:

In this article we have talked about:
- How to Setup Python on macOS.
- How to Setup Pycharm IDE on MacOS.
P.S.: A million thanks for your time reading my story. Before you leave let me mention quickly two points:
- First, to get my posts in your inbox directly, would you please subscribe here, and you can follow me here.
- Second, writers made thousands of $$ on Medium. To get unlimited access to Medium stories and start earning, sign up now for Medium membership which only costs $5 per month. By signing up with this link, you can directly support me at no extra cost to you.
To get back to the previous article, you can use the following link:
To move on to the next article, you can use the following link:


